
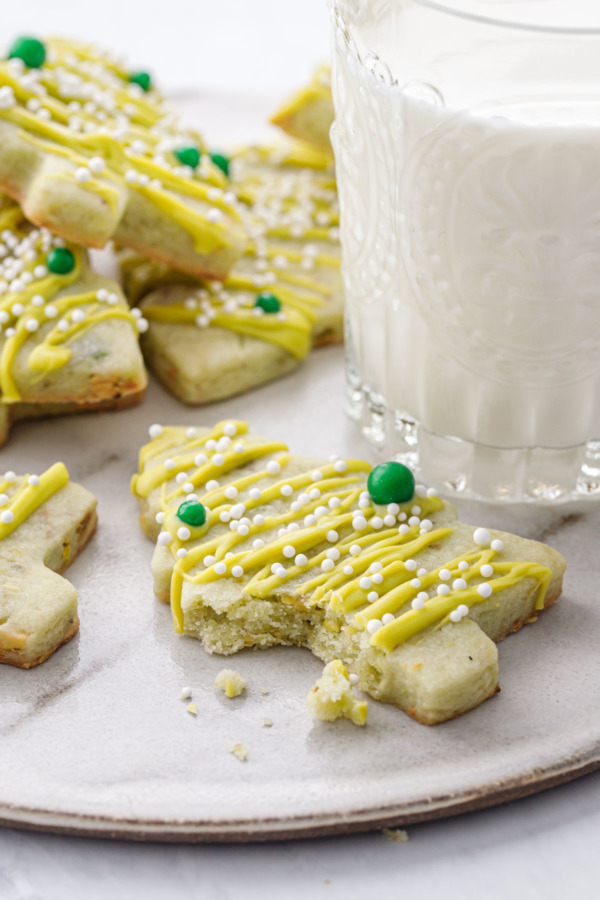
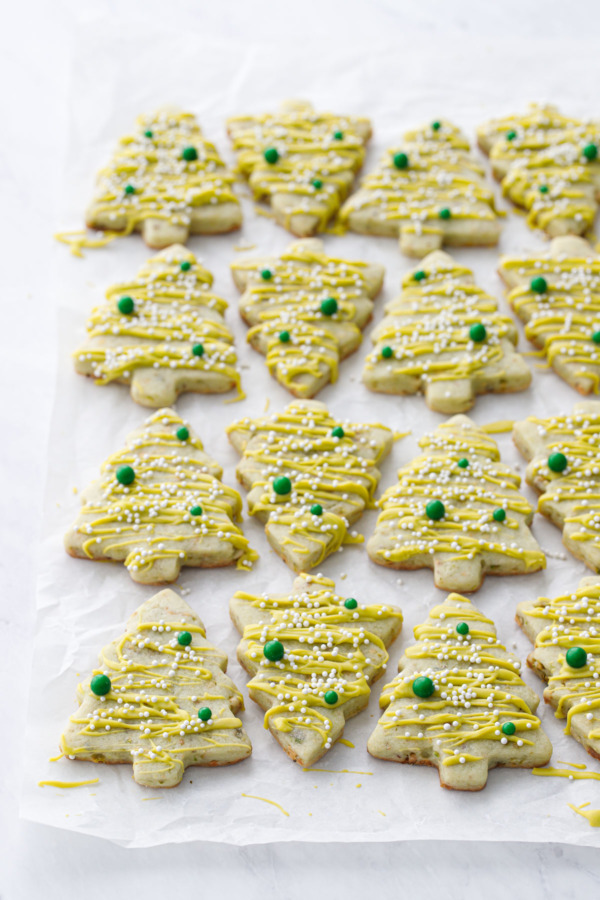
Holiday baking season is upon us, and these pistachio-flavored cutout cookies are the perfect canvas for holiday decoration.
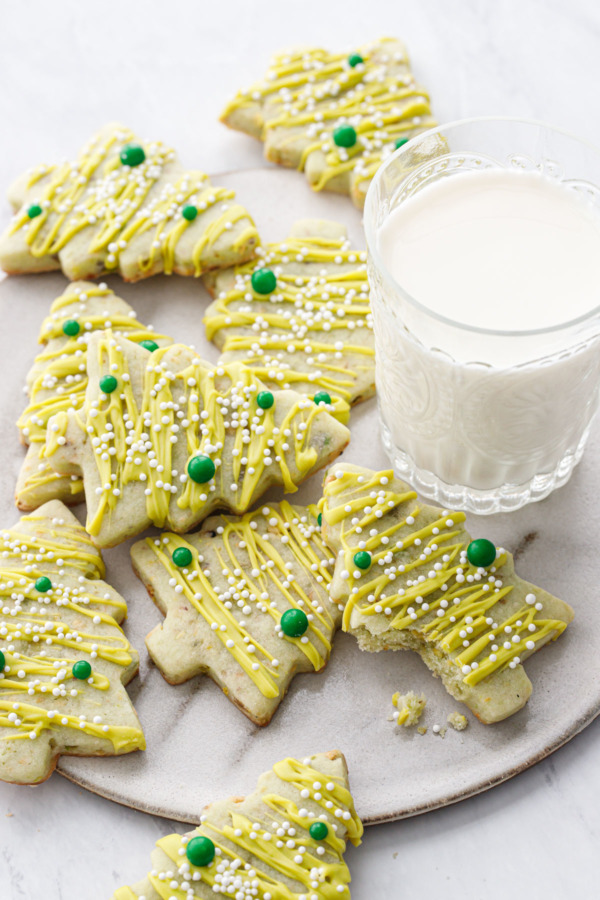
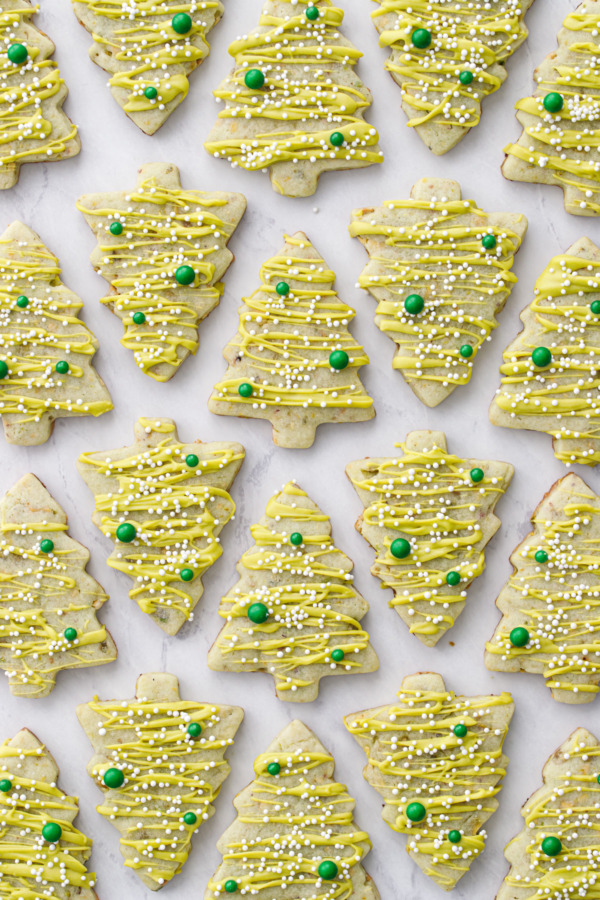
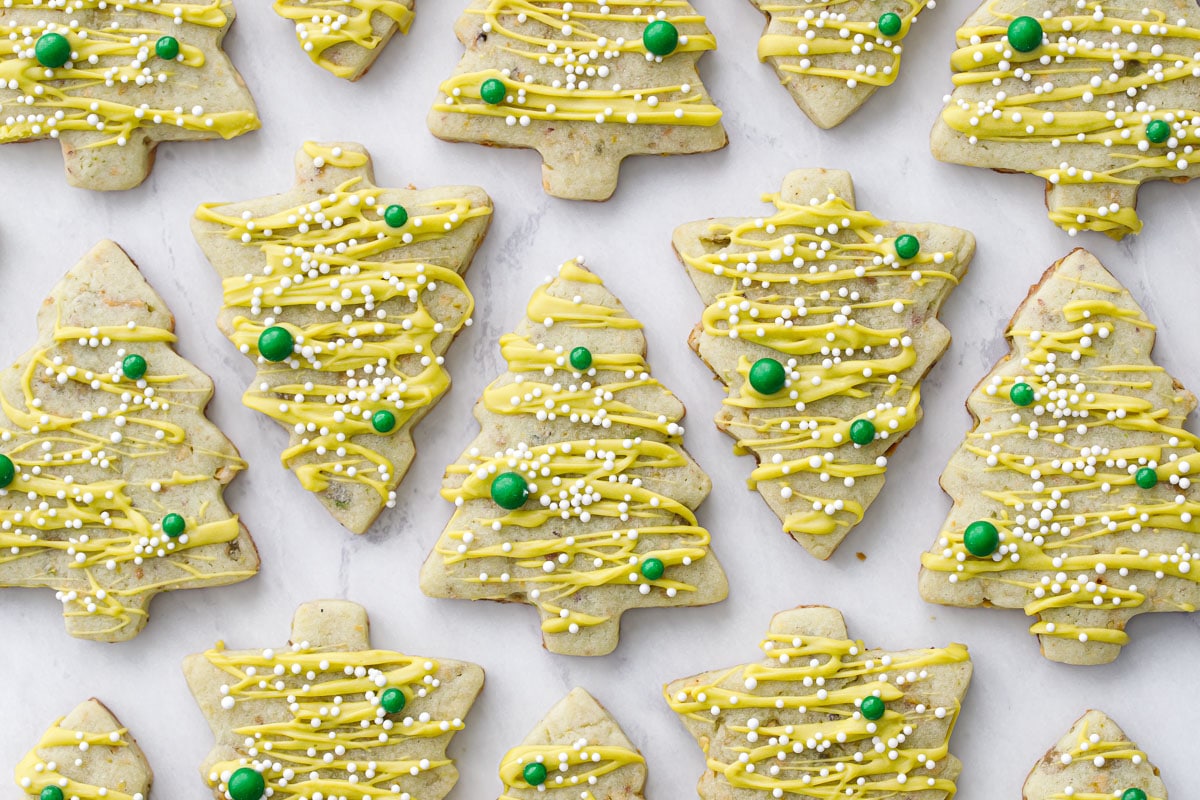
These incredibly soft, subtly green sugar cookies are flecked with bits of chopped pistachios and decorated with a drizzle of candy coating and a flurry of sprinkle snow.
Save this recipe for later!
It’s official, 2019 is the year of the pistachio.
I’m seriously obsessed (as you can very well tell), and have no intentions of letting up anytime soon.
Sweet or savory, from cookies to ice cream to snacks, pistachios are a particularly versatile nut.
Here we bring out their sweet side in a pistachio variation of a classic soft sugar cookie recipe. It might just be a new holiday favorite!
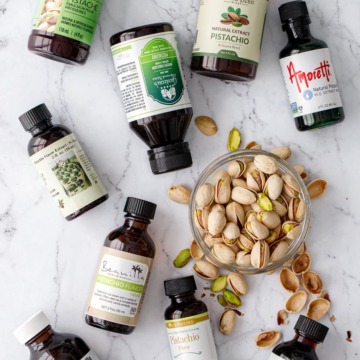
The recipe itself is very similar to my vanilla almond sugar cookies, with the addition of finely chopped pistachios for crunch, pistachio extract for flavor, and a hint of green food coloring to give the cookies a gorgeous pistachio hue.
That hint of green makes this dough particularly suitable for Christmas cookies, a perfect blank green canvas for whatever festive decoration your heart desires!
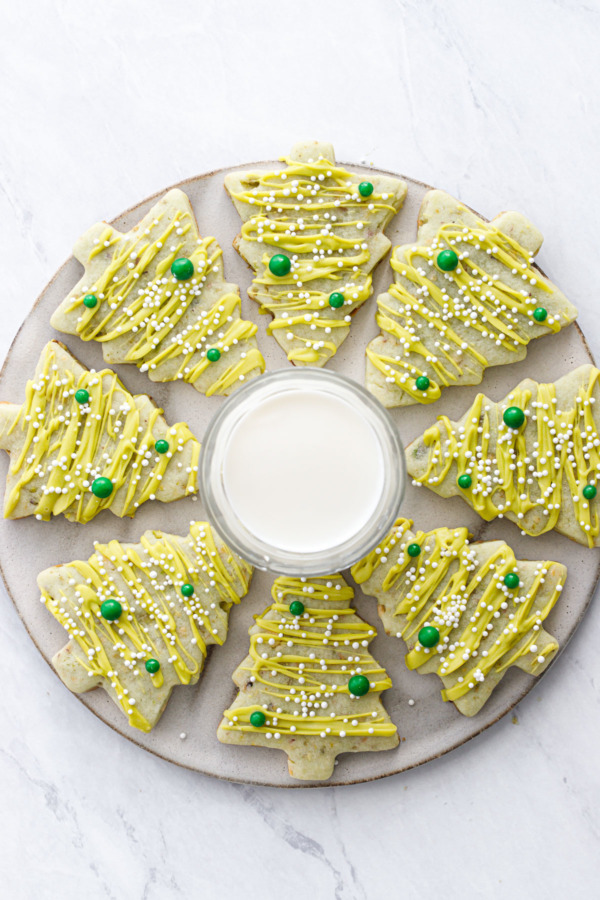
I cut out both tree and wreath shaped cookies, but ultimately liked the way the trees looked the best.
In terms of decoration, I wanted something simple yet impactful, and not overly complicated or tedious like royal icing, ultimately deciding on a drizzle of vibrant green Candy Melts, a flurry of nonpareil sprinkle snow, and a few strategically placed green ‘ornaments’ for a little extra festive cheer.
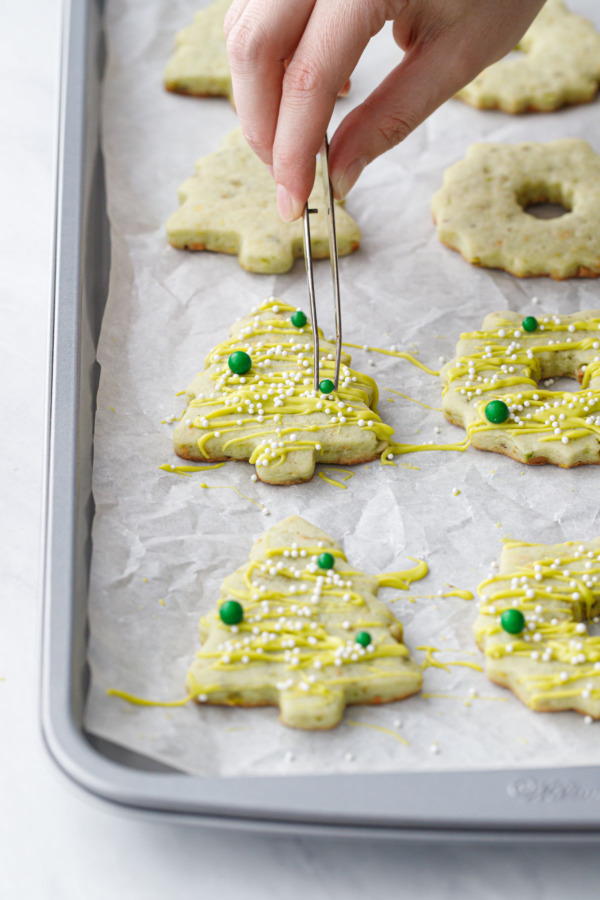
The green balls were picked out from two different holiday sprinkle mixes, one had slightly larger green balls than the other. I like the mix of multiple sizes here, it makes the decoration feel more playful and less symmetrical.
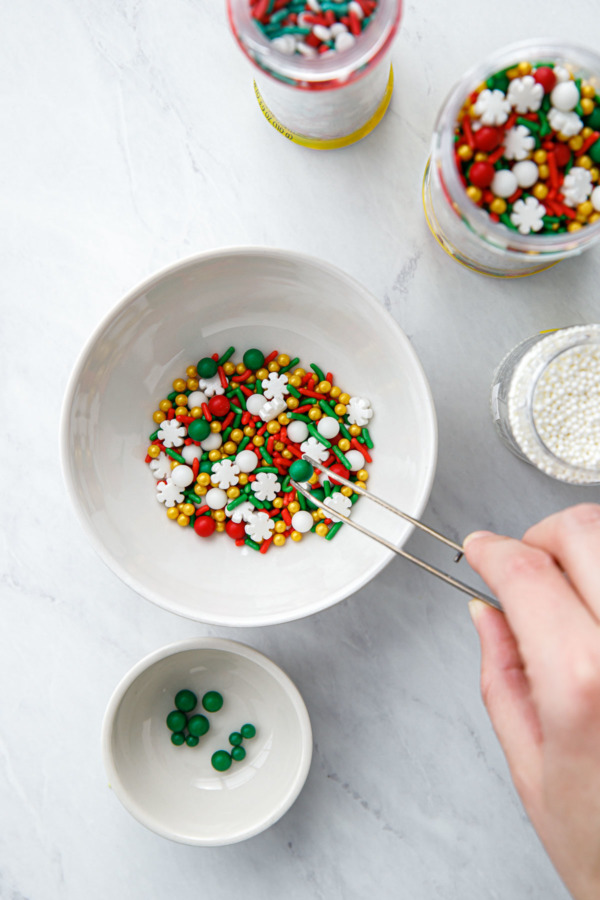
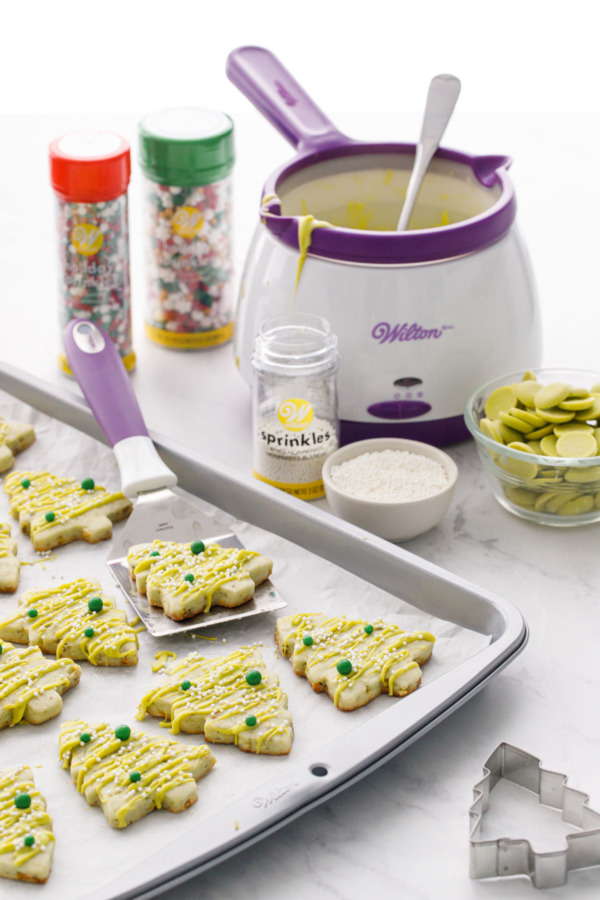
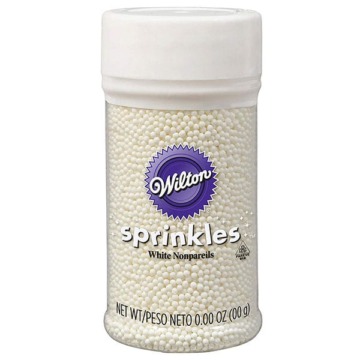
I picked out two sizes of green sugar pearls from a holiday sprinkle mix; the exact sprinkles I used are no longer available, but this mix looks like it’d have similar options, or you can buy a jar of mixed sizes of green pearl sprinkles and some white nonpareils and not have to deal with picking through the sprinkles.
What’s left of the sprinkle mixes are still plenty fun and festive, and can certainly be put to good use (might I suggest a batch of these gingerbread rice crispy treats? They’re one of my all time favorites!)
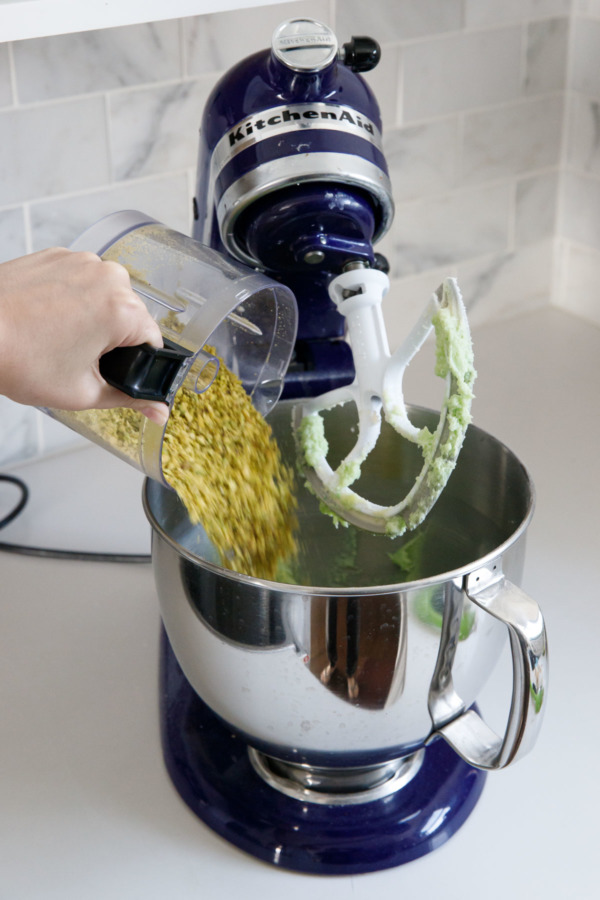
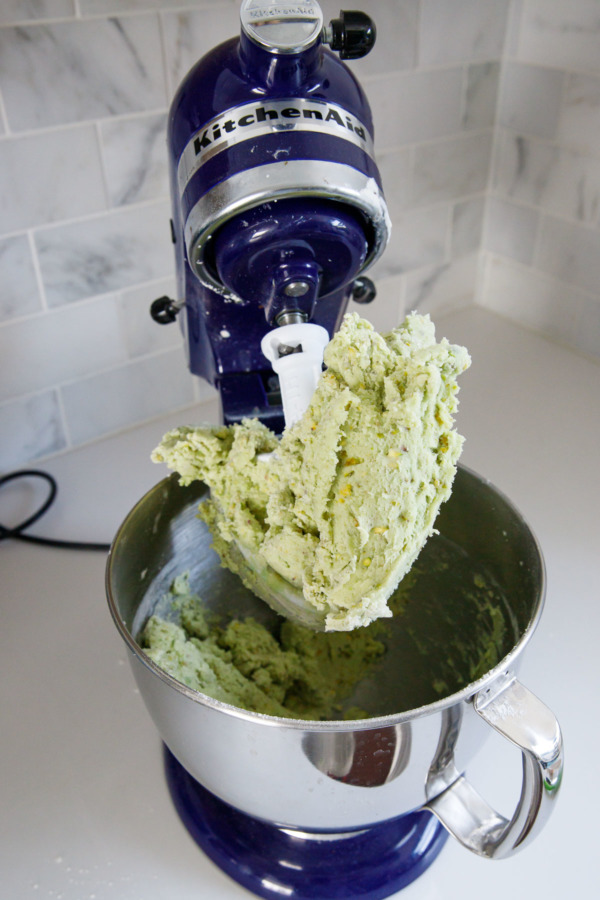
The dough itself comes together in a flash, lightly tinted with Kelly green gel food coloring and flecked with finely chopped pistachios.
Baking Tip: Dip the tip of a pairing knife in the pot of gel food coloring, then smear the dough with the knife to transfer the color. Mix until evenly incorporated, then add more coloring as needed.
Assuming your kitchen is on the cool side, you don’t even have to chill the dough before rolling it out (that said, if you find the dough particularly soft or sticky, pop it in the fridge for 20-30 minutes until it’s workable).
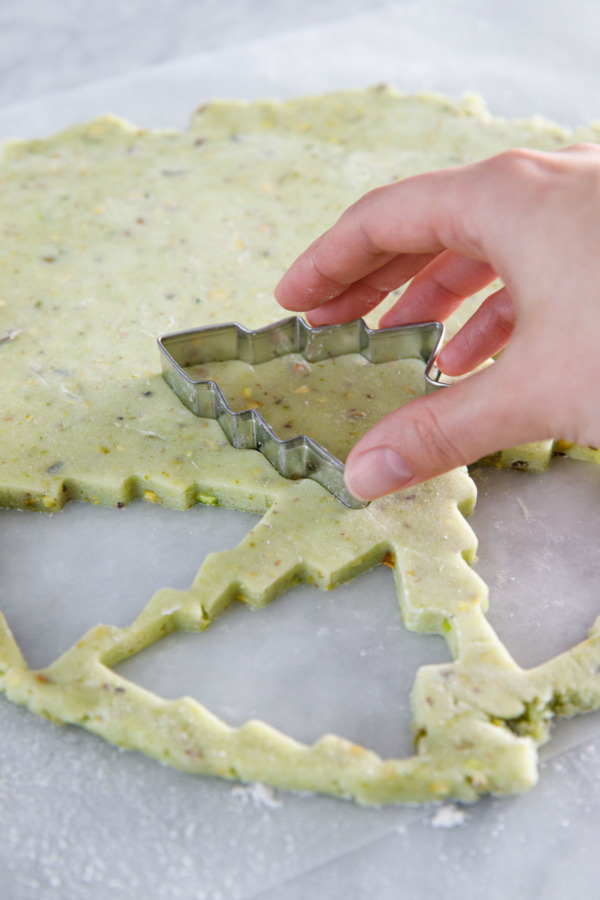
The secret to extra soft sugar cookies is rolling them out thick, a full 1/4 inch. Thinner cookies will bake up more crisply.
I like rolling the dough out between two sheets of lightly floured waxed paper, which helps keep the dough from sticking and makes it easy to flip and move around as needed.
Any scraps can be rerolled and cut again.
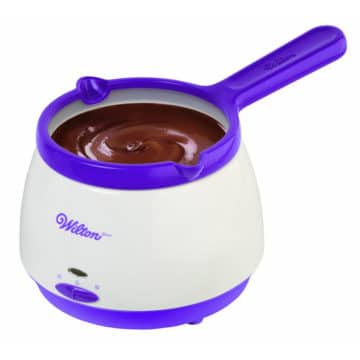
When working with Candy Melts, you do want to be sure you don’t overheat them or they will thicken and seize. Although I still find Candy Melts much more forgiving than pure chocolate.
I personally love my Wilton Candy Melting Pot, which I use regularly for melting both chocolate and Candy Melts. And especially helpful for this recipe is the warm setting, which will keep the Candy Melts warm so you don’t have to keep reheating them in the microwave as you work.
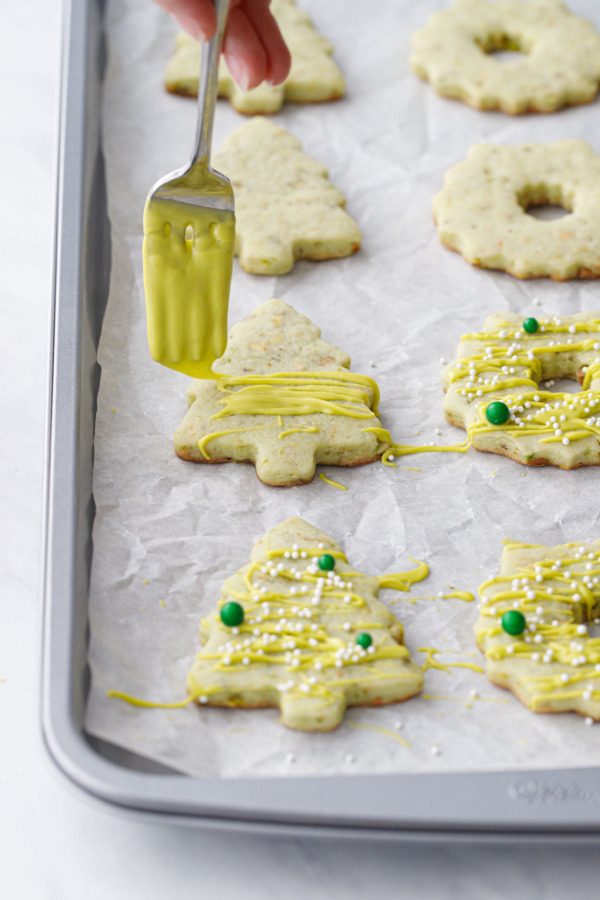
I did thin out the Candy Melts with a few teaspoons of vegetable shortening, just to give them a more drizzle-able consistency.

Cookie Storage tips:
Keep baked and decorated cookies in an airtight container for up to 5 days (layer with parchment or waxed paper to keep the decorations in tact).
Baked and un-decorated cookies can be frozen in an airtight bag for up to 1 month. Let thaw and fully come to room temperature before decorating.
The dough does not require refrigeration, however if you want you can make it up to 2 days ahead of time. Wrap tightly in two layers of plastic wrap and keep chilled. Before rolling, bring the dough fully to room temperature (let it sit out 1 to 2 hours), otherwise it will crack as you try to roll it.
Pistachio Cutout Sugar Cookies
Ingredients
- 3 cups / 375 g all-purpose flour
- 2 teaspoons / 8 g baking powder
- ½ teaspoon kosher salt
- 1 cup / 226 g (2 sticks) unsalted butter, at room temperature
- 1 cup / 200 g granulated sugar
- 1 large egg, at room temperature
- 2 teaspoons vanilla extract
- ¾ teaspoon pistachio extract
- ¾ cup / 100 g raw shelled pistachios, finely chopped in a food processor (you can also use pistachio flour)
- green food coloring
- 8 ounces / 226 g green candy melts or white chocolate
- 2 teaspoons unflavored vegetable shortening
- Sprinkles, for decoration
Instructions
- Preheat oven to 350 degrees F. Line a sheet pan with parchment paper (two if you have them) and set aside.
- In a bowl, whisk together flour, baking powder and salt until evenly incorporated.
- In a large mixing bowl or the bowl of a stand mixer, beat butter and sugar until light and fluffy, about 2-3 minutes on medium-high speed.
- Add egg and beat until incorporated, followed by vanilla and pistachio extract. Dip the tip of a pairing knife in food coloring and add to dough; mix until well incorporated. The color will mellow and lighten when you add the flour, so add more food coloring as needed. You're looking for something about the color of fake mint chip ice cream.
- Add chopped pistachios and dry ingredients and mix on low speed until just incorporated and dough comes together in a crumbly mass. Knead together to form a ball. At this point you can start working with the dough immediately, or if it seems a bit soft, cover and refrigerate for up to 30 minutes as needed.
- On a lightly floured surface (I like to use waxed paper), roll out dough to 1/4-inch thick. Keeping the dough nice and thick will ensure soft cookies as opposed to crunchy ones. Cut into desired shapes, and arrange on prepared baking sheets, leaving about 1-inch of space between cookies.
- Bake for 7 to 9 minutes or until bottoms just begin to brown; if your baking pans are lighter weight you might want to check them after about 6 minutes or so, just to be sure they don't brown too much (tip: try doubling up lighter weight baking sheets to give the cookies more insulation and keep them from getting too brown). For crunchier cookies, bake for a minute or two more.
- Transfer cookies to a wire rack and let cool completely.
- To decorate, melt Candy Melts with shortening using the Wilton Candy Melting Pot. Alternatively, you can use a double boiler or a microwave-safe bowl and microwave on 50% power in 30 second bursts, stirring between each interval, until Candy Melts are melted and smooth. Turn the melting pot to the Warm setting to keep it soft and fluid as you work.
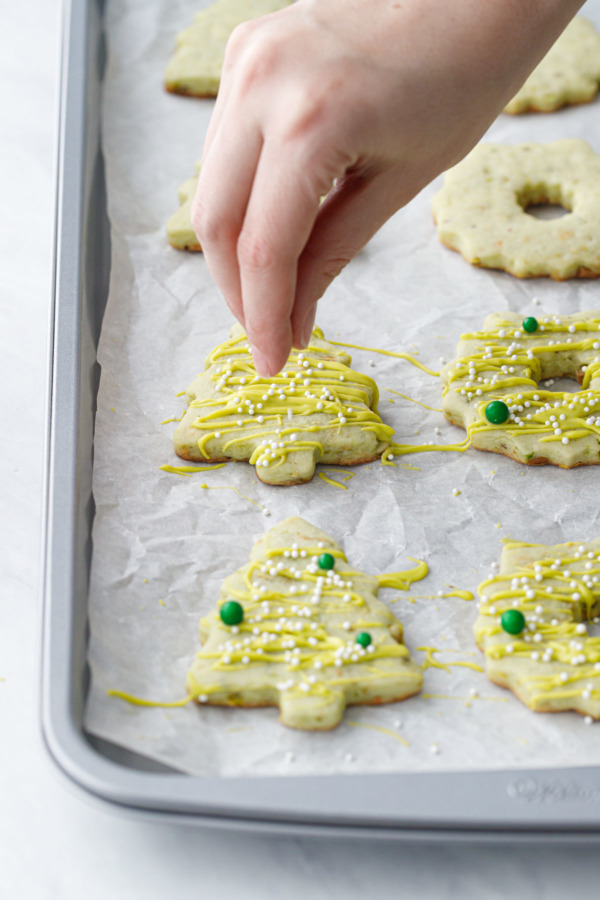
- Use a fork to drizzle melted Candy Melts over cookies. Immediately sprinkle with white nonpareils (you want to get these stuck on before the Candy Melts harden). Use tweezers to place a few green ball sprinkles on each cookie. Let sit until Candy Melts are completely set.
- Cookies will keep at room temperature in an airtight container for up to 5 days.
Did you make this recipe?
Let us know what you think! Leave a Review below or share a photo and tag me on Instagram with the hashtag #loveandoliveoil. Disclosure: This post was originally created in partnership with Wilton®. As always, all opinions written are purely our own. We’re incredibly grateful for opportunities like these that allow us to continue sharing delicious recipes with you, so thank you for supporting us and the brands we love.


Hi! Can the pistachios be roasted to add more flavor, or will that compromise the taste/texture?
Sure, you can definitely roast them first! Just let them cool before grinding as you don’t want to end up with pistachio butter.
Did you use water soluble Pistachio extract or oil based Pistachio extract for those great looking cookies? And is there a particular brand you would recommend? I am planning to purchase some of the extract and it is quite expensive. So, I thought I would check with you first! Thank you and have a Happy New Year🎉
There’s a link to the exact product I used below the recipe card, Watkins is the brand!
Any adjusts needed for high altitude? I am at 8000 ft.
Thanks
Sugar cookies don’t really rise like other kinds of cookies, so you should be fine with the recipe as written.
What should I do if I can’t find pistachio extract?
You can use almond or vanilla instead. The cookies won’t taste much like pistachio, but they’ll still be good!
I just bought all the ingredients for these and will be baking them for my cookie swap this weekend! So cute.
I made these today and they are officially the best Christmas cookies ever. My kids loved helping to drizzle on the candy melts (it was worth the mess lol) Thanks for sharing the recipe!
I love any dessert that contains pistachios… and this one looks like it doesn’t disappoint. I will definitely be making these cookies on the weekend. Thank you, Lindsay, for sharing this with us!
a great cookie recipe pistacchios are very nice, thank you, love the icing too!
Really the cute one. I have tried these pretty cookies at home and the outcome was so gorgeous. Thanks for sharing this beautiful recipe with us. I hope you will share more cookie recipes in the future. Much love and regards. xoxo
Ohh! I’ll have to make them this Christmas – my family and brother-in-law especially LOVE pistachio anything!
this is definitely going to be my evening snack,
Can these cookies be frozen?
I definitely think you could freeze the (undecorated) cookies for a couple weeks at least, though I haven’t tried it personally.
Leave undecorated and freeze up to 1month. Thaw and decorate when ready.