
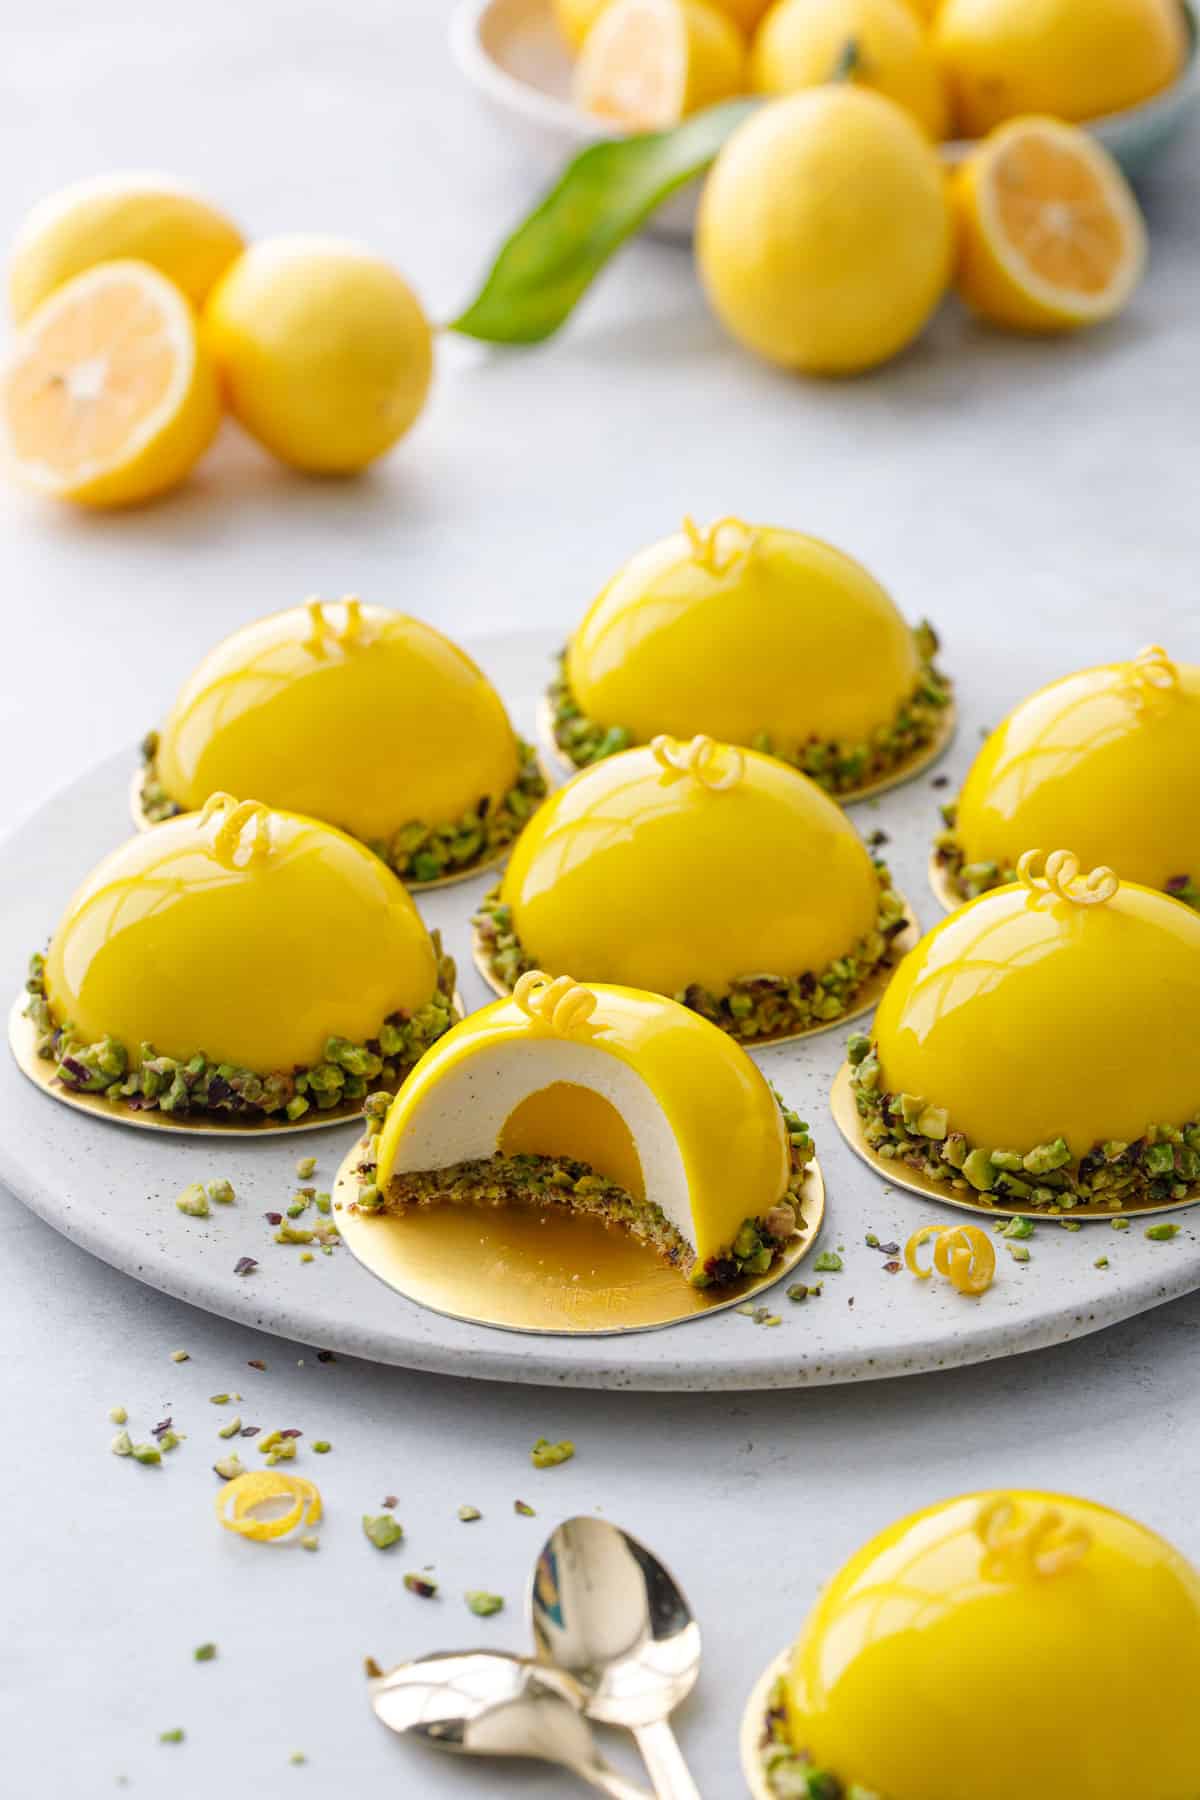
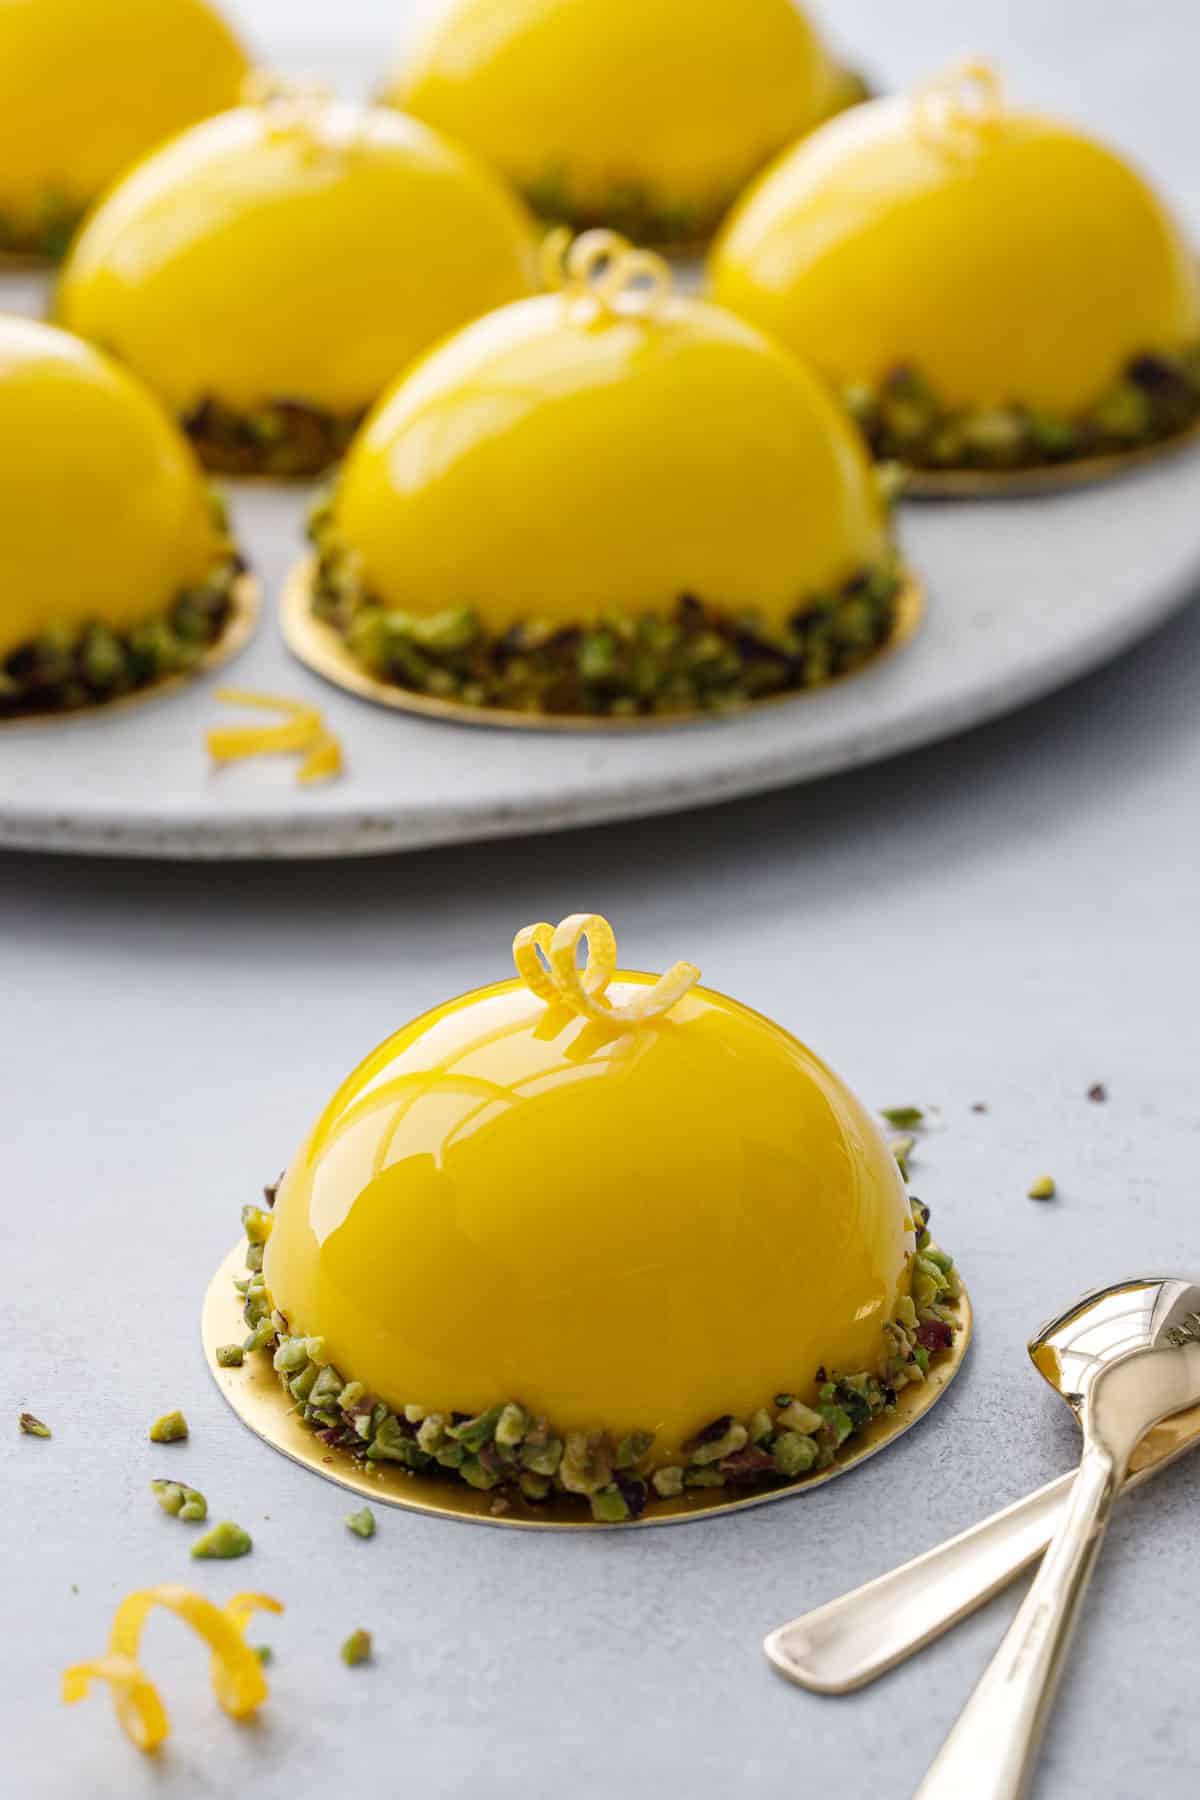
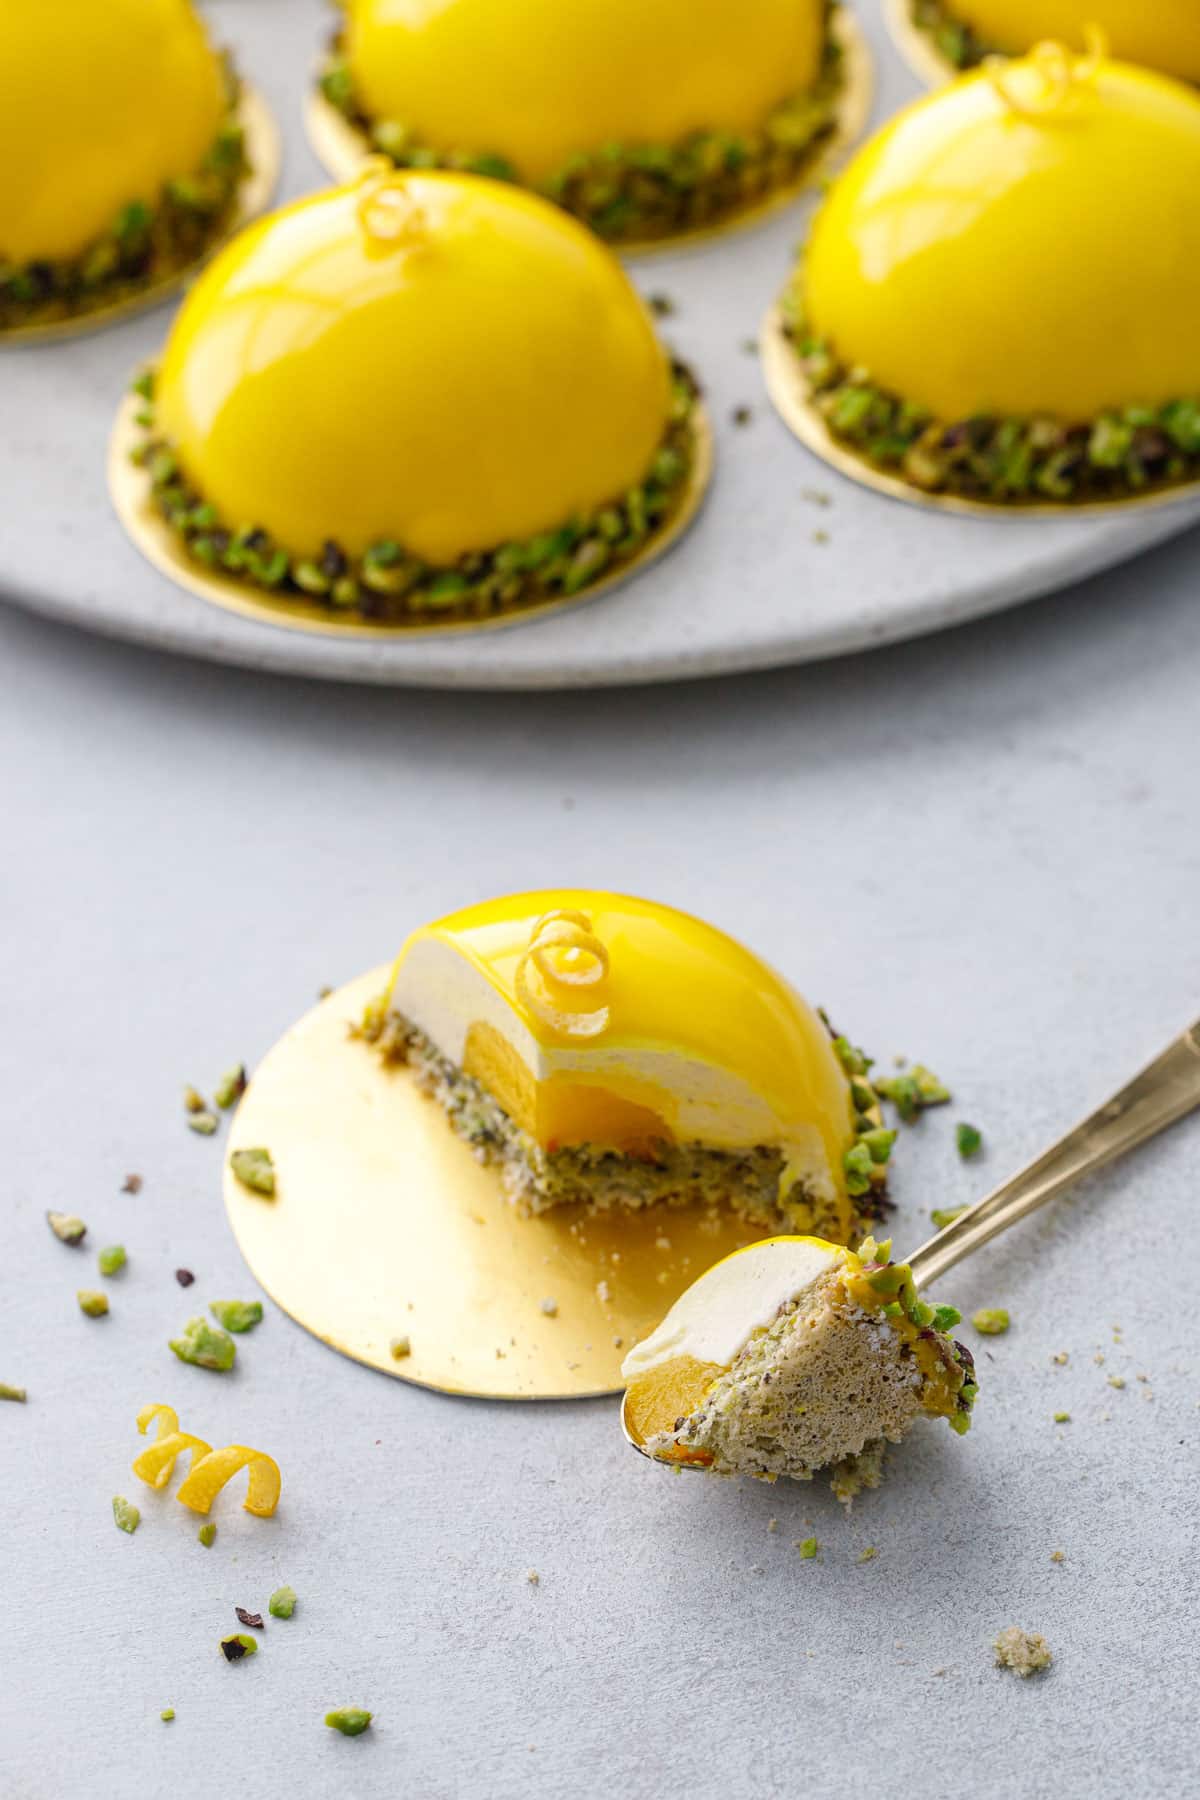
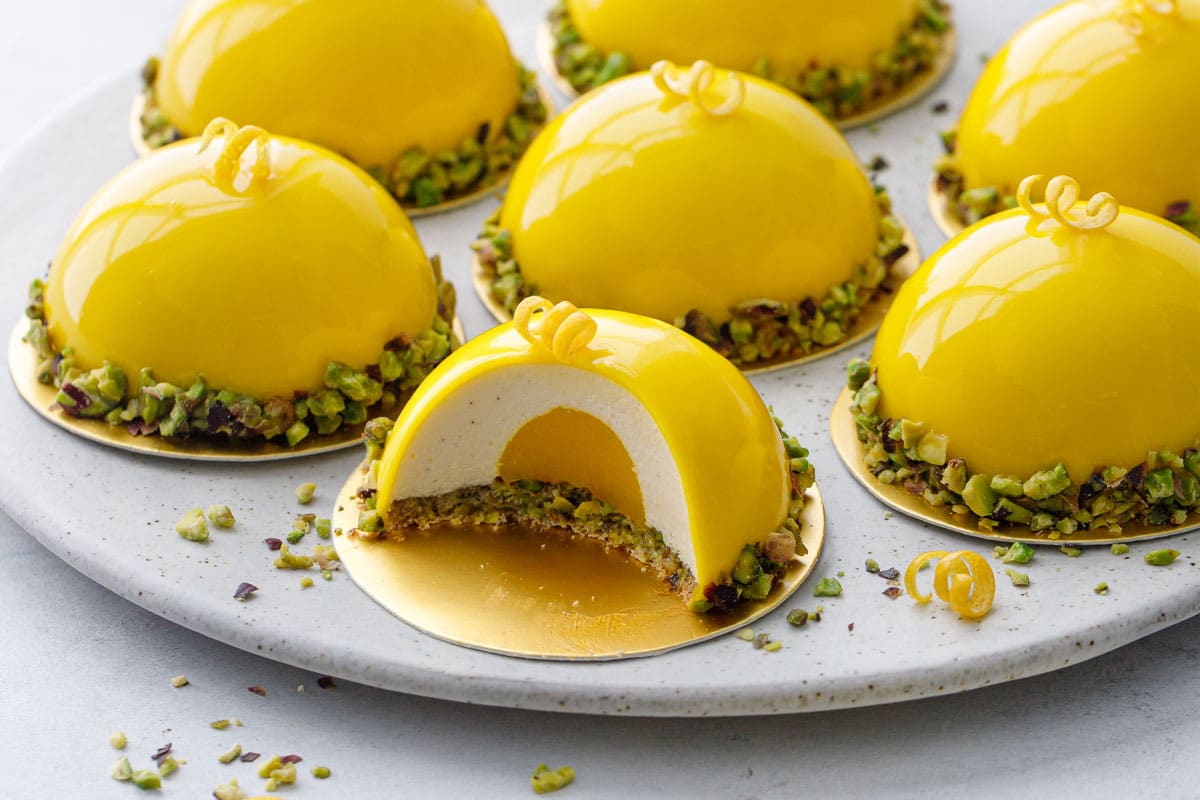
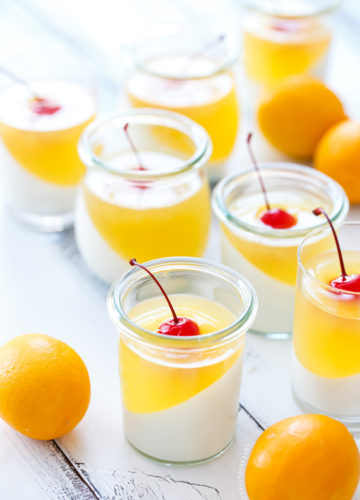
Lemon lovers, this one’s for you! These bright and sunny entrement cakes feature a core of Meyer lemon curd nestled inside a fluffy lemon and vanilla mousse, with a base of crisp and nutty pistachio dacquoise, all enrobed in a beautifully shiny yellow mirror glaze.
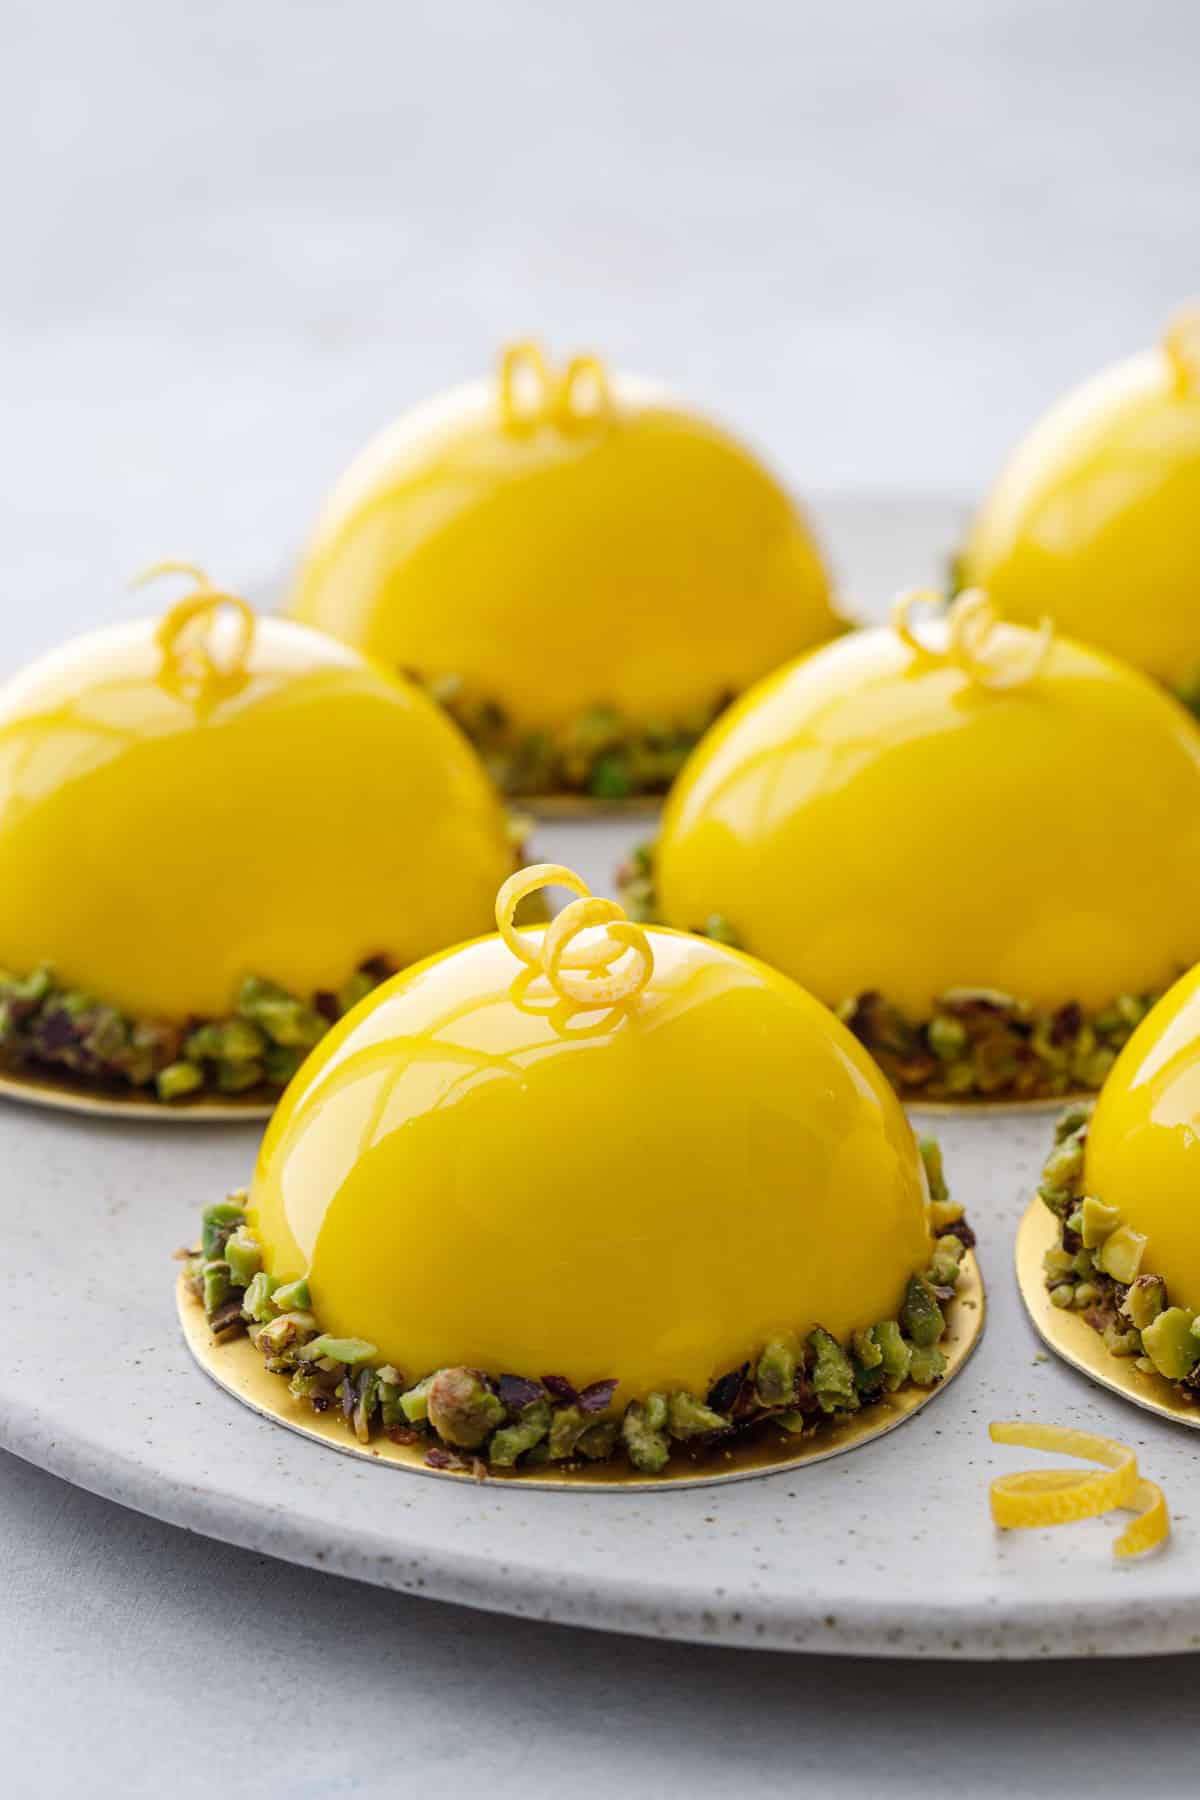
Lemon and pistachio is a match made for springtime. With a tangy lemon curd center and a light and airy lemon mousse, these gorgeous Meyer lemon and pistachio mini mousse cakes are dressed to impress with a shiny yellow mirror glaze and bright green pistachio accents.
Save this recipe for later!
Spring means lemons, and while I’m not usually one for lemon desserts, these gorgeous little mousse cakes are most definitely an exception.
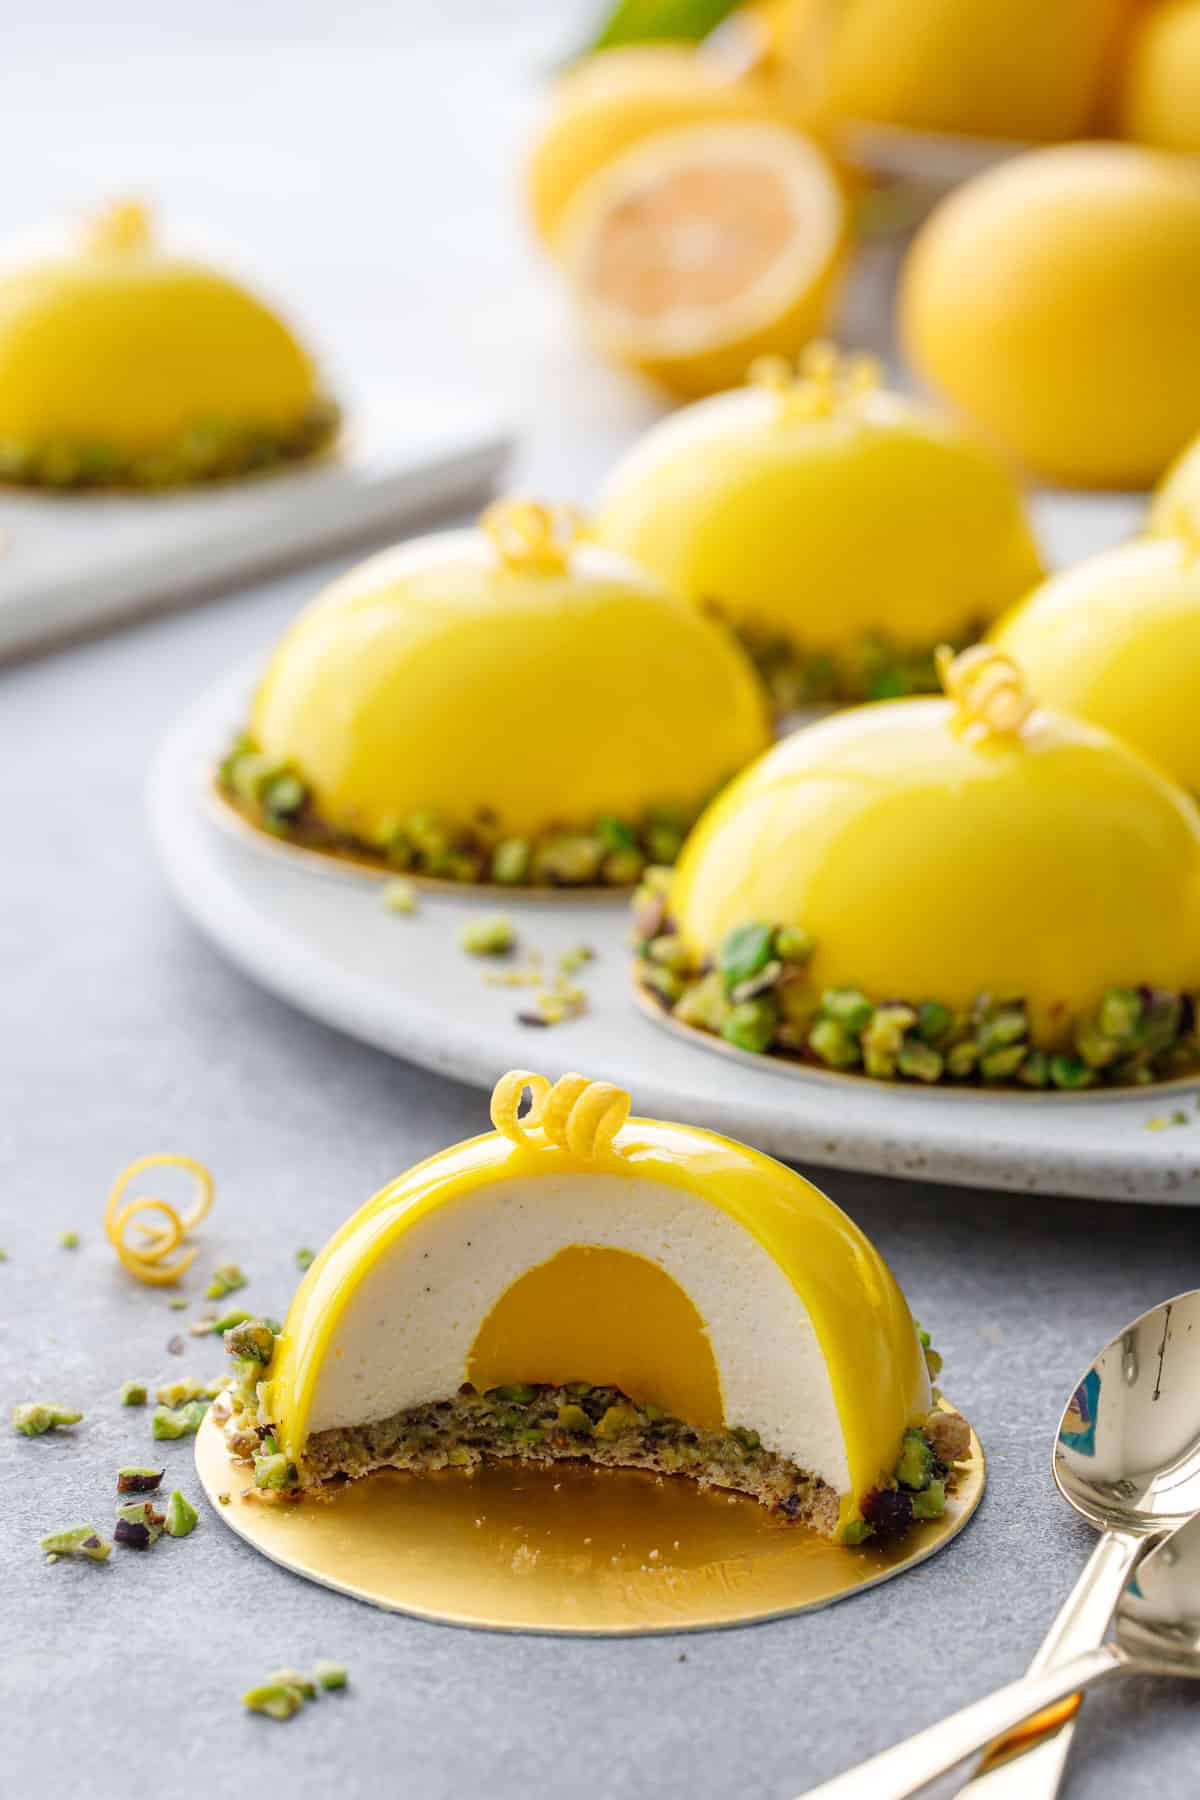
I mean, just look at them! What’s not to love? A joyful combination of lemon, vanilla, and pistachio flavors, they’re like little pops of sunshine… for your tastebuds.
I was the lucky recipient of a box of Meyer lemons from my aunt’s tree in California. Such a delivery always makes me very, very happy, moreso than shoes or clothes or books even. I dedicated about half the lemons for more homemade limoncello (I hope to update the post with more info later this year), but the rest were just sitting in the box, begging me to use them in something unique and delicious.
These lemon and pistachio entremet cakes are certainly that!
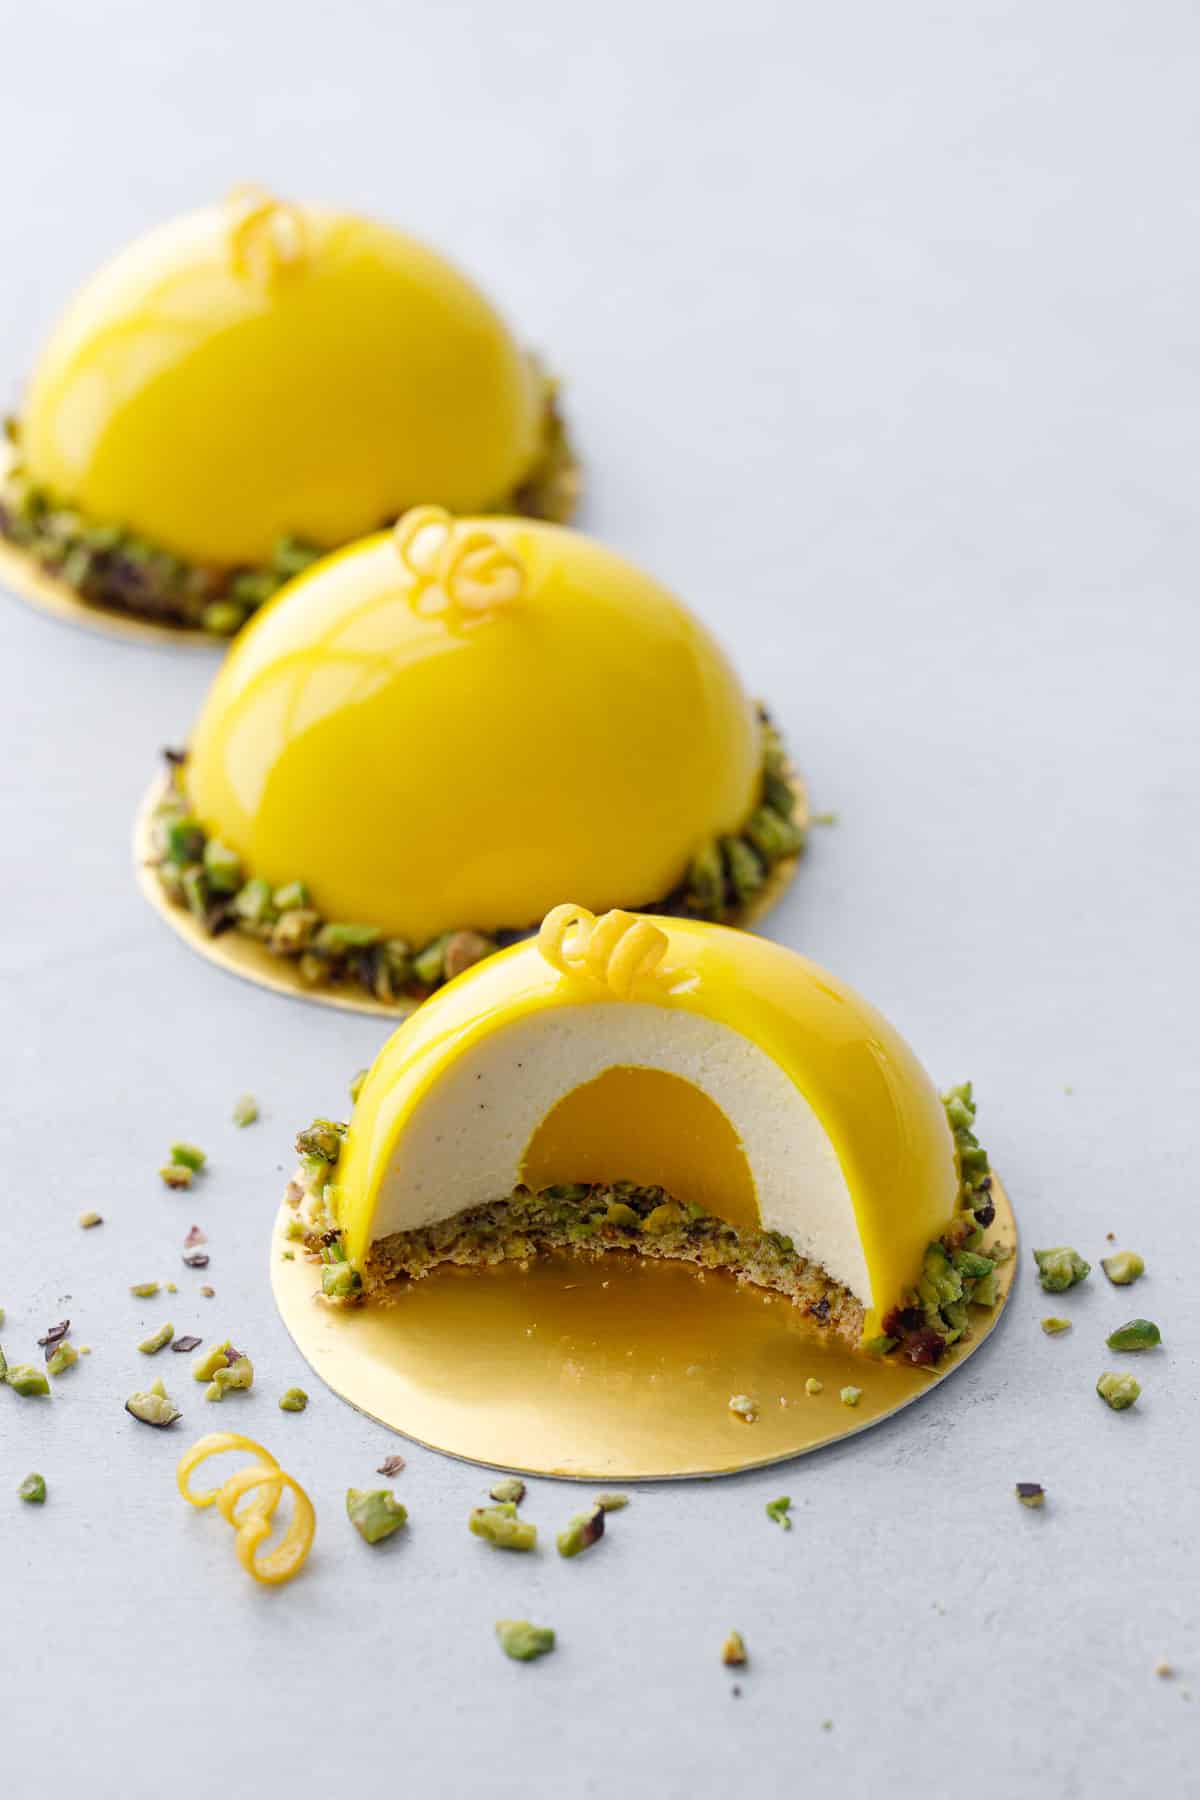
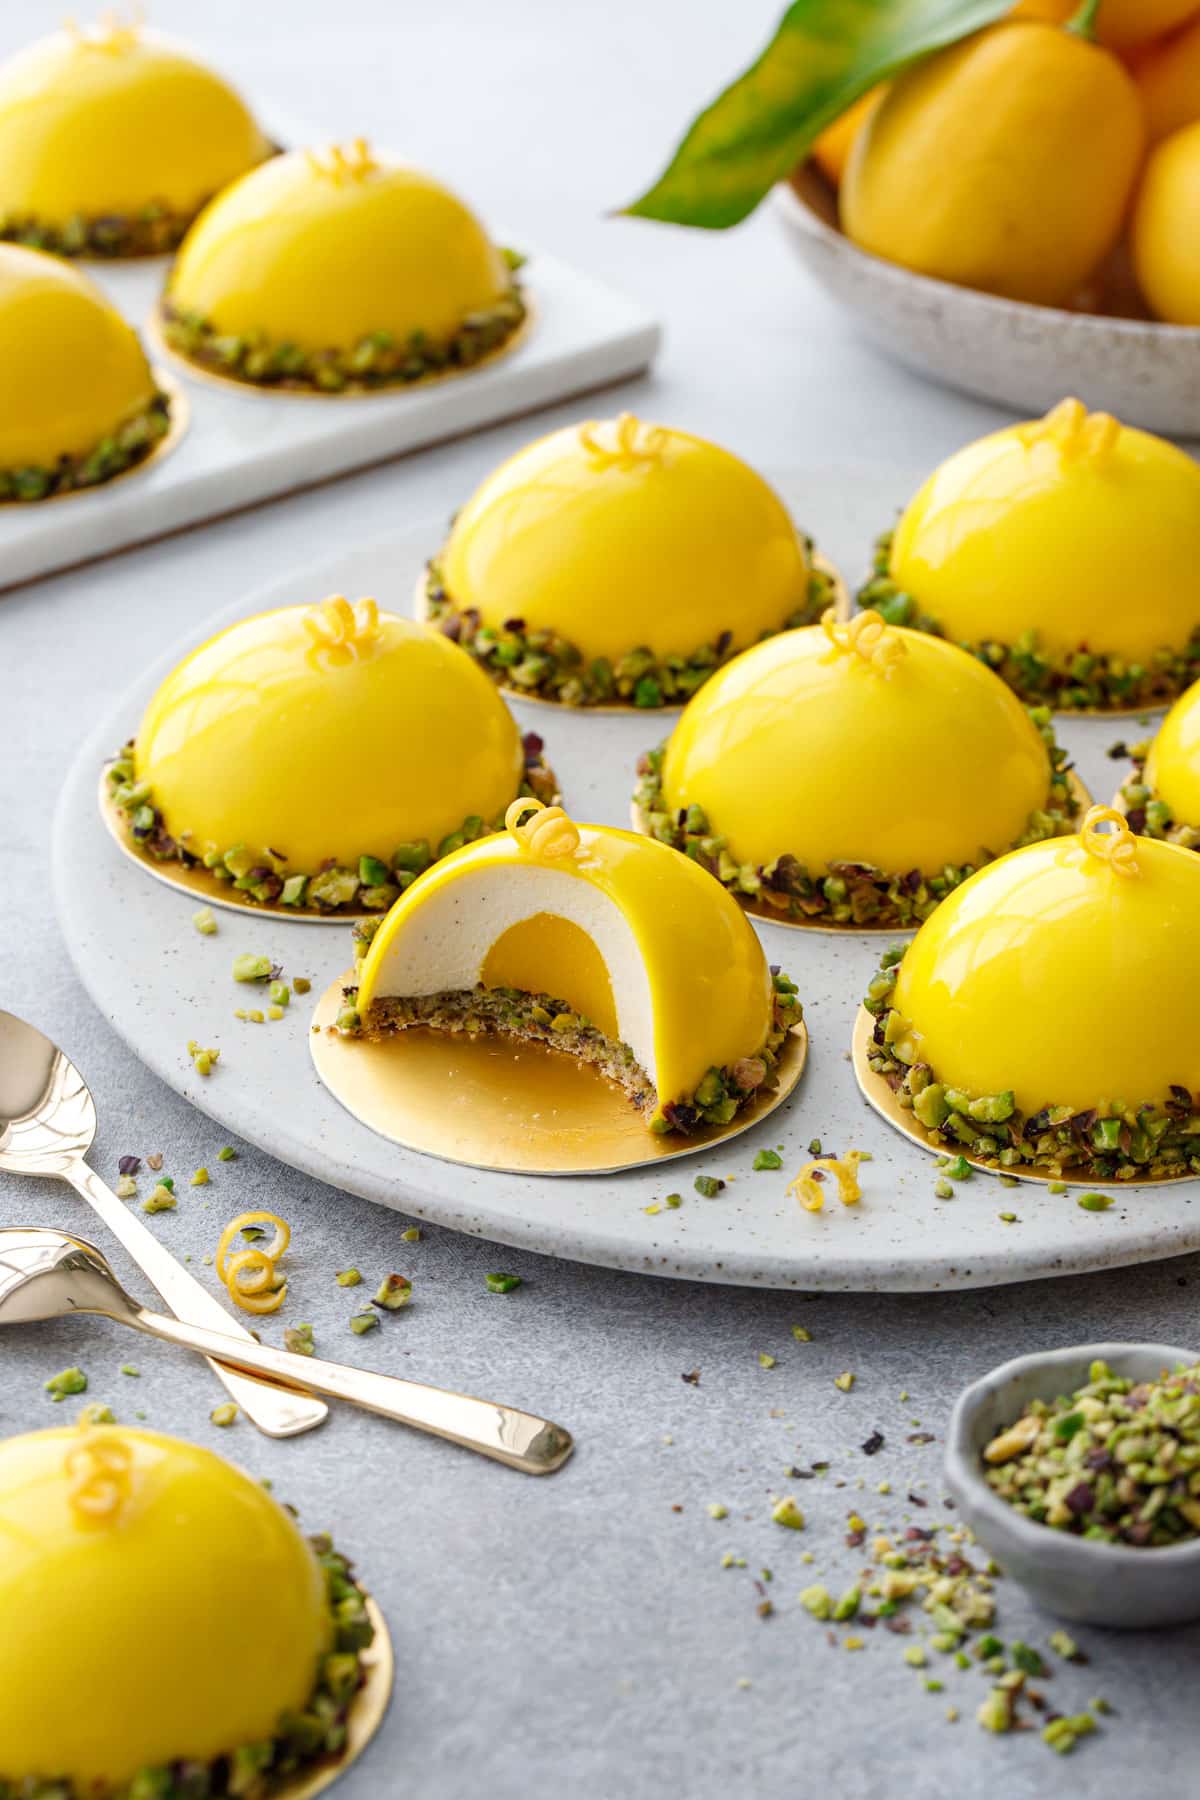
The cakes are comprised of 4 components: pistachio dacquoise, Meyer lemon curd, lemon vanilla mousse, and a mirror glaze. Each is delicious in its own right (well, except the mirror glaze which you probably wouldn’t eat on its own), but combined it makes for a perfect sweet springtime treat.
Sure, entremet cakes take a bit of effort, but the final presentation is oh-so worth it, don’t you think? I highly suggest taking advantage of Meyer lemon season and making a batch of these beauties while you still can, but know that you can freeze Meyer lemons too (whole! just pop them right in the freezer!) for later use.
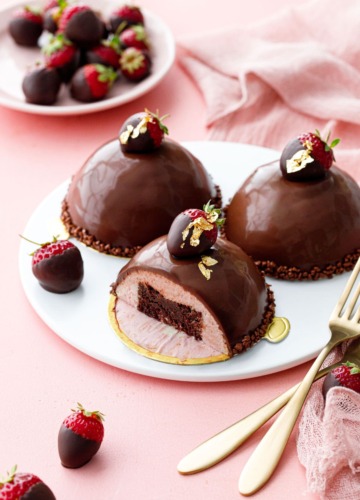
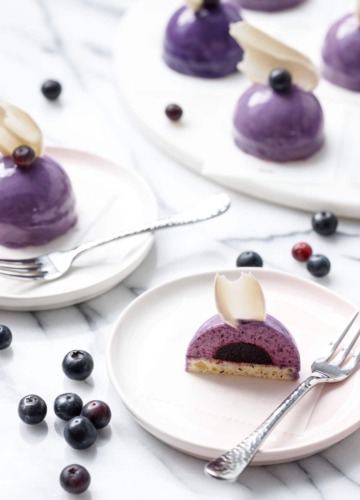
If you’ve made my blueberry mousse cakes, the process here is very similar, just with lemon and pistachio flavors instead of blueberry and almond.
My previous mousse cakes have had bases of cake, brownie, or, in the case of my holiday ornament cakes, a nutty chocolate cookie crust.
For these I wanted to do something a little different, and stumbled upon a recipe for pistachio dacquoise, a meringue folded with ground nuts. It’s is essentially a more rustic (and less finicky) macaron.
(Also, I should tell you I’ve written the word dacquoise about 2 dozen times at this point and am only now able to spell it out without googling it. Not unlike proscuitto or hors d’oeuvres [nope, still needed to google that one].)
This recipe will make about 15 or so dacquoise rounds depending on how thickly you pipe them. If you have leftovers after assembling your mousse cakes… let me just say that they are divine sandwiched with a chocolate ganache. I had a slew of extras leftover from multiple rounds of testing, so I sandwiched them with ganache and brought them into ceramics class this week… where they were promptly and enthusiastically devoured. They were so good that I’m considering making it a standalone recipe.
Curd is the Word
I’ve always had a problem with lemon curd, in that it nearly always tastes slightly metallic to me no matter what I do. Googling the issue brings up article after article telling you not to use anything metal. But here’s the thing, I didn’t use anything metal (going so far as using a plastic cheese knife to cut the lemons even!) and it still took on a metallic flavor as it cooked. What the heck?!
From what I’ve gathered, I think the real issue is the egg. Something about the combination of egg yolks, acid, and heat brings out the iron and other minerals in the egg yolks, resulting in a metallic flavor for more sensitive tasters. In one of many rounds of testing, I tasted the curd as it cooked, and the metallic flavor didn’t appear until about 155 degrees F (the point at which the proteins in the yolks start to ‘denature’ and the curd starts to thicken).
In the end, I gave up trying to produce a non-metallic-tasting curd and instead came up with an eggless curd that is thickened with cornstarch. It’s not quite as rich as a true lemon curd (it falls between a curd and a gelée, essentially). As it turns out, without the extra fat from the egg yolks muddling up the flavors, the lemon is even more fresh and vibrant than traditional curd. This faux-curd serves as a pocket of tart and punchy lemon flavor hidden in the middle of a milder lemon and vanilla mousse. Unintentional win there, but I’ll take it!
If you don’t have the same issues with lemon curd as I do, you can certainly use your favorite lemon curd recipe here instead, just add gelatin so it’ll set up more firmly. You’ll need about 1/2 cup to fill enough mini spheres for the centers of 12 to 15 molded cakes.
The Pistachio is Always Greener
Pistachios come in a wide variety of colors from grassy green to yellowish brown. Here in the US at least, it’s not exactly easy to find the beautifully green pistachios that seem more common in Italy and the Middle East.
If you have a source for Sicilian or Turkish pistachios, it’s worth the effort and expense in this case, as part of the aesthetic appeal of these little entremets is the contrast between the bright lemon yellow and the verdant pistachio green. If you use regular pistachios, I recommend buying raw, in-shell pistachios and shelling them yourself; they’ll be much greener than pre-shelled or roasted nuts.
After extensive searching, I managed to find some beautifully green Sicilian pistachios from MyPanier.com (Brontedolci is the brand – use my referral link and get $10 off your first order). I was worried when I ordered them because it’s really hard to trust photos of things like pistachios, which are often over-edited and artificially-saturated (same with matcha). But these arrived looking just as vibrant as the photos (score!) I didn’t love the darker colored skins that were still present in the whole and chopped pistachios, but still like the look of them nonetheless.
You can buy the Sicilian pistachios in whole, chopped, and powdered form. I actually used all 3 in this recipe, though if you just get whole ones you can chop/grind them yourself, or just get the chopped and they’ll grind just fine for the dacquoise. You’ll need 100g of pistachios in all for the dacquoise, plus a few more tablespoons of chopped ones for garnish.
You can also sub in 50g of the pistachio flour in the dacquoise with almond flour if necessary (the color will be less obviously green though), but that’s a good way to keep the expense down, and save the greenest nuts for the decorative garnish.
If you want to enhance the green color of the dacquoise, you can add a drop or two of water or gel-based food coloring to the meringue. Just be sure you don’t use oil-based food coloring as it’ll ruin your meringue (you probably don’t have to ask me how I know this… oops).
Now, I fully acknowledge this recipe is quite long. As is the case with most entremet-style cakes, there are a lot of different components that need to be made separately and then assembled before the whole thing is enrobed in a shiny yellow mirror glaze.
The good news is that all of the components can be made ahead of time, so you can spread out your time over a couple of days, making the recipe much more manageable.
Unlike some of my other entremet cake recipes, this one doesn’t keep for quite as long once assembled and glazed. The dacquoise layer gets a little soggy after a few days. For that reason I’d recommend glazing the day of or the day before you plan to serve them, but no more than two days max. The mirror glaze and mousse keep surprisingly well, it’s that pesky dacquoise layer that doesn’t hold up.
Ingredients & Equipment
Before you dive in to this recipe you’ll need to make sure you have the right equipment and ingredients.
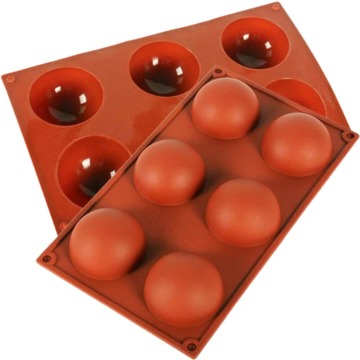
Silicone dome molds. The final cakes are molded in a silicone dome mold measuring approximately 2.5-inches in diameter. You could also use a slightly larger size and make 3-inch cakes, you’ll get about 10 of them with this recipe.
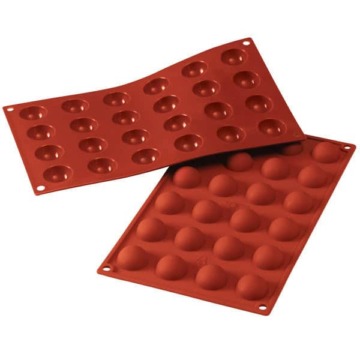
The inner lemon core is molded in a mini dome mold, about 1-inch in diameter (I actually used the same mold I used for the inner cores of my blueberry mousse cakes; though the outer molds are larger on these ones).
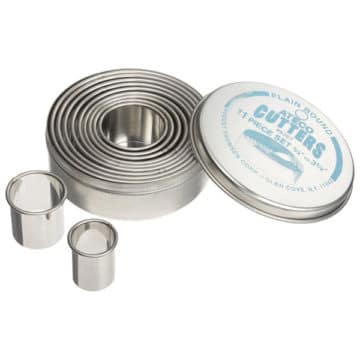
Round cookie cutters. A set of multi-sized round cookie cutters comes in extremely handy. For the pistachio, you’ll want a cutter that is the same diameter as your large dome mold, as well as one about 1/2-inch larger to ‘swirl’ the soft cookies into shape. If you are cutting rounds of lemon curd instead of using a smaller dome mold, use a cutter approximately 1 to 1 1/2-inches in size.
Instant read thermometer. The temperature is one of the most important parts of the mirror glaze process, so you really can’t do it without an accurate, instant read thermometer. Thermapens are my favorite, but any decent digital probe thermometer will do.
Offset spatula. Ideally you’ll have a large offset spatula as well as a small one. These are useful for leveling off the tops of the mousse-filled molds, as well as lifting the final cakes during and after the glazing process.
Cake boards. These gold cake rounds make moving/transporting/serving the final mirror cakes much easier. You can also cut out your own rounds out of thin cardboard like a cereal box.
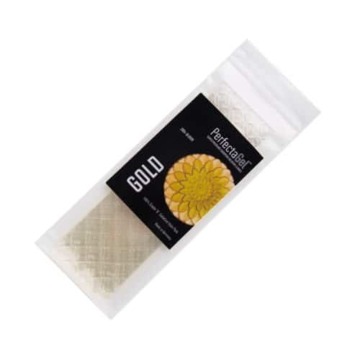
Gelatin. I used gold strength sheet gelatin (you’ll need 9 sheets total), but you can also substitute powdered (1 teaspoon per sheet) if you prefer. Sheet gelatin just needs to be covered in cold water for at least 5 minutes to soften; squeeze out as much water as you can before adding it to the hot liquid. You can use powdered gelatin for this recipe too, 1 sheet of gold gelatin equals 1 teaspoon powdered. Bloom first in water (1 tablespoon per 1 teaspoon powdered gelatin); sprinkle gelatin over top and let sit for 5 minutes. Microwave it for 5 to 10 seconds until melted and then stir in to the warm liquid as instructed in the recipe.
Food coloring. You’ll need yellow gel-based or powdered food coloring for the mirror glaze. With gel coloring especially you’ll need a generous amount to achieve a vibrant color. I found powdered food coloring produced a more vibrant color for the mirror glaze (I also used a little bit in the curd centers since without the egg yolks they’re somewhat pale in color naturally).
White chocolate. The real stuff, NOT baking chips. When in doubt, check the ingredients: cocoa butter should be the first or second ingredient. White baking chips containing palm kernel oil will NOT work for the mirror glaze. I like these Callebaut white chocolate callets (hooray for no chopping!)
Meyer lemons. Meyer lemons are a hybrid between lemons or citrons and mandarin oranges. They have a sweeter flavor than typical lemons. If you can’t find them, use regular lemon juice cut with a little bit of fresh squeezed orange juice (about 20-25% of the total amount). You can also use all regular lemon, but the end result will be much more tart.
Scheduling your Time:
Each of the components of this recipe can be made ahead of time, and in fact many parts must be made ahead of time because they need to completely freeze before you can move on to the next step.
You need to plan for at least 3 days from start to serve, with full overnight freezes for the curd and mousse layers (although if you happen to have a blast chiller or deep freezer, you may be able to speed up the process).
Alternatively, if you want to spend the least amount of time each day, you could stretch out the entire process over 6 or even 7 days, only focusing on one single component each day. While the curd and mousse steps need at least an overnight freeze, they are totally fine freezing longer than that, so plan your time accordingly.
Either way, plan out your schedule before you start to make sure everything has plenty of time to fully set and freeze.
Compact schedule:
(About 1 to 2 hours of active time per day)
- Day 1: Make the curd; pour into small dome molds and freeze at least 2 hours until set. Make the pistachio dacquoise. They can dry out in the cooling oven overnight, then store in an airtight container.
- Day 2: Make the mousse and assemble the cakes in the large dome molds. Freeze overnight.
- Day 3: Make the mirror glaze and glaze the final cakes (the mirror glaze can also be made on days 1 or 2 and reheated before glazing).
Extended schedule:
(about 30 to 60 minutes of active time per day)
- Day 1: Make the curd; pour into small dome molds and freeze overnight or up to 1 week.
- Day 2: Make the pistachio dacquoise. They can dry out in the cooling oven overnight, then store in an airtight container at room temperature or in the freezer.
- Day 3: Make the mousse and assemble the cakes in the large dome molds. Freeze at least overnight or up to 1 week.
- Day 4: Make the mirror glaze (this can be made at any point in the process as it’ll keep in an airtight container in the fridge for up to a week or frozen for even longer).
- Day 5: Remove cakes from molds and glaze.

-

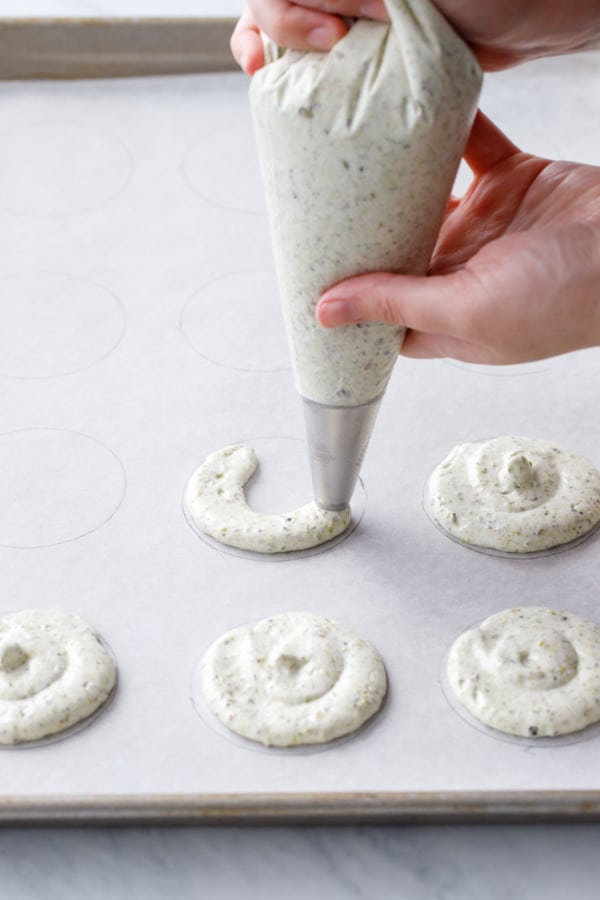
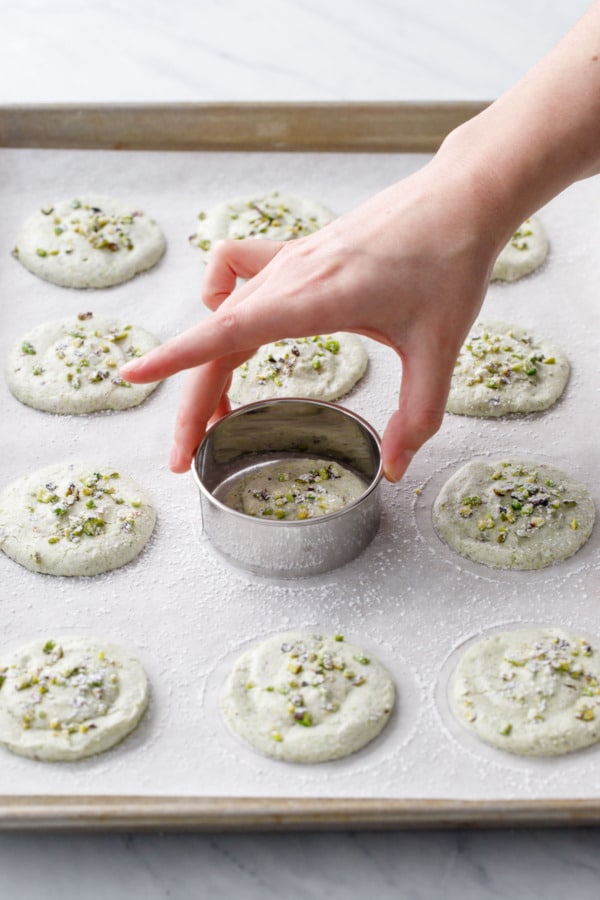
- Pipe the dacquoise into evenly sized rounds on a parchment-lined cookie sheet.
-
- After 8 minutes, swirl a cookie cutter to refine the circular shapes. Then return to the oven to finish baking.
-
- Pour the lemon mousse into silicone dome molds, filling them almost but not quite to the top.
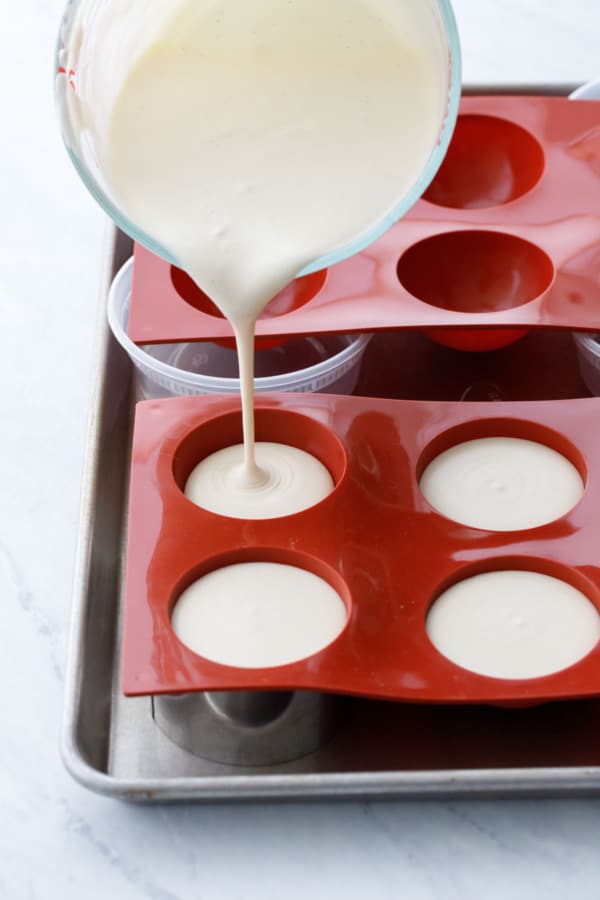
-
- Place frozen lemon curd centers into the partially-set mousse.
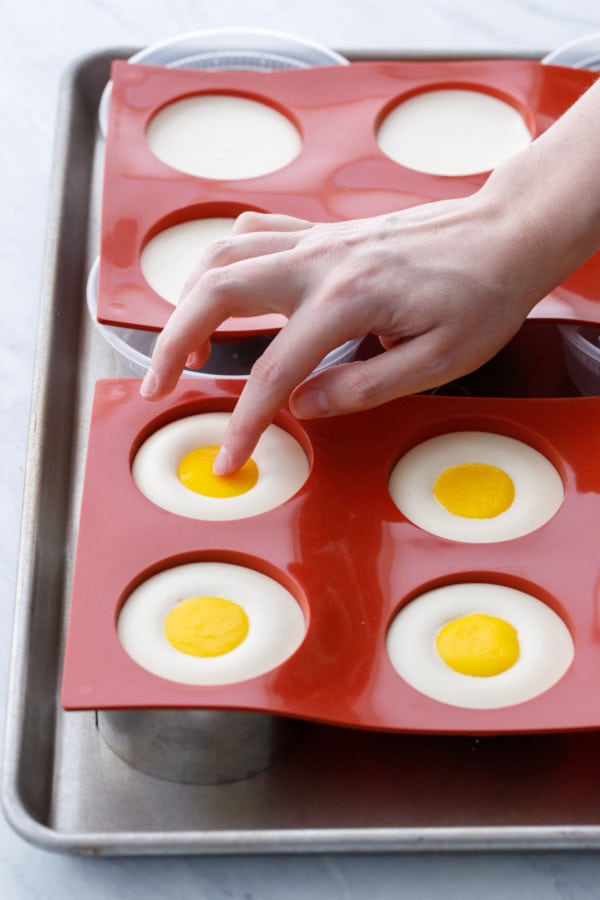
-
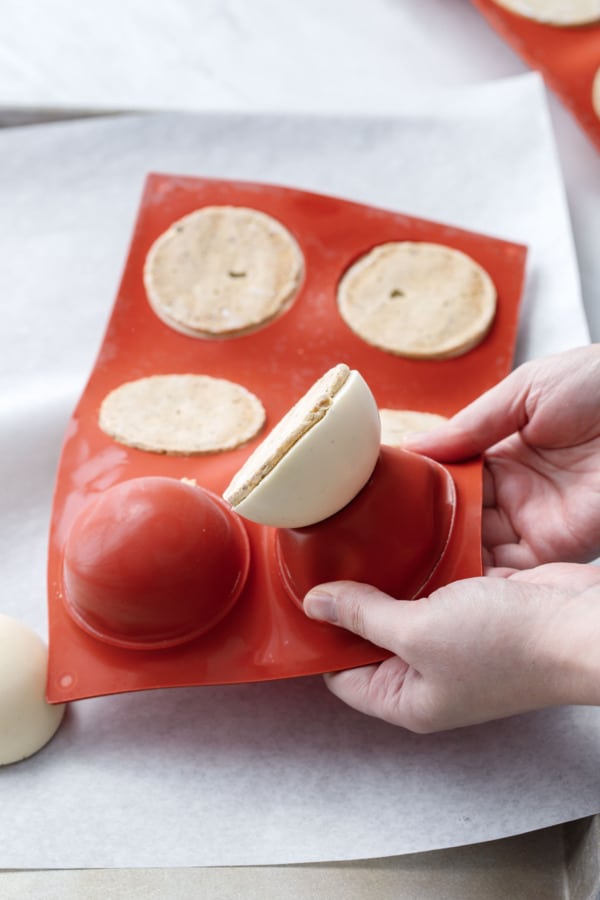
- Place a round of pistachio dacquoise on top of each mold, pressing lightly.
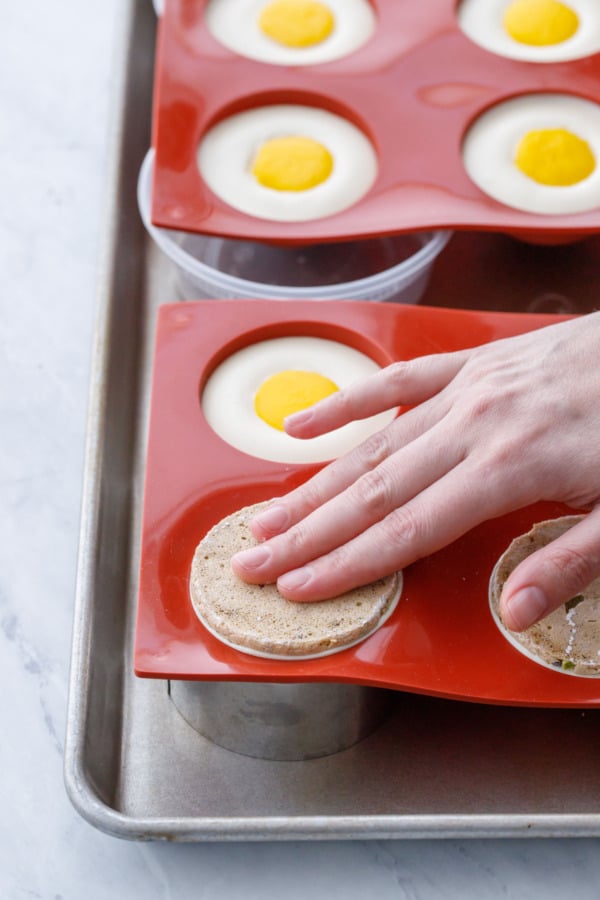
-
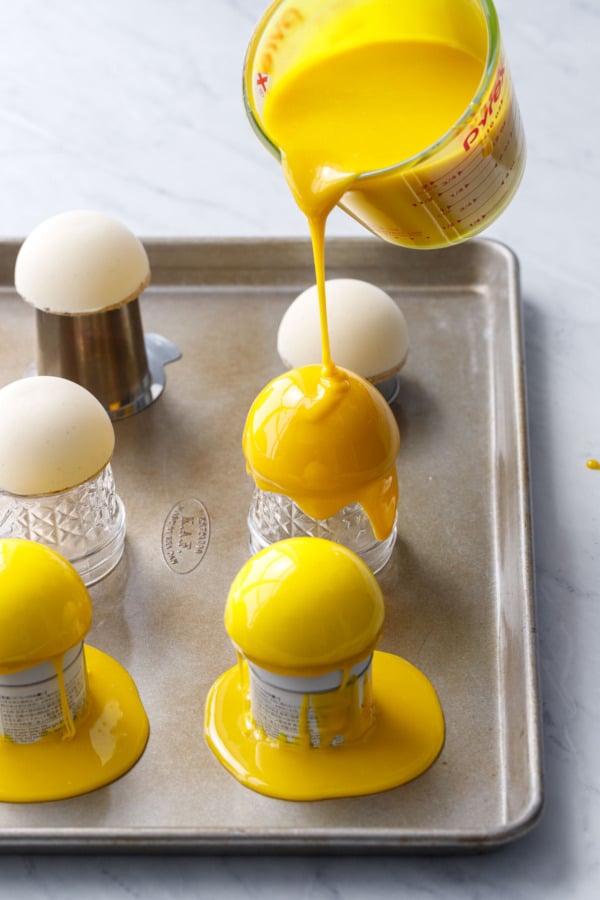
- After freezing completely, pop the cakes out of the silicone molds.
-
- Set the cakes on small jars or tins to elevate them, then pour over the mirror glaze.
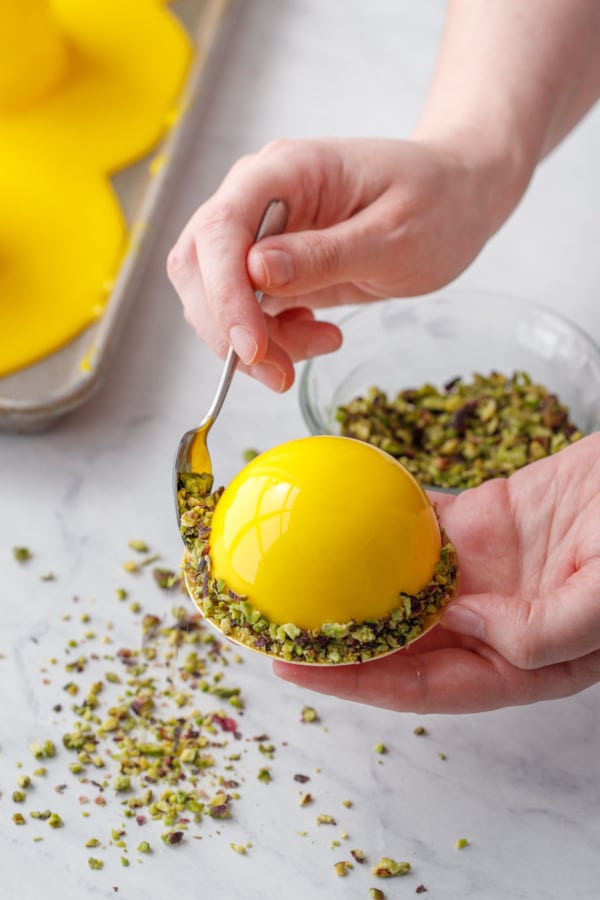
-
- Coat the bottom edge of each cake with chopped pistachios to finish it off.
Entremet Cake Tips & Tricks
- The pistachio dacquoise is piped into rounds (trace a cookie cutter that’s sized perfectly for the base of your dome molds). When it bakes, however, the meringue does spread a bit. To ensure properly sized rounds, take out the meringues after about 8 minutes of baking (they should be still soft, and just barely set on the tops). Swirl a cookie cutter (one size larger than the base) around each round, until you can just barely see your pencil lines. Then pop them back into the oven to finish baking.
- If your mousse is on the thin side when you pour it into the dome molds, the lemon centers might start to sink. If this happens, chill the mousse in the molds for 10 to 15 minutes to let it set up ever so slightly before finishing assembly.
- To avoid the little flat tops that come from silicone molds resting on a flat surface, prop the molds using something round that’s slightly larger and taller than the diameter and depth of the molds. I used a set of pastry rings for one mold (I only had 4), and then a couple plastic half-pint soup containers for the other (see the photo in the gallery above). What this does is just lift the top of the mold off of the baking sheet so it will set perfectly round.
- Mirror glaze must be at the proper temperature before it is poured. Generally 90 to 95 degrees F is the accepted temperature, however in this case I found slightly cooler, around 83-85 degrees, to be ideal, and ended up giving each cake 2-3 coats of glaze. You want the glaze to flow thickly and evenly over the entire cake. If it’s too thin it will run off in a too thin, transparent layer; too thick and it’ll glop and not fully coat the cakes.
Shortcuts and Scaling
I know many of you will take one look at the length and complexity of this recipe and go running for the hills.
But one of the nice things about this recipe is you can customize it however you’d like.
- If you want the impressive outer presentation of the mirror-glazed cakes but with the least possible components, just do the pistachio base, the lemon mousse and the mirror glaze, without the lemon centers. You’ll have a slightly smaller yield, about 10 cakes instead of 12.
- Depending on what size your dome molds are, you may also be able to use a store-bought cookies for the base (as long as it’s the right size for your molds).
- If you want to use a store-bought curd for the centers, you’ll need about 1/2 cup or so. Warm it gently on the stovetop just until it’s warm enough to melt the gelatin (about 100 degrees F), then whisk in the softened and bloomed gelatin. Pour into mini dome molds as directed in the recipe.
This recipe as written will make twelve 2.5-inch domes or ten 3-inch domes, but can easily be halved or doubled (assuming you have enough dome molds for a double batch). For smaller, 1 3/4-inch domes like those used in my Mini Blueberry Mousse Cakes, make the full quantity of curd, but you can halve the dacquoise, mousse, and glaze for fifteen smaller sized cakes.
If you want to make a full size glazed mousse cake instead of minis, the quantities as listed should work in an 8-inch silicone pan or cake ring. Follow the general assembly method outlined in my Nutella Mousse Cake recipe. To help with pan-size conversions, the rough volume yields of each component in the recipe are listed below, which should help you scale appropriately, no matter what size mold or pan you are using.
- Pistachio dacquoise: about 18 2.5-inch rounds
- Lemon curd: 1/2 cup (~120 mL, enough to fill 15 to 16 1-inch dome molds)
- Lemon mousse: 3 cups (700 mL)
- Mirror glaze: 3 cups (700 mL)
Serving and Storage
Mousse cakes are best served chilled or at cool room temperature (fine to keep them there for up to 2 hours); any longer than that and you’ll want to keep refrigerated.
Mirror-glazed entremet cakes like these generally keep pretty well if you want to glaze them a day or two ahead of time. They are shiniest the day they are glazed (and the dacquoise is the crispiest), but they can be stored in the fridge for a day or two in a lidded container. Just be sure they’re not touching each other or the lid (and you can’t really use plastic wrap or it’ll stick to the glaze).
The dacquoise layer in this recipe gets a little soggy after a few days. It’s still perfectly tasty, just not quite texturally as pleasing. For that reason I’d recommend glazing the days the day of or the day before you plan to serve them, but no more than two days max.
To make them more than a day or two in advance, you can make all the components up to a week ahead of time, and store the assembled cakes in their molds or in a lidded container in the freezer. You can also make the mirror glaze ahead of time too (store it in an airtight container in the fridge for up to a week). Just wait to actually glaze the cakes until the day of or the day before you plan to serve them.
I’ve got a fully assembled and glazed cake in the freezer as we speak, as soon as I thaw it out and test it I’ll let you know if fully glazed cakes can be frozen or not, stay tuned!
Pistachio & Meyer Lemon Mousse Cakes with Mirror Glaze
Ingredients
For Lemon Curd:
- 1 teaspoon Meyer lemon zest, from 1 lemon (save the rest of the zest for the mousse layer later)
- ⅓ cup / 80 g Meyer lemon juice, from about 3 lemons
- ¼ cup / 50 g granulated sugar
- 1 ½ teaspoons / 3 g cornstarch
- 1 tablespoon water
- ¾ sheet leaf gelatin*
- 2 tablespoons / 28 g salted butter, cut into small cubes
- yellow food coloring, optional
For Pistachio Dacquoise:
- 1 ¾ oz / 50 g raw shelled pistachios
- 1 ¾ oz / 50 g pistachio flour or almond flour
- ½ cup / 50 g powdered sugar, plus more for dusting
- pinch salt
- 2 large / 65 g egg whites
- ¼ cup / 50 g granulated sugar
- ¼ teaspoon pistachio extract, optional
- 1 tablespoon chopped pistachios, for sprinkling
For Mousse:
- 2 sheets leaf gelatin
- 4 large egg yolks, at room temperature
- ¼ cup / 50 g granulated sugar
- 6 tablespoons / 90 g heavy cream
- 6 tablespoons / 90 g whole milk
- 1 tablespoon Meyer lemon zest, from 2 large lemons
- ½ teaspoon vanilla paste or extract
- 1 cup / 238 g heavy cream
For Mirror Glaze:
- 6 sheets leaf gelatin
- 1 cup / 200 g granulated sugar
- ⅔ cup / 226 g corn syrup or glucose syrup
- ½ cup / 118 g water
- ½ cup / 163 g sweetened condensed milk
- 7 ounces / 200 g good quality white chocolate, finely chopped
- food coloring, as desired
- chopped pistachios, for garnish
Instructions
To make the lemon curd:
- Cut gelatin sheets into 1-inch strips and submerge in cool water for at least 5 minutes to soften.
- Combine lemon juice, zest, and sugar in a small saucepan. Bring to a simmer over medium heat.
- Whisk cornstarch with 1 tablespoon water. Add to saucepan and return to heat, bring to a simmer and let bubble, stirring occasionally, for about 1 minute or until thickened.
- Wring out softened gelatin with your hands, squeezing out as much water as you can (for powdered gelatin, just add it straight to the pan, liquid and all). Add to saucepan with warm lemon mixture and whisk until completely dissolved.
- Remove from heat and whisk inn butter until smooth. If you want a brighter yellow color, add a bit of yellow food coloring if desired.
- Pour into 1-inch silicone sphere molds. Freeze overnight until completely set, then gently remove from molds (they will not be frozen solid; if you have a hard time getting them out of the molds, try using a small espresso spoon to 'scoop' out the curd, retaining the dome shape as much as possible).
To make the pistachio dacquoise:
- Preheat oven to 300 degrees F. Line a sheet pan with parchment paper. Using a cookie cutter that is the exact size of your dome molds (2½-inches for me), trace twelve evenly-spaced circles onto the parchment. You'll use these circles as a guide for piping the dacquoise.
- In a food processor, pulse pistachios a few times to break them up. Add pistachio or almond flour and powdered sugar, and pulse a few more times until finely ground. You can use all whole pistachios if you want (100g total).
- Place egg whites in a mixing bowl (save the leftover yolks, you'll use them in the mousse layer). Whip on medium speed until frothy. With the mixer running, slowly spoon in sugar, a tablespoon at a time. When all the sugar has been added, increase speed to high and beat until whites are thick and glossy and hold medium-stiff peaks.
- Fold half of ground pistachio mixture into whites to lighten, then add remaining pistachios, folding until just incorporated.
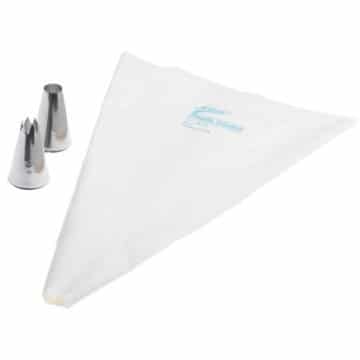
- Transfer to a piping bag fitted with a ½-inch round piping tip. Pipe circles just inside the circles you drew on the parchment.
- Sprinkle tops of piped dacquoise with chopped pistachios if desired, then dust lightly with powdered sugar.
- Bake for 8 minutes or until the tops of the cookies are just set but still soft. Remove from oven and use a round cookie cutter (one size larger than you used to trace the circles) to 'swirl' around the edges of the soft meringue until you can see the edge of the pencil marks. Do this quickly while they are still hot and pliable. If your cookies are already too crisp to reshape, you can use the exact size cookie cutter to cut off the edges to make your rounds the size they need to be. Note that if you do this the cookies will deflate and will be quite a bit flatter in the end.
- Return pan to oven and bake for another 25 to 35 minutes more, or until tops are crispy and ever so lightly browned. Thicker rounds may need up to 40 minutes to completely dry out. Turn off oven, crack the oven door and let the cookies cool down in the warm oven which will help them dry out even further.
To make the lemon vanilla mousse:
- Cut gelatin into 1-inch strips and submerge in cool water to soften.
- In a bowl, whisk together egg yolks and granulated sugar until lightened.
- Warm cream, milk, vanilla, and lemon zest in a saucepan over medium heat until it starts to steam. Slowly ladle into egg yolks, whisking constantly, until most of cream has been incorporated and mixture is warmed through. Return to saucepan and cook over low heat, stirring frequently, until it thickens and coats the back of the spoon (will measure 165 degrees F on an instant read thermometer).
- Wring out water from softened gelatin and add to warm custard; whisk until smooth. Run through a fine mesh sieve to remove zest and any solid bits; let cool for at least 15 minutes until lukewarm.
- In a clean bowl or the bowl of a stand mixer, beat heavy cream until it holds soft peaks (do not over-beat). Add ⅓ of whipped cream to the cooled custard and fold to lighten, then add the remaining cream and fold until fully incorporated.
To assemble:
- To assemble your cakes, spoon or pipe the mousse into 2½-inch silicone dome molds, not quite all the way full. Gently press a lemon dome, curved side down, into the top of each mousse-filled mold. If you find your lemon domes are sinking, let the mousse chill in the molds for 15 minutes or so to firm it up just a tiny bit.
- Finally, top with round of pistachio dacquoise, pressing lightly just until the mousse starts to pop out the sides. Place on a flat cookie sheet and place in the freezer so it is level; freeze for at least 3 hours or overnight until set solid.
- Before you make the glaze, remove cakes from molds and invert (dacquoise side down) on a frozen cookie sheet lined with parchment paper. Return to freezer until just before glazing.
Make the mirror glaze:
- Cut gelatin into 1-inch strips and submerge in cool water for at least 5 minutes to soften. Place white chocolate in a heat-proof bowl and set aside.
- Combine sugar, corn syrup, and water in a saucepan and bring to a boil over medium heat until sugar is completely dissolved and mixture is clear.
- Remove from heat, then add gelatin (squeeze out as much water as possible first) and whisk until dissolved. Whisk in sweetened condensed milk. Pour hot mixture over chopped white chocolate and let sit for 30 seconds, then stir until chocolate is completely melted and mixture is smooth (you can also use an immersion blender if you have one to expedite this process, just try not to mix air bubbles into the glaze if possible).
- Add powder or gel food coloring as desired. You can also divide your glaze up into multiple colors and then swirl them if you'd like.
- Let glaze cool, stirring occasionally, until glaze reaches approximately 85 to 90 degrees F on an instant-read thermometer. The glaze needs to be the correct temperature: too warm and it will not form a thick enough layer on the outside of the cakes; too cool and it will not flow smoothly.
- Remove cakes from freezer and place on a cookie sheet, elevated off the sheet using small jars or cookie cutters (ideally something smaller in diameter than the cake itself so the glaze can drip off). You can also put them on a wire rack. If you have more than 6 or 8 individual cakes, I recommend working in two batches. You can always rewarm the glaze if it gets too cool (do so gently over a double boiler or in very short intervals in the microwave).
- Pour glaze generously over cakes, taking care to ensure there are no bare spots left. Allow the excess glaze to drip off for 5 or 10 minutes, then gently scrape the edges to remove any remaining drops. Carefully transfer cakes using a small offset spatula to cardboard cake rounds or small pieces of parchment paper for easy movement. Any leftover glaze can be scraped up and refrigerated in an airtight container for later use.
- Use a small spoon to coat the bottom edges with chopped pistachios, tapping off excess. Garnish with a lemon twist, if desired.
- Glazed cakes will keep in the refrigerator for up to 3 days. Let come to room temperature before serving.
Notes
- * To substitute powdered gelatin, use 1 teaspoon of powdered gelatin per 1 sheet of leaf gelatin called for in this recipe. Instead of softening the gelatin in cold water and then wringing it out, you'll need to sprinkle the gelatin over a few tablespoons of cool water to allow it to soften, then add the whole mixture to the hot liquid to dissolve.


I’m curious if you think lime would work in place of all the lemon components? I have a favorite cookie recipe that’s lime and pistachio and am thinking this might be an amazing new take on it!
Totally! Lime can be a bit more tart than lemon, so for the curd filling just adjust sugar as needed to taste.
Re April 29 2025 response
I did add 1 teaspoon of lemon extract to my mirror glaze
It’s a great idea
I’m just finished glazing 6 of my 18 domes…they look absolutely amazing!
I will say…the glaze is very thin…I glazed mine twice
Set them on gold cake boards and added chopped pistachios around edge
I also made candied lemon twists for the top
I’m very pleased overall w the end result
Will finish rest another day
Thank you again for sharing such an amazing recipe
I look forward to trying out some of your other ideas
Here’s day 3 of my domes..made the bases. They turned out beautifully altho I tried to swirl at 8 minutes and stopped and tried again at 10 minutes.. this time it worked
I ended up with 19. Some are a bit big so I will just set the mousse dome on top
They’re waiting in freezer for glazing tomorrow
So far..so good!
As per my previous post…today I made the mousse. After a few missteps I finally poured the domes. Very pleased w the thickness of mousse..my 1″ curd domes were solid enough to easily remove and set into place.
Altho by the time I’d almost finished… the few left were getting quite soft
Happy to say they’re in the freezer and ready for next step
May 1 2025. Last night I made the curd. Turned out beautifully.. altho I’m using 1 inch domes and it made 24 domes? Today I’m making the mousse. Ok now but I made a mistake and measured the 6 tbsp of cream and milk then added the 1 cup cream to the pot also. Ended up having to re measure it correctly after realizing the 1 cup cream is for whipping ( luckily I had enough extra cream to begin again lol) taking an unplanned break now because my mistake stretched my time line. I have issues w standing for long periods of time which is why I’m trying my hand at entremets. Nice to be able to make such fabulous desserts over a few days. Will send updates as I progress. Note: I’m very impressed w the detail of your post and the pics are absolutely amazing! In the future I plan to make the strawberry and also the blueberry…they both look delicious too
PS wish I could include pics of my progress in this post as I’m not familiar w instagram
Not sure if I commented earlier or if it posted but aside from this being an awesome recipe that turned out beautifully I want to add that I ended up using hersheys premier white chocolate chips(despite it containing kern oil) bc I scoured the internet high and low looking for white chocolate without cocoa butter and kern oil in the ingredients but had no success. I made a very small batch of the mirror glaze to test it and turned out AMAZING! It saved me ALOT of money and the stress from continuing to search for it! Anyways I can’t wait to try out this recipe again but using different flavors! Thanks!
Just to clarify… good white chocolate will be made WITH cocoa butter, it should be the first or second ingredient. White baking chips/white coating will be mostly hydrogenated oils (good to know it worked for you with the baking chips though!)
I just made this today and knocked it out of the park!! My coworkers(and I) was very impressed! Thanks for the recipe – it’s definitely an A++!!!
Can the fully assembled and glazed cakes be frozen? How did yours turn out?
Yes, however the mirror glaze won’t be quite as mirror-like (as it thaws it gets a little condensation which mars the perfectly smooth finish). The cookie bases will also be a little softer as well after thawing.
You do need to be sure you can freeze them upright without them touching each other or the container, the mirror glaze stays sticky even in the freezer.
I am making this tonight/tomorrow, but making some substitutions. 1) I don’t like corn syrup as an ingredient, so I’ll be using honey instead. and 2) I only use powdered gelatin instead of gelatin sheets as I find its much easier.
Fingers crossed! Thank you for such a great recipe to follow!
I do NOT recommend using honey. The mirror glaze is a very particular recipe and using substitutions will not produce reliable results. You really need corn syrup or glucose syrup; golden syrup *may* work but it’s a darker color and you will not get the vibrant color glaze as pictured.
I caved in and bought corn syrup. I’ll be making almost no substitutions except for gelatin, as this is my first time making these. Eventually I’ll learn how to use sheet gelatin, but not before my party tomorrow!
Good call, I’m sure they’ll turn out fantastic! (And for future reference know that the Karo corn syrup sold in grocery stores is not the same thing as high-fructose stuff they pack into processed foods. Regular Karo corn syrup is all glucose which is less sweet than fructose. In this recipe (and most candy-making recipes) the corn syrup serves as an invert sugar to keep the mirror glaze from crystalizing.
I’ve made this 3x now and its gotten better every time. I will say, as someone who started baking 2-3 months ago…this recipe is so much harder than it looks, while also being so much simpler than it seems. :D
Making the curd, easy and amazing (make extra, you won’t be sorry). Making the pistacchio dacquoise, easy and amazing (topping w/ finely ground pistacchio and powdered sugar before baking is a MUST, it changes everything). That being said – the whole “8 minutes then take out and swirl” did NOT work for me…it just destroyed a few of the rounds. I had to get better at anticipating the expansion and make them smaller than I drew the circles. Also, the amount of pistacchio was confusing, so I ended up using 50g instead of 100g in all my bakes. Making the mirror glaze – easy and amazing (do NOT use chips unless you want it to end up looking like a dinosaur egg). The hardest part to be patient for though. Making the mousse – easy and amazing IF YOU KNOW how to make custard and whipped cream as an experienced baker. If you don’t – it’s gonna be bumpy. If you raise the temperature of the eggs too quickly, even SLIGHTLY, when warming in the eggs container OR the saucepan afterwards, they will scramble. Now it doesn’t impact taste at all and it’ll still be delicious, but you’ll feel that fluffy scramble texture ESPECIALLY when they stop being frozen and just become fridge-cold. Additionally, if you whip the whipped cream 30 seconds past the peaks, it’ll deflate. When you add the custard to the whipped cream, it WILL deflate a bit because of the egg, and THAT IS OK. Remember its a mousse not a whipped cream anymore. My repeatable panic at this and trying to “fix” it with more whipping cream were just from inexperience.
I will say – the 3 times I’ve made it – despite my blunders and developments, they’ve all turned out incredible and the reviews are amazing.
I can’t find when the pinch of salt gets added into the pistachio dacquoise in the steps?
Add it in with the dry ingredients!
Now that I’ve made this recipe I found some parts of it that I would do a little different next time.
The main thing is that the cookies are difficult to make them the right size to fit easily into the molds with the mousse. To make this easier I would fill the mousse right to the top of the molds so that it squeezes out a little when you put the dacquoise on top even if it’s slightly bigger than the mold.
I’d probably make real lemon curd or buy some and add the gelatin. It also wouldn’t hurt to buy molds that are 1.2″ for the centers, because the mini 1″ are so tiny and hard to remove from the molds. I used a spoon to careful remove them but even straight from the freezer they’re very soft. Maybe I’d add a full sheet of gelatin to help firm them up a little more.
Otherwise this is an impressive recipe. I used roasted unsalted pistachios and those dacquoise smell and taste amazing even on their own. I think I’ll make those and dip them in chocolate because they were so easy to make.
This recipe is terrific. Complicated as it seems, it was easy to follow and turned out perfectly and perfectly gorgeous. Next time I make it, I wonder if there’s a way to infuse a little more of the meyer lemon deliciousness for those of us who really like lemon?
For more lemon flavor, you can add more lemon zest and/or some lemon extract to the mousse. The glaze could also work with a little bit of extract I think!
How many grams is your gelatin sheet?
As I know it’s 3.33 g but it could be up to 5 g too.
Thank you
I linked to the exact gelatin I used, it is 2g per sheet (gold strength).
Beautiful! I have started making these, just waiting for the molds to set up in the freezer.
How do you create the cute little lemon spiral?
I cut off strips of peel with a vegetable peeler, then used a paring knife to cut into 1/4-inch strips. You can try wrapping them around a skewer, clipping the ends and letting them sit and dry out a bit. I also had luck just rolling it up and sort of using a little pressure/tension (carefully pull the spiral tighter) to get the shape to hold.
I made this for a fancy dinner party, very beautiful cakes! Freezing the mousse and lemon curd in the molds made that part super easy – aka hard to mess up :) The dacquoise recipe was perfect (I sifted the almond flour and ground pistachios thru a fine mesh strainer to remove big chunks). I’d never done a mirror glaze before so for me that was the most finnicky – but once I figured out the technique, worked great. And I used an upside down muffin tin to prop them up for glazing.
If I made this again I might experiment with a tempered chocolate outer shell, or even just a drizzle? The mirror glaze was totally gorgeous but I might have made mine too thick, I personally didn’t love the jelly texture. The dacquoise, mousse, and curd were divine though. Thanks for the great recipe!!!
So glad you enjoyed! I haven’t tried this with a chocolate shell (or white chocolate maybe?) but I imagine it could work, just coat the insides of the dome molds with a very thin layer of chocolate and let it set before adding your mousse directly inside.
Beautiful recipe. For the mousse, steps 2 and 3 both say to add sugar. But sugar is only listed once in the ingredients. How much do you add in step 2 and how much in step 3?
Fantastic very very nice
Can you please suggest alternatives for gelatine as I cook for many vegetarian and Muslim family/customers who do not wish to eat animals/pigs.
Thank you
Unfortunately entremet-style cakes like this one are heavily reliant on gelatin for multiple components (glaze, mousse, and filling), and there really isn’t a suitable replacement. I’d recommend finding a different recipe entirely, but I’ve got lots of other cake recipes that don’t require gelatin!
So, it’s really sugar AND glycose Sirup for the glaze? I’m from Germany – there is no corn Sirup to find here. I’m a little anxious. I’ve been working on the domes for 3 days now. Tomortow I want to prepare the glaze in the morning and coat the domes. My family loves lemons. So this is my Christmas dessert.
However, the sugar plus Sirup and chocolate worries me a bit. Is that maybe for the “mirror” part?
Thank you so much!
Happy holidays
Tina
Yes, both sugar and glucose (or another invert sugar syrup like corn syrup, golden syrup, etc.) are needed for this recipe. All the ingredients in combination is what gives you the mirror finish, so I don’t recommend making any substitutions.
Absoluterly scrummy emmmm
I loved the taste and how professional these domes look. But I wonder if you could recommend a different gluten-free base instead of dacquoise (like a pistachio sponge perhaps)? The dacquoise was delicious, but because it’s so crispy, I found it difficult to neatly cut through the mousse and the dacquoise without getting crumbs everywhere.
I found the base softened quite a bit once it sat with the mousse (it wasn’t very crispy at all when I cut into mine). You could try letting it sit it a little bit longer before cutting, or try baking the dacquoise a few minutes less which would make the base softer. I don’t have any gluten free sponge recipes, unfortunately!
These look absolutely stunning and even although they will need to be made over a few days, each stage is not that complicated. I purchased dessert molds so that I can improve my plating and this is the perfect recipe to use them. I can’t wait!
Thank you for sharing the recipe.
I am making these for our cafe and was wondering what the outcome was in regards to freezing the fully assembled cake?????
The only part that doesn’t do so well in the freezer is the pistachio base, it gets a bit soggy as soon as it thaws. But the curd, mousse, and glaze all do surprisingly well in the freezer, as long as you can figure out a way to store them without the glaze touching anything else.
How much gelatin would you use if using your own lemon curd?
Depends how firmly it sets up, but for 1/2 cup of curd 1/2 to 3/4 sheet of gelatin is probably fine. Some curds may be firm enough on their own without gelatin, though I’d probably err on the side of too firm as opposed to too loose.
I have tried both the pistachio Meyer lemon and the blueberry mousse recipes. I followed them to the letter, but both times, my glaze did not turn out shiny! My measurements and temperature were spot on. The mousse domes were frozen solid. What can I possibly be doing wrong? Other than that, both were delicious!
Did it start off shiny, or was it matte when you first poured it? They definitely aren’t quite as shiny the next day. Extra condensation may dull the shine as well.
Did you use powdered or leaf gelatin? I’ve noticed leaf gelatin is much clearer in other recipes, guessing that would be the case here too. Could also be the type/brand of white chocolate you used, that should ideally be a good quality white chocolate and not white baking chips for example. Does that help at all?
Love this recipe. I was a little scared to try it because it looked so complicated but was easier than I figure. I changed the dacquoise for an almond shortbread cookie and made raspberry mirror glaze. Everyone enjoyed them and they looked so fancy.
This makes me so happy to hear! So glad you enjoyed, and hooray for baking outside our comfort zones! :)
I could seriously stare at your recipe pictures all day! Your food photography is like artwork – so crisp, clear, and your composition is perfect. Amazing work, Lindsay!
For the Mousse recipe, you mention adding sugar in Step 2 (whisk with egg yolks) and in Step 3 (add to the milk/cream). However in the mousse ingredients listing, you just mention sugar once: 50 g granulated sugar. How much sugar does one use in Step 2 and how much in step 3 in the mousse recipe?
All the sugar gets mixed in with the egg yolks.
The 2 tbs of butter seems to be missing from the the curd recipe. When do you add this?
Add it right after the curd comes off the heat!
Gorgeous, as always!
I actually DO like lemon desserts, love them really, so these are perfect for me, as is the serving size, they look great too, thank you!
You need to change step 2 under lemon vanilla mousse.
Updated now, nice catch. ;)