
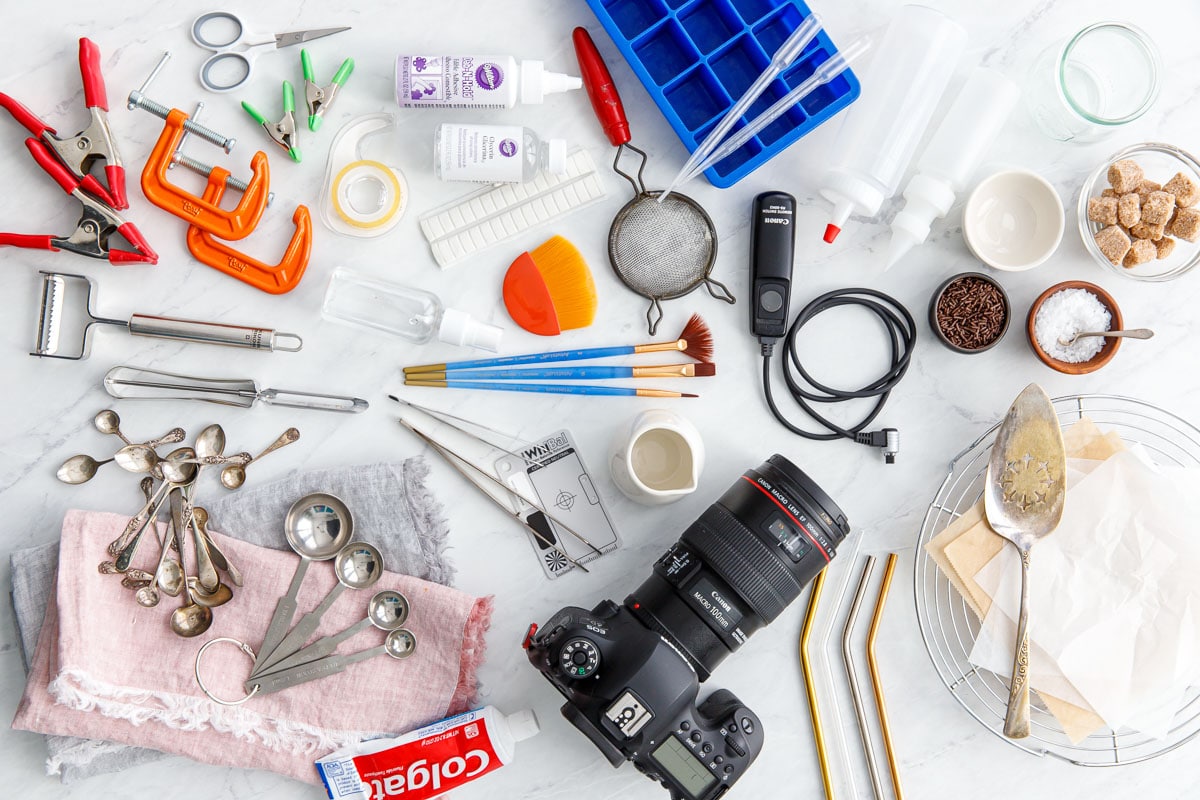
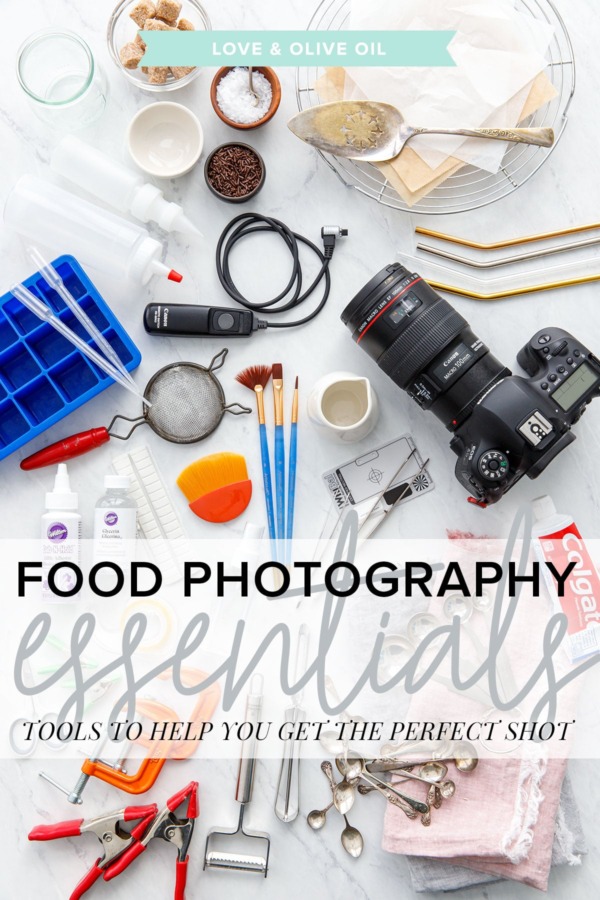
When it comes to food photography, a few useful tools and stylish props can make all the difference.
Here’s an extensive list of my most used food photography equipment, styling tools, favorite prop sources and more to help you capture the perfect photo!
Save this recipe for later!
Caveat: I am by no means a professional food photographer, however I’ve certainly learned a lot (and come a long ways) over the nearly 13 years (!!) I’ve been doing this. So maybe I do know a thing or two…
This list is a compilation of my personal equipment, most used tools and favorite resources for props and backgrounds.
And you know, with Black Friday and all the crazy holiday sales gearing up, this would be a great starting point if you’re looking to get the food blogger in your life a little something special for the holidays (or, you know, treat yourself *winkwink*). I mean, it’s basically a gift guide if you look at it that way!
(Speaking of gift guides, while I won’t be doing a full one this year, my ultimate foodie gift guide from last year is still a great place to start if you’ve got a foodie on your list!)
(Please note there are affiliate links in this post.)
Equipment
You can’t take food photos without at least a camera. Even if you’re just using your phone, you’ve got to start somewhere!
Camera – The photographer makes the photo, not the camera (I’ve seen amazing work come out of an iPhone and horrible photos from thousand dollar cameras), so focus on your skills first and equipment second. That said, I currently shoot with a Canon 6D Mark II, Canon’s entry level full-frame camera. I started with a Rebel (which is a great, affordable option if you’re just starting out!), eventually moved up to a full frame 5D when I needed more megapixels my first cookbook, then upgraded to a 6D when it first came out, and just last year upgraded to the new 6D Mark II. I ultimately decided the extra $1,200 for the 5D Mark IV just wasn’t worth it to me (you gain some extra focal points and 4K video… but lose the rotating screen, something I use regularly).
Lenses – Most of my food photos are shot with a Canon 100mm F/2.8L macro lens. If you aren’t using a full frame camera, I’d recommend something with a lower focal length (50 or 65mm), as the 100mm is going to feel like a superzoom. But for full-frame cameras it’s a fabulous, ultra creamy lens perfect for food photography. For process shots I mainly use my Canon 24-70 f/2.8L II, which gives me more flexibility in framing with wider angles (this is also my go-to travel lens).
Extra battery – I can’t tell you how many times I’ve been in the middle of a shoot, ice cream melting or frosting drooping, and had my battery go dead. Don’t let your hard work go to waste. Have an extra battery at all times, and be sure it’s charged (whenever I take a dead battery out of my camera, I always put it directly into the charger so I don’t forget). I also recommend getting name brand batteries; I’ve tried the 3rd party brands because they are much more affordable, but the battery life is dismal. Not worth it.
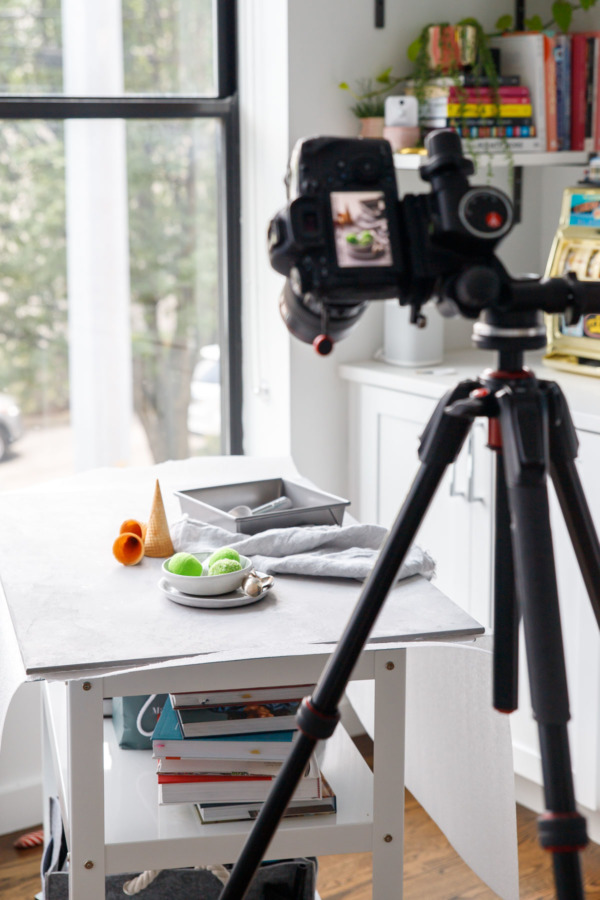
Tripod – Shooting with a tripod allows you to work with lower light situations, without having to worry about lens shake. I find it also lets me be more intentional about my shooting, setting up and planning my shot beforehand and framing it exactly the way I want. I highly recommend a tripod with a 90 degree center column so you can shoot overhead as well. I currently use this Manfrotto tripod with this geared head (great for precise adjustments) or this ball head (smooth and quick movements).
Remote Trigger – Sometimes you can’t stand right by your camera (especially when it’s on a tripod) and that’s when a remote trigger comes in handy. Maybe you’re by yourself and trying to get an action shot. Without a remote trigger your only option would be the camera timer and that’s much less forgiving. You can use a simple corded remote, or if you foresee needing more freedom, a wireless remote.
Lens Filters – I always. ALWAYS. Have a basic clear UV filter on my lenses (be sure you get the right size for your lens). This is mainly for protection (I’d much rather break a $50 filter than a $2,000 lens, and trust me, it’s saved my butt more than once). I also have a circular polarizer that I mainly use it for travel when shooting water and other surfaces with lots of glare. That said, I’ve heard these work well to remove glare when shooting liquids/glassware, though I have yet to try it out myself.
Gray card – If you struggle with white balance, think about getting a gray card or color correction card. Basically, a gray card is a neutral gray card that can be used to sample white balance in post processing (use the white balance eyedropper tool and click directly on the gray card – you can then copy those settings to the image without the card in it). I use this most often when I’m shooting something on a colorful background without any pure white objects to reference. I find the gray card tends to result in an overly warm image, but it’s easy enough to use as a starting point when editing.
Lighting – I shoot 95% of my images in natural light. Artificial light is still a mystery I’ve yet to solve. That said, I do have a set of continuous LED lights with stands and filtering umbrellas, and have used these mainly when I need photos in my kitchen and there’s not enough natural light. A speedlight is also another great option (as opposed to continuous lighting, a speedlight only goes off when you press the shutter, like an external flash, essentially.)
Backgrounds
A background is the foundation of a good photo. If you have a nice kitchen counter or dining room table, that’s a great place to start. But you may find at some point that you want more options that you can switch out as needed, and it’s them that having a nice assortment of backdrops will come in handy.
Woodville – Beautiful faux painted backgrounds direct from Russia! The boards themselves are lightweight and the finishes are beautiful. I have a handful of them, but some of my favorites are Rouen and Lima. I use the 24×35 size, which is plenty big for most situations. Erickson Surfaces is another company doing great work, although I find their backdrops much thicker and heavier.
Foam Core – Bounce baby bounce. I have a half dozen or so white and black foam core boards that I use to control my light. If I want to bounce more light back in to a subject—if the shadows are too harsh for example—I’ll use a white board. Black boards are helpful to add more dynamic shadows and directional light on days when the light is particularly flat. You can easily find foam core at any art supply or craft store.
Marble Pastry Board – My favorite, most versatile background is this marble pastry board from Sur La Table, though you can also find similar, less expensive options at Crate & Barrel, World Market and Amazon. When I’m struggling with a shot, my marble board is my go-to. If you buy one of these, I recommend going to a store in person so you can pick out the exact board you want (marble can vary a lot and you want to be sure you like the veining and coloring of your specific board).
Contact Paper – The one downside to my marble board is the size. I’ve tried a few faux painted marble backgrounds in the past and just wasn’t happy with them. Recently I stumbled across this marble contact paper which is nearly indistinguishable from real marble. I covered a 1/4-inch thin plywood board with the contact paper and have been using that a lot lately! You can also get contact paper in other patterns and textures including concrete.
Subway Tile – Another new find, this mini faux subway tile perfectly mimics a kitchen backsplash. I’ll put my marble or my faux marble on my rolling cart, prop up the subway tile board behind it, and voila! Fake kitchen.
Art Paper – If you’re looking for some cheap, unique backgrounds, try art paper! No, it’s not waterproof and you’ll probably leave grease stains and smudges, but for $6/a pop you can get a bunch. Great when you want a bold, solid color or a fun pattern! Check out your local art store or a store like Paper Source.
Styling Tools
Tools and tricks to make that food look downright drool-worthy. I keep all of my styling tools in a tool caddy like this one, which makes it easy to access just what I need, when I need it (and when your ice cream is melting on the table, you don’t have the luxury of time on your side).
Rolling cart – When you’re chasing the light, it’s important to be able to move freely! I have a rolling kitchen cart set up in my photo area (the back half of my living room, basically). When I’m setting up, I can move the cart around as needed to get my desired angle. I’m currently using this cart from CB2, but here’s a less expensive option with drawers (!!) from Michaels that’s nice as well.
Tweezers – A couple pairs of kitchen tweezers (in varying lengths/shapes) are extremely useful for placing delicate garnishes (like individual sprinkles and sprigs of cilantro), repositioning wonky noodles and the like.
Pipettes – I use these to strategically place drips of sauces and salad dressing. If only you didn’t have to buy 100 of them…
Squeeze and spray bottles – For the perfect drizzle of chocolate or caramel, use a squeeze bottle. And these smaller squeeze bottles are perfect for piping intricate details (they’re compatible with any standard size piping tip). When a dish starts looking a wee bit dry, a fine mist of water usually perks it right up.
Paint brushes – Useful for painting tiny bits of sauce and dressing exactly where it needs to go. I also like a big fan brush or this model brush for removing stray crumbs.
Sheet pans – My photo area is in a separate room from my kitchen, so rather than go back and forth with a dozen ingredients and dishes, I’ll set it all up on a sheet pan and carry it all at once.
Toothpaste – For when that cool vintage flatware is just a bit too… vintage. Toothpaste (the old fashioned white paste kind, not the blue gel!) will polish silver flatware to a clean sheen without removing all of the beautiful patina (straight up silver cleaner makes things too shiny, in my opinion).
Dulling spray – Reflections are tricky. If you’re working with some extra shiny flatware, give it a spritz of dulling spray to give the shiny metal a more matte finish. I’m not sure if this is food safe, so be sure you just use this for the photos and not actual eating.
Straws – Paper, metal, silicone, bamboo and even glass: drinking straws come in all sorts of materials these days! They’re also helpful for lightly melting the edges of ice cream (just gently blow where you want to soften the ice crystals) as well as quickly clearing out errant crumbs.
Sticky tack – Sometimes a prop just won’t stay where you want it. Maybe a round object keeps rolling so the label is facing down, or a fork won’t stay propped at just the right angle on a plate. White or clear sticky adhesive is perfect, as it will temporarily hold an object where it’s supposed to be, without being overly obvious in the final photo.
Double stick tape – Another useful tool when you need something to stay put.
Clamps – Useful for propping up backdrops and foam core, although I’ve yet to find a really good solution to this and usually end up hacking something together with chairs and planters to hold things up.
Peelers – A julienne peeler is a great way to get beautiful ribbons of carrot for salads and noodle dishes. And a bare bones metal vegetable peeler like this one is a great prop in and of itself (I try to avoid fancy/grippy/branded type tools, as practical as they may be; plain, old-fashioned tools really look best in photos).
Props
While the food should be the focus of your shot, well-chosen props can help add to the story you are trying to tell. That said, I find that less is more: when I find myself having trouble with a photo, I start taking things out rather than adding things in.
Cooling racks – I have a whole stack of cooling racks—round, square, chrome, rusted and vintage—that I often use to add texture and a bit of height to photos. It’s more interesting than placing your cookies directly on the background or even on a plate. I have a few favorites, including this pretty round one from Donna Hay, this gorgeous copper one from Williams Sonoma, and this ultra versatile chrome rack that you’ve seen in a post or two.
Wood boards – You simply can’t have too many wooden boards. I have an assortment of shapes, sizes, and colors, and will often pull them out when I feel I need to add some natural texture or height to a scene. Places like World Market have some beautiful options!
Little spoons – Wee spoons! I really have a thing for spoons, and small spoons, the tinier the better, are my favorite. I have a whole pouch of itty bitty condiment spoons from my grandmother that I simply treasure. Look for espresso or demitasse spoons, condiment spoons, and salt spoons.
Serving utensils – Cake/pie servers are one of my favorite photo props; my favorites are a set of vintage ones I found at the flea market, although you can find nice basic ones online and some really pretty ones at shops like West Elm and Anthropologie. If you can find them, matte finishes are ideal for photography as you don’t have to worry about weird glare and reflections.
Cake stands – Is there such thing as too many cake stands? Every home baker and dessert photographer should at least have a set of basic white cake stands (mine are discontinued Martha Steward collection, but these look somewhat similar). I also have a vintage Ateco Cast Iron cake stand with a spinning tip (pretty and practical!) that I love, but you can really go crazy will all sorts of beautiful cake stands (these cake stands are absolutely gorgeous, and this one is definitely on my wish list).
Pinch bowls – Perfect for holding a bit of salt or pepper, or some of the raw ingredients from a dish, a little bowl full of something is a great way to add more interest to an image. I mean, you really can’t have too many. Some of my favorites include this colorful terra cot set, the nut bowls from Fishs Eddy in NYC (not sure if they still have them or not), these wooden ones from World Market, and Anthro’s latte bowls. I’ve also picked up some beautiful handmade bowls in my travels, tiny bowls like this are easy to bring home!
Measuring cups/spoons – I have my everyday set of measuring cups and spoons that I actually use in the kitchen, and then a few nice sets just for photos, including one stainless steel, one copper, and one aqua blue enamel. You can often find really unique measuring cups and spoons these days, and they can serve the same purpose as a pinch bowl in a photo: showing a bit of the raw ingredient or seasoning that goes into the recipe to add some texture and interest to the photo.
Vintage tools and utensils – I’m always scoping out flea markets and estate sales for rusty old kitchen tools and utensils, beautifully aged silver flatware and well-used cookie sheets and baking pans. A little rust or patina makes for a beautiful textural element in a photo, although you don’t want anything that looks too dirty or downright unsanitary (lol). You can often find these on Ebay or Etsy, although they are going to be quite a bit more expensive.
Linens – I have a love hate relationship with linens. They’re a great way to add some organic texture to a scene, but I struggle with getting the placement just right so it looks ‘natural’ without looking like a complete mess. I prefer linens that are softer, not starchy, that have a nice drape to them. For this reason I recommend buying them in person (Anthropologie is a great source) where you can really feel for yourself.
Parchment paper – Another great way to add some texture, just layer or crinkle up some parchment! I’ve got the basic white, natural brown, and also some fun newsprint parchment that makes for a really fun accent in photos.
Handmade ceramics – I have a thing for handmade ceramics; they make the most unique props, with their organic shapes and gorgeous textures. I recently started taking ceramics classes myself so I can make my own, which if anything has made me appreciate handmade ceramics even more. Some of my favorite ceramic artists are Suite One Studio, Sarah Kersten Studio, and Nashville-based RVPottery. I also love seeking out unique pieces when I travel, and will often come home from a trip with a small plate or a pinch bowl I’ve found along the way.
Ingredients
Take a cue from professional chefs: sometimes a little final touch or garnish makes all the difference!
Flake salt – The perfect finisher for almost any dish. I like Maldon sea salt, which has large, diamond-shaped flakes that show up beautifully in photos.
Sprinkles – I mean, sprinkles make everything better! The sprinkle mixes from Sweetapolita are especially fun.
Sugar cubes – I recently discovered these rustic looking natural sugar cubes and I’ll never go back to the igloo bricks. They’re great accents in shots with cups of coffee or tea.
Microgreens – If you can find a source for microgreens near you, make the most of it! I love using micro greens and micro herbs instead of the full size versions, they just add an element of sophistication to any dish.
Glycerine – A spritz of 1 part vegetable glycerin mixed with 4 parts water on a glass mimics the perfect dew drops of a frosty glass, or brushed directly on fruit or meat for a glossy finish. This is a commercial photography trick I don’t use often, although I still keep some on hand just in case a subject is being particularly problematic. While glycerine is edible, I don’t recommend using it excessively on items you will be consuming.
Citric Acid – Helpful for keeping fruit and vegetables (like apples or avocados) from prematurely browning. Have a citric acid solution in a spray bottle and use as needed to keep your produce looking fresh. Lemon or lime juice will also work.
Software & Editing
Once you’ve taken the photo, now what do you do with it?
Lightroom – Adobe Lightroom is the gold standard in photo editing. Occasionally I’ll bring an image into Photoshop if I need to merge a few photos together or add text, but 98% of my editing work is done solely in Lightroom.
Spyder – This is the best tool for monitor color calibration. You’ll be surprised at how much of a difference a properly-calibrated monitor makes, especially when it comes time to print your images.
External Hard Drive – Photo files, especially RAW files (you are shooting in RAW, aren’t you?) are enormous, and will most certainly start to slow down your computer as they pile up. I have a system where I save copies of all my final edited photos and cropped web versions, and then transfer the original RAW photos (with obvious rejects or duplicates deleted) onto an external hard drive for safekeeping. I have needed to access these files on occasion, and have been glad that I didn’t delete the files completely!
***
Phew. That post turned out a lot longer than I anticipated. It’s actually quite surprising just how many different tools and things I use on a daily basis. Obviously if you’re just getting started you can get away with a whole lot less (I’d argue that just a camera and your subject are all that are truly essential) but the deeper you go into the world of food photography, the more you’ll want to explore. And in that respect I hope you find this post helpful!
I’m always on the lookout for new prop sources too, so if you have a favorite, definitely share it in the comments!


wow, had no idea so many tools are involved in food photos, but makes sense given that yours are so beautiful, thank you!