
Bitter and sweet, fruity and chewy, candied orange peel is one of citrus season’s under-appreciated treats. Whether spooned over ice cream, garnishing a fancy cocktail or mocktail, drizzled over pancakes, or chopped and mixed into cookies or scones, they are as versatile as they are delicious.
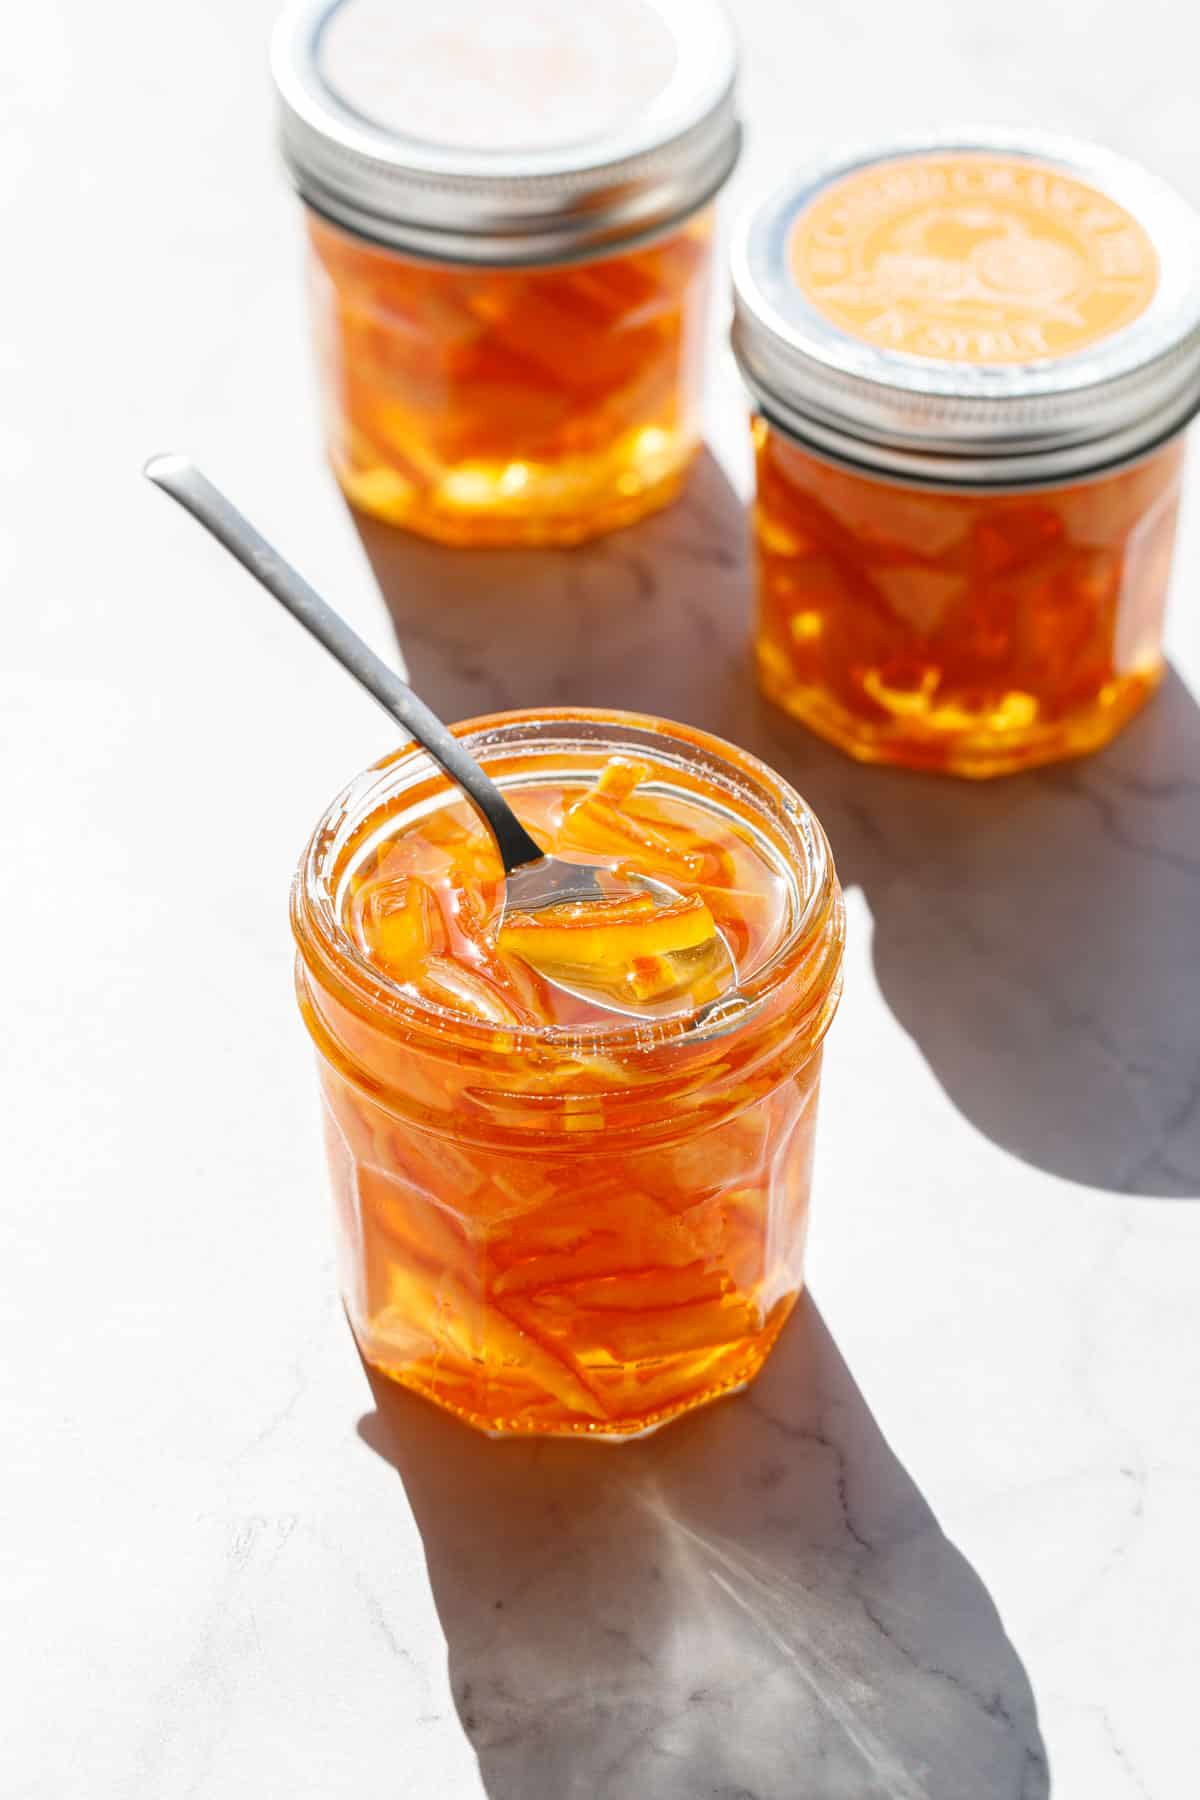
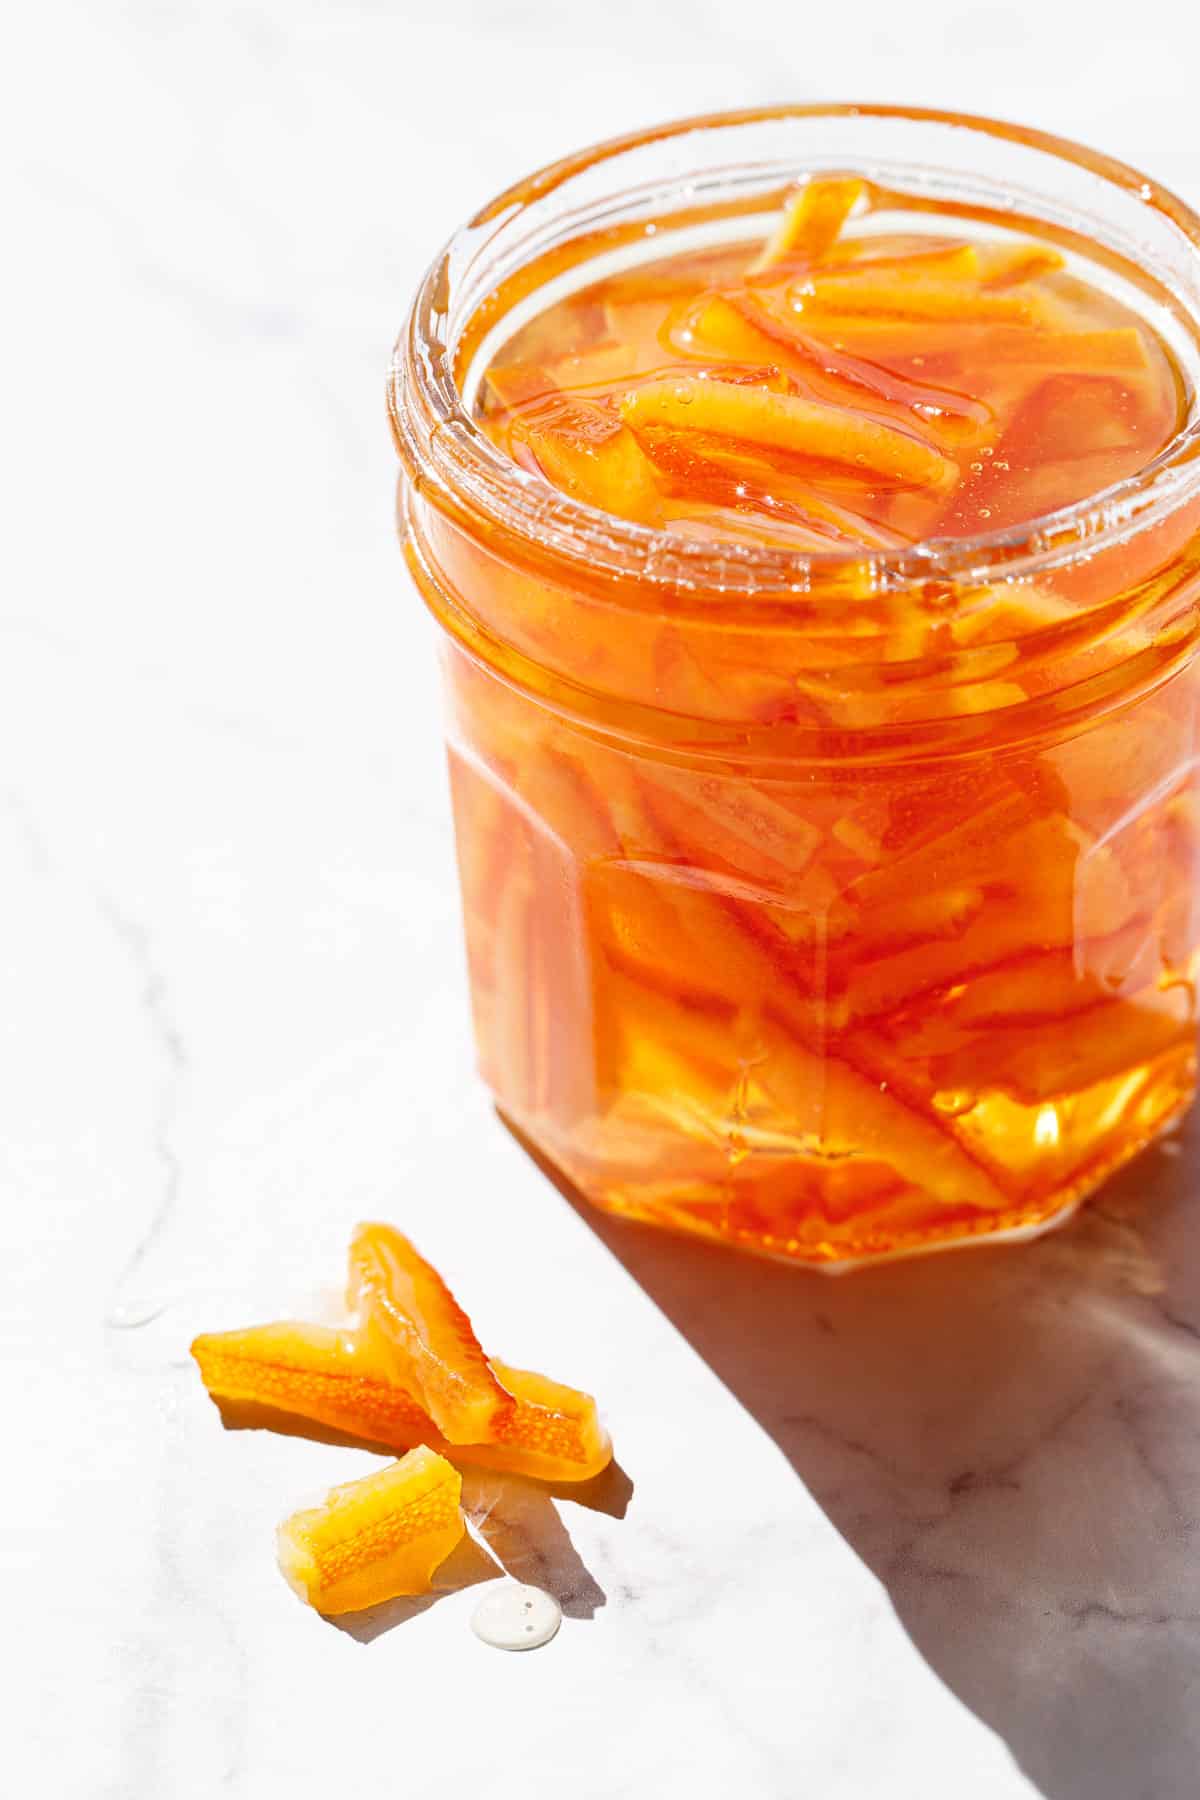
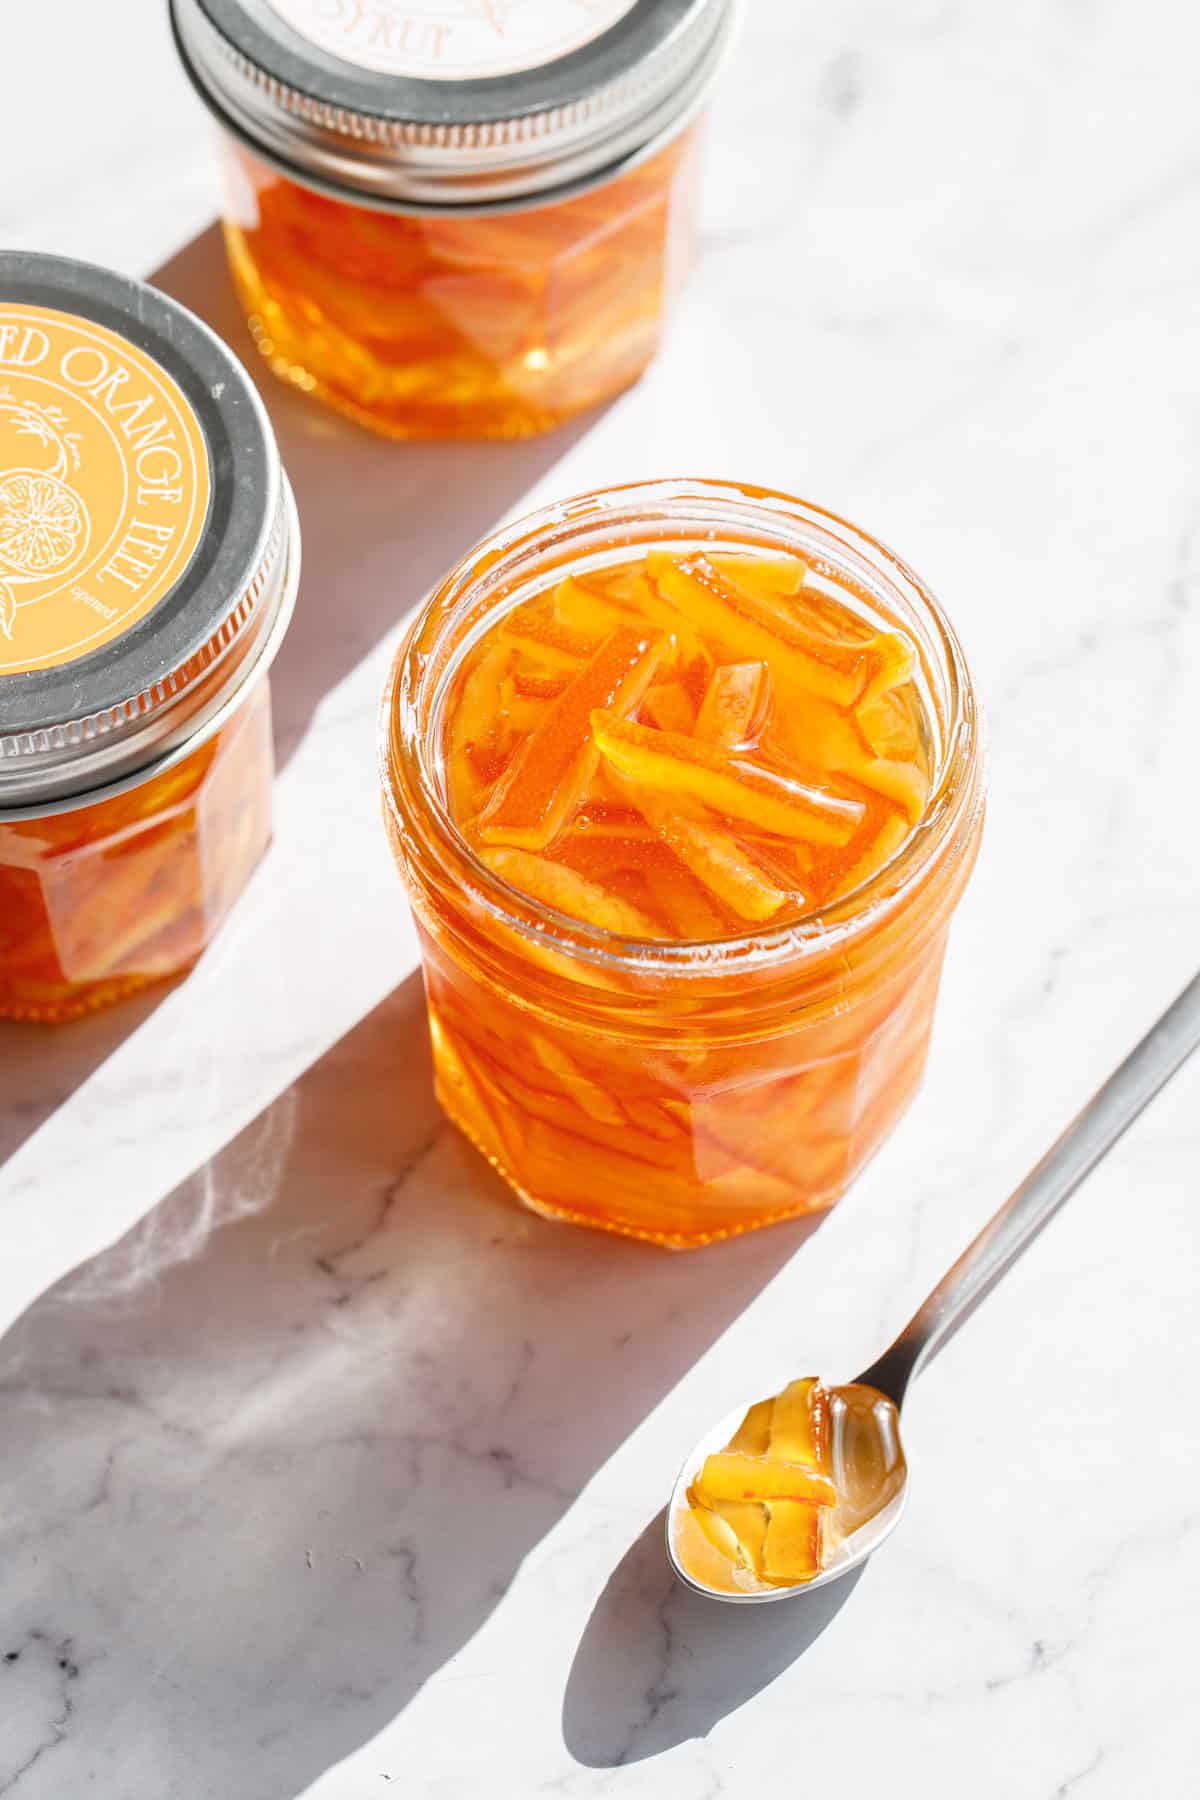
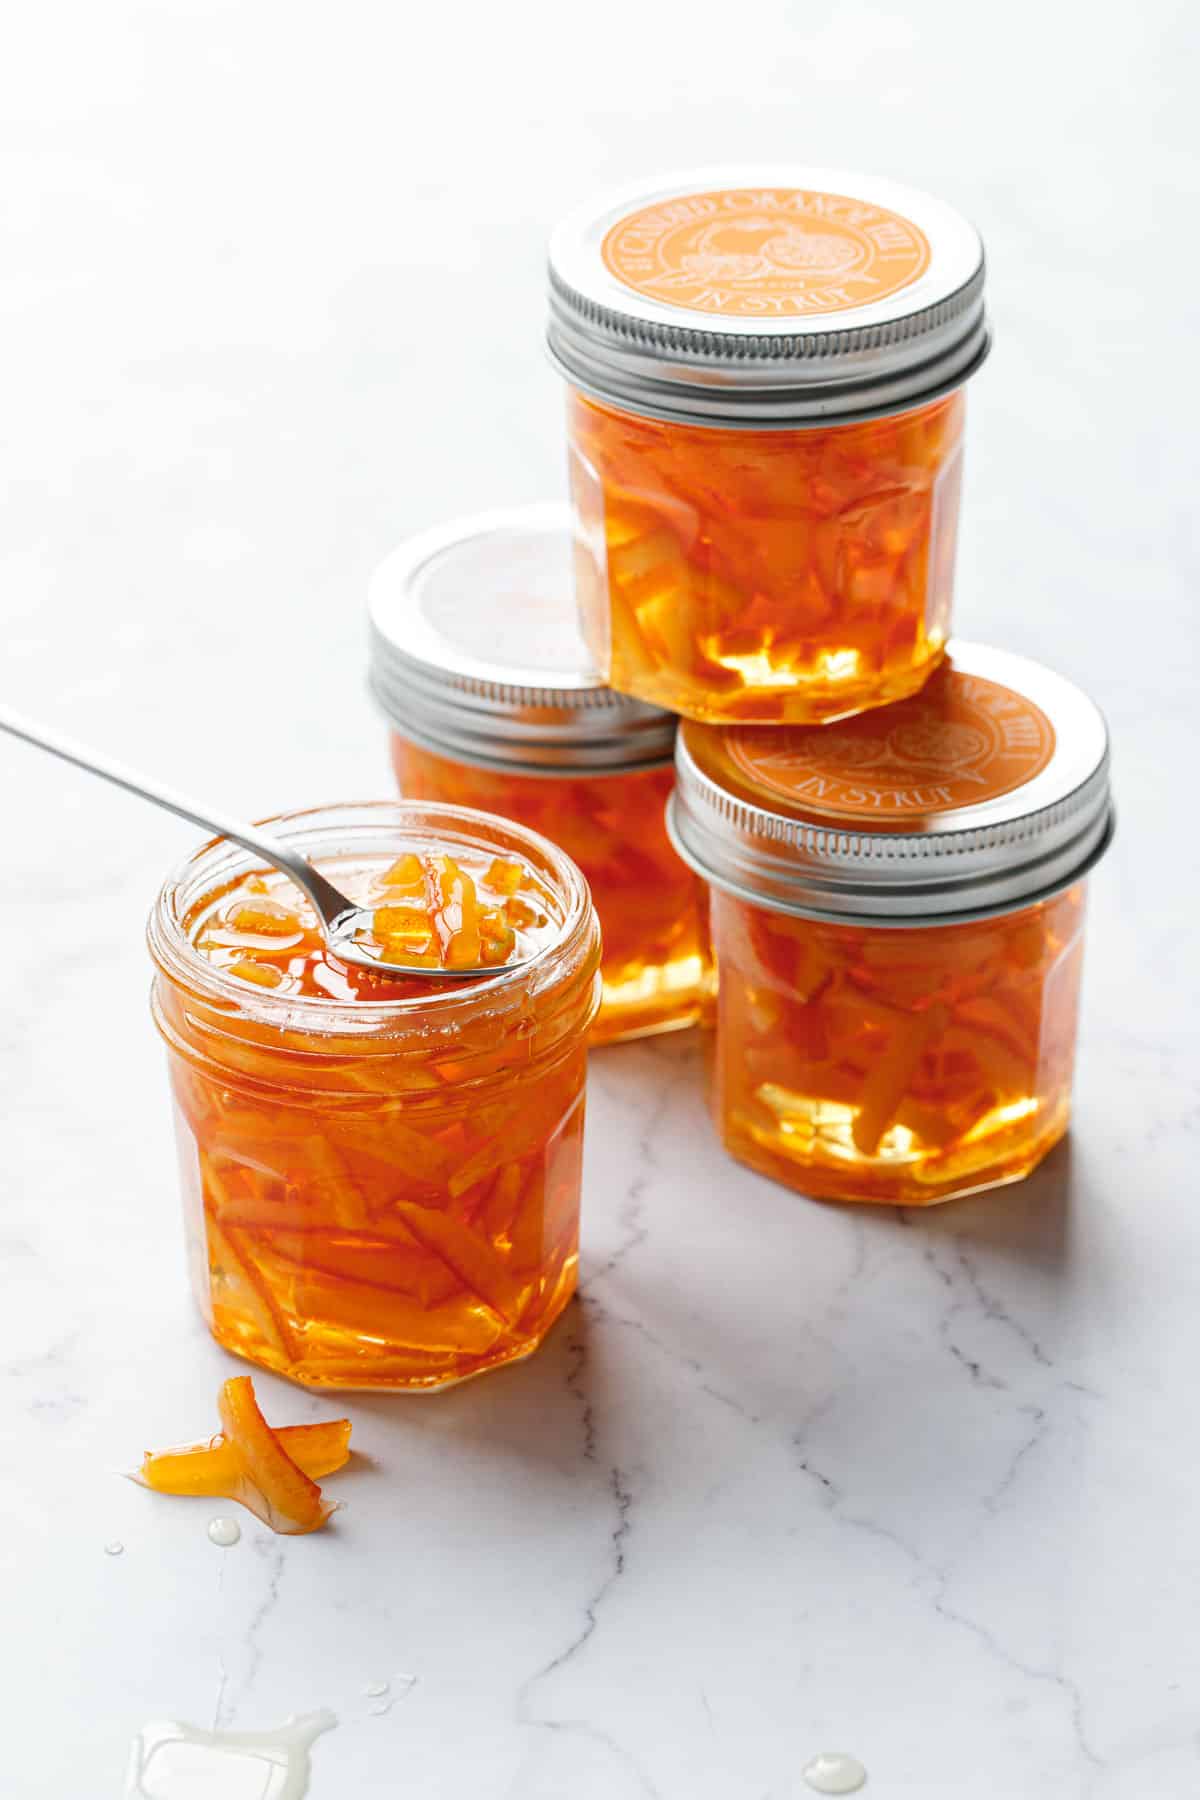
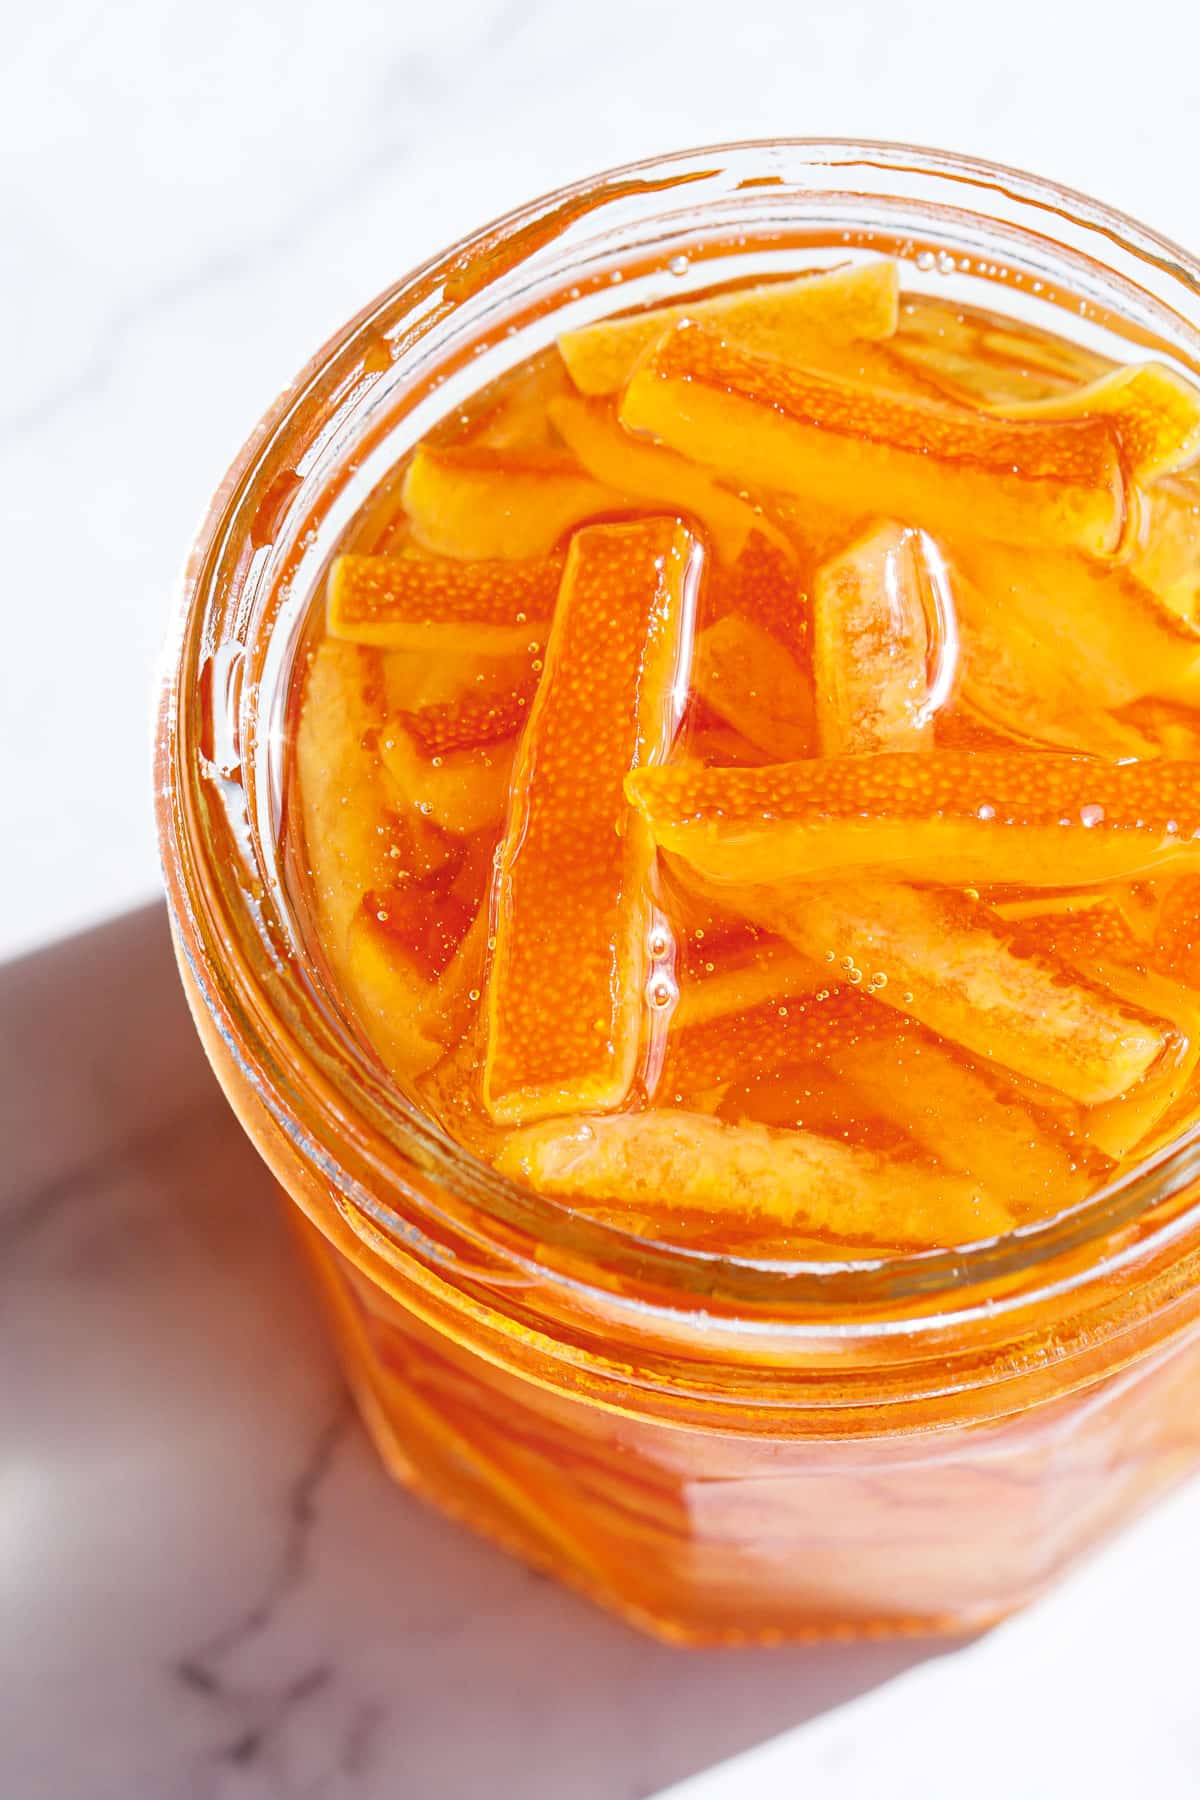
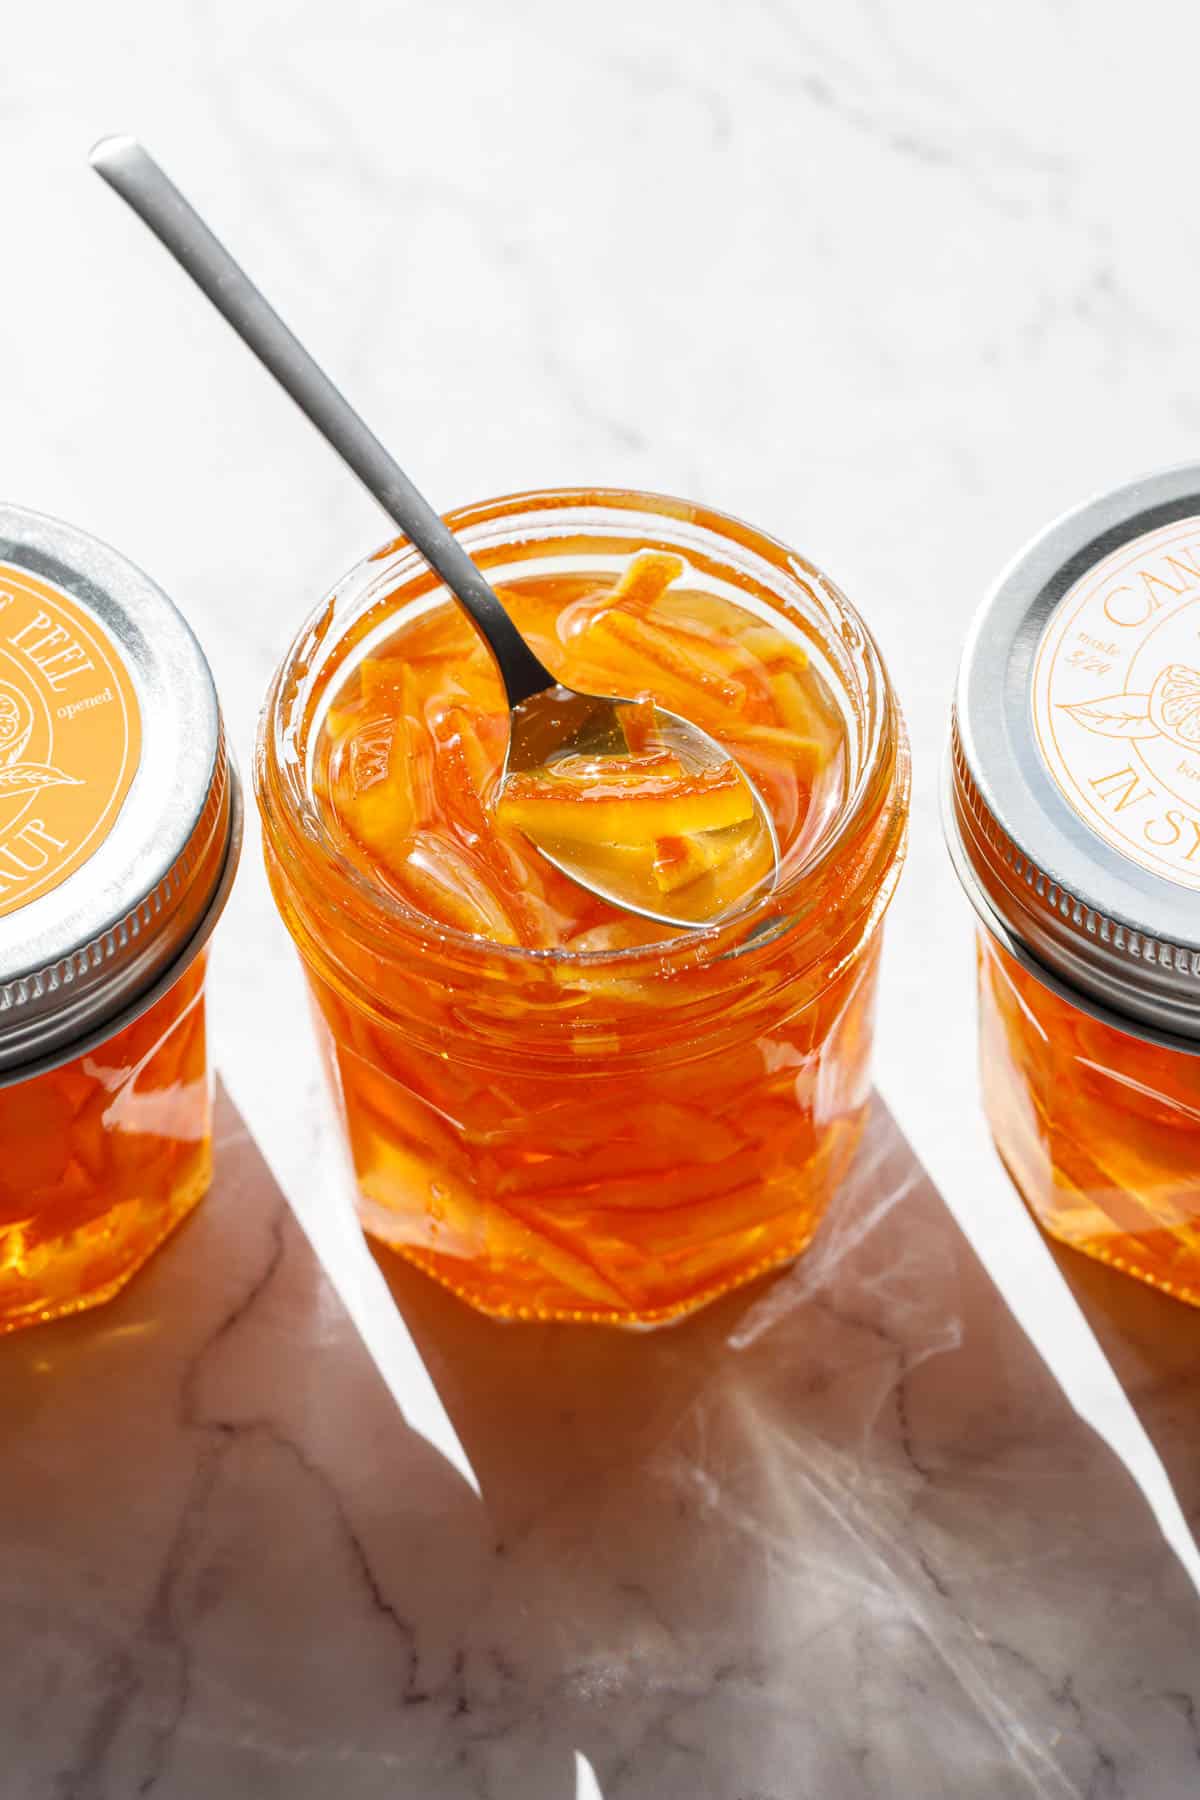
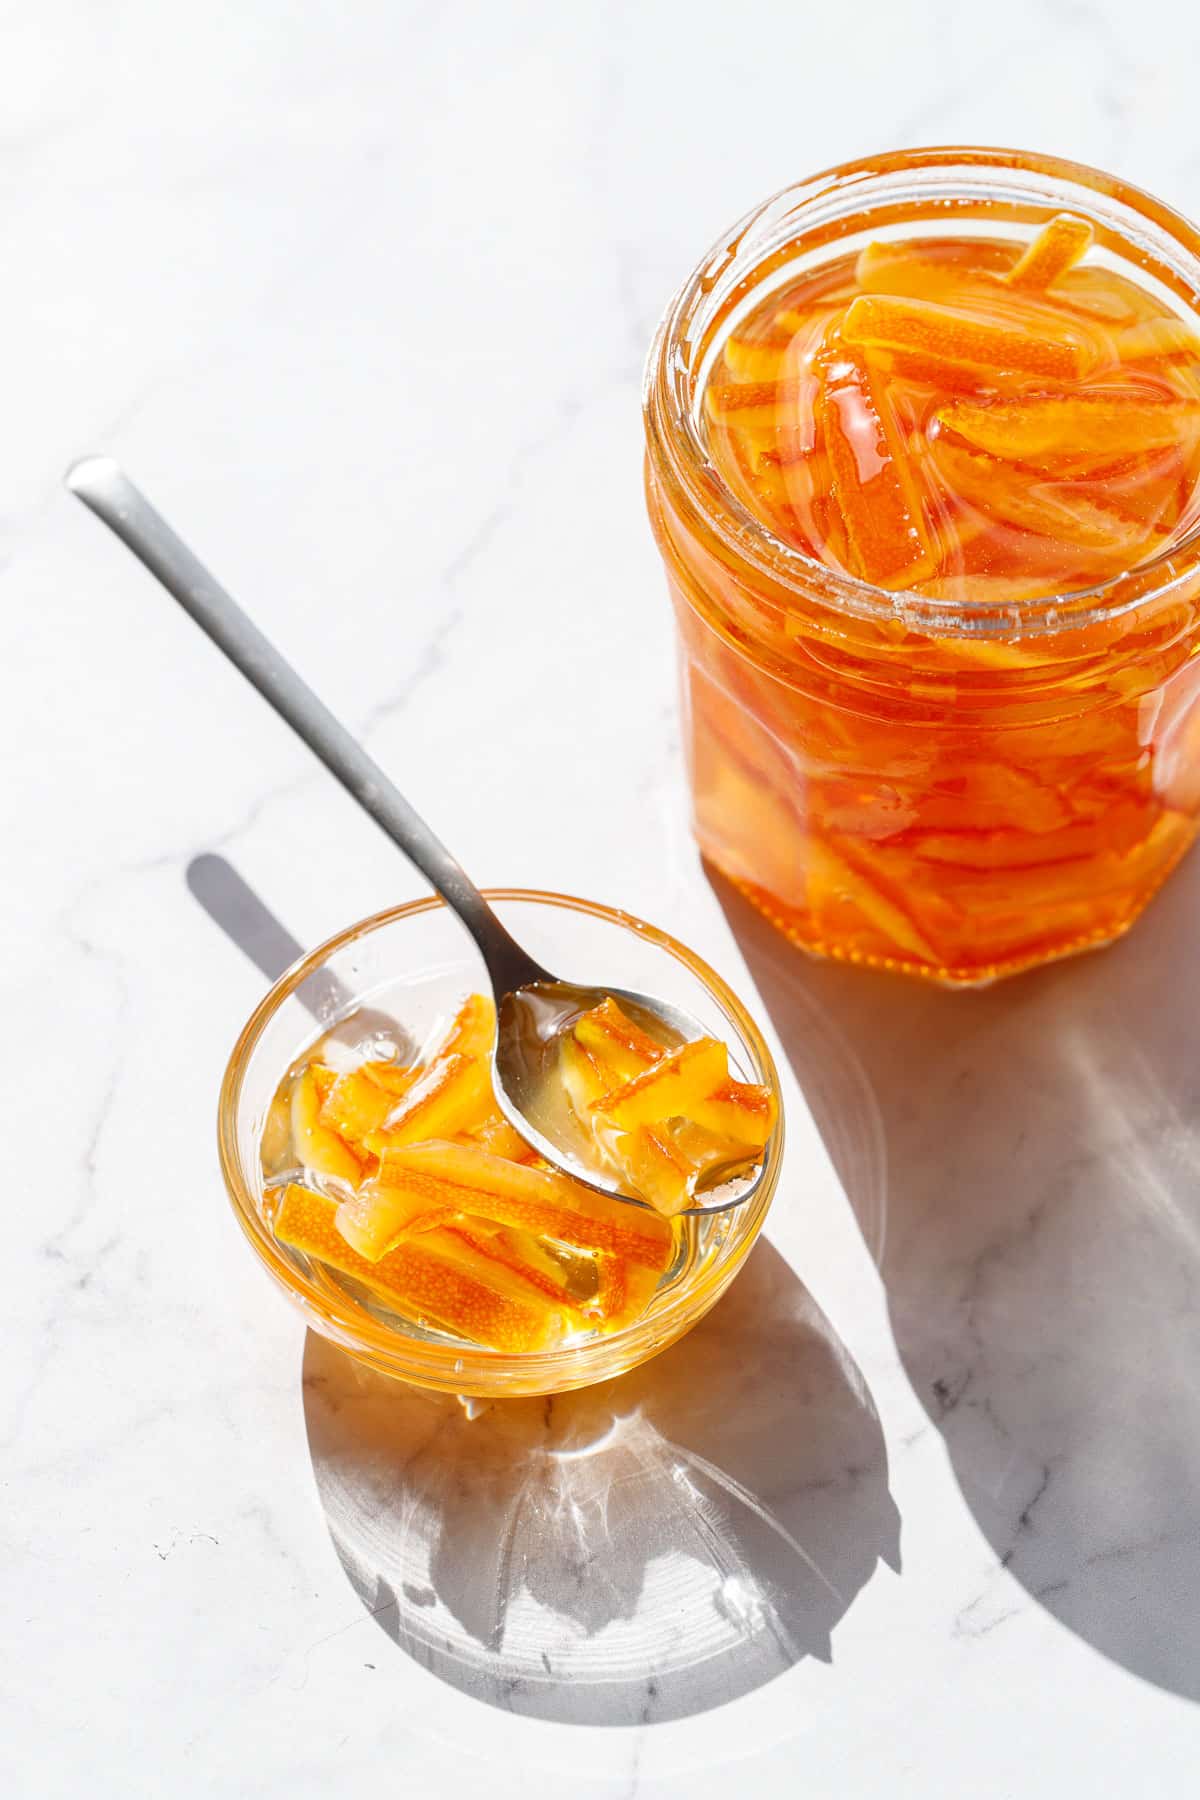
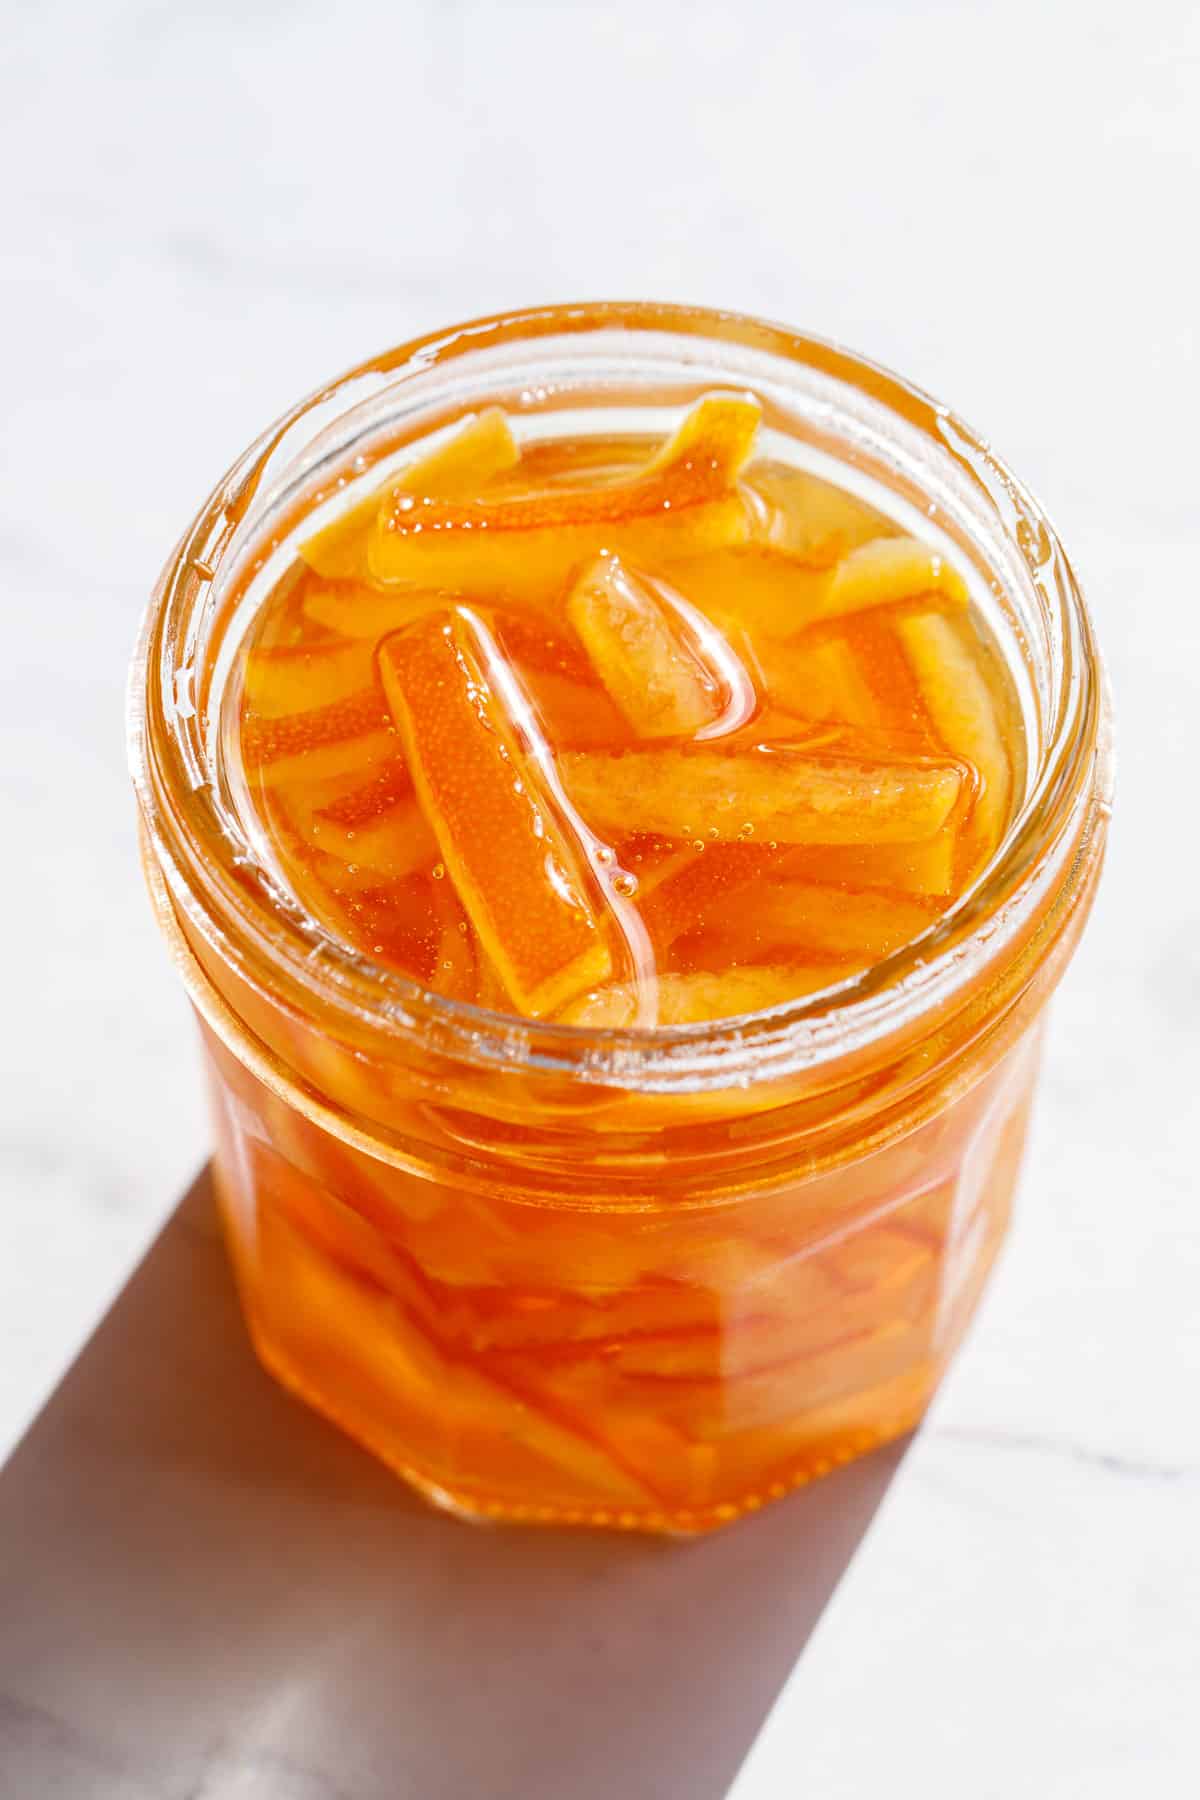
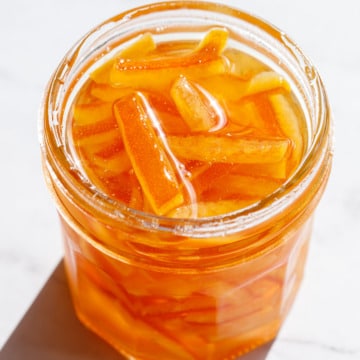
Sweet and chewy candied orange rind swimming in a thick sugar syrup, lightly scented with honey and orange blossom water. This recipe has been thoroughly tested and expert reviewed to be safe for water bath canning methods for shelf-stable storage (that said, you don’t have to can them and can store the jars in the refrigerator or freezer too).
Save this recipe for later!
2024 is the year of the candied orange, apparently.
Seriously though, I don’t think I’ve let a weekend go by without at least one test batch of candied oranges in one form or another. I’ve probably gone through 25 pounds of oranges and upwards of 10 pounds of sugar at this point.
I am still finding sticky bits of syrup on various surfaces and even my camera buttons (oops).
So yes, I know I’ve already posted a recipe for candied orange slices (which I used to top these gorgeous Chocolate Blood Orange Cupcakes), but this recipe is slightly different in that it uses strips of orange rind rather than full slices, and it has been developed specifically so that, instead of drying, the peel is preserved in the syrup (you’ll notice it calls for a lot more sugar as a result, since we need enough syrup to fully cover all of the candied peel). Additionally, it’s been thoroughly tested and expert reviewed to be safe for water bath canning! Which makes it a great option to make now while citrus season is still in full swing so you can enjoy candied orange peel all year round.
I developed this recipe specifically to use as a component in a truly spectacular candied orange and chocolate swirl gelato recipe inspired by our travels to Venice a few years ago. The idea being that the syrup from the candied orange peel is used to flavor the ice cream base, and then bits of chewy candied orange peel are folded in after churning. If you’re intrigued (as you should be), I promise I’ll be sharing this delicious recipe very soon! Trust me, you’re going to love it, so you may want to get a head start and make a batch of this candied orange peel in syrup now (while oranges are still in season) and you’ll be ahead of the game.
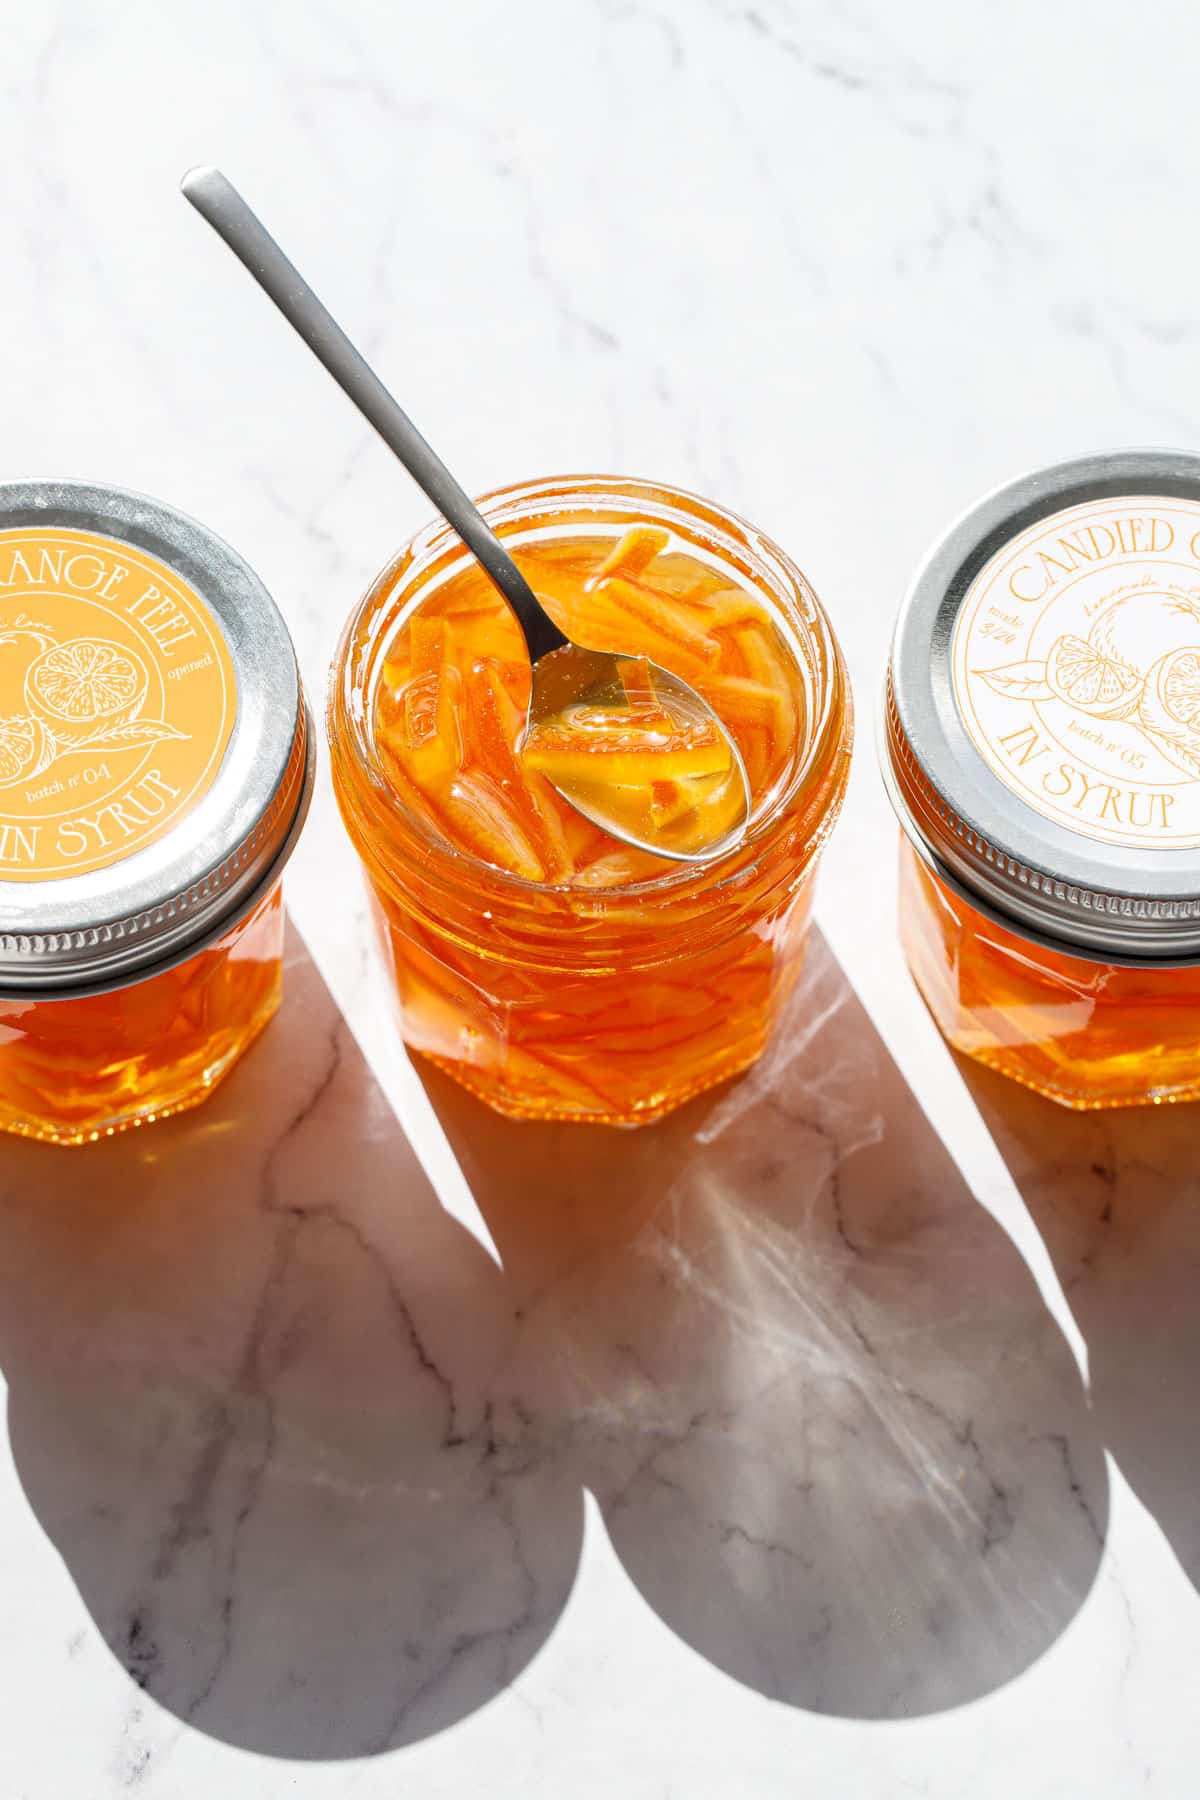
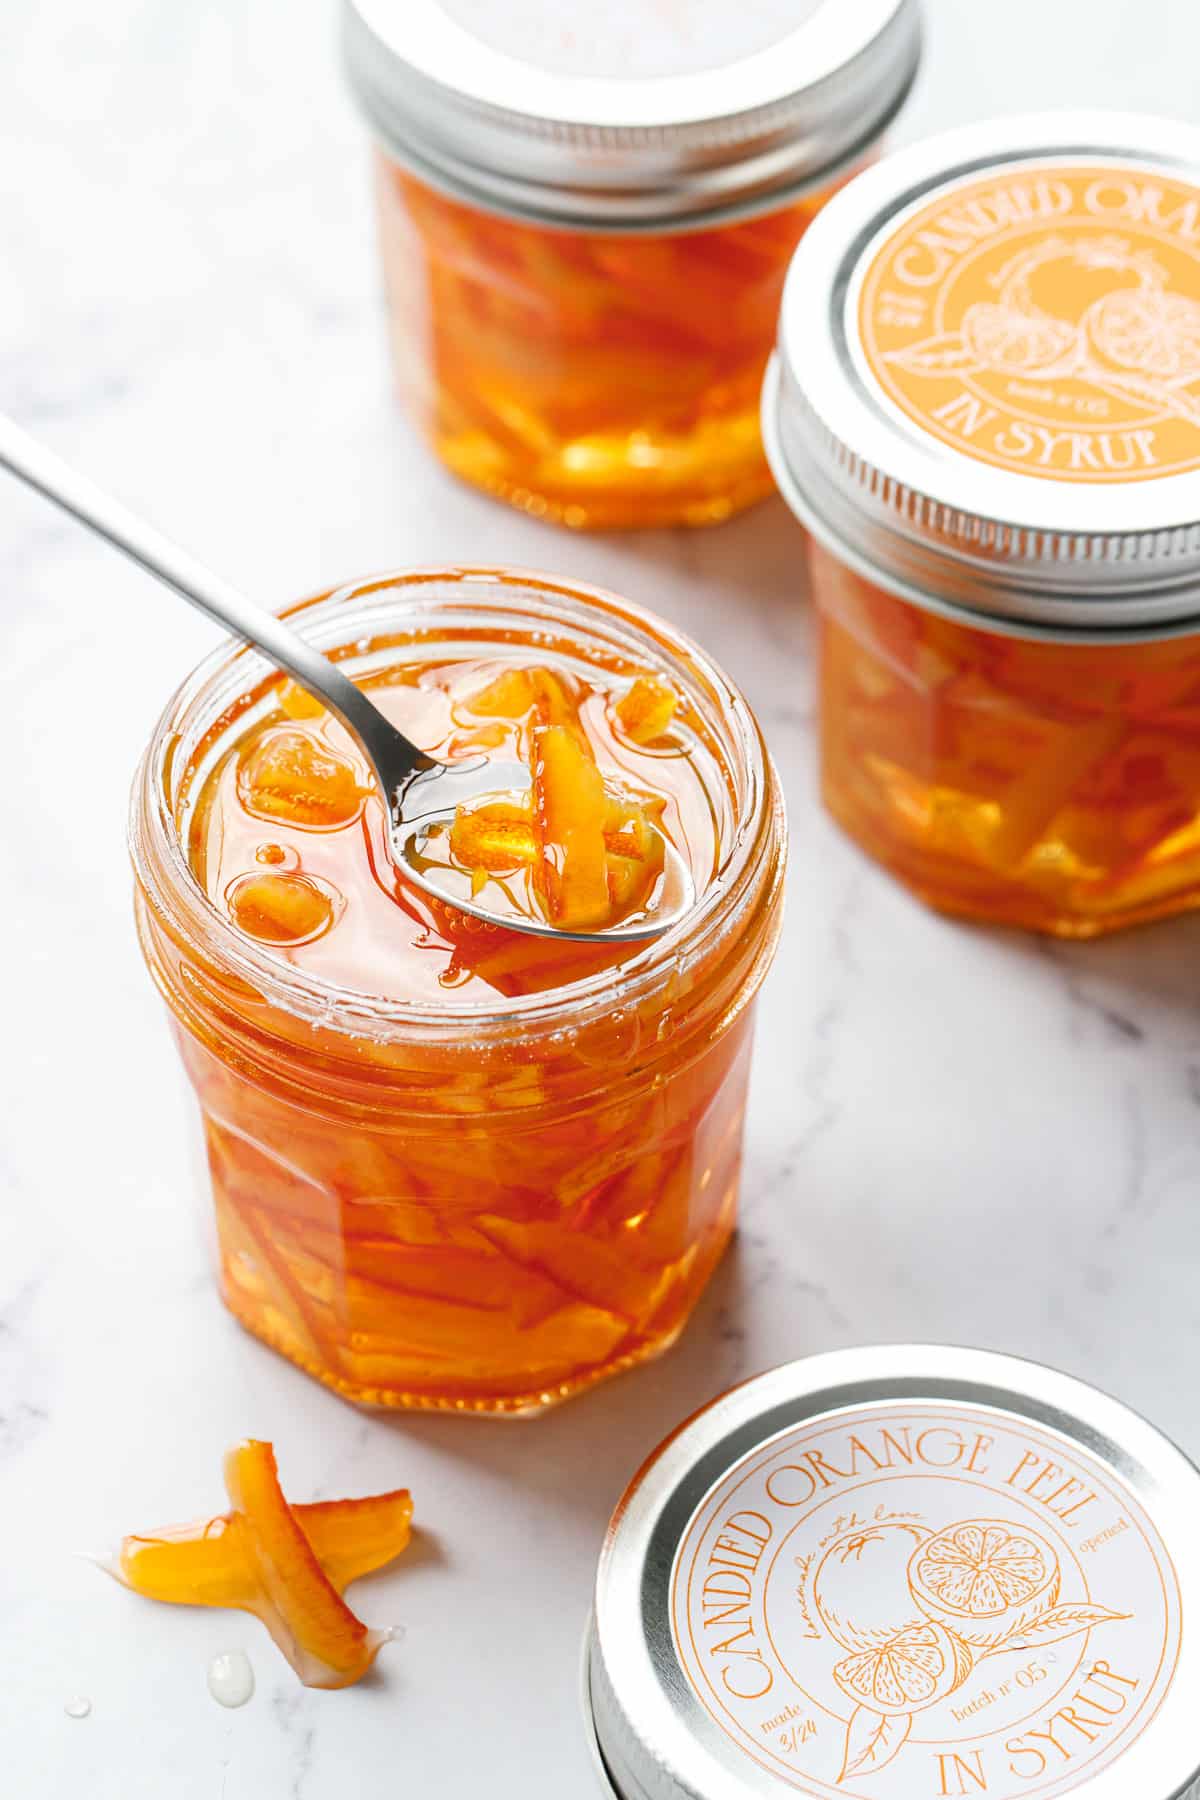
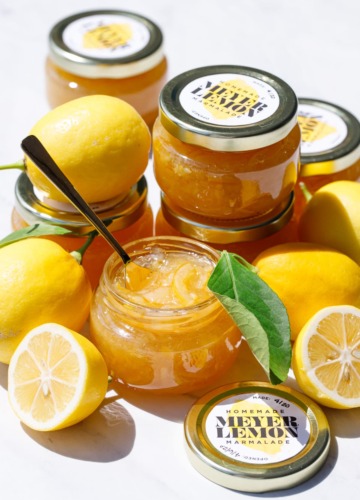
Looking for the pretty printable labels featured in my photos? Scroll down to the bottom of this post to download and print them yourself!
When I set out to develop a candied orange peel in syrup recipe, I first searched all my cookbooks, scoured the internet, browsed the forums on the farthest corners of the web, and still couldn’t find a trusted and tested recipe for what I was looking for, namely, candied orange peels in a thick sugar syrup (that last part is key!) The internet has hundreds of recipes for candied orange peel that are drained and dried and coated in granulated sugar, and also plenty of canning recipes like orange marmalade and even whole orange segments in a light syrup. But there was absolutely nothing that fit the exact parameters of what I was looking for. So I set out to come up with one myself.
Developing the candied orange peel recipe in and of itself was not difficult, the process really isn’t much different from my candied orange slices recipe, although the proportions are different since we have a lot more peel that needs to be fully covered by syrup.
What wasn’t quite so easy was determining whether this recipe was, in fact, safe for home water bath canning methods.
Despite the fact that it seemed pretty similar to a marmalade, and the pH tested at well below the acceptable limits for water bath canning, it still seemed different enough from my typical jams and jellies that I wanted expert confirmation that it was indeed safe for home canning.
To verify the safety of this recipe, I consulted with a Food Safety Field Specialist, who reviewed and approved this recipe as safe for home water bath canning (wohoo!) I even have an official acid verification letter if you’d like to see it.
That said, you don’t have to can this recipe, it’ll keep perfectly well in the fridge for up to a month or in the freezer for longer. And since it’s a pretty small batch (it makes about 2 cups worth), I think you’ll find you’ll have no difficulty using that amount within that time period.
Just for reference if you want to plan ahead, you’ll need about half a batch of this recipe if you want to make the candied orange ice cream (recipe coming soon).
The Old Fashioned Way
The traditional method of candying orange peels involves submerging orange peels in a simple syrup, bringing that syrup to a rolling boil, then allowing it to cool overnight at room temperature. Then repeating that same process again the next day, and the next, and the next…
After about 7 days of boiling and cooling, the syrup will be nice and thick (like honey) and the orange peel will be tender and chewy all the way through.
If you don’t have a candy thermometer, the old fashioned way will give you a nice thick syrup without a candy thermometer. Basically, you just keep repeating the boil-and-cool process until the syrup is as thick as you want it (let it cool completely before judging the final thickness).
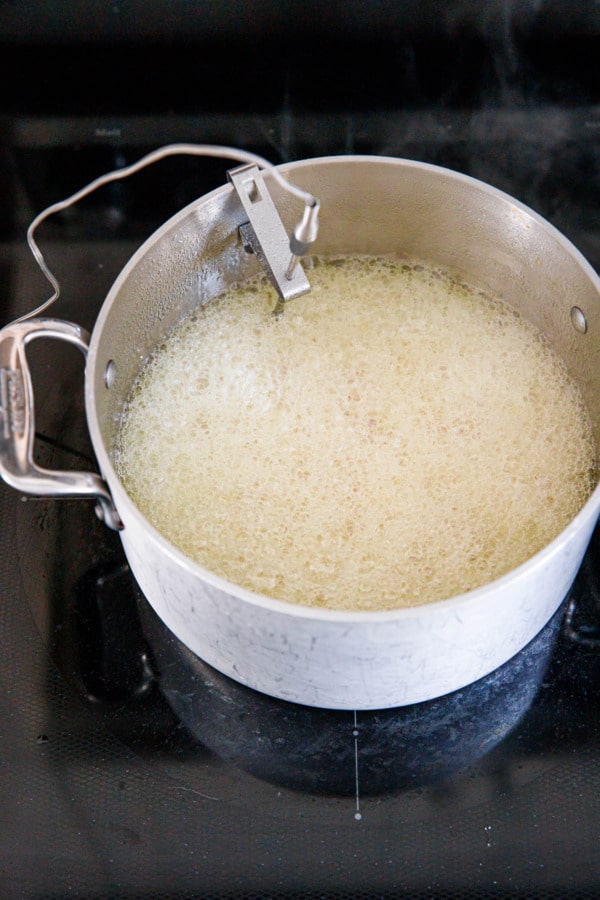
If you want to be precise about it, you can use a refractometer to measure the final Brix° of the syrup: you’re looking for about 75°Bx, which is about the same thickness as honey. Brix is the measure of the sugar concentration of a syrup; a 75°Bx solution has about 75% sugar by weight, even though it started at 50% (as more water boils off, the sugar concentration increases).
Note if you’re looking to buy a refractometer for this recipe, be sure to get one that’s labeled for honey/maple syrup. There are refractometers used in brewing, for example, that only go up to about 30°Bx (for reference, a 1:1 simple syrup is 50°Bx, or 50% water concentration.)
The New-Fashioned Way
How does the old fashioned method compare? Well, to be honest I really couldn’t discern much difference between the batch I made using the old-fashioned method made over the course of 7 days and the batch I made in one day by cooking the oranges in syrup to a precise temperature.
The syrup was pretty much the same thickness in both, though the old fashioned method did have a slightly more flavorful syrup. However the orange peel pieces themselves were virtually indistinguishable from one another.
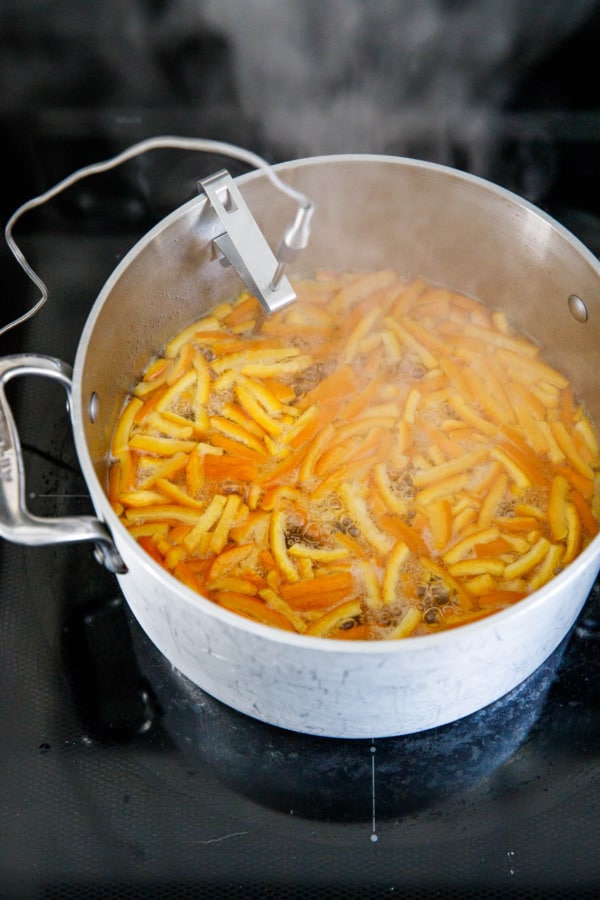
For my updated, new-fashioned method for candied orange peel, I call for you to simmer the pieces of orange peel in a sugar syrup until that syrup reaches 230 degrees F (the thread stage). You’ll need an accurate candy thermometer for this recipe, I recommend a probe thermometer like this one that can be clipped to the side of your pan (so you don’t have to babysit it for the whole 50 minute cook time).
The specific temperature to which the syrup is cooked, combined with the amount of water added at the end, will determine the final thickness of your syrup. For a thinner, looser syrup, cook to a lower temperature and/or add more water at the end; vice versa if you want a super thick and sticky syrup. I found a 75°Bx syrup, which has a 75% sugar concentration, to be a nice thick consistency that was still thin enough to be usable (any thicker than this and the syrup was too thick to spoon).
Note this recipe was tested at 500 feet above sea level. If you live at higher altitudes, subtract 1 degree F from the listed temperature for each 500 feet above sea level (so if you live at 5,000 feet, cook your syrup to 220 degrees F).
I know it seems like this recipe calls for a lot of sugar, but these are candied orange peels in syrup, after all. Reducing the sugar is only going to increase your cook time and decrease your yield. This is not one of those recipes you can play with sugar quantities and still expect edible results.
Preparing the Orange Peel
Before you start, wash and scrub your oranges well. I like to soak them in hot water with a teaspoon of baking soda, then scrub them under hot water to remove all outer waxes. Ideally you’ll have sourced organic, unsprayed fruit, and you should still wash that, but particularly if you are using grocery store fruit you want to remove that outer waxy coating and as much residue as possible as this can impart bitter, off flavors to your candied oranges.
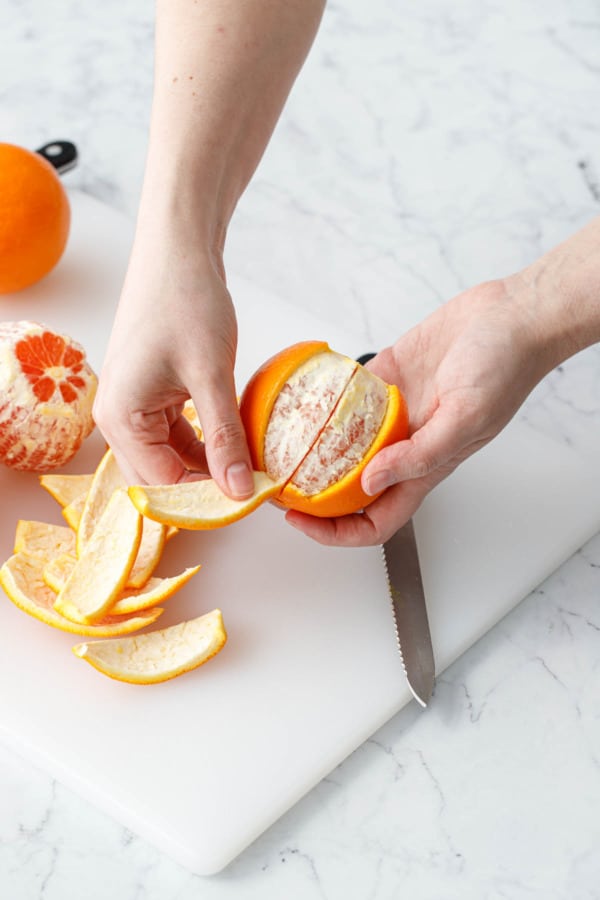
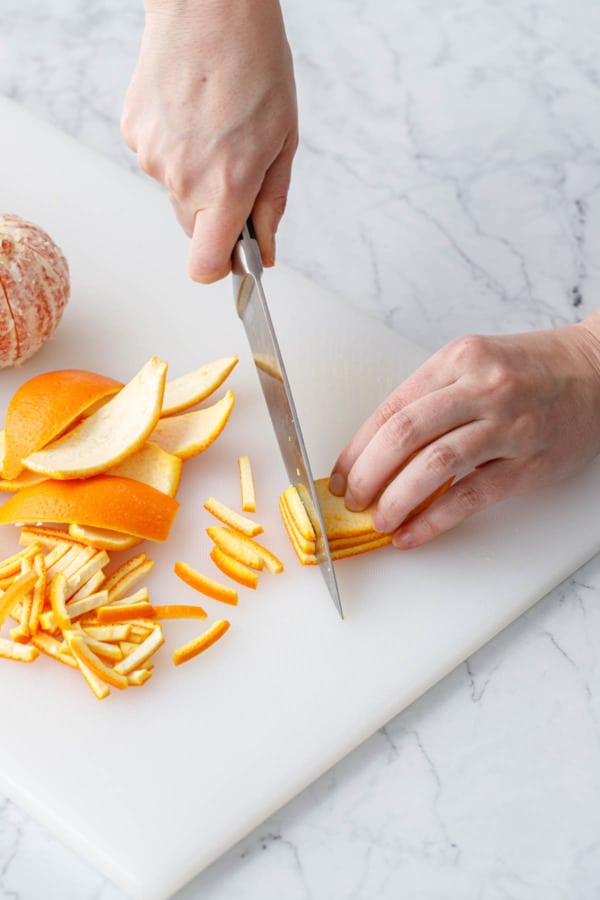
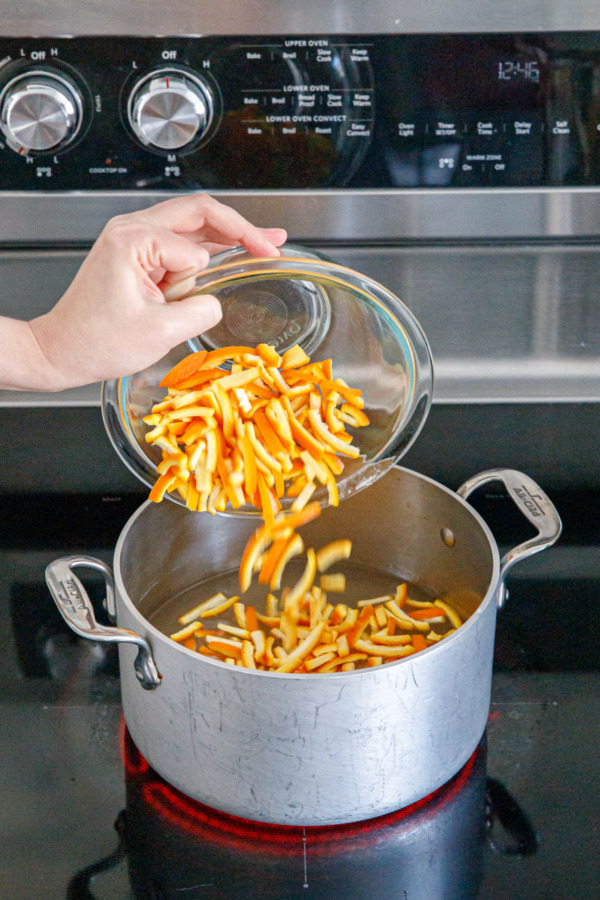
After washing, cut off the stem end of the orange, then slice peel by scoring wedges into the outer surface of the orange, cutting only about 1/4-inch deep (you don’t want to cut into the flesh, just the peel), then pull of wedges of orange peel.
If your oranges have particularly thick layers of pith, you can thin it by ‘filetting’ some of the excess pith off, but don’t remove it all (the pith is what makes up the majority of the ‘bulk’ of the candied orange pieces). Ideally you want about 1/4″ thick pieces of orange rind.
I found that naval and cara cara oranges had thicker layers of spongy pith that needed a bit of trimming, while blood oranges had much thinner, firmer rinds that did not. It really depends on the size and type of fruit you are using.
Feel free to eat or juice the naked oranges that are left after peeling; you won’t need them for this recipe.


The Bitter and the Sweet
Many candied orange peel recipes call for par-boiling the orange peel in a few changes of water to help reduce bitterness. In my experience (and I tested this with plain old naval oranges, cara cara, and blood orange varieties), the extra boil didn’t make a noticeable difference in bitterness and, if anything, just made the final candied orange peels a bit soggier/spongier in texture.
Instead of boiling, soak the orange peels overnight in the refrigerator, fully covered in cold water. This is just as effective at removing some of the excess bitterness as a boil does, without softening the peels quite as much. Just be sure you measure the weight of your peels BEFORE soaking (since it’ll absorb some of the water overnight, making it heavier; for example 150g of peel is about 250g after soaking overnight).
If you’re the type to snack on oranges every day, save your peels! Just slice the peel off in clean strips (instead of peeling it haphazardly), then place peel in a bowl or jar of cold water in the fridge. You can keep adding pieces of peel to the bowl over the course of a week or so, until you have about 2 cups of sliced peel. Hooray for no food waste!
Feel free to soak the peel overnight or up to 5 days ahead of time; this is also a great way to split up the work into smaller, more manageable chunks of time.
Once you’re ready to start candying, drain your orange peel well before you begin.


Can’t can? No problem.
While I jumped through a few extra hoops to ensure this recipe is safe for home water bath canning, it also works perfectly fine if you don’t want to can it—just refrigerate or freeze the finished product instead.
Instead of processing in a water bath, wash jars and lids in hot soapy water and, after filling and securing lids, store the jars in the fridge for up to 1 month or in the freezer for up to 6 months. Seeing as it’s a fairly small batch recipe, I don’t think you’ll have any issue at all using it up within that time period.
You can also dry out your candied orange peel rather than store it in syrup. Once your syrup reaches the desired temperature, don’t add the water/citric acid right away. Rather, drain the candied orange peel and spread out on a wire cooling rack or a piece or parchment paper. Then add the citric acid, water, and orange blossom water to the leftover syrup (which will thin it to a more usable consistency and prevent crystallization). You can save and refrigerate the syrup for another use. Let the orange peel dry overnight, or, once the excess syrup has drained off, toss with granulated sugar for a crunchy, crystallized finish that’s not as sticky.

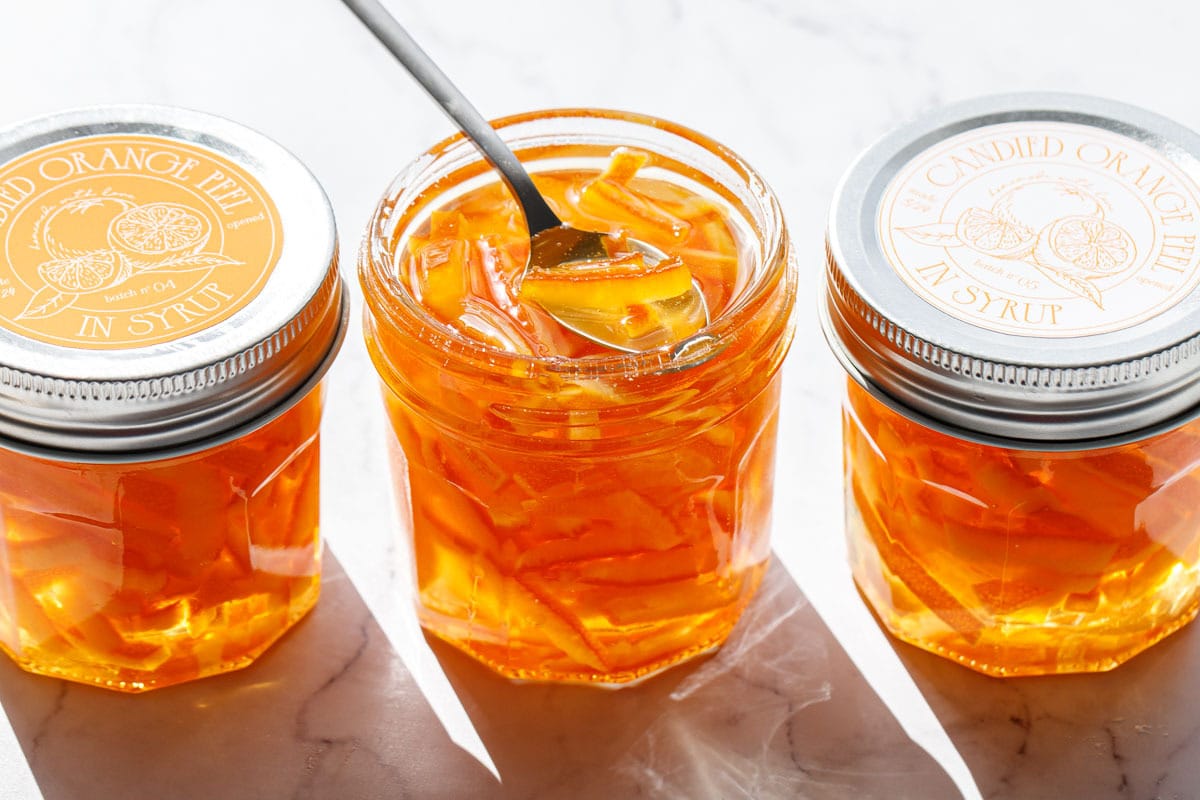
But if you DO want to can this recipe for shelf-stable storage for up to 1 year, simply divide the peel and syrup among sterilized glass canning jars and top with syrup (mine yielded about three 6oz jars or two 8oz jars, with a little bit leftover for quality control purposes, obviously). Then process in a water bath for 10 minutes (increase processing time slightly for higher elevations).
You can also scale this recipe to make a larger or smaller batch depending on how much orange peel you have: essentially you need triple the weight of the orange peel for both the sugar and water (so if you had 75g of orange peel, use 225g of both water and sugar). I added an extra 1/4 cup of sugar just to be sure I had enough to fully fill three 6-oz jars, but if you’ll just be refrigerating it then you don’t need to worry about headspace and all that.
While I think you’d be fine doubling the written recipe (use a larger 8-quart saucepan or Dutch oven for increased surface area), I do not recommend scaling it any larger than that as the syrup would simply take too long to cook to the proper temperature, leading to overcooked peels and a more caramelized flavor. Better to make a few separate smaller batches instead.
Preventing Crystallization
Even with the addition of some invert sugar to the syrup mixture, this recipe is prone to crystallization if you are not careful! But it’s easy enough to avoid by following a few simple tips:
- Stir your syrup mixture just until the sugar is dissolved and it starts to boil, then stop stirring. Once you add the orange peels, you can gently swirl the pan occasionally to ensure even cooking, but the more the mixture is agitated, the more likely it will crystalize.
- Once your syrup starts to boil, brush down the sides of the pan with a pastry brush dipped in water to dissolve any stray sugar crystals that may be stuck there. You can brush down the pan a few more times as it starts to boil more vigorously too (since it will sputter and splash up the sides as it cooks).
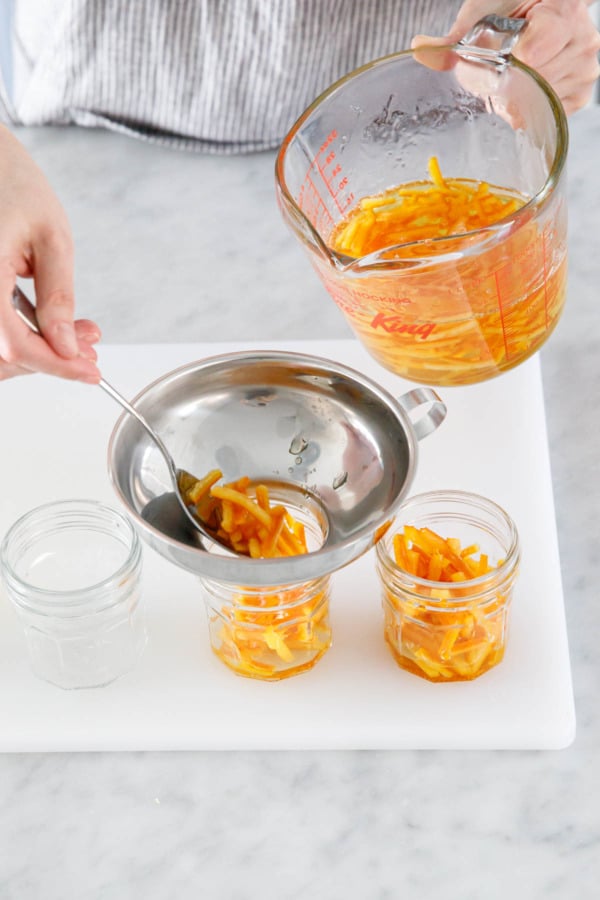
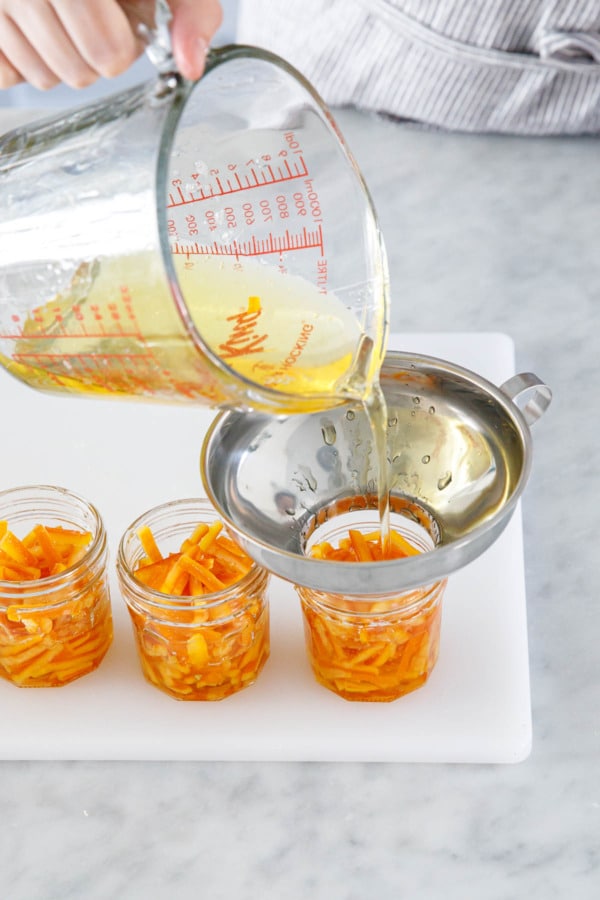
- When you pour out your syrup, quickly pour into a heat proof container, don’t scrape the bottom or edges of the pan (because there are likely stray sugar crystals there). I transferred mine from the saucepan into a 4-cup glass measuring cup, which makes it easier to pour into the individual jars too.
- Waterbath-processed jars are less likely to crystalize than non-processed jars (since the heat of the water bath generally dissolves any stray sugar crystals that may have snuck in).
- Try using corn syrup instead of honey—since corn syrup is slightly more acidic it will do a better job at preventing crystal formation.
- You can also add the citric acid at the beginning of the cooking process (remember, acid prevents crystallization), however note this will cause a slight browning of the final syrup.
If, in the end, you find your syrup has crystalized on you, simply dump the whole thing back into a sauce pan and reheat it over low/medium-low heat until the crystals have dissolved. You can add a bit more corn syrup as well, and then transfer to a new, clean jar.
Ingredient Notes
Oranges
Try to source organic, unsprayed citrus if possible, as any waxes/coatings can lead to unsuitable flavors in the final finished product. Regardless of what kind of oranges you have, be sure to wash and scrub them well.
I made and tested this recipe with different varieties of oranges, including Naval, Cara Cara, and Blood oranges. The blood oranges were actually my favorite, even though the red color cooks out almost entirely (visually they are indistinguishable from the others). But I found the blood orange peel to be thinner and firmer than the other varieties (the naval particularly had a really thick layer of spongy peel that made for a softer, mushier final product). If your orange peel is particularly thick, I recommend trimming off some of the pith so it is about 1/4-inch thick.
In the end you can really use any kind of citrus in this recipe in place of the oranges, including lemons, limes, or even grapefruit!
Invert Sugar
A small amount of invert sugar helps prevent crystallization in the final syrup. I tested this recipe with both honey and corn syrup, and either way works. The honey (I used a very light acacia honey, orange blossom honey would work too) gave a nice subtle flavor to the orange syrup without overpowering it. However, the corn syrup was a bit more reliable as far as preventing crystallization, so if that’s a concern for you, definitely go the corn syrup route. Golden syrup or glucose syrup would work as well.
Note that to completely prevent crystallization, even with the corn syrup or honey, you need to be very careful when you’re cooking the peel not to stir too much (rather just swirl the pan if you need to), and also as it begins to boil brush down the sides of the pan with a wet pastry brush to dissolve and stray sugar crystals that may be stuck there.
If worse comes to worse and your syrup crystallizes after it cools, just rewarm it in the microwave or a saucepan until all the crystals are dissolved. You can add another tablespoon or two of corn syrup too if you want to prevent further crystallization.
Granulated Sugar
The granulated sugar in this recipe cannot be reduced (doing so would simply increase the cooking time and decrease the final syrup yield so you won’t have enough to cover your oranges). Nor can it be replaced with sugar substitutes.
Water
Always use filtered water in canning recipes to avoid any off tastes.
The final 2 tablespoons of water added at the end is needed to dissolve the powdered citric acid, and also to bring the syrup back to a more fluid consistency. 2 tablespoons of water will give you a honey-like syrup, approximately 75ºbx. For a thicker syrup, add less water (1 tablespoon will give you about 78ºbx) or more water if you want a thinner syrup. Let the syrup cool fully before you make any judgements about consistency.
Citric Acid
Powdered citric acid is added at the end of the cooking process to up the acidity of the final product (making it safe for canning), as well as brighten the flavor and help preserve the color without altering the flavor profile (like lemon juice would, for example). That said, you can replace 1/4 teaspoon of citric acid with 1 tablespoon lemon juice if you want.
Orange Blossom Water
The orange blossom water at the end is an optional addition for flavor, feel free to leave it out.
Candied Orange Peel in Syrup
Ingredients
- 2 cups / 150 g thinly sliced orange peel, cut into 1/4" thick slices
- 2 ½ cups / 500 g sugar
- 2 cups / 450 g water
- 2 tablespoons / 42 g light honey or corn syrup
- 2 tablespoons water
- ¼ teaspoon citric acid
- ½ teaspoon orange blossom water, optional
Instructions
- Score orange into wedges and peel off strips. If pith is extra thick, remove any excess so peel is approximately 1/4″ thick. Slice crosswise into 1/4″ wide slices. Optionally, soak peel overnight in water, or pre-boil in one or two changes of water to soften and remove excess bitterness.
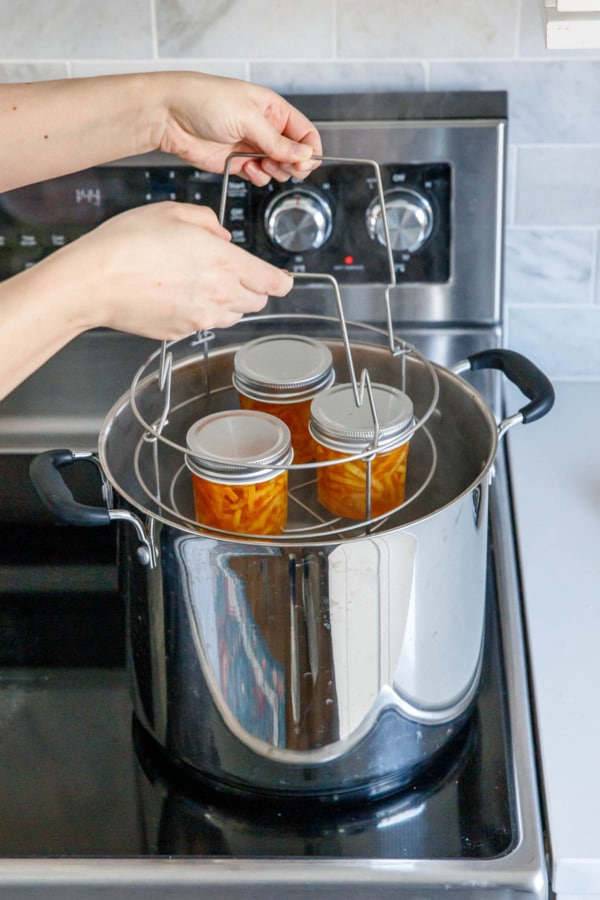
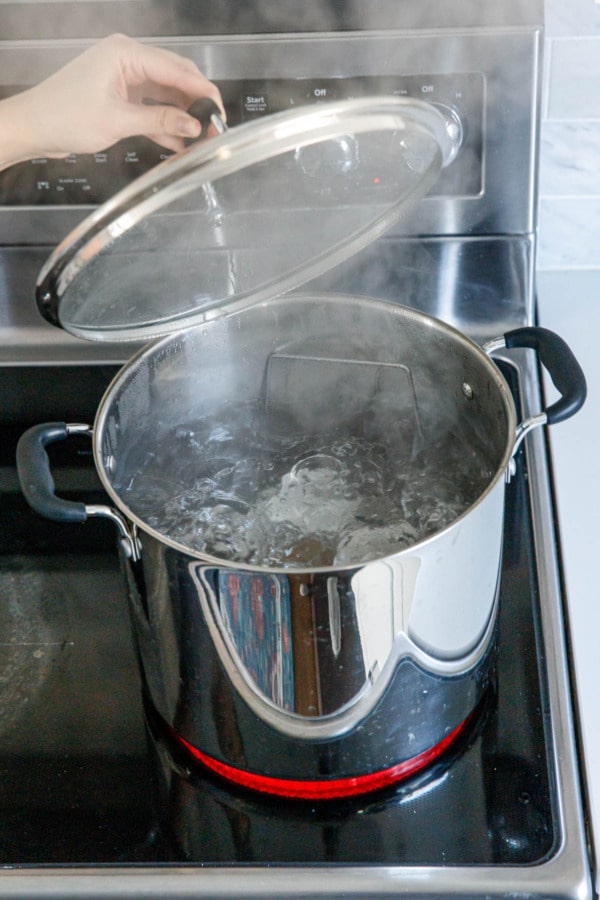
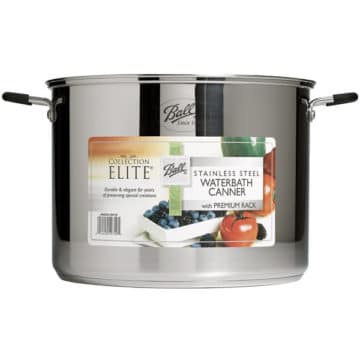
- If water-bath canning, set up your canning pot filled with water (water should fill at least an inch over height of jars). Wash jars and lids in hot soapy water and submerge jars in canning pot to come up to temperature (ideally the water should be just about boiling by the time the orange peel is done).
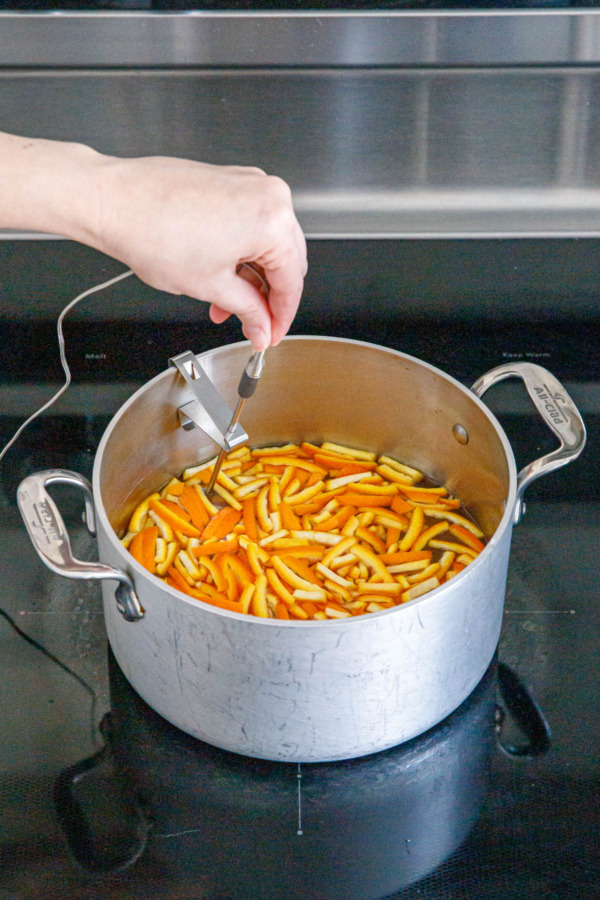
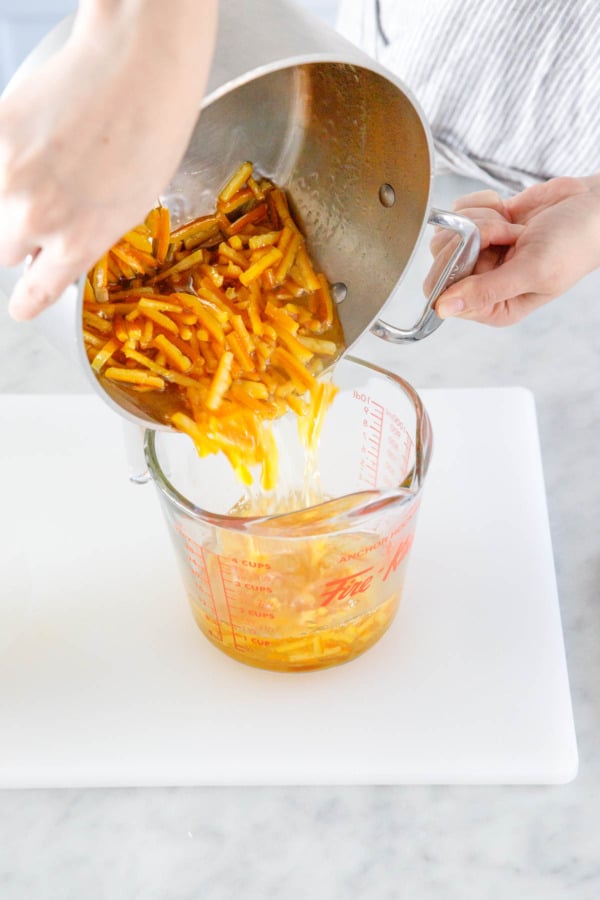
- Combine sugar, water and honey in a saucepan set over medium heat. Once sugar is dissolved, add orange peel. Bring to a simmer and cook until syrup reaches 230ºF*, about 50 minutes, keeping stirring to a minimum to prevent crystallization.
- Dissolve citric acid in 2 tablespoons water and orange blossom water (if using). Stir into saucepan once syrup comes to temperature then remove from heat.
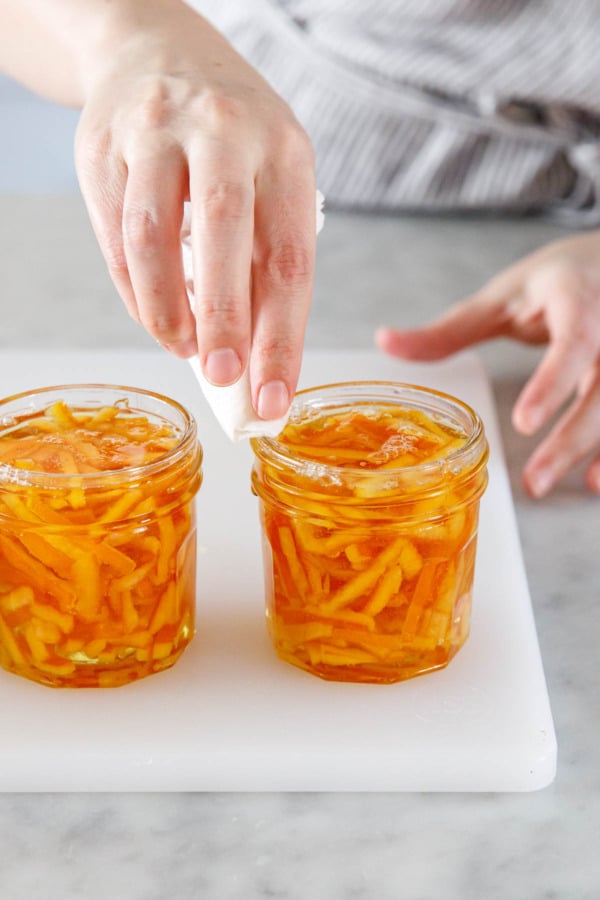
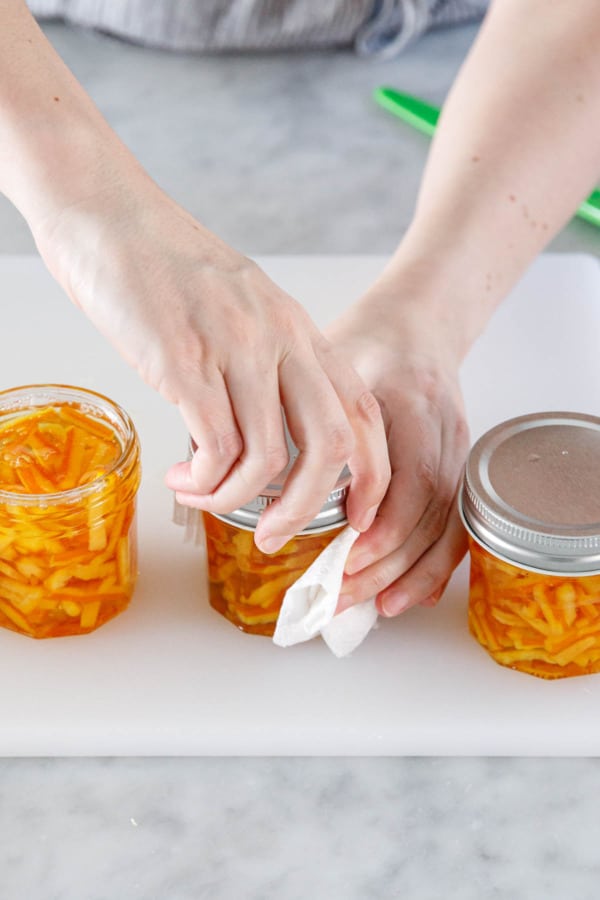
- Remove peels with a slotted spoon and divide among washed and sterilized jars, distributing evenly among 3 6oz jars or 2 8oz jars. Fill jars with syrup, ensuring peels are completely submerged, leaving 1/4" headspace; wipe rims and secure lids.
- Process in a boiling water bath for 10 minutes; remove from heat and let sit for 5 minutes, then remove from water bath and let sit at room temperature for 24 hours before moving.
Notes
- *Tested at 500 feet above sea level. For higher elevations, adjust your final temperature by subtracting 1 degree F for every 500 feet of elevation. You’ll also want to increase your water bath processing time as well.
Did you make this recipe?
Let us know what you think! Leave a Review below or share a photo and tag me on Instagram with the hashtag #loveandoliveoil.Download the FREE Printable Labels!
How cute are these labels though?
Download the printable label file using the form below. The FREE PDF download includes round label designs in orange and white suitable for regular mouth canning jar lids. You can print directly on a 2-inch round label (such as Avery #94501), or print onto 8.5×11″ white sticker paper and cut out the shapes by hand. You can also print onto cardstock and use as a hang tag!
Each label includes space to write in the made date, opened date, and batch number.
Alternatively, you can buy the customizable version and change the text, colors, and more! Choose Canva (works with the Free account!), Photoshop or Illustrator formats. I hope to convert some of my other label templates into these other formats as well, feel free to email me if you have a specific request I’ll bump it to the top of my list. ;)

Free PDF Download
Enter your email address below to instantly download a convenient PDF file, ready for printing!


Editable Template
Want to customize these labels to suit your exact needs? Buy the editable label template and you can personalize text, change colors, and more! Choose from Photoshop, Illustrator, or Canva formats.


Hello there! This is actually a traditional Greek way of preserving any kind of fruit or veggie (eg.aubergine!) isespecially back in the old days when refrigeration was not an option for many households…We still serve it with a teaspoon on small coffee cup plates hence the name “glyko koutaliou”(i.e.spoon sweet) and you can find it in many places around Greece, especially in rural ones or islands. So glad to see this recipe getting a new approach 😍
I love this! I think it’s time for a trip to Greece!