
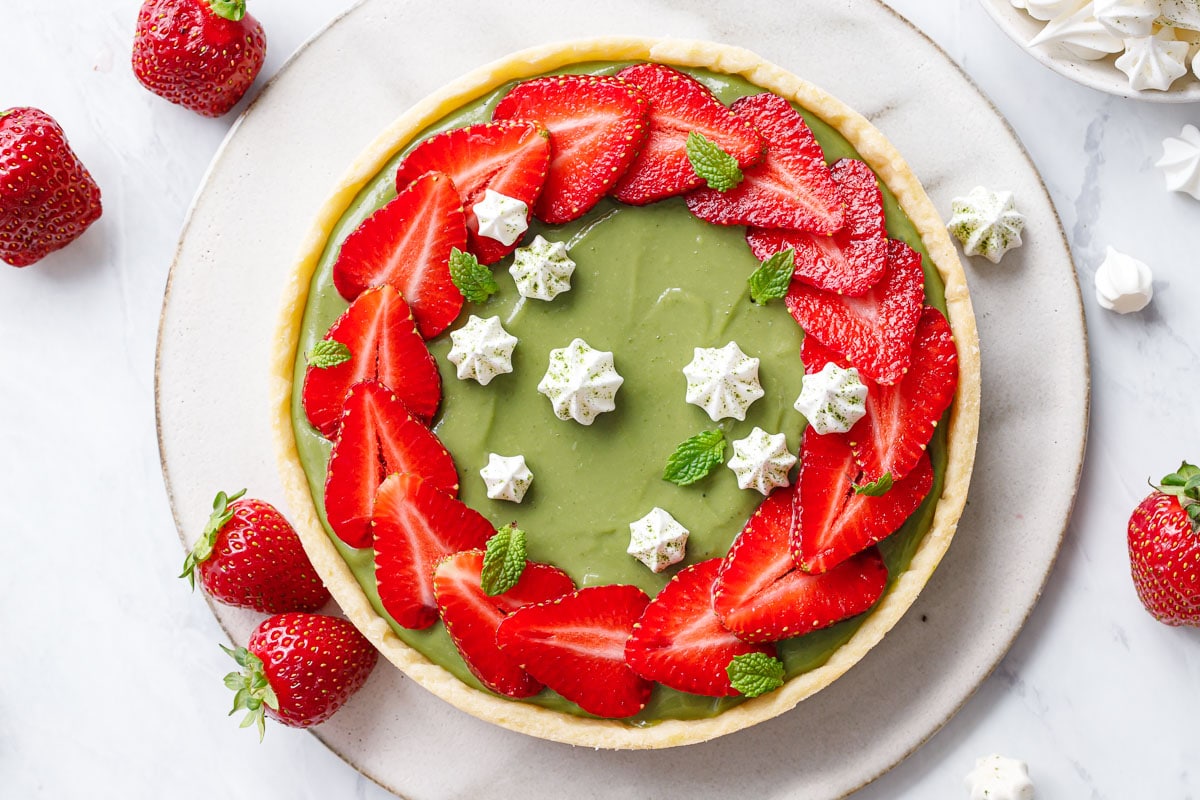
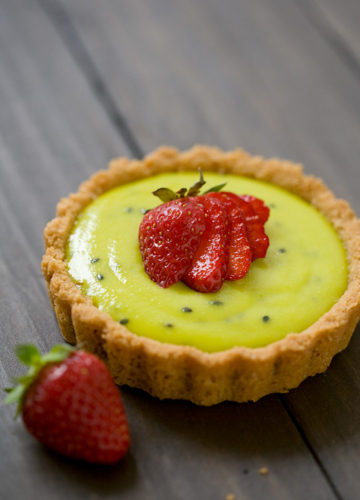
Savor springtime with these luscious strawberry and matcha tarts: with a rich matcha pastry cream filling and ripe fresh berries, it’s a unique combination your tastebuds will adore!
My love for matcha is more than a spring fling, and this tart is no exception. The natural sweetness of the strawberries is the perfect contrast for the grassy bitterness of the matcha.
Save this recipe for later!
“I think we might go to the Clarksville place and pickup strawberries in just a bit. Want some?”
More exciting words have rarely been spoken. Or texted, in this case, by my friend Phillip on Friday afternoon.
Normally this time of year we’d have already made at least one trip out to one of the U-Pick strawberry farms within a 45 minute drive of Nashville, where we’d fill our buckets with more berries than two people could feasibly eat before they went soft. Some would be undoubtedly eaten straight from the fields, and more than a couple snuck from the tupperware container on the drive home. Some we’d freeze, a couple pounds would invariably make their way into some kind of jam. And the rest… well, I usually had some sort of springy strawberry concoction up my sleeve. From fresh strawberry pie to chocolate strawberry ice cream, strawberry blondies and even strawberry-topped guacamole, if you scroll back through the archives you’ll surely notice a few new strawberry recipes pop up each and every May.
But this year has been different for many reasons. So Phillip’s text took me off-guard, and I hadn’t had time to plan and scheme about what exactly I would do with all those berries. Although that didn’t stop be from replying that I’d take a gallon! without a second thought.
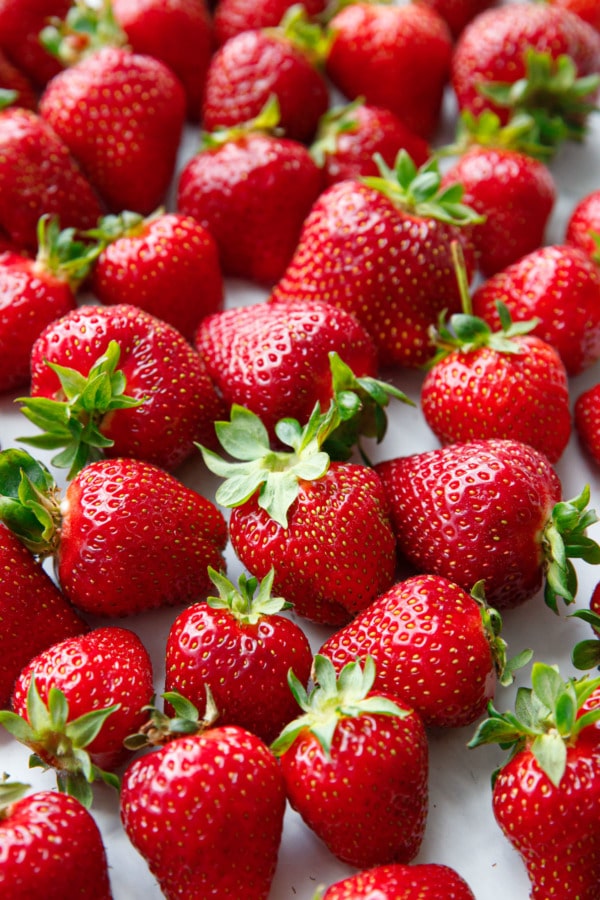
When he dropped off the flat of beautiful, glossy berries (seriously though, I’m not sure if I’ve ever seen such pretty strawberries), I spent some time photographing them (as you do with pretty fruit)… but beyond that, I was stymied. Stumped. At a complete loss.
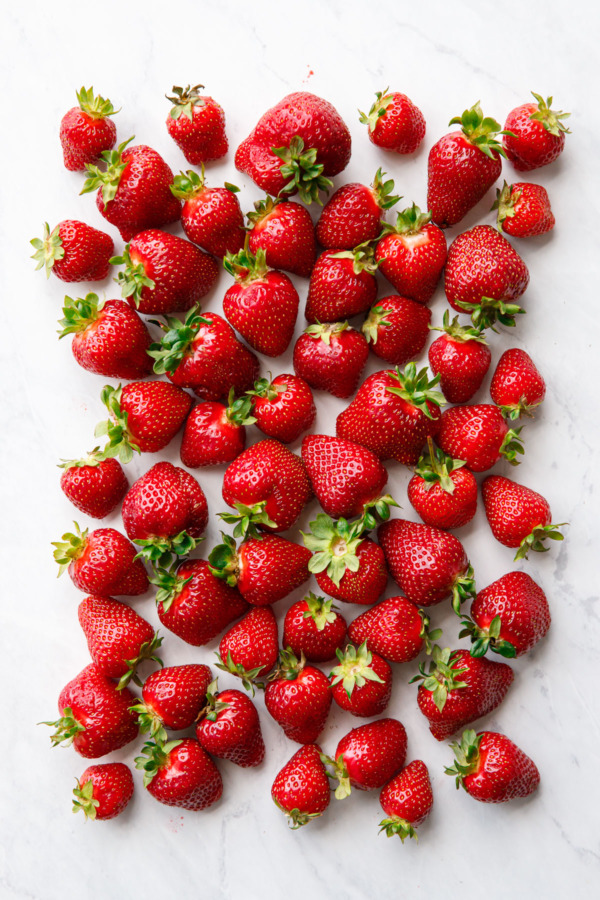
I know I’ve been a bit quieter here than usual, my 2-post-a-week streak long since broken, so I knew I had to put these berries to use in a way that would be worthy of a blog post. And that pressure, well, it paralyzed me. I simply couldn’t decide what to make, and the clock was ticking (unlike the white and crispy grocery store berries engineered for storage and transport, these local berries were picked at the peak of perfection, but that perfection doesn’t last long).
I wanted a recipe that was interesting, not the same basic cake or tart that’s been done before. But I also didn’t want something too complex, something that I’d have to test 2, 3 or 4 times to get it right, and also since I know we’re all taking fewer trips to the grocery store these days, and ingredients aren’t quite as easy to acquire. (Case in point: I didn’t even have a drop of heavy cream, which ruled out pretty much any sort of shortcake-take. On the plus side, I guess that cut down infinite possible choices to a less staggering number.)
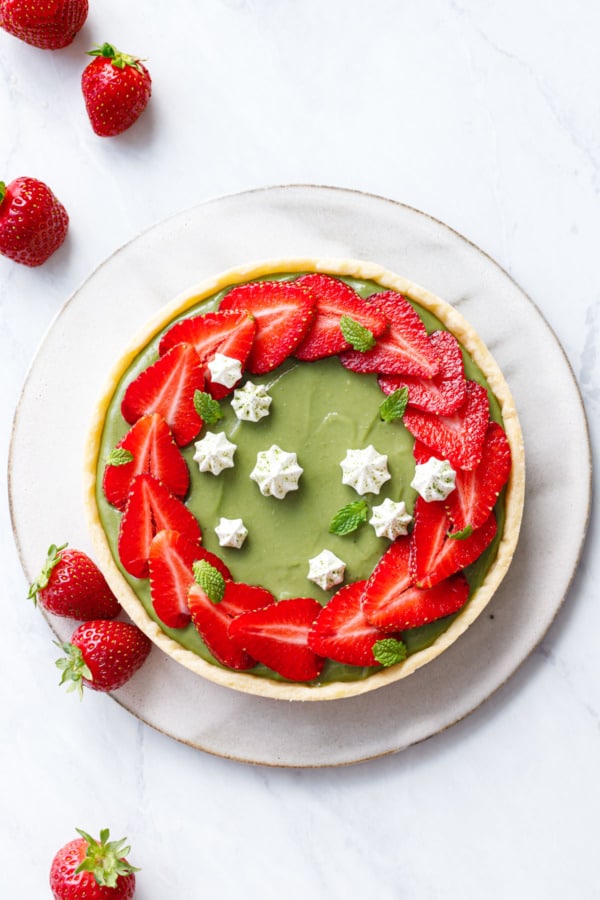
Ultimately, after much hemming and hawing, I decided on a simple strawberry tart, one that would shine a spotlight on the beauty of the ruby red berries in their freshest form.
But, if you know me, you know I can’t leave well enough alone, and so a plain strawberry tart was out of the question. Most recipes call for a base of pastry cream that is then topped with a starburst or swirl of fresh sliced strawberries, and that pastry cream base was ripe (no pun intended… ok, maybe a little intended) for adaptation.
My choices having being limited even further, I now debated between almond pastry cream, or something slightly wackier, a vibrant green from either matcha or pistachio (you know how much I adore both of these ingredients).
Matcha ultimately won the day.
Now, I regularly battle with pastry cream. It requires a level of patience that I don’t often have. I should know better, because it would have certainly taken me less time to make one good batch of pastry cream than it did for me to re-make it three separate times: the first I took off the heat too soon, forgetting that pastry cream is the one cooked egg custard that actually needs to boil to properly thicken (luckily, thin pastry cream makes a perfect ice cream base). The second batch I cooked to high in a rush to get it to that boiling state, and the result was chunky and pasty. Finally, frustrated and running out of eggs, I slowed myself down for my third and final batch (if it failed, I was going to throw in the towel), resisting the urge to crank the burner, and treated my pastry cream with the care and patience it deserved. Like I should have the first time.
Will I remember this lesson next time I attempt pastry cream? Only time will tell.

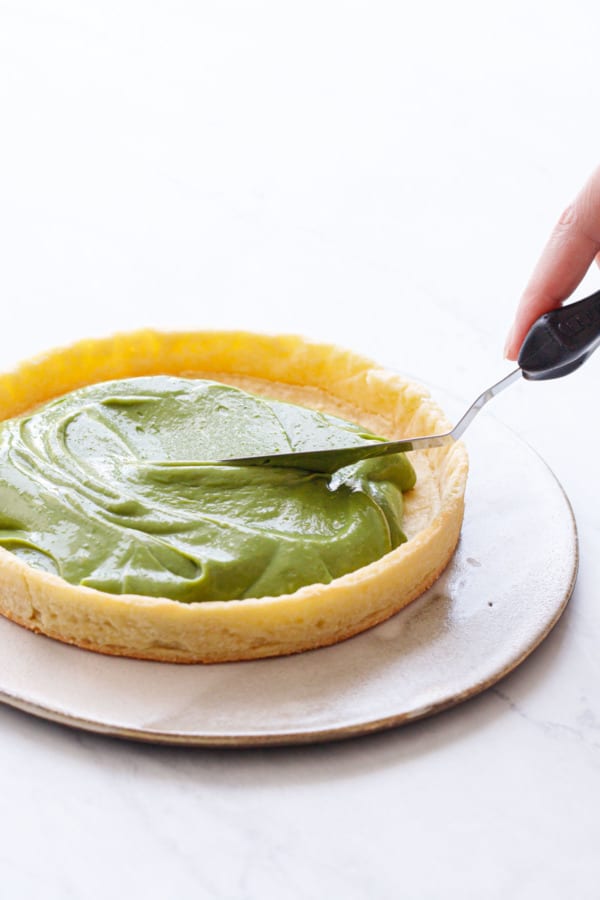
Now, I will say that, even with ample patience, the matcha pastry cream filling falls on the soft side, as pastry cream usually does (I feel like I always expect it to be firmer and am always disappointed). But I don’t like adding too much starch as the cream tends to take on a starchy quality to it that I don’t love. I’d much rather have a soft, creamy filling than a thick, starchy one.
That said, if you’re wanting a clean cut slice, you might want to add a teaspoon or so of bloomed and melted gelatin to the pastry cream at the very end. Then immediately pour it into your baked and cooled tart shell, and let it chill for a few hours in the shell (instead of in the bowl, since the gelatin will set up firmly enough it won’t be ‘spreadable’ into the crust later).

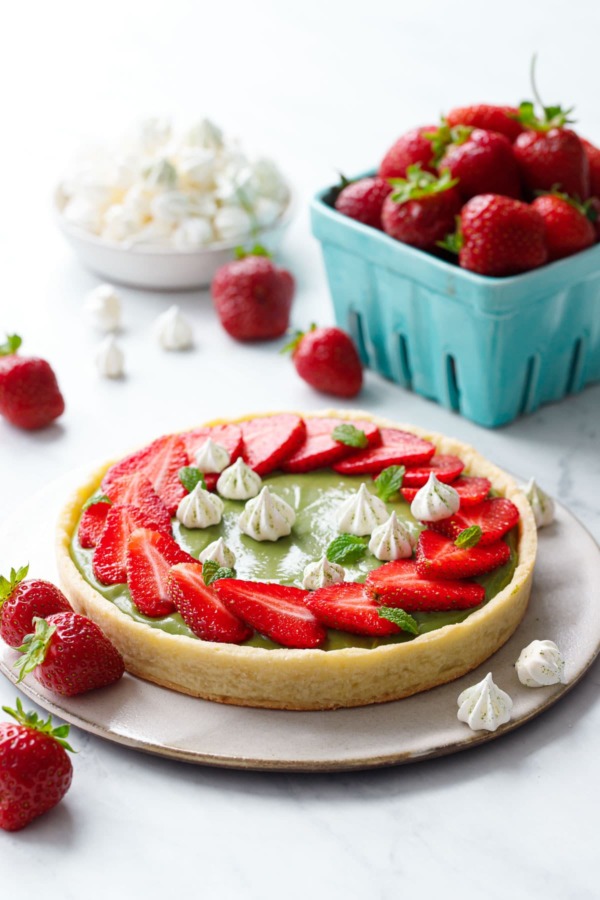
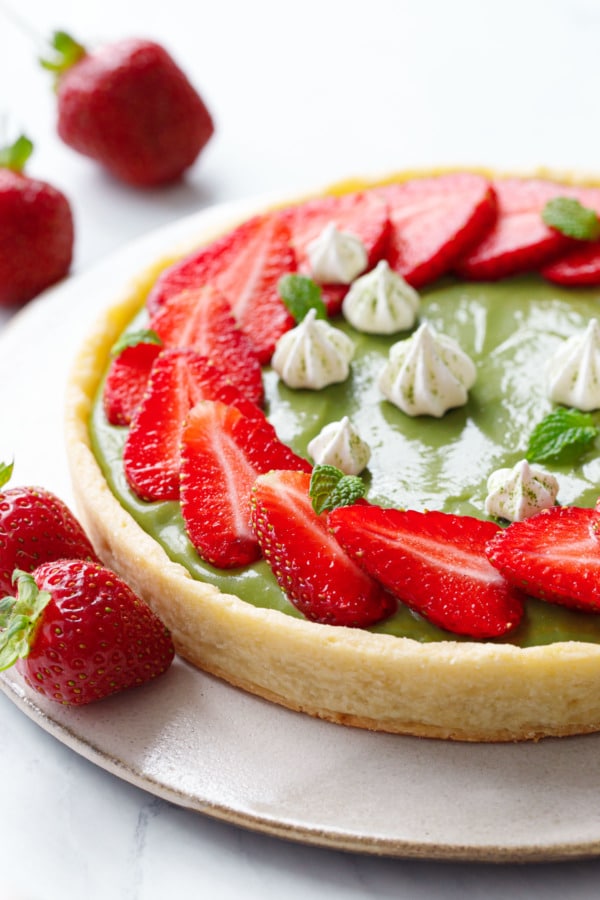
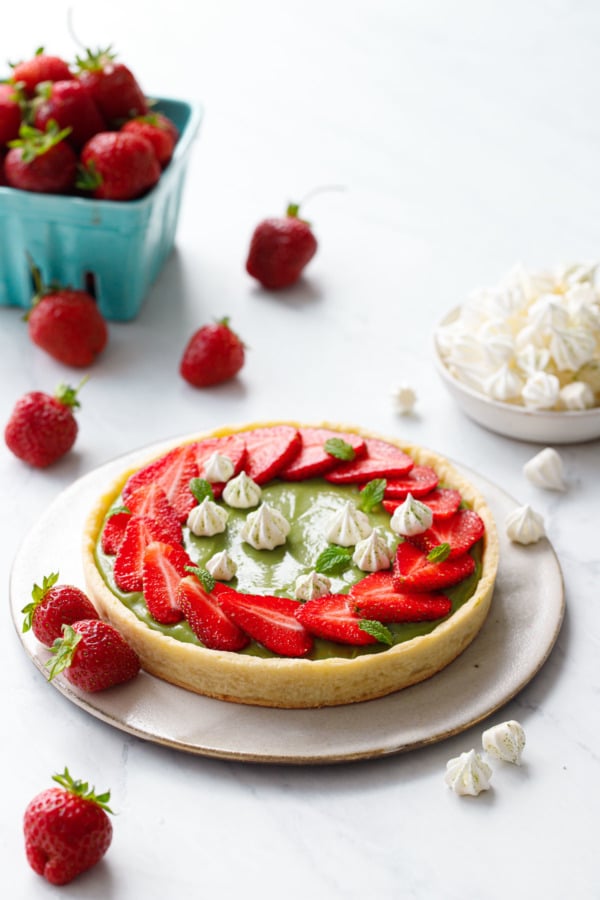
The strong, grassy bitterness of the matcha flavor is perfectly tempered by the sweetness of the strawberry. And while I opted for a more minimalist approach to the decorating, I do think that every bite needs to have a piece of strawberry in it. So if you mimic my arrangement, definitely serve more berries on the side for good measure. Or free to cover the entire thing with sliced strawberries, too.
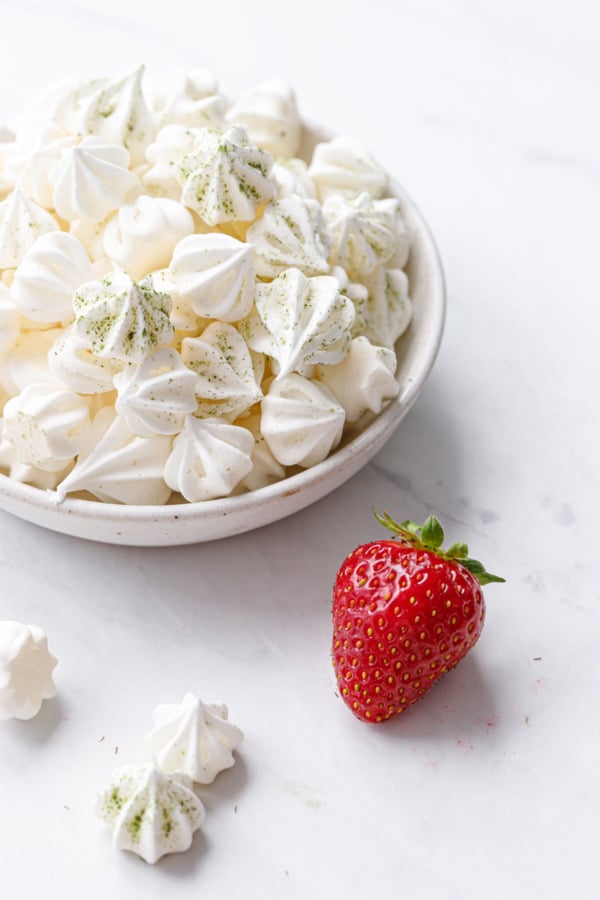
As for the matcha-dusted mini meringues… you’ll have two egg whites leftover from the pastry cream, so why not put them to good use (we’re all about limiting food waste these days, so why not?)
For these itty bitty meringues I used a Wilton #21 star tip and piped kisses of varying sizes onto sil-pat lined baking sheets; half I dusted with matcha and the other half I left white (since I was undecided which I’d like better in the end). I filled up two full cookie sheets of mini meringues, which when you consider I only ended up using 9 of them on the tart itself, seems like overkill. But two egg whites is really the minimum amount to whip up a stable meringue; 1 egg white is just not enough liquid for most stand mixers to adequately whip.
You could also pipe some starlets of whipped cream on top too (if you had some on hand, that is). In which case plop the egg whites in a zip top bag and freeze them for later, or, even better, whip up a batch of my favorite amaretti cookies (which calls for exactly 2 egg whites).
You’ll notice that this recipe is written for one 6-inch tart, though the crust makes enough for two tarts (or one larger, 9-inch tart). You can certainly try to halve it, though I find halving a whole egg is not the easiest of tasks so I avoid writing my recipes as such.
That said, you can freeze leftover tart dough, either in a disc tightly wrapped in plastic, or rolled and pre-shaped in the tart pan (where it basically becomes like one of those pre-made frozen pie crusts from the store, only better). Wrapped airtight, it’ll easily keep for a month or two.
You can also double the filling recipe to make a 9-inch tart, though I figured that wouldn’t be very practical since none of us are exactly entertaining a crowd these days. And this tart is really best the day it is made. While the shell and pastry filling (without the berries) are ok the next day (the crust just won’t be quite as crisp), the berries like to ‘weep’ and seep into the filling, turning it into a watery mess. For that reason I do not recommend assembling this tart ahead of time.
That said, you can make the tart dough ahead of time, you can even shape and bake off the shells in advance as well. The pastry cream can definitely be made the day before (just make sure you press a layer of plastic wrap onto the surface of the cream so it doesn’t form a skin). And, assuming it’s not terribly humid out, the meringues will keep in an airtight container for a few days. But plan to assemble the whole thing, arranging the berries on top as well as the meringues, as close to serving time as possible.

The final result is quite stunning, with a buttery short crust, a rich, creamy filling whose stunning grass-green hue contrasts vividly against the bright red berries on top. And with a scattering of meringue stars and a few itty bitty mint leaves, the effect is just as impressive as the pastries in the fancy upscale bakeries.
Except you’ll have made it yourself from the comfort and safety of your own home.
Go ahead, pat yourself on the back. You did this! You deserve it! Now dig in to your delicious reward.
Matcha Strawberry Tart
Ingredients
For Crust*:
- 1 ½ cups / 190 g all-purpose flour
- ¼ cup / 50 g granulated sugar
- pinch salt
- ½ cup / 113 g unsalted butter, cold, cut into cubes
- 1 large egg
- ¼ teaspoon almond extract, optional
For Matcha Pastry Cream:
- ¾ cup / 185 g whole milk
- ¼ cup / 50 g granulated sugar
- 1 tablespoon / 8 g all-purpose flour
- 2 teaspoons cornstarch
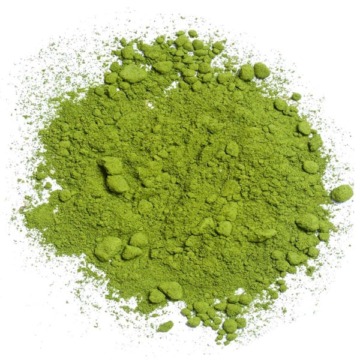
- 1 teaspoon / 4 g matcha powder, sifted
- 2 large egg yolks
- 1 tablespoon butter, cut into small cubes
- 6-10 ripe strawberries, hulled and sliced vertically into 1/4-inch thick slices
- fresh mint leaves, for garnish (optional)
For Meringues (optional):
- 2 large / 60 g egg whites
- ⅓ cup / 70 g granulated sugar
- ½ cup / 70 g powdered sugar
- matcha, for dusting (optional)
Instructions
- For crust, combine flour, sugar, and salt in the bowl of a food processor. Sprinkle over butter cubes and pulse until butter breaks up into pea-sized chunks. Add egg and pulse until just incorporated. Dump mixture out onto a clean surface and knead a few times to bring it together in a ball. Don't overwork it, especially if your kitchen is on the warm side: we want to keep the dough as cold as possible so the butter never fully melts until it is baked.
- If you are making 6-inch tarts, split the dough in two and form into a disc shape. Wrap tightly in plastic wrap and refrigerate at least 30 minutes or overnight. If you are only making one tart today, you can freeze the second dough disc for later (you can also shape it in the tart shell and freeze it then too).
- To make matcha pastry cream, heat milk in a small saucepan set over medium-low heat until it just begins to bubble and steam (do not let it scald). While milk is heating, whisk together sugar, flour, cornstarch, matcha and salt in a bowl. Add egg yolks (save the whites for the meringues) and whisk until mixture forms a smooth paste. If you need to, spoon a tablespoon or so of milk from the saucepan into the yolk mixture to help it come together smoothly.
- Gradually ladle a little of the hot milk mixture, about 1/4 cup at a time, into the matcha mixture, whisking constantly, until about half of the milk has been incorporated and mixture is warm to the touch. This will 'temper' the egg yolks rather than cook them. Pour mixture back into saucepan with the rest of the milk, whisking to incorporate.
- Return saucepan to low heat (emphasis on LOW here - if you rush this, you'll end up with chunky pastry cream which is less than ideal). Continue to stir, alternating between a whisk and a rubber spatula to scrape the sides and the bottom of the pan. Continue to gently heat, stirring regularly, until pastry cream has thickened to the consistency of pudding and starts to bubble in the center.
- Remove from heat and add butter, whisking gently until completely melted and smooth. If you notice any chunks at all in your pastry cream, press it through a fine mesh sieve to remove any bits of cooked egg.
- Transfer to a bowl, then press a layer of plastic wrap onto the surface of the pastry cream to prevent a skin from forming. Refrigerate at least 2 hours or until completely cool.
- To make meringues, preheat oven to 225 degrees F, and arrange baking racks to sit in the bottom 1/3 and top 1/3 of the oven.
- Beat reserved egg whites in a stand mixer fitted with the whisk attachment until doubled in volume. With the mixer running, gradually pour in sugar, and continue to whip on medium-high speed until mixture is stiff and fluffy, about 5 to 7 minutes more. Sift about a third of the powdered sugar over top of bowl and fold until incorporated. Repeat with remaining powdered sugar in two additions until incorporated.
- Fit a large piping bag with a small star tip (I used Wilton #21) and fill with half of meringue mixture. Line two baking sheets with parchment or silicone baking mats. Pipe small kisses of varying sizes into rows on baking sheets. They won't spread in the oven, so you can pipe them pretty close together. Refill your pastry bag and repeat on second baking sheet. If desired, spoon a bit of matcha powder into a small sieve and dust tops of meringues.
- Bake for 20 to 30 minutes or until meringues easily release from the baking sheets, but the centers are still soft. Turn off oven, prop the door open with a wooden spoon, and let the meringues cool with the oven.
- To bake your tart shells, you can either use a tart pan with a removable bottom, or a French tart ring set on a parchment-lined baking sheet. Dust a surface liberally with flour and unwrap one dough disc. Start by pounding the dough with a heavy rolling pin to soften it slightly, rotating the rolling pin at different angles to it flattens evenly. Then roll out into approximately 9-inch round. If the dough gets too soft at any point, pop it back in the fridge to firm it back up (it helps to roll out on a piece of parchment to make this easier). Gently drape the rolled dough into the tart shell, easing the edges into the corners and taking are not to stretch the dough. If you are using a straight sided tart ring, you can also opt to shape the dough in two pieces, by cutting out a round for the bottom, then rolling out a long piece of dough for the sides. Cut into an even strip using a ruler, then lay vertically onto the base, pressing lightly to adhere. Trim edges flush with the top edge. Place in the freezer for for 15 to 30 minutes or until completely firm.
- Preheat oven to 375 degrees F (don't forget to take your meringues out if they are still in there!) Line frozen tart shell with parchment (I find it helps to crumple the parchment so it'll go into the corners more easily. Fill with sugar, pressing into the corners as best you can.
- Bake for 12 to 15 minutes or until crust is starting to brown. Gently lift out parchment with sugar, then return shell to oven for an additional 3 to 5 minutes or until golden brown. Let cool completely.
- To assemble, whisk the chilled pastry cream a few times to smooth it out, then spread into the cooled tart shell. Top with a ring of sliced strawberries, and, if desired, decorate with mini meringue kisses and mint leaves. If not serving right away, keep refrigerated, though I recommend at placing the berries and meringues as close to serving time as possible.
Notes
- This makes enough crust for two 6-inch tarts or one 9-inch tart. If making a larger 9-inch tart, double the filling portion of the recipe.


If I make the 9 inch tart, will I have to double the pastry recipe as well? Looks yum!
The crust makes enough for two 6-inch tarts or 1 9-inch! No need to double that part.
Hello,
This looks amazing!
I’ve don’t tarts, however I’m not particularly good with dough, I make the crust from graham crackers and butter, can I replace the dough crust in the recipe with mine?
Thanks!
You can definitely use a graham cracker crust here, I think that’d be lovely!
Love the idea! I like more sharp elements in desserts, like matcha, because I’m not a big sweet person.
I doubled the pastry cream recipe. The cream came out a much darker green, but it tastes great. Assembly tomorrow.
Cute decoration! I’ve never mixed matcha w strawberry but your tart looks so good! Added it in my list ;)
The tart looks pretty! I really like the matcha flavor, can’t wait to try this recipe, thank you so much!
This is so beautiful!
i’ve made cakes, pies and almost everything in betweem except for tarts, just never did, and this is lovely inspiration, thank you!
This is so beautiful!!!!