
These jewel-like candied blood orange slices have a gorgeous, stained glass appearance, making them the perfect decorations for desserts or drinks, and a sweet and chewy texture that makes for a delicious snack all on their own, or (better yet) dipped in dark chocolate.
While candying oranges does involve a good chunk of time to achieve that perfect chew and glass-like appearance, the result is well worth it. Not to mention the delicious candied orange syrup that’s leftover at the end which as good or better as the orange slices themselves! All you need to make this impressive homemade confection are sugar, water, and oranges (and a bit of powdered citric acid to preserve the leftover syrup at the end).
Save this recipe for later!
Hello, gorgeous!
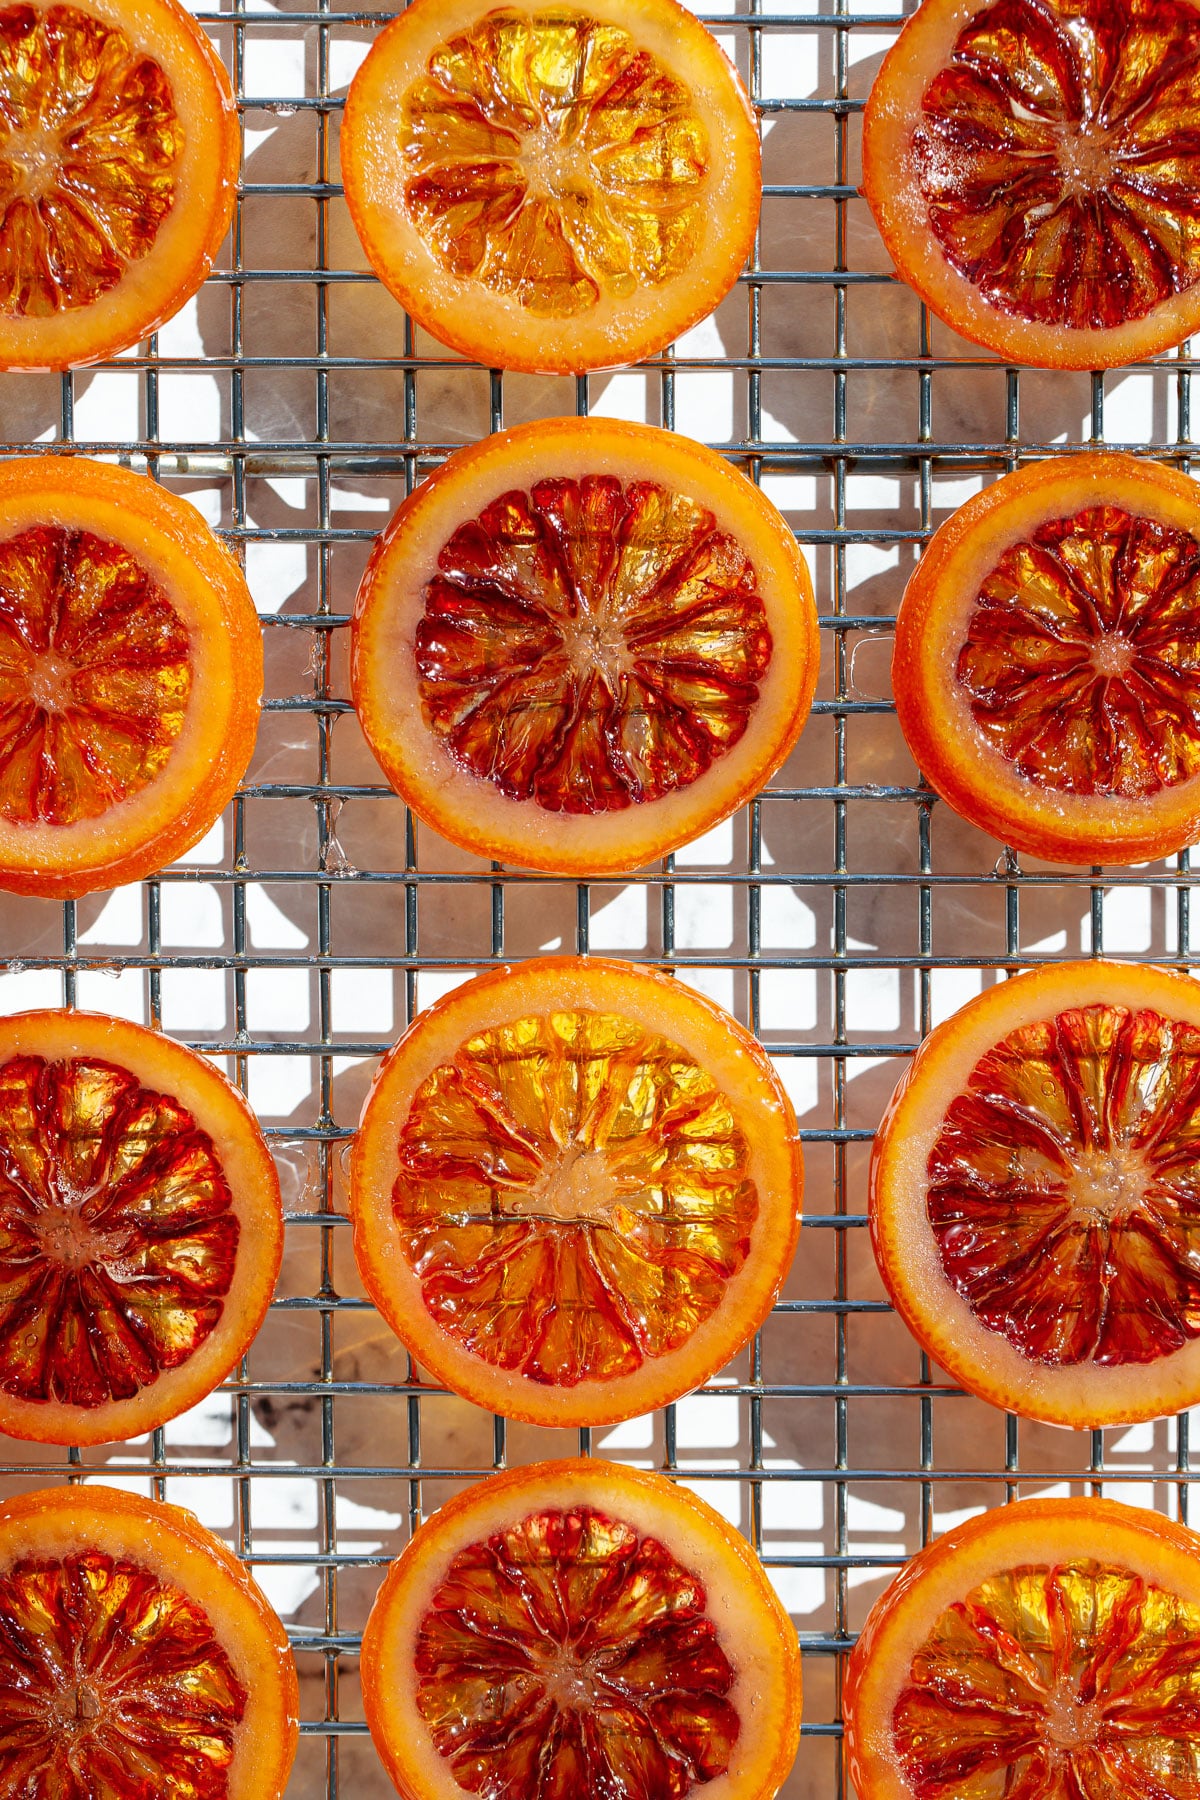
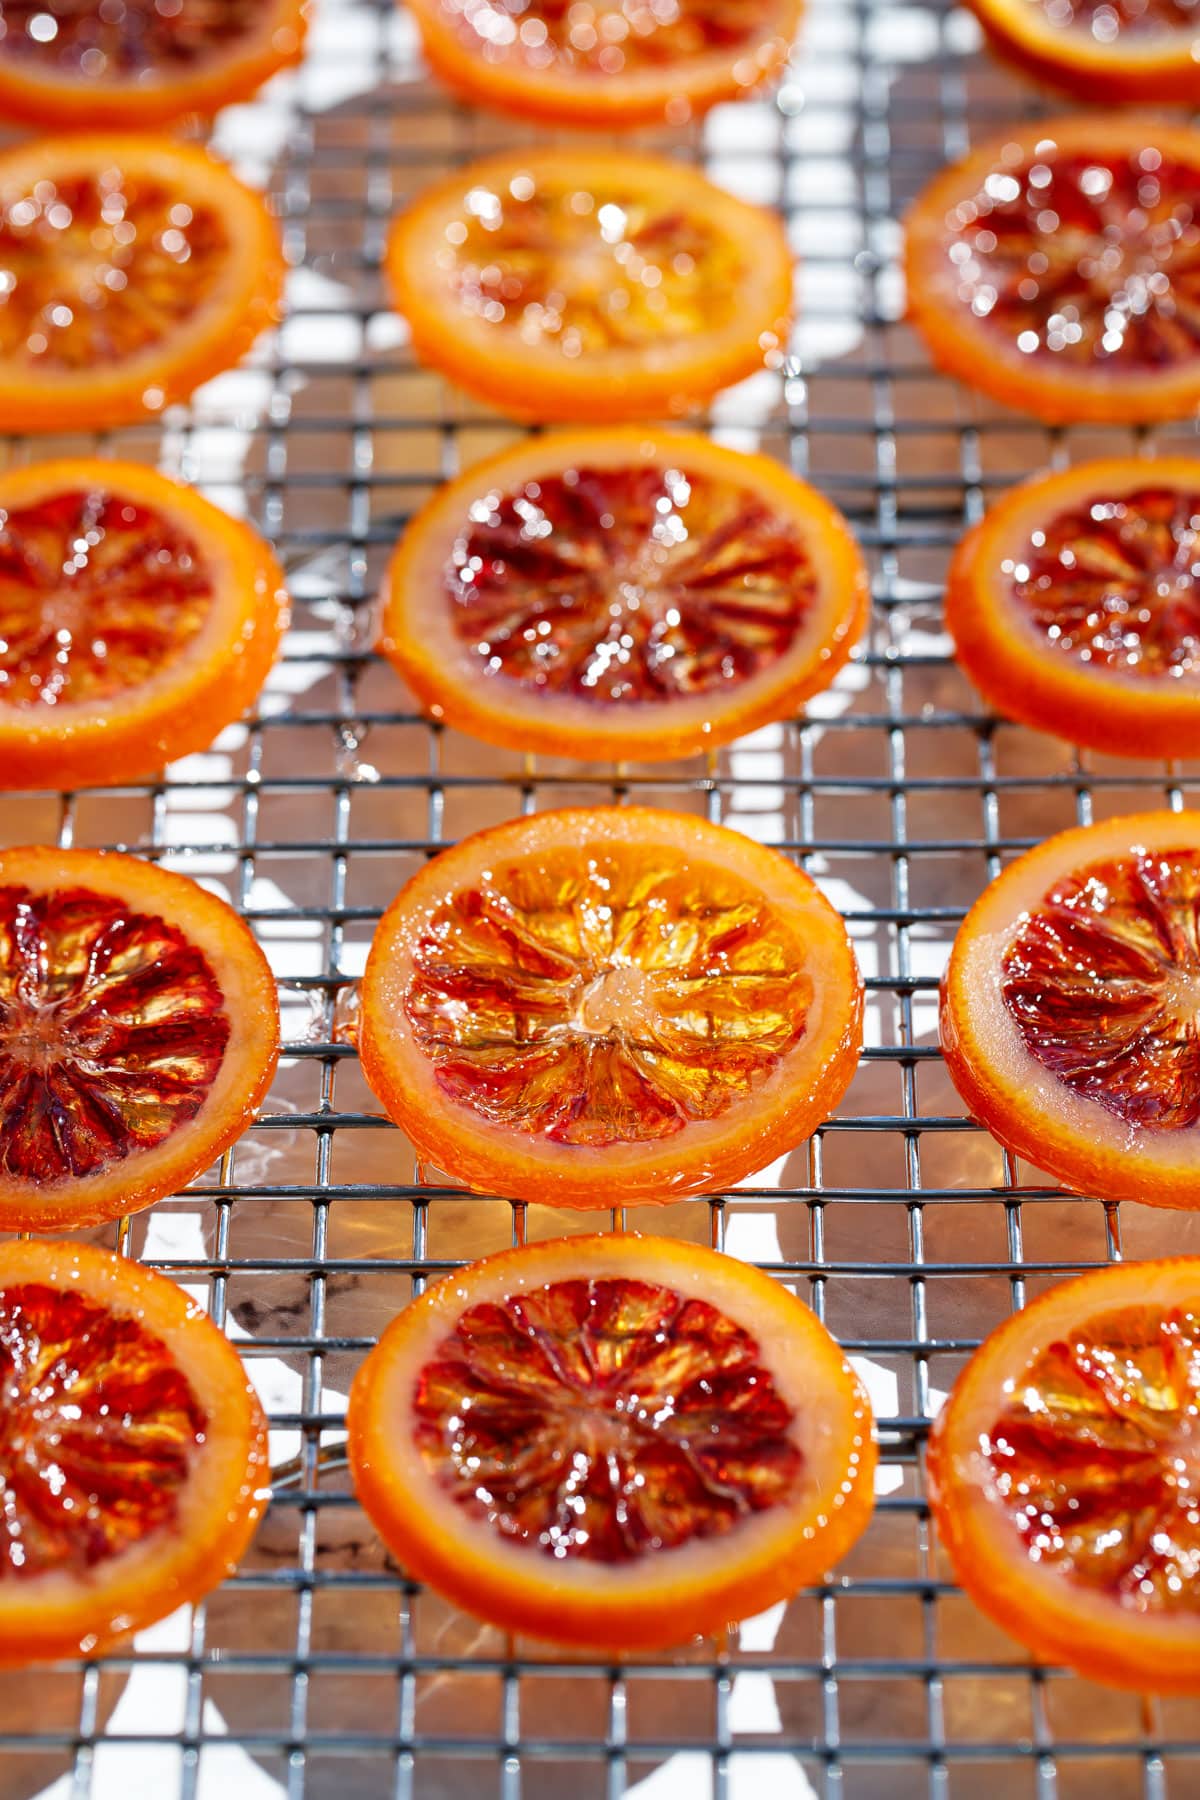
Really though, is there anything prettier than a slice of candied blood orange, shiny and translucent in the winter sun?
They’re basically like edible stained glass, deliciously chewy and bursting with sweet orange flavor. And yes, the entire thing is edible! The ‘candying’ process, wherein the orange slices are simmered in a sugar syrup, softens the rind and infuses it with sugar syrup.
Not to mention that the ‘byproduct’ of the entire process is a truly fantastic candied orange syrup that’s almost better than the oranges themselves. It’s like a recipe two-for-one!
I used these candied blood orange slices as a garnish on some chocolate blood orange cupcakes. Cut into half moons and nestled in a swirl of pale pink blood orange buttercream, they provided the perfect finishing touch to the already gorgeous cupcakes, both adding visual impact and hinting at the flavors to be found inside. Rather than try to tack this on as a part of the cupcake recipe (which already had cake and frosting parts), I figured they were pretty enough (and finicky enough) to warrant their own post.
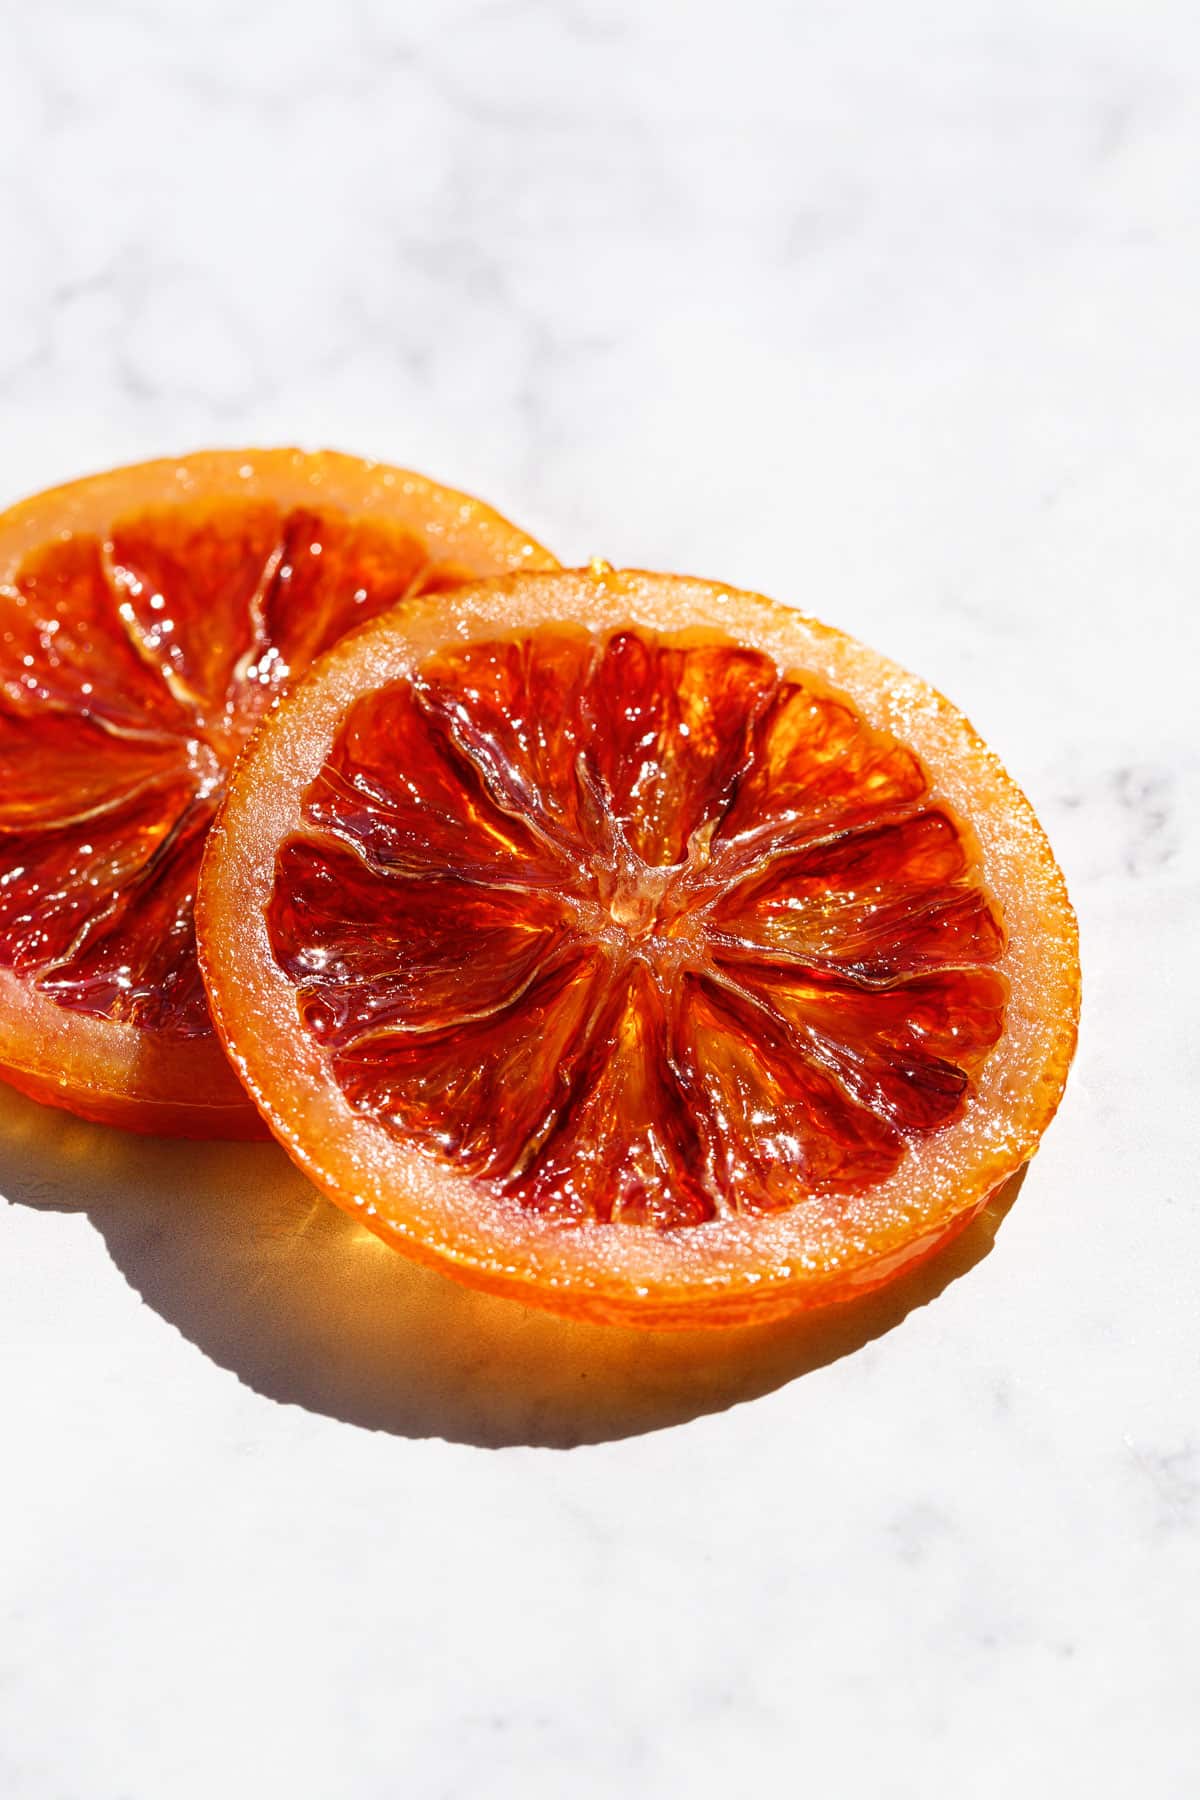
I’d candied orange peel before, but had never attempted full orange slices. And while full slices can be a bit trickier (ok, a lot trickier), the results are simply stunning, with the centers turning fiery red and transparent, almost like stained glass.
The fact that, when all was said and done, I made 10 full batches of these candied oranges should tell you something, mainly that any recipe involving boiling sugar can be extra tricky. But have no fear: I made all the mistakes so you don’t have to! Be sure to read through the full post for all my tips and tricks to ensure you’re set up for success the very first time.
While I’ve written this recipe for blood oranges, it also works with any other citrus, including navel or cara cara oranges, Meyer lemons, limes, even kumquats (the teeny tiny slices would candy beautifully!)
So I mentioned I tested this recipe upwards of 10 times… what exactly was I testing?
Mainly, I wanted the reddest, most beautiful blood orange slices I could get, and set about testing different variables to see what produced the prettiest results without negatively affecting the flavor or texture.
One of the first things I tried was adding some citric acid to the sugar syrup at the beginning of the cooking process to help brighten the flavor and color as well as help impede crystallization. Adding citric acid is a trick I use often in my canning recipes to help preserve the color and brighten the flavor of jam.
But after numerous tests with lackluster (aka brownish, notably un-vibrant) results, I realized that the citric acid was doing the opposite of what I wanted, and was actually producing a browning effect at much lower temperatures than a plain sugar syrup made without citric acid (molten sugar normally starts to brown or caramelize around 320°F). I’m not sure of the exact science behind this browning, but I was kicking myself once I realized my clever ‘trick’ was not really a trick at all.
So I went back to the basics, with just sugar and water in the syrup. You do need to be careful not to stir the sugar after it starts to boil, lest you trigger crystallization. You can gently press the slices down into the syrup as they cook, and also flip them over a couple of times to be sure both sides get candied evenly, just don’t stir the pot (literally or figuratively).
If you’re nervous about crystallization, add a tablespoon of corn syrup to the pot along with the sugar and water. The final candied orange slices will be slightly softer and stickier, but honestly I really couldn’t tell the difference. Also, if you don’t have or opt to skip the citric acid (which is added to the syrup at the end to keep it from crystalizing as it cools), but still want to utilize the leftover syrup, then I definitely recommend using corn syrup (glucose syrup would work as well).

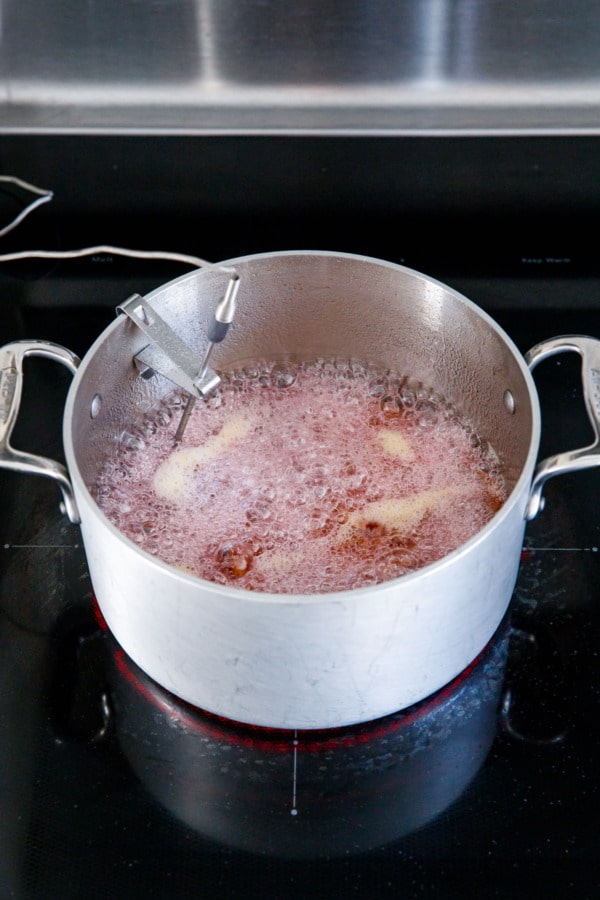
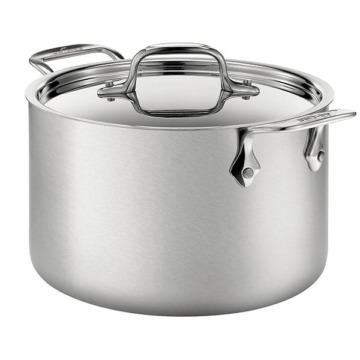
For this recipe I used a 4 quart saucepan, which was a good balance of depth and width and fit 10 to 12 small orange slices (my blood oranges were on the small side which is preferable). While you don’t need a super deep pan, you also don’t want to use a frying pan or skillet that’s too shallow, as during the cooking process the syrup will foam up and almost double in volume at one point. You want about an inch of syrup in your pot, deep enough for the orange slices to fully submerge and for your thermometer to be able to get an accurate reading. The depth will reduce by about half by the end.
If you use a larger saucepan, you can increase the syrup quantities to 3 cups each of sugar and water to accommodate. However, I found that larger quantities of sugar syrup increase the cooking times quite a bit, so if you’re going to scale up or double the recipe I’d recommend using two separate pots instead of one large one.
Instead of slices, you can candy strips of orange peel in very much the same way (I plan to post a separate recipe at some point for a candied orange peel in syrup recipe). I’ve previously made candied Meyer lemon peel for a sunshiny lemon waffle recipe and candied orange peel for a fennel and arugula salad recipe (you heard that right, candied orange peel on salad is surprisingly amazing!). The process for candied peel is very similar, although I didn’t pay as much attention to the final syrup temperature, and also coated the thin slices of peel in granulated sugar to keep them from sticking together.
While I opted to skip the sugar coating in this recipe (I wanted the transparent, stained glass-like effect for my cupcake decorations), you can certainly toss your candied orange slices in granulated sugar if stickiness is a concern, see “Finishing Options” below for more info.


A Cut Above
Cutting the oranges into even, 1/4-inch thick slices is probably the hardest part of the whole process. You can use a mandoline, but I found it easier just to use a very sharp knife. Start from the blossom end (not the stem, where there is more pith and less pulp). The last slice or two always gets a bit weird, but it still worked better for me personally.
Tip: Use a fork to mark 1/4-inch increments to use as a guide for consistently thick slices.
While you can cut your slices thinner than 1/4-inch, I found if they were too thin, the centers were more likely to partially disintegrate when simmering in the sugar syrup. The peels are definitely more tender the thinner they are, but the centers just don’t hold up. So if you want perfect, whole slices, stick to 1/4″ thickness.
I will add that smaller diameter slices seem to hold together better than larger ones (the centers don’t fall apart quite as much). I was lucky to find very small blood oranges, which worked really well for candying.
You can candy other citrus fruit too, not just blood oranges. Cara cara oranges, Meyer lemons, limes and even kumquats can be candied using this same recipe and method!
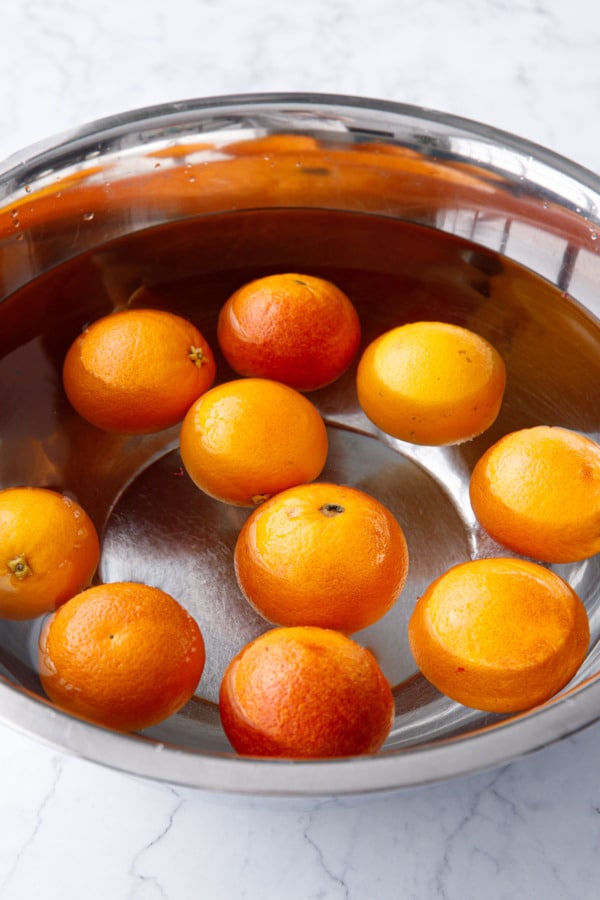
Try to buy organic and/or unsprayed/unwaxed fruit. If you can’t find unwaxed fruit, scrub the whole fruit under hot water (I even soak them in hot water for 15 minutes or so, then scrub vigorously with a brush) to remove all the coatings and waxes.
Also, fresher, juicer oranges will hold up better to the cooking process than older, dryer oranges (which will likely come out with lots of holes in the middle part). Buy the freshest citrus you can and use it quickly; if you have to store your citrus, keep it refrigerated so it doesn’t dry out as much.


Time vs Temperature
You’ll notice this recipe calls for cooking the sugar syrup to a specific temperature as well as an estimated duration.
While time is a good indicator of how long the orange peel will take to become tender all the way through (mine took about 50-60 minutes), the actual temperature of the sugar is the most important factor, as it will determine the consistency and set of the final product, as well as the thickness of the leftover orange syrup.
You want to cook the oranges until they are transparent and tender (about 50-60 minutes) AND the sugar syrup reaches 240-245°F (118-121°C).
If you want softer, stickier slices, you can take them off the heat at around 235-240°F.
Alternatively, cook them upwards of 250-255°F for a firmer finish (think lollipop), and though the harder candy finish is less sticky, you may want to have your dentist on call (lol). For that reason I much prefer a slightly softer finish.
I definitely recommend getting a reliable digital thermometer before starting this recipe. It can be a digital probe or one that clips on to the side of your pan (as long as you have a solid 1/2″ of syrup this kind works great as you don’t have to repeatedly measure temperature). I used a Thermoworks ChefAlarm which also let me set a temperature alarm so I didn’t have to babysit the pot quite as much (I still don’t recommend walking too far away as the temperature will rise super slowly at first, but faster towards the end).
In lieu of or in addition to the temperature, you can also test the sugar stage, dropping a spoonful of the hot syrup into a bowl of ice water, then test it between your fingers. It should form a soft, slumpy ball (this is known as the soft ball stage) at 240-245°F. Sugar cooked to higher temperatures falls into hard ball, soft crack, or hard crack stages.
Elevation adjustments: because water boils at a lower temperature at higher altitudes, those of you above 3000 feet or so may need to adjust your temperature a few degrees. The general rule is to decrease the target temperature by 2°F (1°C) for every increase of 1,000 feet (300 meters) in elevation above sea level.
Since we’re not using any corn syrup or other crystallization-inhibiting ingredients, you’ll need to be extra careful not to trigger the crystallization process. And a single stray sugar crystal added at the wrong time can cause the entire pot of syrup to seize up and solidify. But if you brush down the sides of your pot with water, and don’t agitate the syrup any more than you need to to flip the slices a few times (definitely don’t stir), you should be just fine.
Seeing Red
Let’s talk about color, because this was one of the main reasons I ended up testing this recipe nearly a dozen times, changing different variables to try and produce a more vibrant red color in the final candied slices.
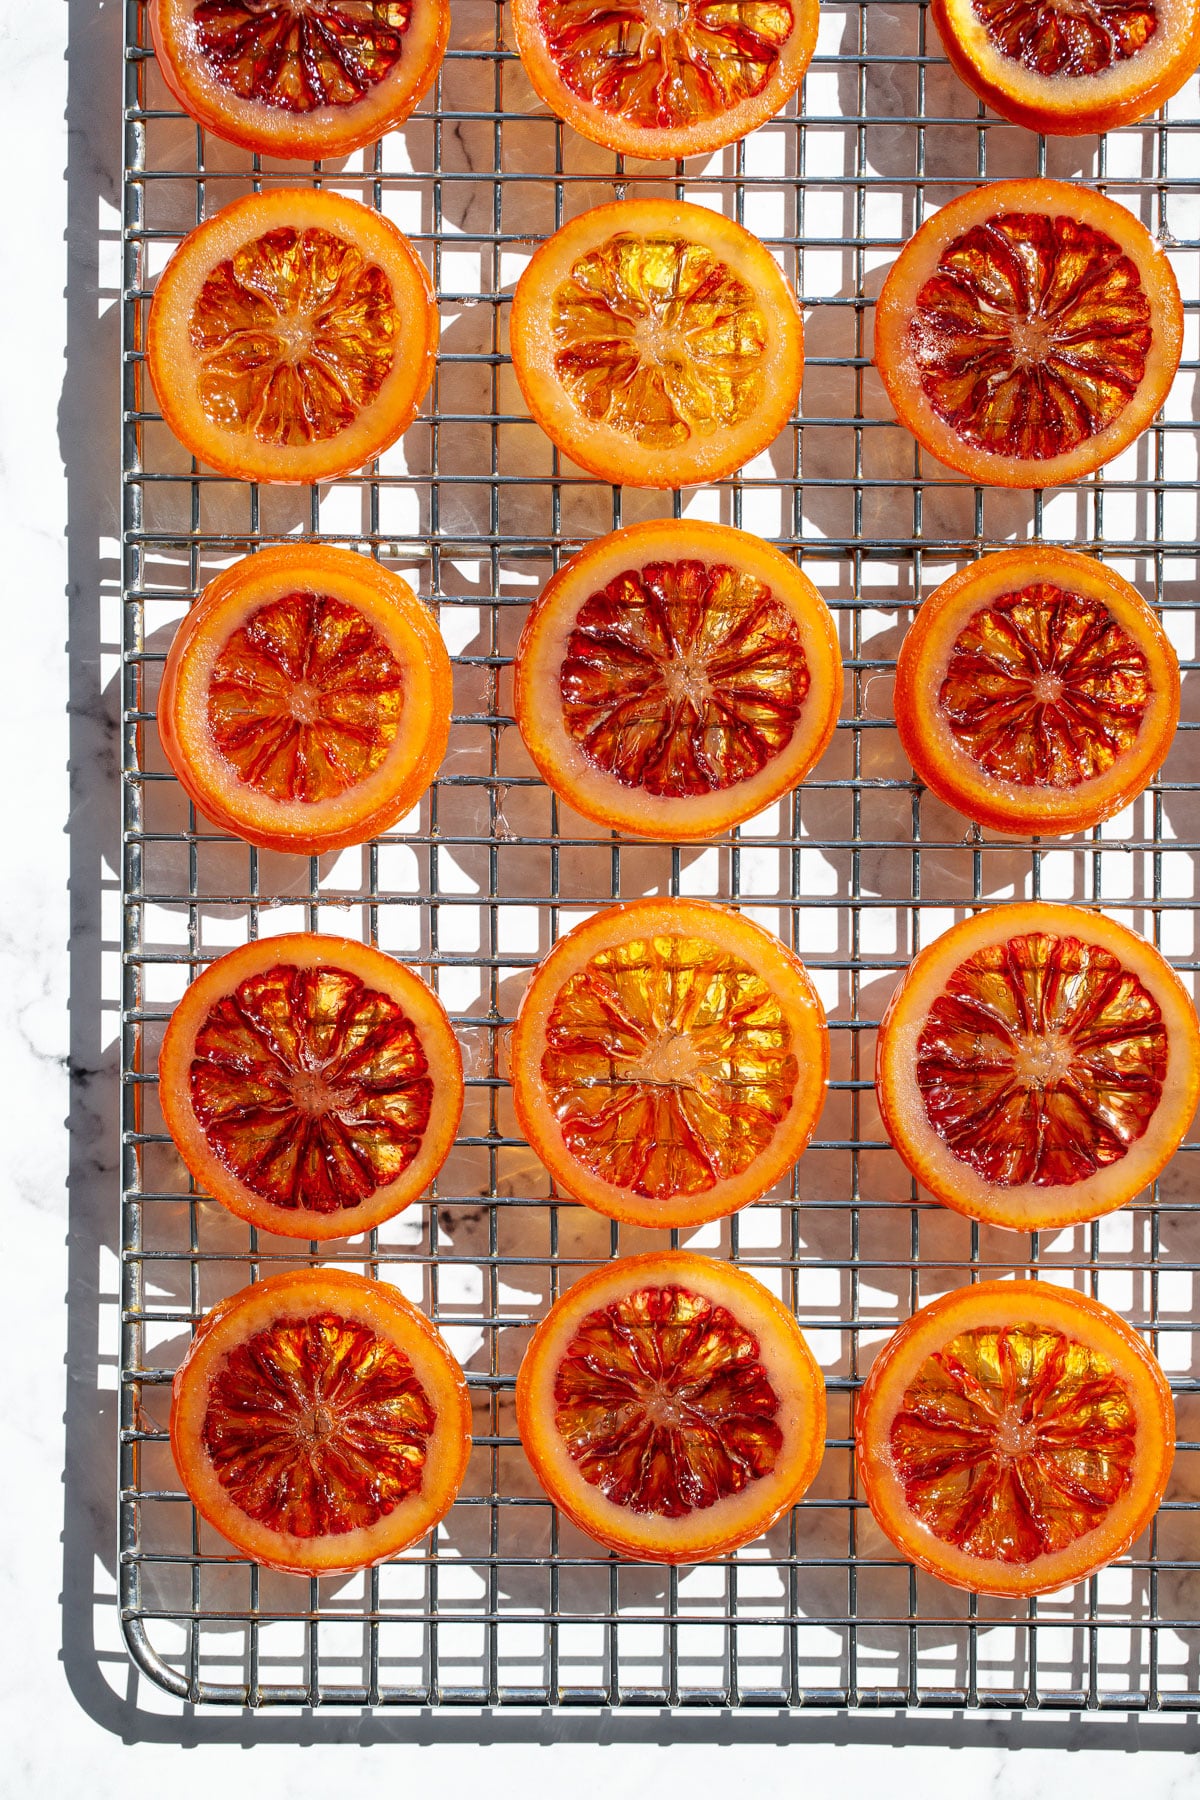
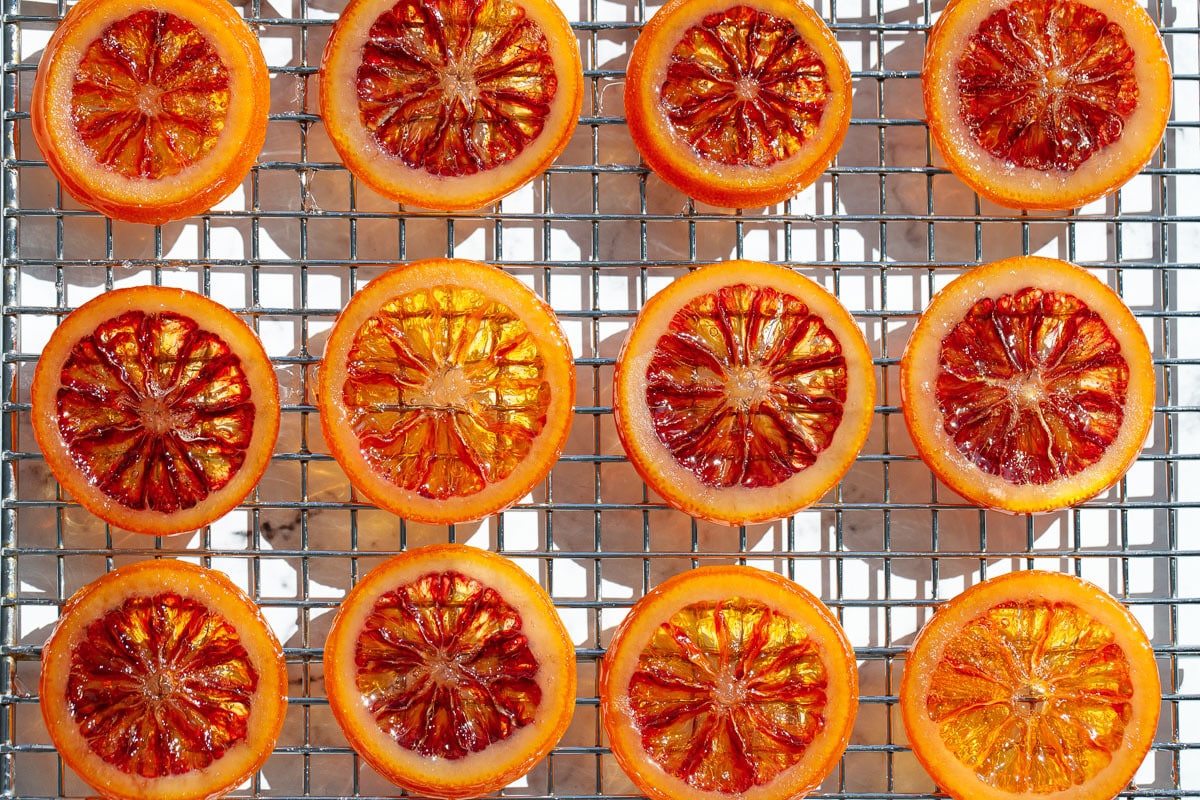
Because of the high temperature of the sugar, a little color loss is to be expected and unavoidable. It’s not quite as obvious with regular oranges, but the red tones of blood oranges are affected more by the heat, and oranges cooked to 245°F are never quite as bright as fresh ones.
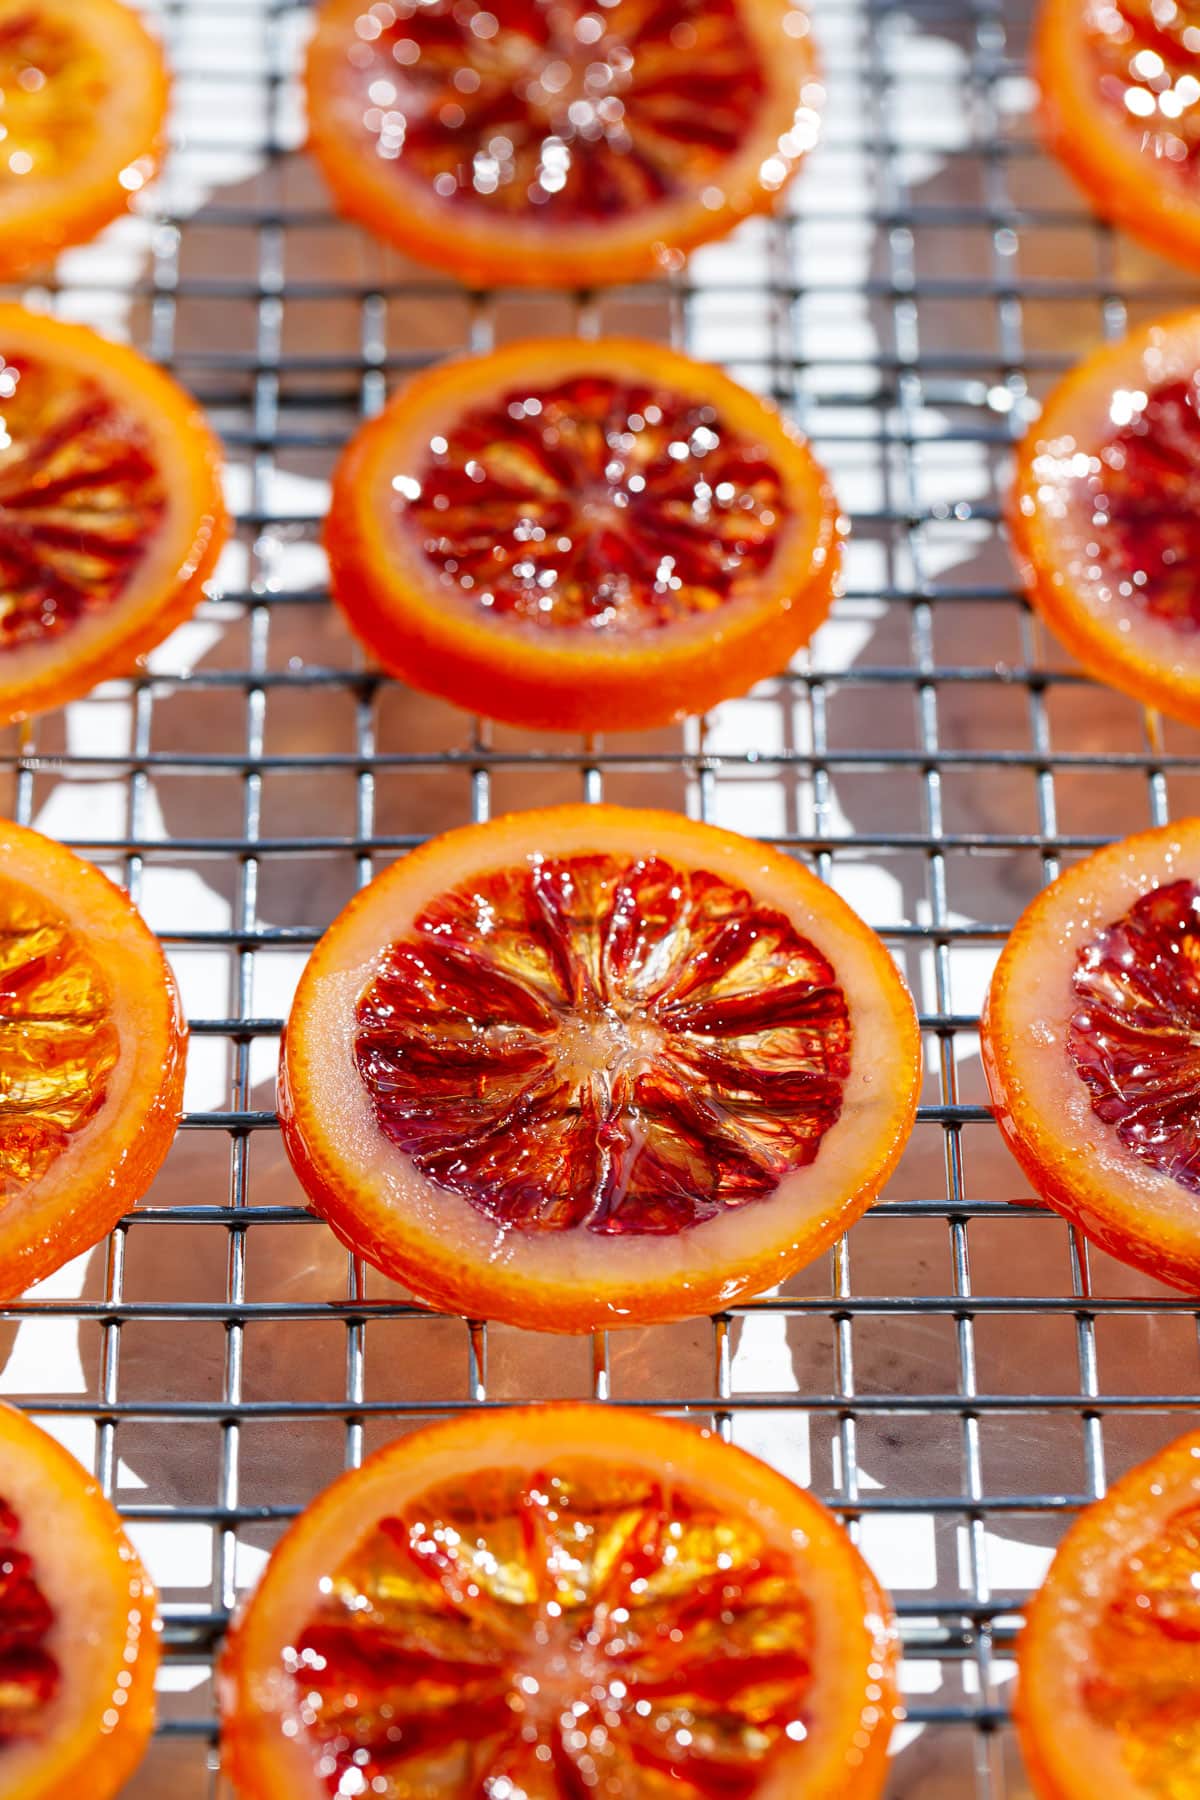
But also consider that blood oranges have a huge range of natural variation in color. You can see in the photos that some are almost entirely orange, while others are so dark they’re almost brown. Unfortunately there’s really no way to change or brighten the natural color of your oranges, so other than trying to buy the brightest, reddest oranges you can find; and even that is a challenging task, as the color of the outer peel is not always a reliable indicator of interior color.
I noticed this same variance when making my blood orange curd brownies last year; different batches of curd ranged from an almost mauve color to a deep maroon (I happened to luck out with the dark red oranges I got for my final batch for the photos).
I did not want to add any artificial color to my candied oranges, but if color is critical for you, a few drops of red food coloring to the sugar syrup would brighten the natural hue quite a bit.
The Bitter End
Optionally, if your oranges are particularly bitter or if you are extra sensitive to bitter things, you can pre-boil them in one or two changes of water to draw out some of the bitterness (boil for 3-5 minutes, then drain; change the water and boil again for another 3-5 minutes).
Pre-boiling the oranges does help make the rind more tender and less bitter, however it also makes the centers more fragile and prone to falling apart.
Boiling the orange slices is an optional step, I found my blood oranges plenty sweet and so I was fine skipping it to better preserve the full circle of orange.
If you plan to pre-boil, use the freshest, juiciest oranges you can find, and don’t slice them any thinner than 1/4-inch or they will fall apart by the end of the cooking process.


Finishing Options
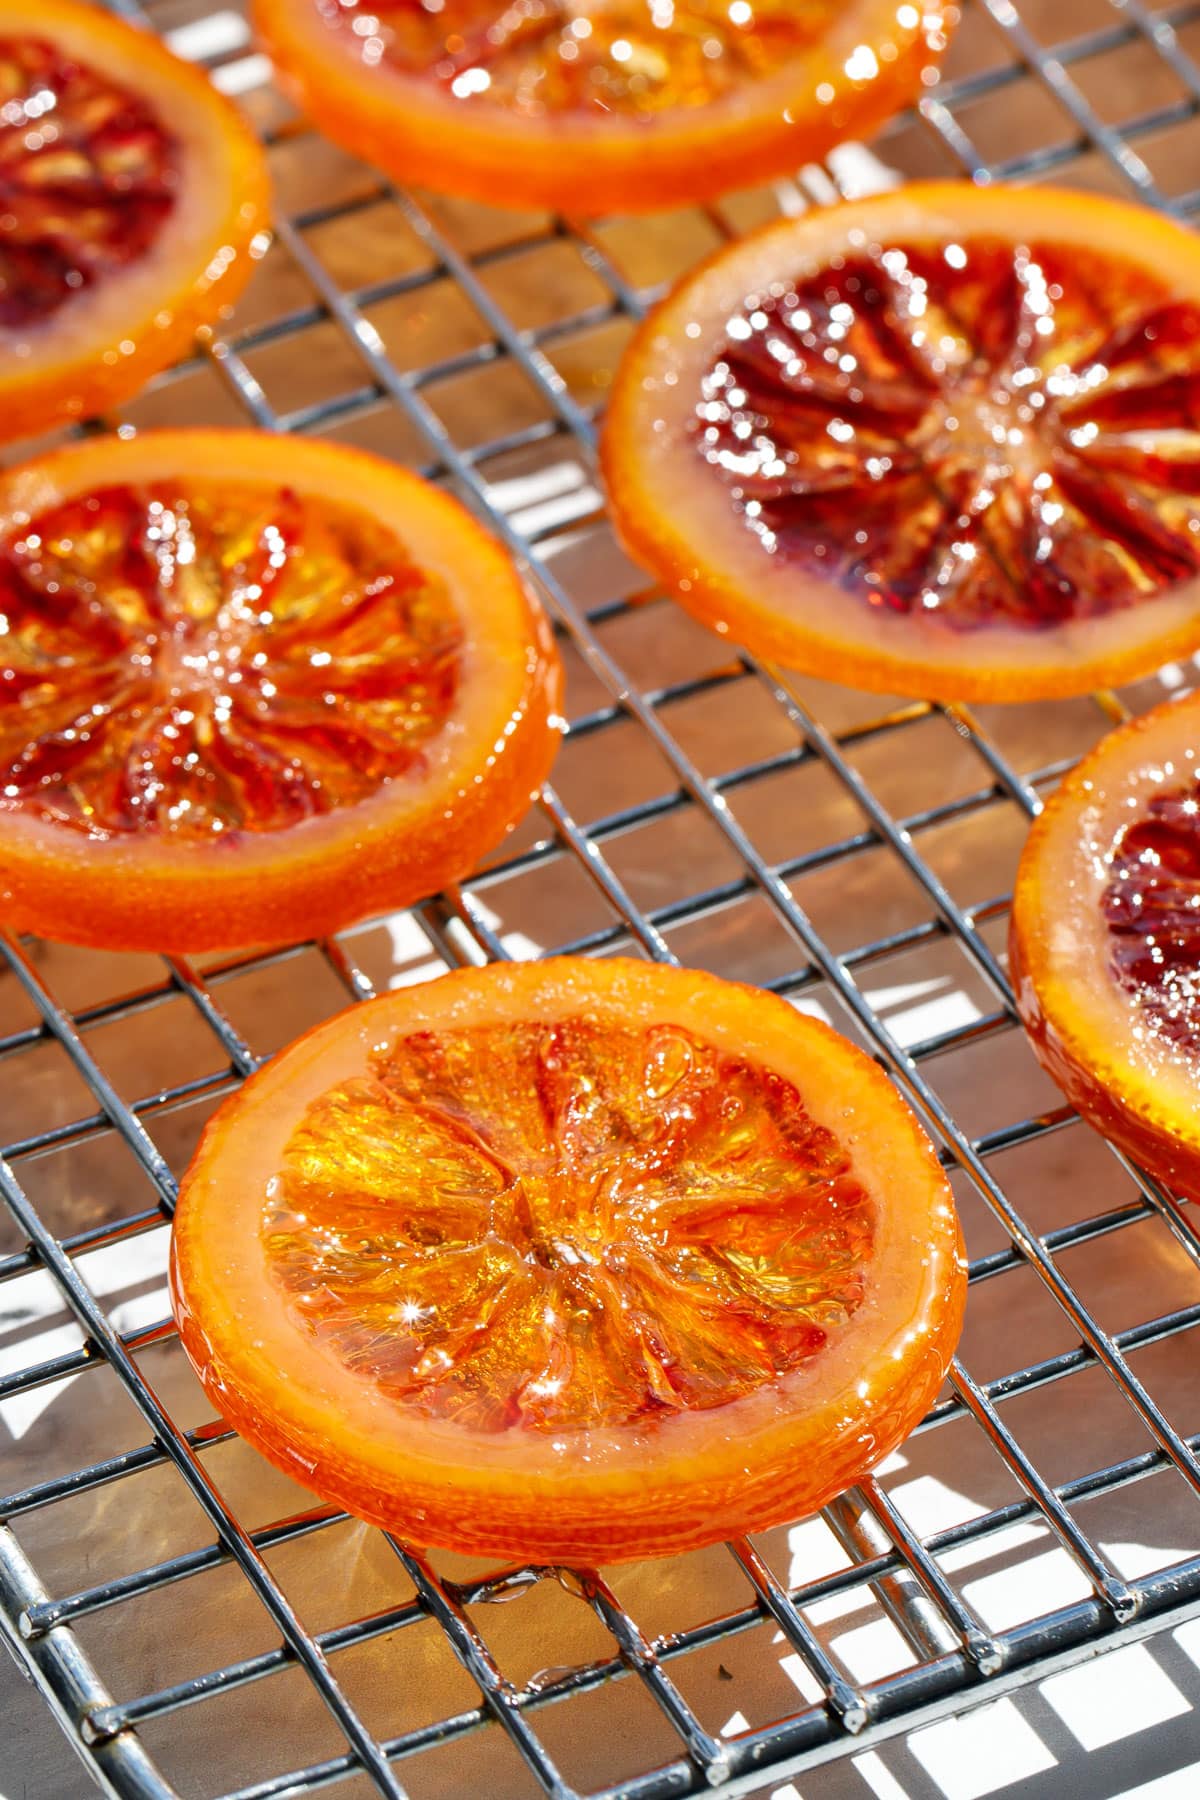
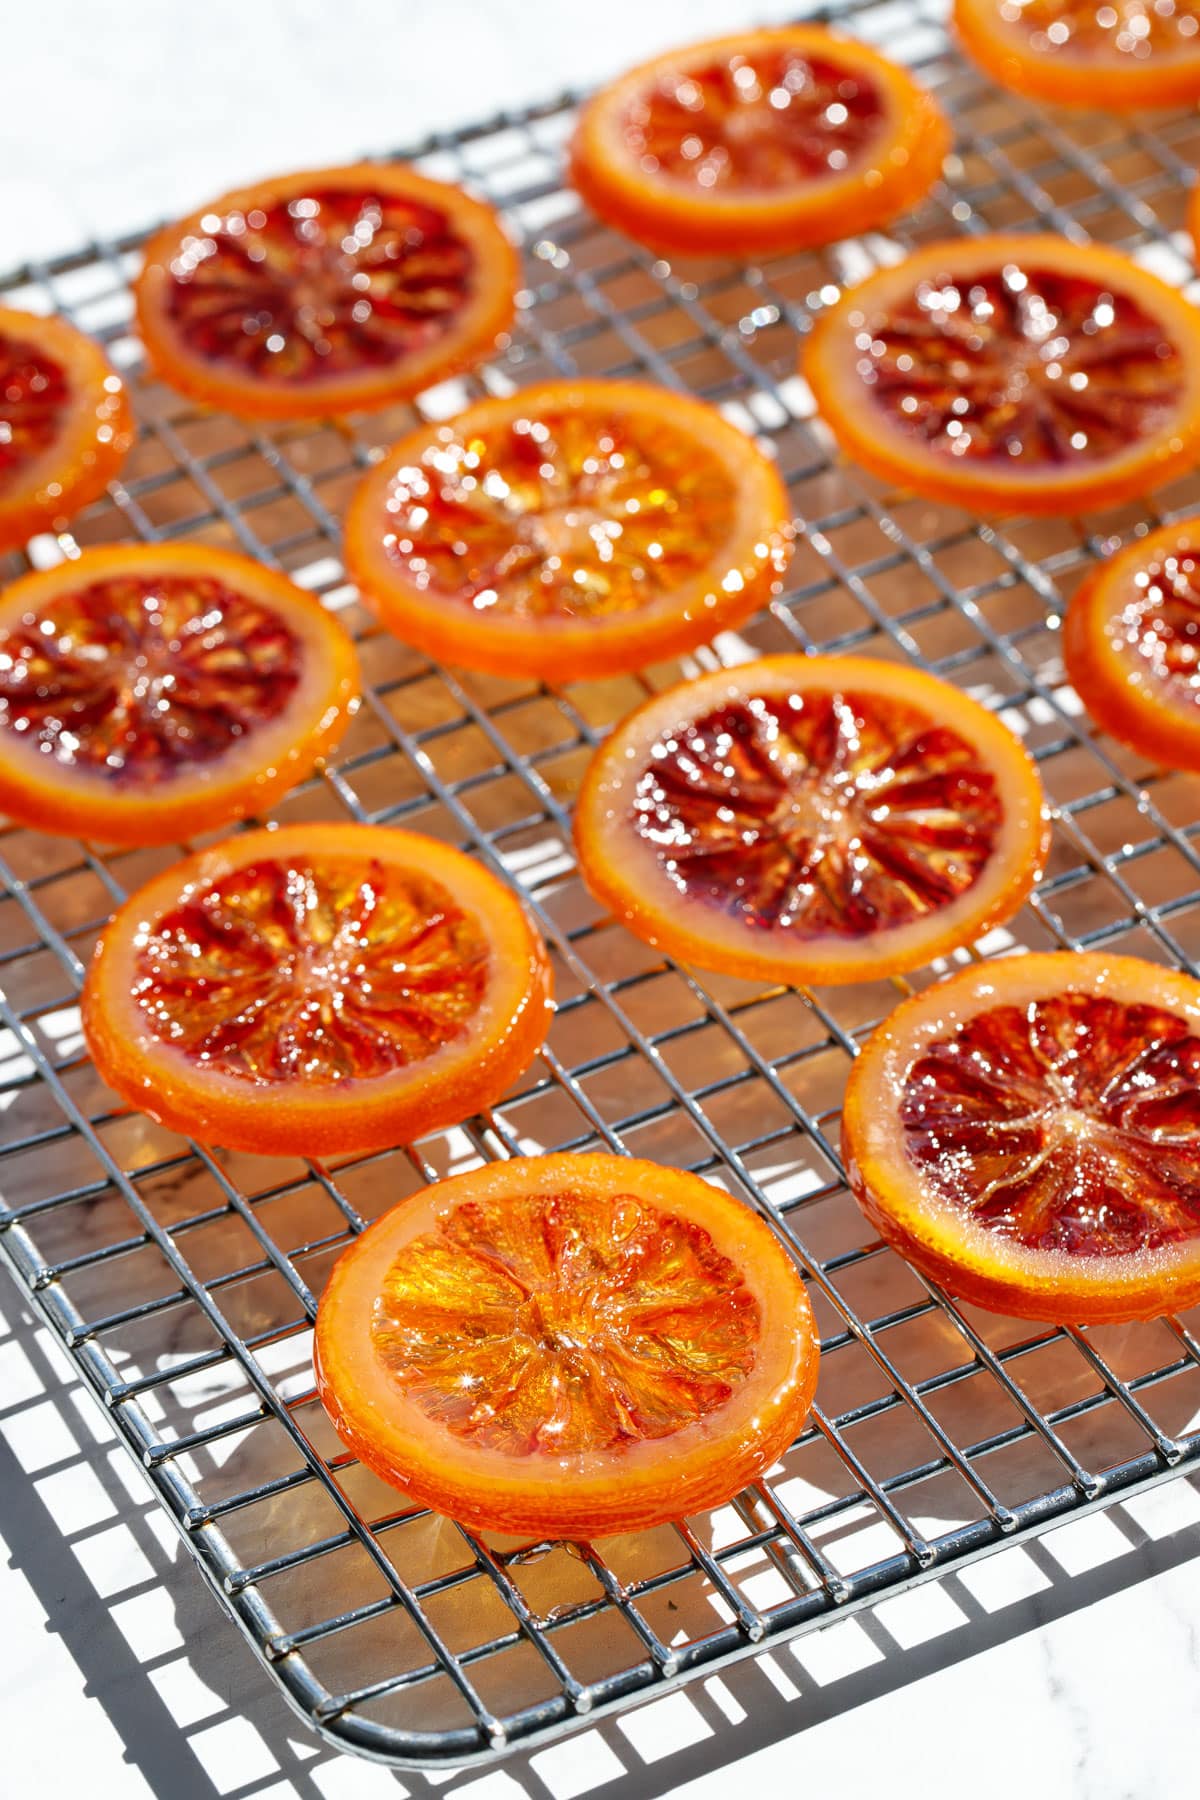
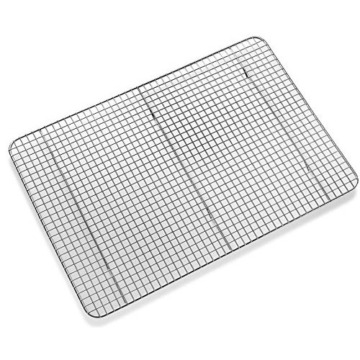
After removing from the syrup, transfer the slices to a wire rack or parchment paper and allow to dry for 24 to 72 hours at room temperature. They’ll still be on the sticky side, but letting them dry out fully definitely makes them more manageable.
If you want less-sticky slices in a shorter amount of time, you can dry them out in a 200°F degree oven for 1 to 2 hours. I sometimes bump it up to 250°F for the last 20 minutes or so, though keep an eye on them to make sure they don’t start to bubble or brown.
To reduce the stickiness even further, toss your finished slices in two or three coats of granulated sugar (coat in sugar, let sit for 15 minutes, then coat again. Repeat until the slices no longer soak in the sugar). It’s a different look for sure, but it gets rid of the stickiness almost entirely and makes the orange slices much more manageable. If you want to package a few slices together in a treat bag for gifts, then the sugar coating is really the only reliable way to ensure they don’t stick together.
Another finishing option is dipping the candied orange slices in chocolate. This makes for a truly gourmet presentation (and we all know chocolate and orange go together beautifully). I coated some of my slices in a tempered bittersweet chocolate (I found this beautifully fruity 66% dark chocolate from Republica del Cacao; it’s my new favorite dark chocolate for dipping and goes particularly well with the sweet orange flavor). White or milk chocolate would work too! Dip thoroughly-dried slices into tempered chocolate and then lay flat on parchment paper to set.

Storage Tips
Store your candied orange slices between layers of parchment paper; they’ll keep in a cool, dry place for a few weeks without issue, or refrigerate in an airtight container. I personally leave my slices uncovered or lightly covered, but I know that’s not always an option if you have pets or pests or sticky-fingered children… or just limited counter space. If you happen to have a food-safe desiccant pack, that will help prevent them from absorbing excess moisture if using an airtight container.
Candied orange slices can also be frozen (in an airtight bag or container between layers of parchment paper so they don’t stick) for up to 6 months.
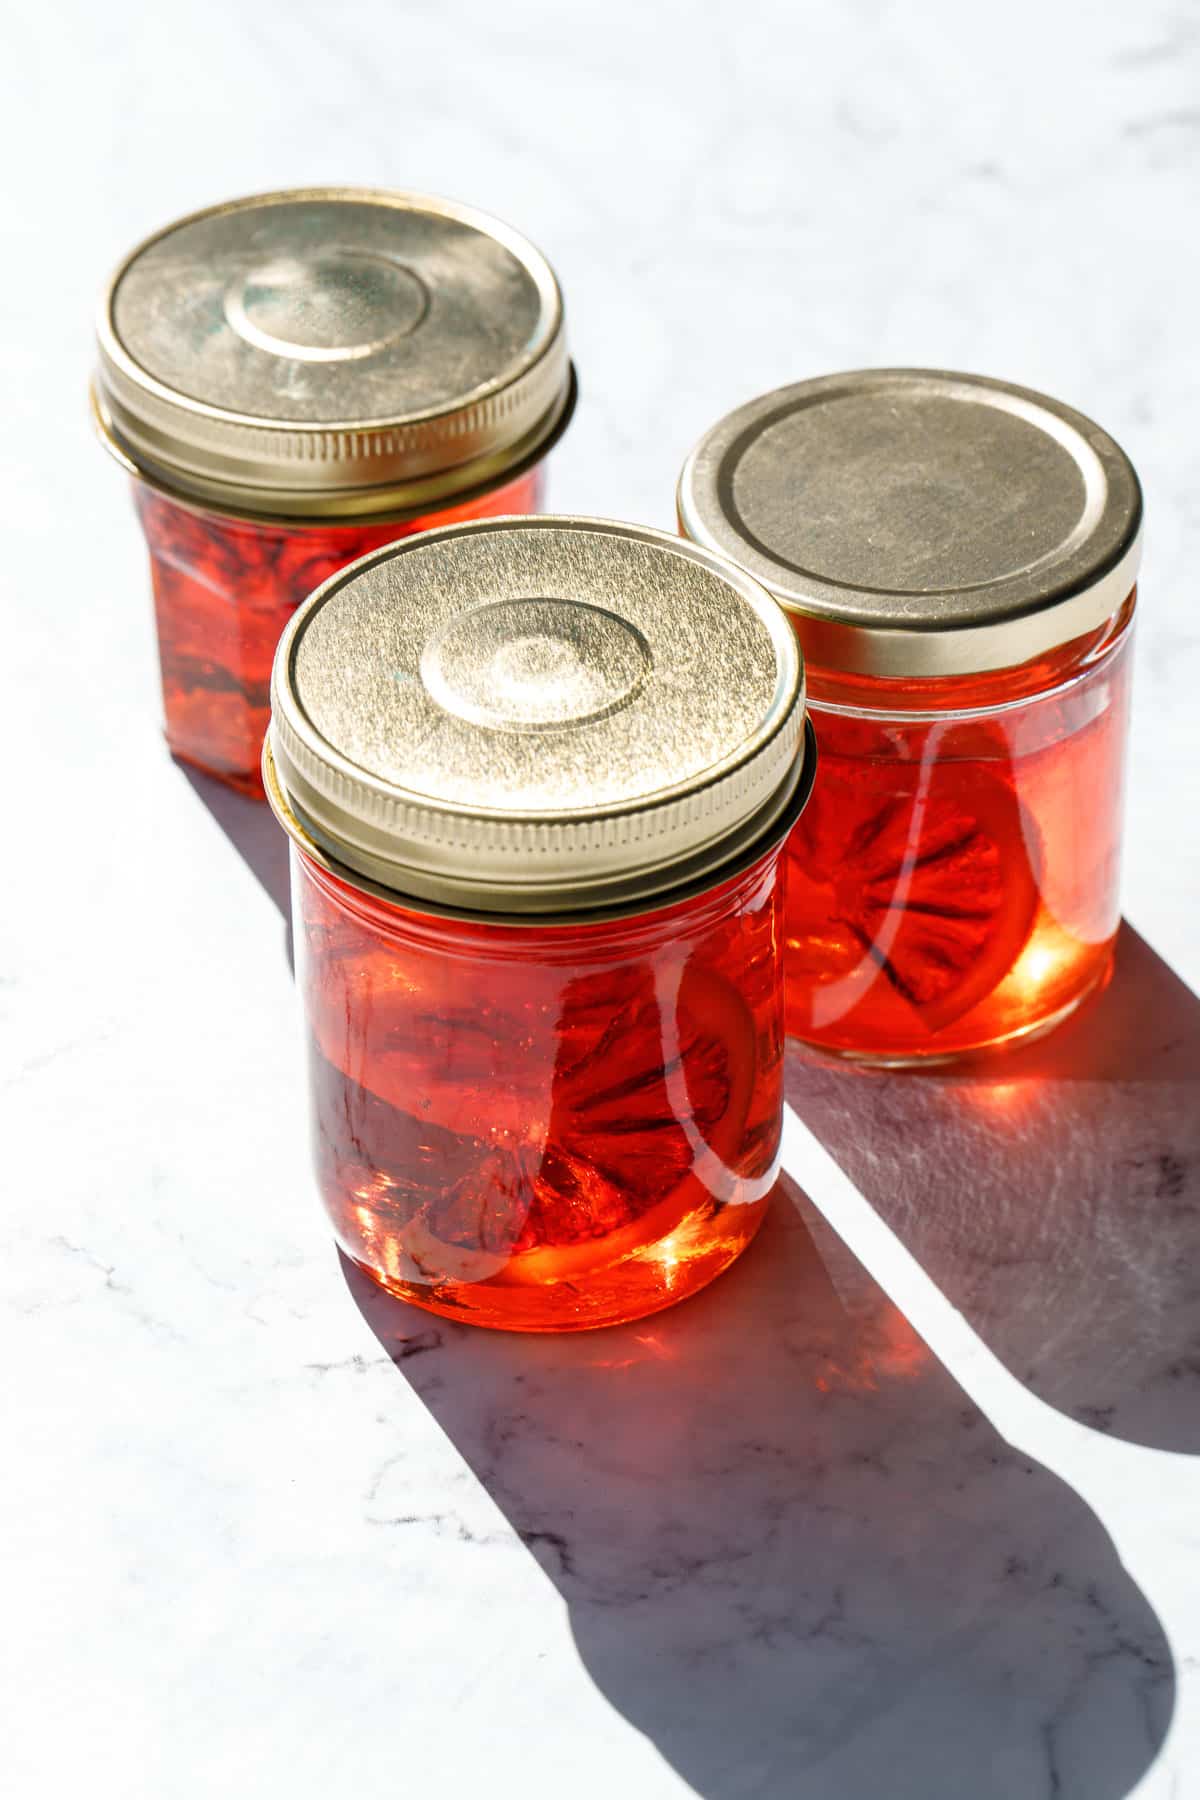
Finally, the candied orange slices can be stored in the syrup itself, and they actually get better the longer they sit. Partially fill a glass jar with warm leftover syrup (after having added the citric acid), then add your orange slices (whole or halved), not packing them too tightly so that there is some space for the syrup to move in between. Top off with more syrup as needed to ensure orange slices are completely covered. Store the jars in the refrigerator for up to a month.
Wait! Don’t toss that syrup!
The orange-infused sugar syrup that’s left after the candying process is quite lovely, with a bright, candy-like orange flavor that is too good to waste. In fact, I’d argue the leftover syrup is almost as good as the candied oranges themselves. Since you’ve spent all that time candying the orange slices, it’d be a shame to let it go to waste.
To preserve the syrup for later use, after removing the orange slices but while the syrup is still hot, add a bit of powdered citric acid mixed with 3-5 tablespoons of water (or more orange juice), then transfer to jars. Less water will make a thick, viscous syrup, while slightly more water will make for a more drizzle-able consistency.


Since we cooked the syrup to such a high temperature, the extra water is necessary to bring the syrup back to a usable consistency (like honey, instead of soft taffy). The citric acid will prevent the syrup from crystalizing and also brighten the orange flavor.
If you don’t have or don’t want to use citric acid, definitely use the corn syrup as specified in the recipe, as this helps prevent crystallization. If you have citric acid (which I highly recommend!) then you can skip the corn syrup if you want (I tested it both ways and they both work, though the corn syrup slices were a little softer and stickier.)
I like to add a slice or two of candied orange to each jar for a truly gorgeous presentation. The syrup will keep in the refrigerator for 2 to 3 weeks, or can be frozen for even longer.
Before I get asked… I have not tested this recipe for water-bath canning; I have a hunch it is safe to do so because it’s basically just pure sugar and is plenty acidic (I measured it around 3.0pH), however I don’t want to say definitively as I have not been able to verify this from trusted sources so. I’ll definitely update this post if that ever changes. (The same goes for canning candied orange slices in the syrup. While I *think* it would be ok, I can’t say for sure, and I always err on the side of caution when it comes to canning safety.)

What to do with the leftover orange syrup, you ask?
You can use this syrup in any recipe that calls for simple syrup or honey, and in some recipes calling for corn syrup (the exception being recipes where the corn syrup serves to inhibit or control crystallization, like marshmallows; I probably wouldn’t replace ALL of the corn syrup in that case, but maybe replacing 25% of the corn syrup would be fine [candied orange marshmallows sounds incredible, actually, and something I might just have to try!])
Taylor’s been using it in place of simple syrup in cocktail recipes like an Old Fashioned. Our Antioxidant cocktail recipe calls for tangerine syrup, but this candied orange syrup would be a great substitution; similarly, you can use it in place of the vanilla lemon syrup in our Sicilian gin spritz (which also calls for blood orange juice so I’d say it’s a perfect use for it!)
I like adding a spoonful or two to cream-based desserts like créme brûlée or a custard ice cream base, where it adds a lovely candy-like orange flavor without risk of curdling the cream as fresh orange juice.
Brush it in between cake layers or on top of loaf cakes to add moisture and increase longevity. Mixed with a little powdered sugar it’d make a lovely drizzle-able glaze!
I also think it’d be a great addition to a citrus salad dressing in place of honey or maple syrup, or as a glaze or marinade for grilled or roasted chicken or root vegetables. So it’s not just limited to sweets!
Can the sugar syrup be reused?
You’re probably wondering if the sugar syrup can be reused to cook multiple batches of candied oranges.
The answer is yes, it can, though with some limitations.
If you want to reuse the syrup for another batch of orange slices, don’t add the citric acid. Instead, after removing your first batch of orange slices, put the syrup back on the stove and add some additional sugar and water to bring the level back up to 1-inch deep (I did 1 cup water and 1/2 cup sugar). You may want to add a bit of corn syrup too if you haven’t already, just to cover your bases and make sure it doesn’t crystalize on you.
Then, add another batch of orange slices, and repeat the whole process, bringing the syrup back up to 240-245°F. It’ll probably go quicker for this second batch since the syrup was already warm.
I don’t recommend reusing the syrup more than twice though, as it absorbs much of the bitterness from the oranges as it cooks, and that will only increase the more batches you do.
The final oranges and syrup will likely be slightly darker in color the second time around as well.
Candied Blood Orange Slices
Ingredients
- 2 small blood oranges, or 1 large orange
- 2 cups / 400 g granulated sugar
- 2 cups / 480 g filtered water
- 1 tablespoon corn syrup*, optional (see notes)
For Leftover Syrup:
- 3 tablespoons / 45 g filtered water
- ¼ teaspoon powdered citric acid*
Instructions
- Lightly spray a wire cooling rack with cooking spray. Set on top of a piece of parchment paper to catch any drips.
- Wash and scrub oranges in hot water (you can even soak them in hot water for 10 to 15 minutes, then scrub with a brush) to remove any wax coatings.
- With your sharpest knife, cut off the bottom or blossom end of each orange. Use a dinner fork to mark out 1/4-inch increments, then slice into even, 1/4-inch slices. You can also use a mandoline if you have one and are comfortable using it. Poke out any seeds. Discard end pieces (or juice them for another use).
- In a medium heavyweight saucepan, combine sugar, water, and corn syrup (if using, see notes). You want about an inch of syrup, deep enough for the orange slices to fully submerge and for your thermometer to be able to get an accurate reading. The depth will reduce by about half by the end. You can increase the syrup quantities to 3 cups each of sugar and water to accommodate a larger pan if necessary (cooking time will increase slightly if you do).
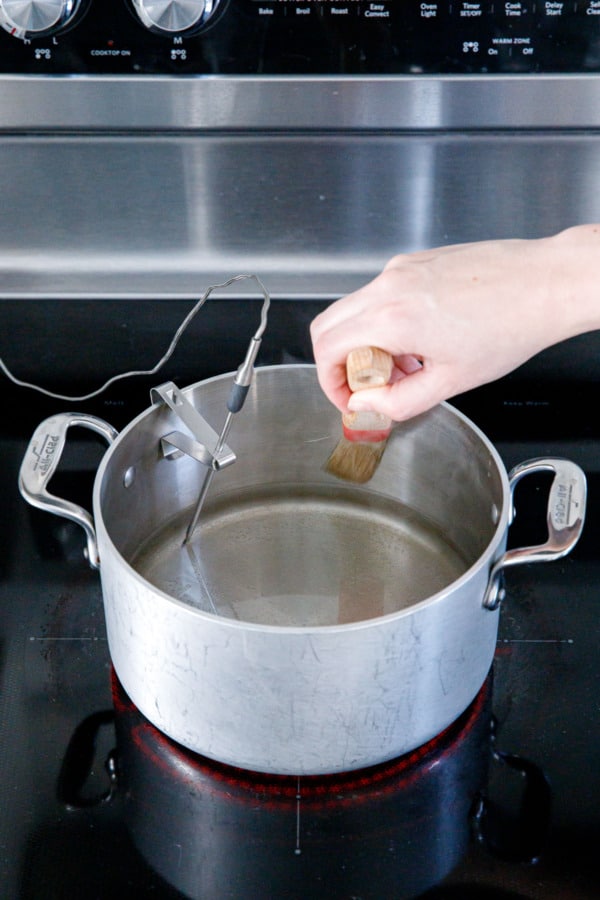
- Gently stir sugar mixture over medium-high heat until sugar is completely dissolved, then stop stirring. Use a pastry brush dipped in water to brush down the sides of the pan to remove any stray sugar crystals that may have splashed there.
- If you're using a probe thermometer that comes with a pot attachment, affix it to the side of your saucepan so the tip is fully submerged into the syrup but not touching the bottom.
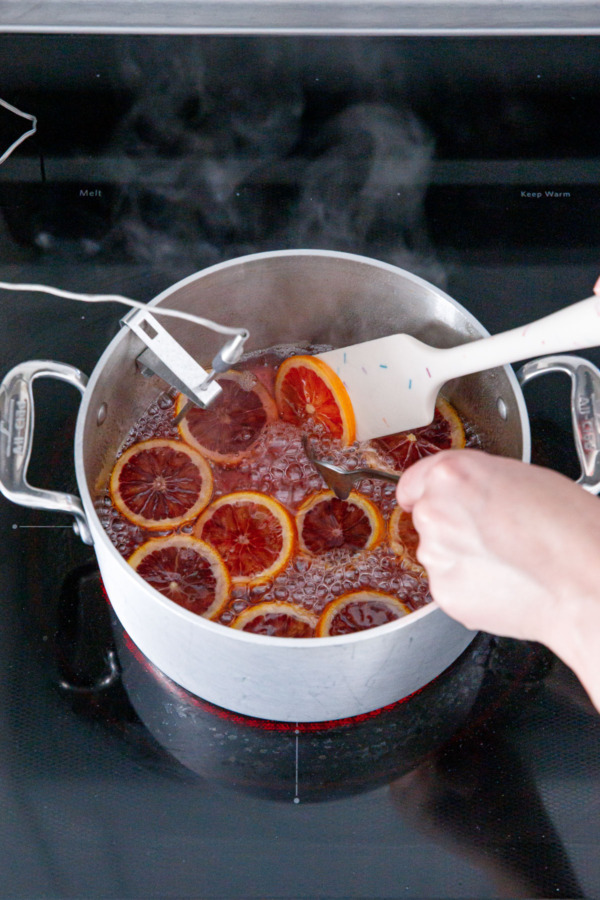
- Once the sugar mixture comes to a full boil, reduce heat to medium low. Gently lay orange slices into the syrup (use caution as the syrup is very hot). Try to arrange the slices into a single layer, a little overlapping is fine but you don't want slices piling on top of each other.
- Continue to cook without stirring, though you can use tongs or a fork to press the slices under the syrup and separate any that have gotten a bit too friendly with each other. Adjust the heat as necessary to keep the syrup at a gentle simmer as opposed to a vigorous boil. You'll also want to gently flip the slices every 10 to 15 minutes or so to ensure even cooking.
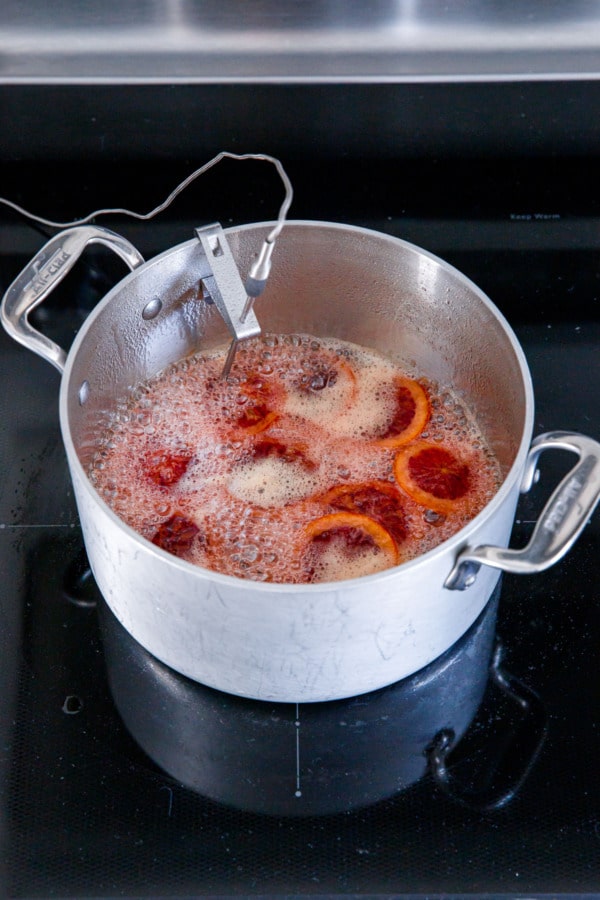
- Around 225°-230°F, the syrup will start to bubble and foam until you can't even see the oranges any more. The foam itself is fine, but you can skim off any orange scum that gathers around the edges of the pan with a spoon or spatula if you want.
- When the syrup reaches 240°F to 245°F (soft to firm ball stage), the slices should be tender and almost fully transparent. This will take about 50 to 60 minutes, slightly longer if you used a larger quantity of syrup or had more orange slices crowding the pan.
- Remove from heat, let it sit for a minute or so until the foam subsides and you can see the orange slices again.
- Use a fork to carefully lift the fragile slices and transfer to a lightly greased cooling rack. You can also cool directly on parchment paper (NOT waxed paper) or a silicone baking mat if you prefer (but the excess syrup will pool up more instead of draining off).
- Mix together 3 tablespoons water and 1/4 teaspoon citric acid until dissolved, then whisk into syrup while it is still hot. This will prevent crystallization as well as thin the syrup to a more manageable consistency instead of setting up into a thick, taffy-like mass. Transfer the hot syrup to heat-proof jars with lids; let cool to room temperature then refrigerate for up to 3 weeks or freeze for longer storage.
- Let the orange slices air dry at cool room temperature overnight and up to 48 hours. If you want to dry them out more quickly, bake at 200°F for 45 to 60 minutes, then increase heat to 250°F and bake for 15 to 20 minutes more, keeping a close eye on them to be sure they don't start to brown or bubble. Remove from oven and let cool completely.
- Store orange slices between layers of parchment paper loosely covered at room temperature. If you put them in an airtight container, they will absorb moisture and get stickier. You can also toss the sticky slices with a few coats of granulated sugar to make them less sticky as well.
- Candied orange slices will keep at room temperature for 2 weeks, refrigerated for up to a month, or frozen for up to 3 months.
Notes
- *The citric acid is added at the end to brighten and preserve the leftover syrup and prevent it from crystalizing as it cools. If you don’t have or don’t want to use citric acid, definitely use the corn syrup, which also helps prevent crystallization. If you have citric acid, on the other hand, you can skip the corn syrup if you want (I tested it both ways and either works!)


Oh my goodness! I was looking for a recipe for candied orange slices to top an orange cake I make often and came across your page. I haven’t attempted this yet, but I’m just so absolutely impressed by how thorough your directions are and how gorgeous your photos! My search for a recipe is over. Can’t wait to bake and decorate! Thank you so much for your work!
I made this with 4 organic blood oranges – about 17 slices – so I used 6 cups of water plus 6 cups of sugar and did it in a much larger pot – 10 inch diameter by 5 inch deep – I think the bigger version of your smaller AllClad. I was very slow on the heat so it took three hours – I didn’t want to risk it as it was my first experience to do such a non-marmalade thing. The slices came out gorgeous – like yours did – and I got about 30oz of outrageously delicious blood orange syrup. They seem to be rather sticky so I’ll probably toss them in a bit of turbinado sugar to make them easier to handle.. I can hardly wait until my DryJan is over so I can make an old-fashioned and throw one of these in! Thank you so much for the very detailed (both text and photos) recipe!
Next time try using two smaller pans, it’ll go a lot quicker! The more sugar syrup you have in a single pan the longer it is going to take go come up to temperature. Bravo on your patience and glad you enjoyed them!
Exquisite ♥️