
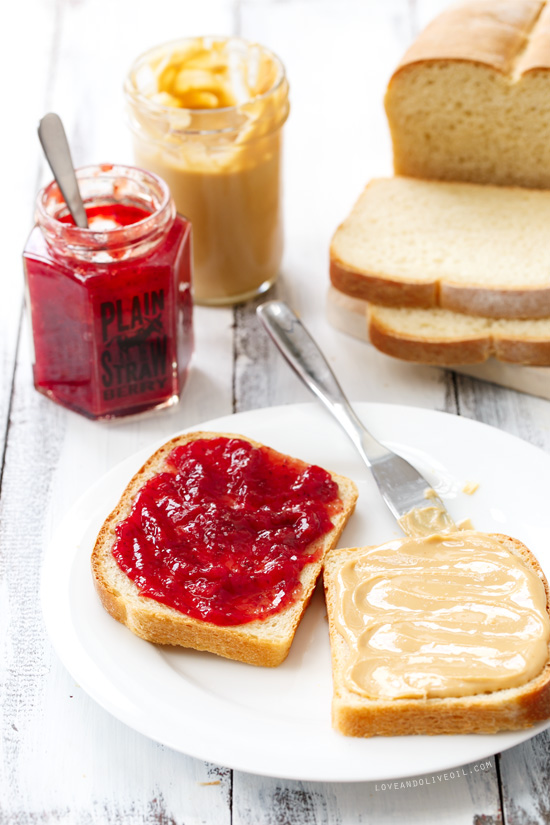
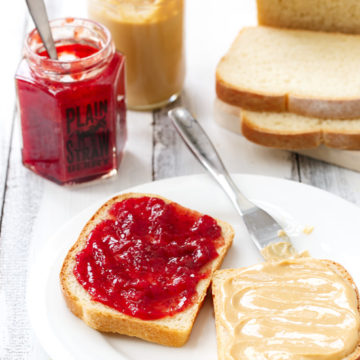
You might think it ridiculous that I’m posting a peanut butter and jelly sandwich here. I mean, really, who doesn’t know how to make a PB&J?
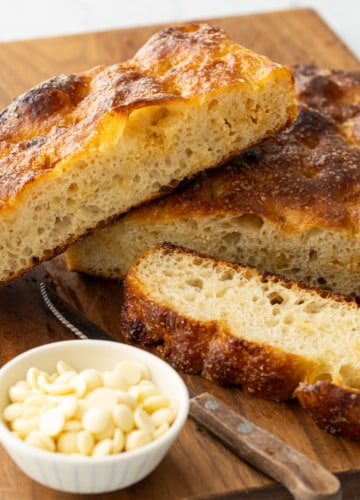
But this version just so happens to be made entirely from scratch. I’m talking homemade white sandwich bread, freshly ground peanut butter, and homemade strawberry jam (plain-ass strawberry jam, if you were curious).
Sure, we’ve taken a 3-minute snack and turned it into a 3-hour one, but it’s kind of cool to see the whole process from start to finish, without buying anything pre-made in a jar or bag. Pretty much the only thing we didn’t do was grind our own flour (that’s just taking it too far, in my opinion).
The whole thing was Taylor’s idea, really. Since I was taking care of the jam and the peanut butter (which we had previously made in our Vitamix for some pretty awesome pie), I told him the bread was entirely his responsibility.
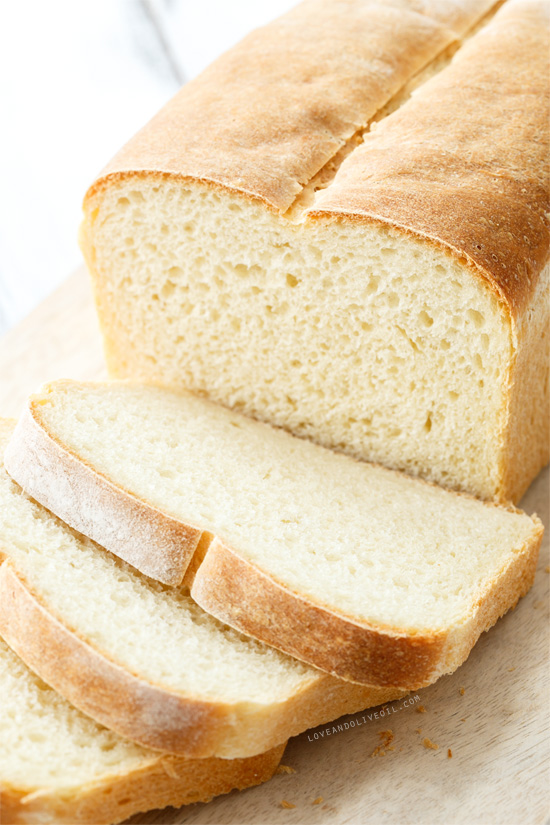
After scouring the internet for the ‘perfect’ recipe, comparing recipes for wheat and white and pullman and potato (and various iterations of each), I think the final result is pretty darn perfect. Slightly crustier than wonder bread, but with a soft and tender center and beautiful even crumb, there’s no denying it’s a beautiful loaf. He thought so too, apparently, not-so-modestly declaring himself “a bread man” after pulling the second near-perfect loaf out of the oven.
Nowadays where everything can be bought so easily and cheaply, we often forget that it’s not only possible, but downright delicious to make everyday staples from scratch. From bread to peanut butter, almond milk to spicy mustard, the value of homemade isn’t in saving time or money (actually it’s rarely either), but rather in knowing exactly what went into that loaf of bread. Flour, yeast, salt, milk. No stabilizers or unpronounceable mystery chemicals. In this case a little bit of effort goes a long way in the end.
After enjoying a sandwich made completely from scratch, you may just say it’s the best thing since sliced homemade bread.
Ultimate Scratch-Made Peanut Butter and Jelly Sandwiches
Ingredients:
For Bread:
- 1 teaspoon active-dry yeast
- 1/2 cup luke warm water
- 1 tablespoon unsalted butter, melted
- 1/2 cup milk
- 1 tablespoon granulated sugar
- 1 1/2 teaspoons salt
- 2 1/2 to 3 cups all-purpose flour
- oil, for coating
For Filling:
- 2 cups (10 ounces) roasted, unsalted peanuts
- 1/4 teaspoon fine sea salt
- 1 jar homemade strawberry jam
Directions:
For Bread:
- Place water into a large mixing bowl or the bowl of a stand mixer. Sprinkle the yeast over top. Let stand for 5 minutes or until frothy.
- Add 1/2 cup of flour along with melted butter, milk, sugar, and salt and stir until it comes together into a loose dough (a few lumps are ok).
- Continue stirring in another 2 or so cups of flour until the dough comes together in a shaggy ball. Reserve remaining flour.
- Using the dough hook attachment, knead the dough on medium-low speed for 8-10 minutes. You can also knead the dough by hand on a lightly-floured surface. If the dough still sticks to the sides of the bowl or the counter, add flour, a tablespoon at a time, until it is no longer sticky. The final dough should feel slightly tacky and will spring back when poked.
- Lightly coat a clean bowl (it’s ok to scrape out the bowl you just used) with oil. Gather the dough into a ball and turn it in the bowl to coat with oil. Cover and let rise in a warm spot until doubled in size, about one hour.
- Turn the dough out onto a lightly floured surface and roll into a loose ball. Let rest for 10 minutes.
- Grease one standard-size loaf pan with oil or cooking spray. Gently shape the dough into an oblong oval and transfer to the loaf pan. It’s important that the surface be stretched taut; this helps the loaf expand and prevents an overly-dense interior. Let rise a second time until it starts to dome over the edge of the pan, about 30 minutes.
- Meanwhile, preheat the oven to 425 degrees F.
- Slash the top of the loaf with a serrated knife and place in the oven. Immediately turn down the heat to 375 degrees F and bake for 30 to 35 minutes, or until dark golden-brown and hallow-sounding when tapped on the bottom. Remove from pans and let cool completely before slicing.
- Bread will keep at room temperature for several days, or wrapped in foil and plastic and frozen for up to three months.
For Filling:
- Place peanuts and sea salt in the canister of a high-powered blender or food processor and secure lid. Gradually turn to high speed and continue to mix until the peanut butter begins to flow freely, scraping down the peanut mixture as you go (or using the tamper that came with your blender) to ensure even mixing. If desired, you can add a teaspoon or two of peanut oil to thin out the final butter to a consistency more like that of store-bought.
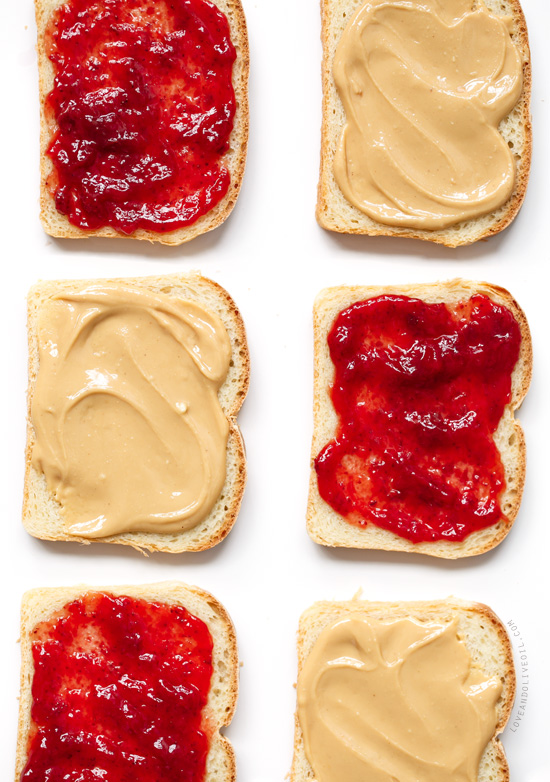
- To assemble sandwiches, slice bread into 1/2-inch-thick pieces. Lightly toast (if desired). Spread one side with a thick layer of peanut butter, and the other side with a layer of jam. Press sides together, and cut in half to serve.
Sandwich bread recipe from The Kitchn.
All images and text ©Lindsay Landis / Love & Olive OilDid you make this recipe?
Let us know what you think!
Leave a Comment below or share a photo and tag me on Instagram with the hashtag #loveandoliveoil.


I so love that you did this project! All of your ingredients look amazing too. Is it possible for you to update the post with more pictures? Maybe some of the sandwiches assembled and cut in half? I don’t know that I will ever endeavor to make everything from scratch so I’m hoping to settle for marveling at beautiful pictures instead (not many people are pulling this project off and taking pictures of it out there lol).
I’m assuming you can make this in a breadmachine on the ‘Dough’ cycle, then shape, rise, and bake in the oven??
I’ve never baked with a bread machine, so I can’t say whether this would work or not. Sorry!
My mom, the perpetual gift giver, called me the other week and told me she had a Christmas present for my husband and I and did I want to wait until Christmas or get it early? I opted for Christmas, but just a couple of days later, there she was, welcoming us into her home for dinner and pushing a bread maker into my hands. Merry Christmas to me…2 months early. I’m not complaining. Homemade bread is delicious and I can’t wait to make my first loaf!
I love that every aspect is homemade! There is nothing better than homemade bread, or PB, or jelly….and all rolled into one? I would honestly take this over a 5-course dinner, happily, on my couch with a blanket :) Perfect comfort food!
Absolutely love that you made PB+J entirely from scratch. Props to you and Taylor!!
Oh Lindsay! We already make jam a few times of year, bread every week and now, apparently I have to make peanut butter too?! This looks insanely delicious!!! :)
I love a good pb&j sandwich – I love this whole post!
My toddler is in a major PB&J rut lately – this would definitely kick things up a notch. Beautiful photos!
I am so in love with this post. It’s so simple, yet so perfect! Class PB&J kicked up a notch :) I’ll definitely be doing this instead of store bought PB&J’s for my kids in the future :)
Completely agree with you, Lindsay. I’ve always tried to make things from scratch just so I know what’s inside. :) Your loaf looks soooo fluffy and I love PB+J sandwiches.
Wow! That IS a perfect loaf of bread!! And love this post, it has been way too long since I made homemade sandwich bread. I often forget about it too!
Awesome. I love the idea of seeing the whole process through: makes it something really special.
ummm YUM! This looks absolutely delicious. I looooove PB&J. I made one completely from scratch once and it was the BEST EVER! Must do it again.
These pictures are amazing! I love how you captured the simplicity of the sandwich. And it reminded me that I need to get on making homemade sandwich bread asap!
WoW! Didn’t think I’d ever be EXCITED enough about PB&J to actually post a comment on one…I eat them, and love them…but face it, they ARE pedestrian. But you guys have done it! Doing this when I have one spare moment. Was drawn here in search of bread, my final baking frontier.
This just kicked up PB&J to a whole new level. I’m dying to make this!
Oh my gosh, this loaf of bread looks só good! Soft, fluffy and full of carbs :D This recipe is a “P&J sandwich +” I love to toast my P&J sandwiches too so the jelly becomes warm and tastes extra sweet. So wrong. So right. ;)
We call jelly jam in the UK…jelly here means something completely different!!