
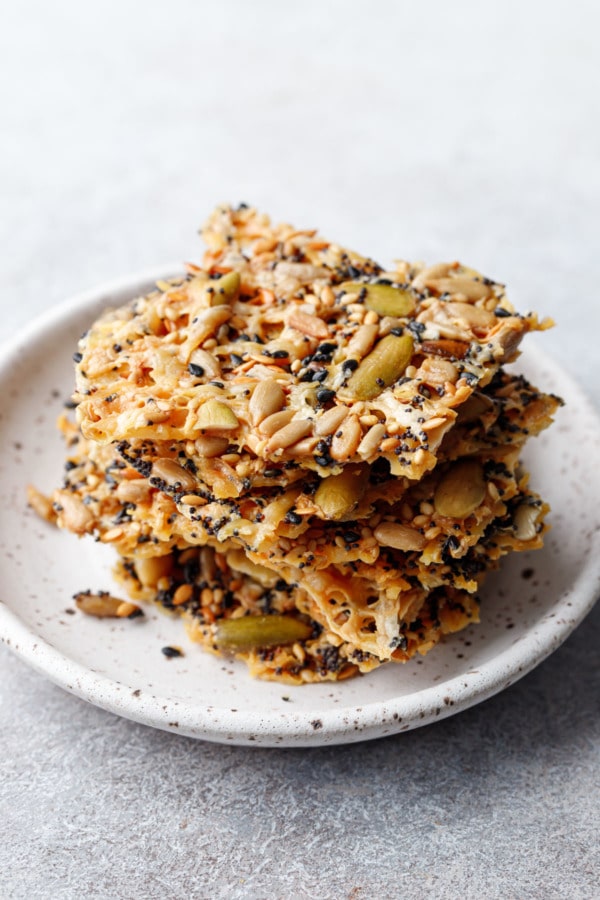
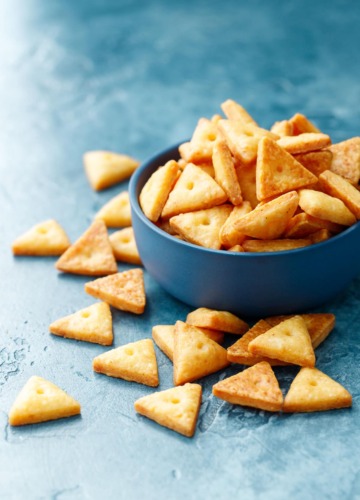
These seeds & cheese crackers are made from two kinds of cheese and five different kinds of seeds, baked to light and crispy perfection. They’d make a unique and delicious addition to any cheese board!
If you love the lacy bits of crispy cheese that form on the edges of a grilled cheese sandwich, these (naturally gluten free) crackers are for you! The addition of five different kinds of seeds makes for a unique textural experience that is deeply satisfying.
Save this recipe for later!
I was finally able to get out to California to visit my family last month, which was a lovely treat after so many months (er, years?) of not being able to travel.
Granted, I spent most of my time there loafing on my sister’s extremely comfy couch binge watching all the trashy TV that Taylor doesn’t like, which is pretty close to what I’d be doing at home. But being able to do so with my sister? Priceless.
One day we had a lovely lunch with my aunt and uncle who I hadn’t seen since… well it’s been so long I can’t even remember now.
Along with a lovely assortment of prepared salads, she set out a spectacular snack plate with a few different kinds of crackers and cheeses. One of those crackers happened to be a cracker made out of cheese, and after one bite I was hooked. I literally could not stop eating them.
After politely inquiring as to the origins of said crackers (my brain already running through recreation possibilities), my aunt revealed they were called Seeds & Cheese Crackle from Market Hall in Oakland (if you’ve never been, it’s magical; like Disneyland for food lovers).
The ingredients list was short and simple, just seeds and (you guessed it) cheese, and I was certain I’d be able to recreate them at home.
It took me a few tries to get the proportions and process right, my first batch ended up tasting ever so slightly burnt, and the second batch had a too-thick layer of cheese so the texture wasn’t quite as delicate.
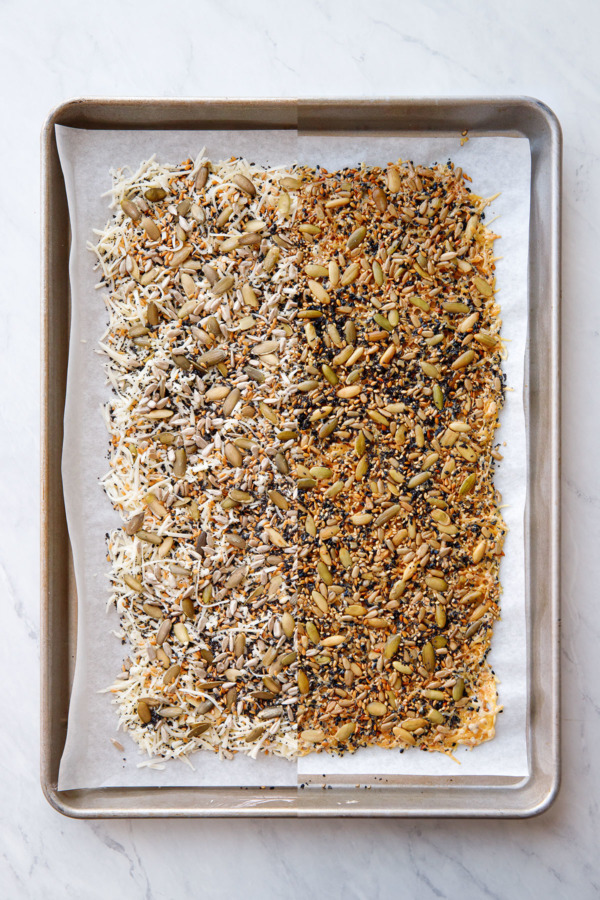
But the final result, once I nailed down the specifics, is ridiculously easy and oh-so-satisfying. You don’t need a mixer to make these easy homemade cheese crackers, heck, you don’t even need a mixing bowl. Just a baking sheet, a piece of parchment paper (a silicone baking mat works too), and a cheese grater (freshly shredded cheese melts much more smoothly and evenly than the bagged shredded stuff). I found a finer shred worked best here.
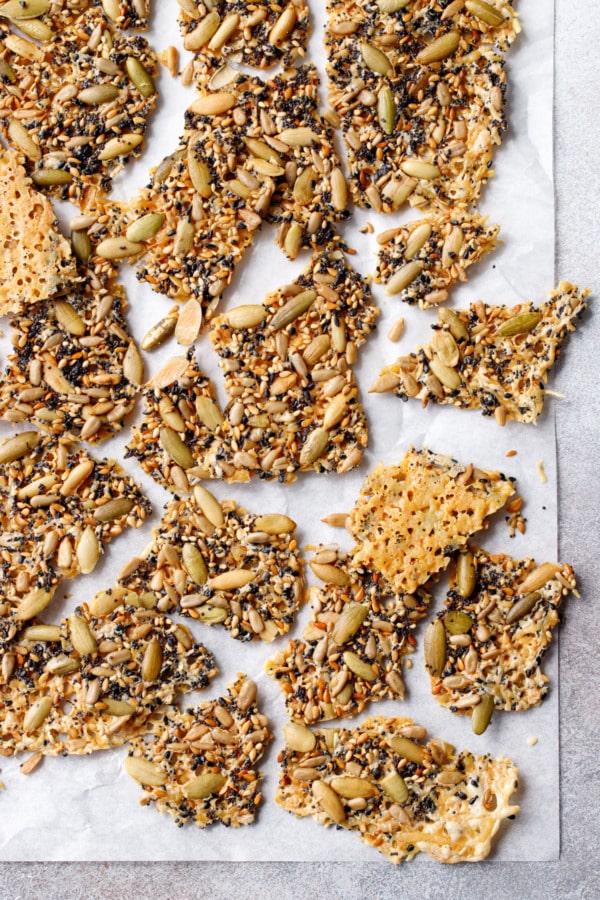
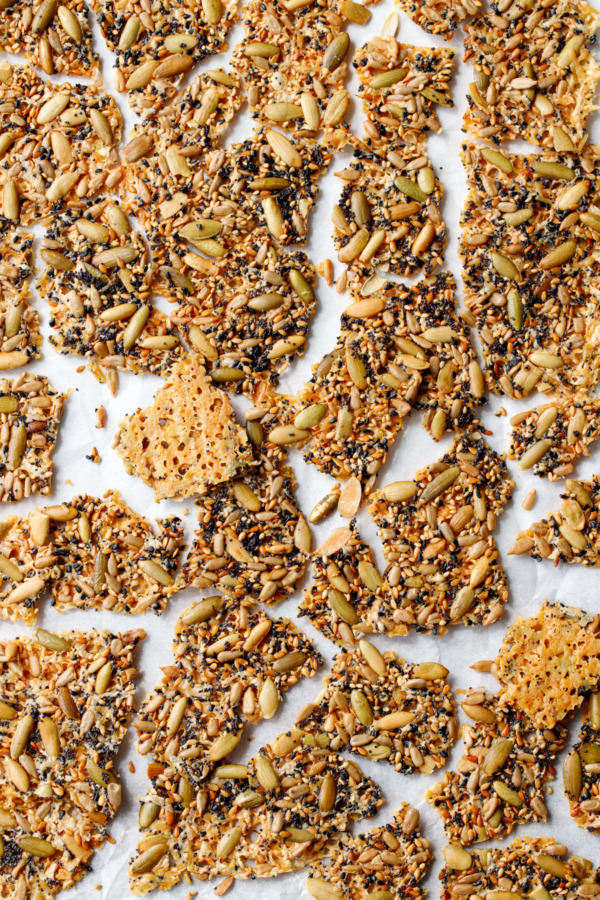
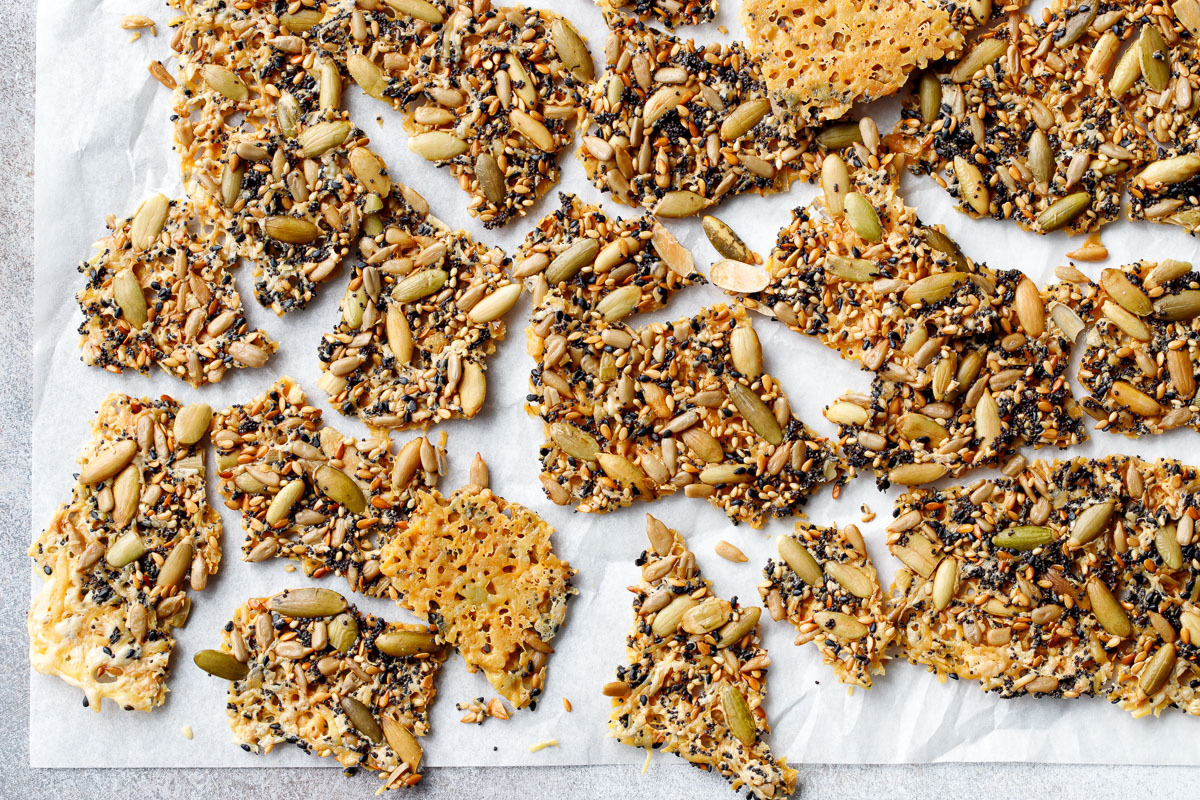
Much like my sourdough crackers, I don’t deal with shaping individual crackers, rather baking one big piece and then, once throughly cooled, breaking them up into bite-sized pieces at that point. The rustic shapes are, in my opinion, far more visually appealing (not to mention much less work) than trying to create individual shaped crackers.
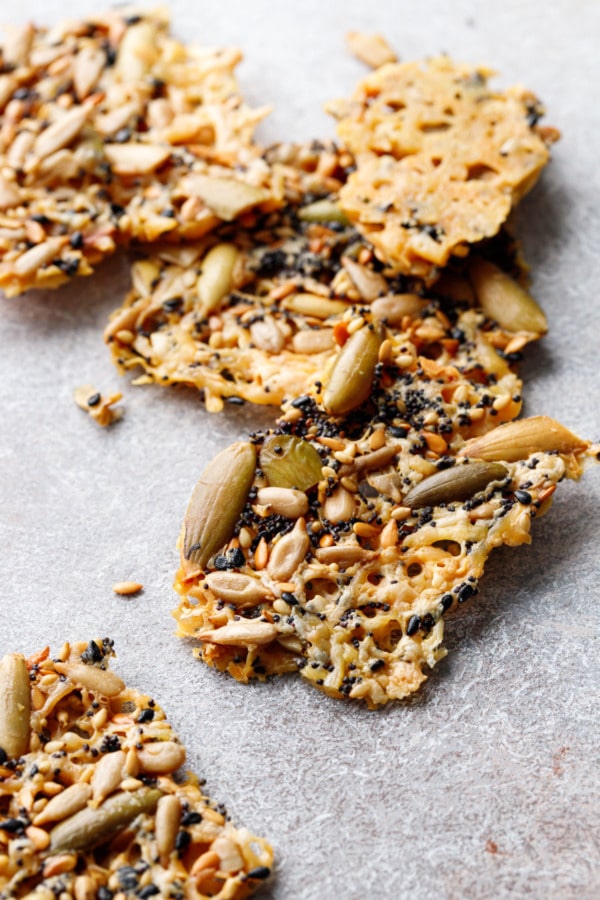
There are cheese crackers, and then there are cheese crackers: crackers made entirely from cheese. They get their crunch from baked cheese rather than a wheat-based dough. You know those lacy, crispy bits of cheese that you get when your grilled cheese overflows? Same general principle, except it’s an entire pan of crispy cheese rather than just a single shred.
True to the original, I used a mix asagio and fontina cheeses, but feel free to mix it up and use your favorite cheeses. As long as the cheeses have a similar meltability (so probably not super-aged parmesan or extra soft brie, for instance, but anything in the middle there should work just fine). I think cheddar or gruyere, for example, would work well in place of or in addition to the fontina.
The seeds part is also a rather flexible mix. I used pumpkin seeds, sunflower seeds, flax seeds, sesame seeds (both black and white), and poppy seeds. I’m not really sure what other kind of seeds there are out there, but if you happen to have something else stashed in the back of your pantry, I say go for it.

But are they cheese crackers or are they cheese crisps? The original version was actually called a cheese crackle, but I think of a crackle as more of a sweet toffee confection. While hearing cheese crackers immediately brings to mind the ubiquitous store-brand, bright orange squares of cheesy goodness, I still opted to call them crackers, despite the fact there is no actual flour or dough involved.
Whether you call them crackers, crisps or crackle, there’s no denying they are seriously good.
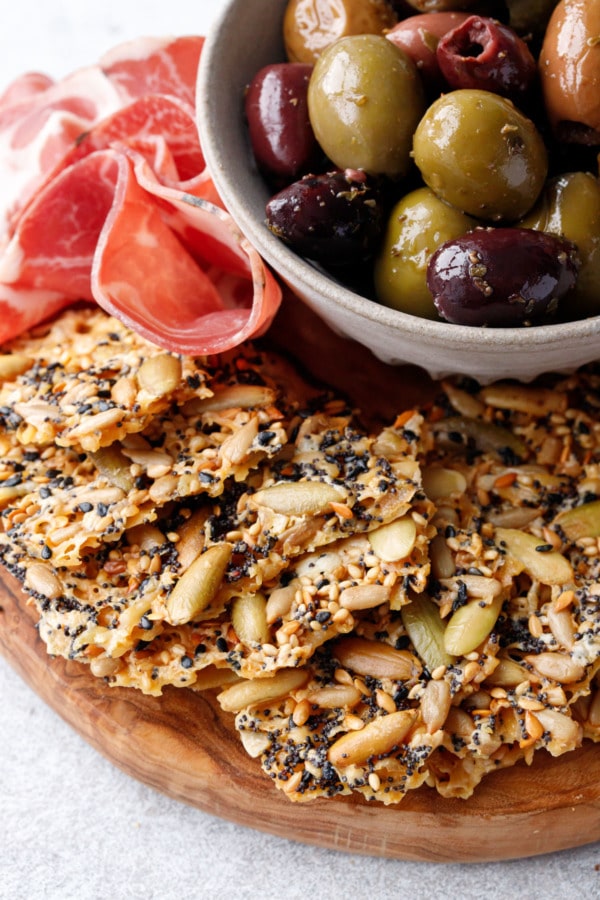
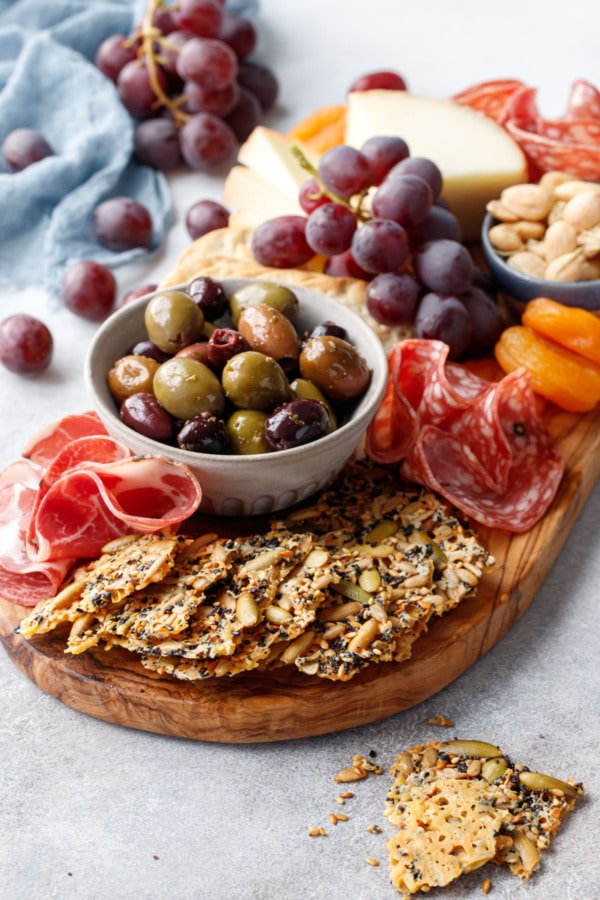
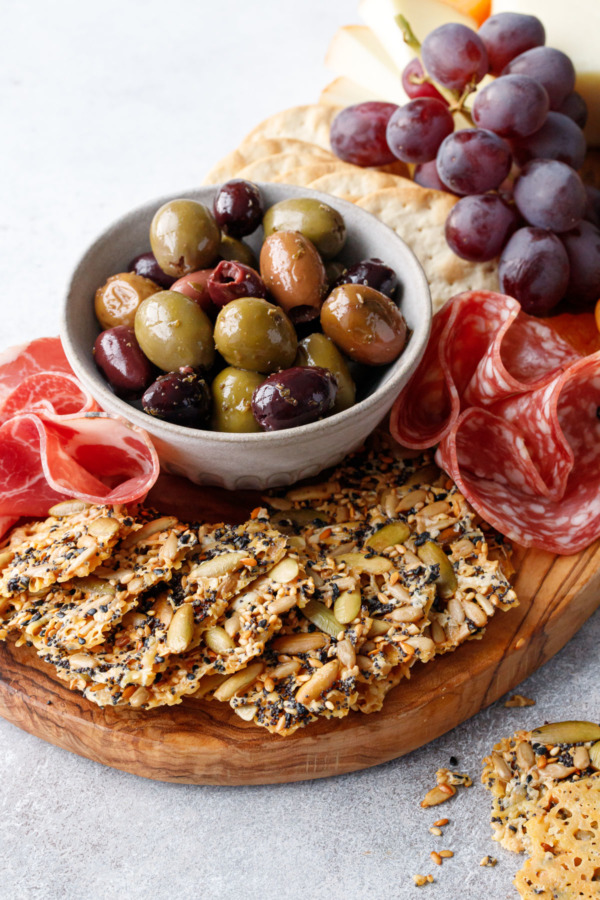
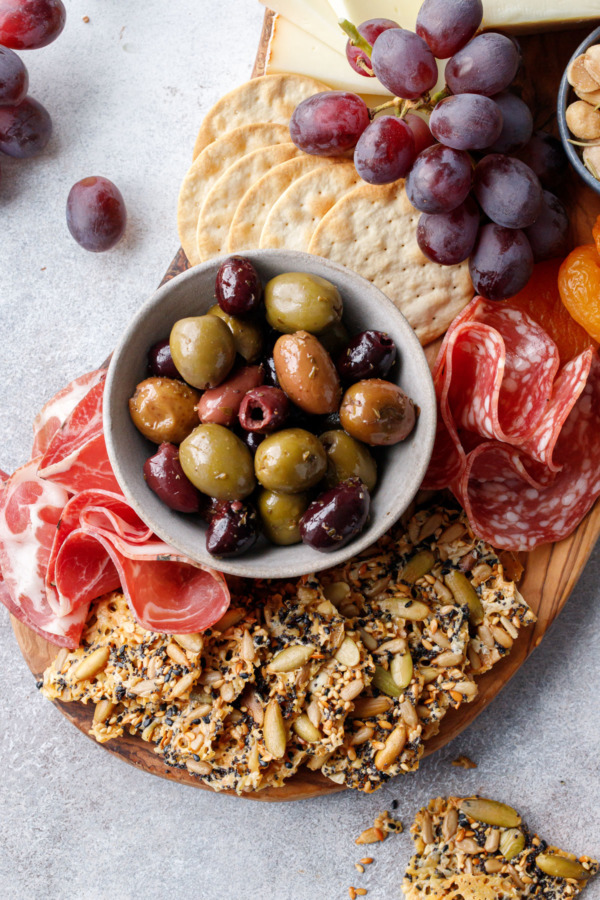
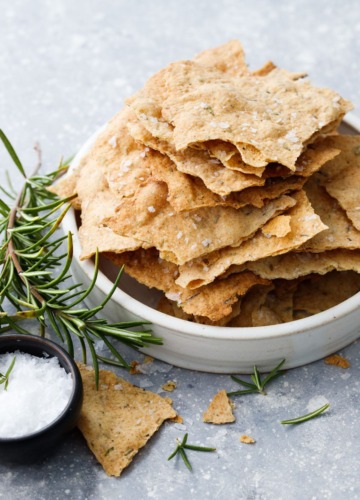
These seedy cheese crisps are the perfect addition to any cheeseboard. I mean, they’re actually sort of a cheese board in and of themselves, with the cracker AND the cheese baked in one.
They’re lovely served with a bit of cured meat, dried or fresh fruits, roasted nuts, and even some homemade jam or pepper jelly.
I baked these at a slightly lower-than-expected 325 degrees F, as I found that at 350, the fine line between done and burnt left no room for error. At a slightly lower temperature there is a bit more wiggle room in the range to account for differences in ovens, baking pans and so forth.
Basically, you want to cook the crackers until the cheese is lightly browned and crispy, but not burnt. I’d describe the color you are looking for as butterscotch. Undercooked crackers will be lightly colored and limp rather than crispy. Overdone, and, well, not that burnt cheese is the worst thing in the world, but it’s still something you should probably try to avoid. The first batch I made was overcooked on the edges and it wasn’t as enjoyable to eat.
For me, the sweet spot was about 38 minutes at 325 degrees F. If your baking pans are darker in color, you should probably check them around 30-32 minutes instead.
I’d also recommend rotating the pan in the oven once or twice during the baking process, to account for any unevenness in your oven’s heat (which, like it or not, most ovens are not perfectly consistent and will have hot spots).
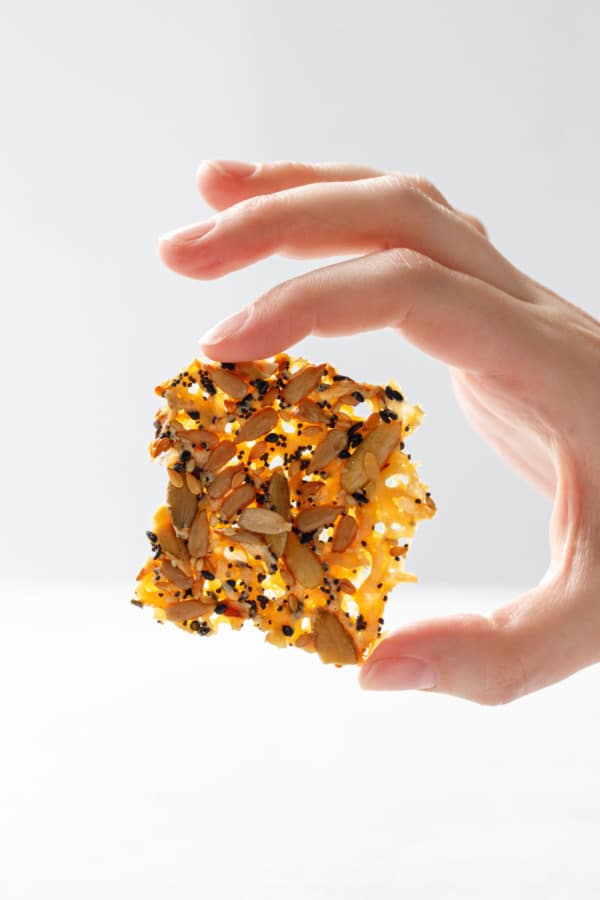
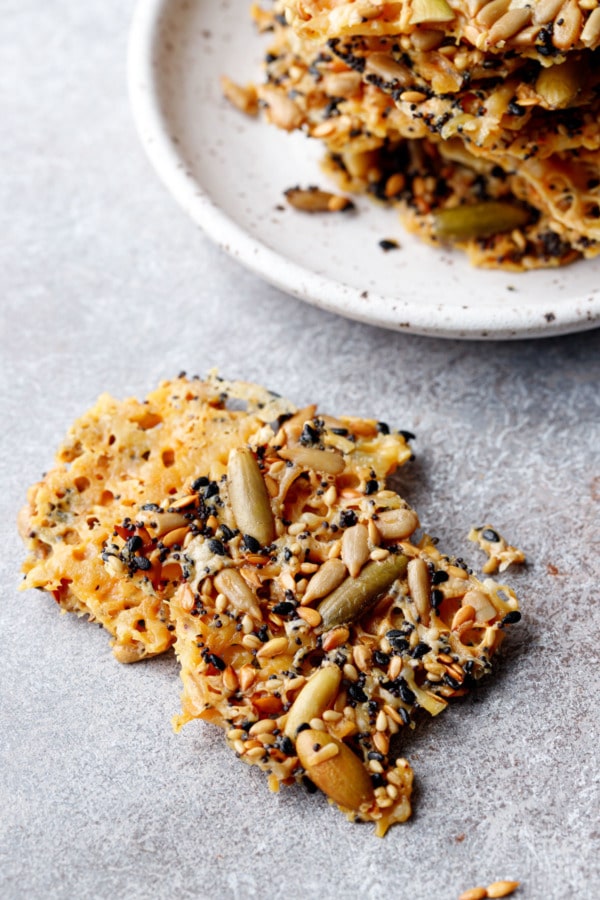
The lacy texture is really quite stunning, don’t you think?
These seedy cheese crackers are easy to make ahead of time, and keep well at cool room temperature for at least a week.
In fact, I found that they were actually better the next day, something about an overnight rest mellows the sharpness of the cheese and improves the texture, making for a melt-in-your-mouth crispness that’s more delicate than the day before.
Seeds and Cheese Crackers
Ingredients
- 4 oz / 113 g finely shredded fontina cheese , about 1 packed cup or 1½ cups loosely packed
- 4 oz / 114 g finely shredded asiago cheese, about 1 packed cup or 1½ cups loosely packed
- ¼ cup / 50 g raw or roasted/unsalted pepitas
- 2 tablespoons / 25 g raw or roasted unsalted sunflower seed kernels, no shells
- 1 tablespoon / 9 g poppy seeds
- 1 tablespoon / 12 g flax seeds
- 1 tablespoons / 10 g white sesame seeds
- ½ tablespoon / 5 g black sesame seeds, you can also use all white
- flake sea salt
Instructions
- Preheat oven to 325 degrees F. Line a baking sheet with parchment paper or a silicone baking mat.
- Sprinkle shredded cheeses evenly over the entire sheet pan. Top with seeds, distributing them evenly over the entire pan. Sprinkle with sea salt.
- Bake for 35 to 40 minutes, rotating the pan once part way through. The cheese will have melted and darkened to a light golden brown, the color of butterscotch candy. Take care not to let it bake too long or the cheese may taste burnt.
- Remove from oven and let cool completely before breaking up into bite-size pieces.
- Store crackers in an airtight container at room temperature or in the refrigerator for up to 7 days.


Holy Slam Dunk! I lived next to Market Hall for a decade and am obsessed with their crackers. I live so far now and miss them so much. On a whim I thought “someone has figured this out” and it’s you. You have made my life in cold Montréal so so so much better. Thank you.
Ha! I’m so glad I could be of assistance! I don’t live in Oakland, was just visiting, so I knew I had to recreate these once I got home immediately.
Delicious. I love these as much as the ones at Market Hall . Thank you!
Outstanding! And SO easy! Thank you for a perfect recipe!
Hi- I made these crackers tonight and the entire batch stuck to the parchment paper. I don’t know what I did wrong. I couldn’t even peel a tiny piece off but did get to try a few crumbs and it was delicious! I really want to try again but would like to know what I did wrong so I can avoid another mishap. Thank you so much.
I’m so excited to find this recipe. These are my favorite! What measurement of flax seeds do you use? I don’t see that in the recipe.
Thank you!
Flax should be 1T or 12g!
I made a batch and it turned out great. Just made another batch and it all stuck to the parchment. I’m so bummed! Trying again and am going to grease the parchment. Hopefully it won’t stick.
Different brands of parchment, different kinds of cheese could make a difference. A silicone mat works really well for this recipe too!
I’m so excited to find this recipe. These are my favorite! What measurement of flax seeds do you use? I don’t see that in the recipe.
Thank you!
Ok, this recipe is the bomb!! I mean it with all my heart and soul. I discovered it last Xmas and it has been a steady constant in my house since. There has rarely been someone who has not asked for the recipe. It’s so wonderful for an app at a gathering. I keep wondering when am I going to tire of this and it has not happened yet?! It’s a very special thing and I don’t exactly know why. I follow the recipe without any changes as well. I find using a mild Asiago vs a strong one the way to go. Thank you so so much!
I added 2 tbs of flax seeds – the original from Market Hall have some in. Quite delicious!
These crackers are easy to make, tasty and versatile. My only issue is the bottoms come out quite oily after cheeses melt. If there was a way to avoid this, they’d be perfect!!
Try baking on parchment instead of silicone. You can also transfer the baked crackers to a layer of paper towels as soon as they’re cool enough to handle, that will absorb some of the excess oil.
Having just made my first ever 5 ingredient seed crackers, I saw this recipe and had to try it. I used Swiss and gruyere cheese with the seeds listed and OMG, I can’t stop eating it!! Can’t wait to try it with other cheeses!! A delicious snack!!
Is there a substitute for the fontina cheese that would work?
Any other melty white cheese should work just fine. White cheddar, havarti or gruyere for example would work well here.
I’m addicted to Market Hall’s Seeds and Cheese Crackle but too lazy to try your recipe. But it was very helpful figuring out the calories etc for my food tracking app. Thank you.
Thank you for this great recipe! I always want something to nibble on while working and this is perfect for that.
I will make these again but caution people not to use parchment paper. My first batch had to be tossed because I could not peel away parchment whether the crackers were warm or cooled.
That doesn’t make sense. I’ve only used parchment paper and it’s perfect!
Would chia seeds and hemp seeds work in this recipe?
I haven’t tried it personally but I think pretty much any seed would work!
great snack or as you write great on a cheeseboard, these are the kind of things I’d expect to find as some packaged product, although it would likely have a lot of other ingredients, so it’s very nice to be able to control what goes into these, thank you
These look fantastic! What is the second type of cheese listed in the recipe (it’s not specified)?
Apologies for the oversight, it’s asiago cheese. :) It’s updated now.
I made them and also noted the greasiness on the bottom. I have eaten them when someone else made them and they were delicious. Not at all greasy. I only baked them about 25 minutes as they were definitely golden brown. Even with adding more pepitas and sunflower seeds I feel there was just too much cheese for the amount is seeds. Any words of wisdom?
Try baking on parchment paper as it absorbs some of the grease; also transfer to paper towels once you can move it which will help as well!
Aha! I’ve been trying to figure out this recipe for a while. I quit trying so just kept buying them every time I was at Market Hall. Bless you for your trial and error, I’m off to the store to stock up on the ingredients. I will be very popular at our Easter gathering this year.
YES! Thanks for coming up with the recipe based only on the ingredients listed on the package. These are addicting, and will always be a hit. I always keep some in my cupboard, they are my go-to snack! It was great to see you last month.
Auntie Sal