
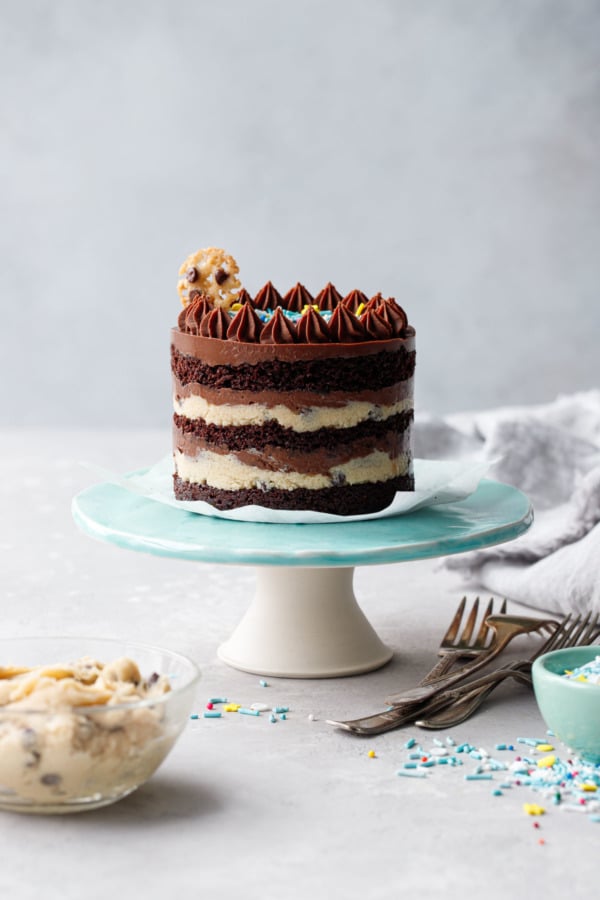
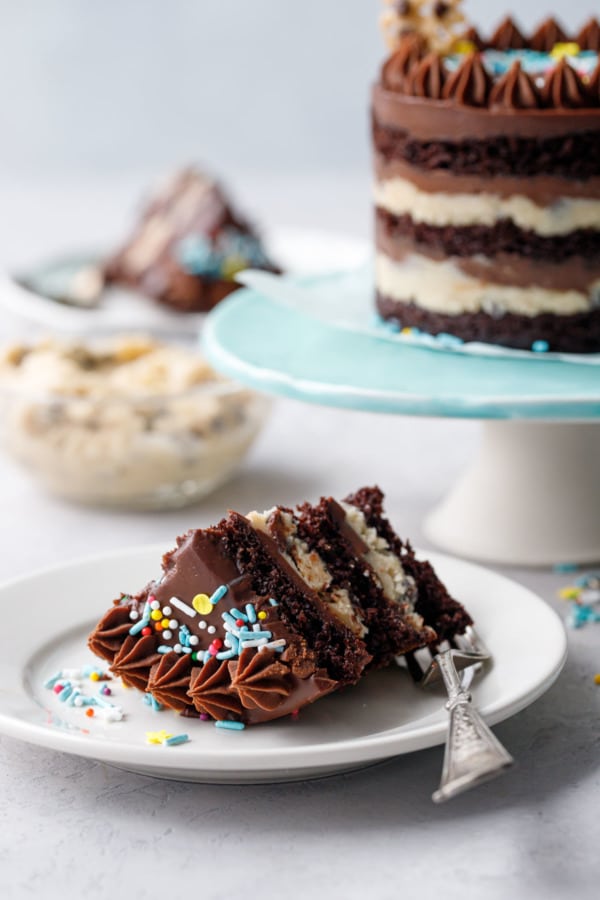
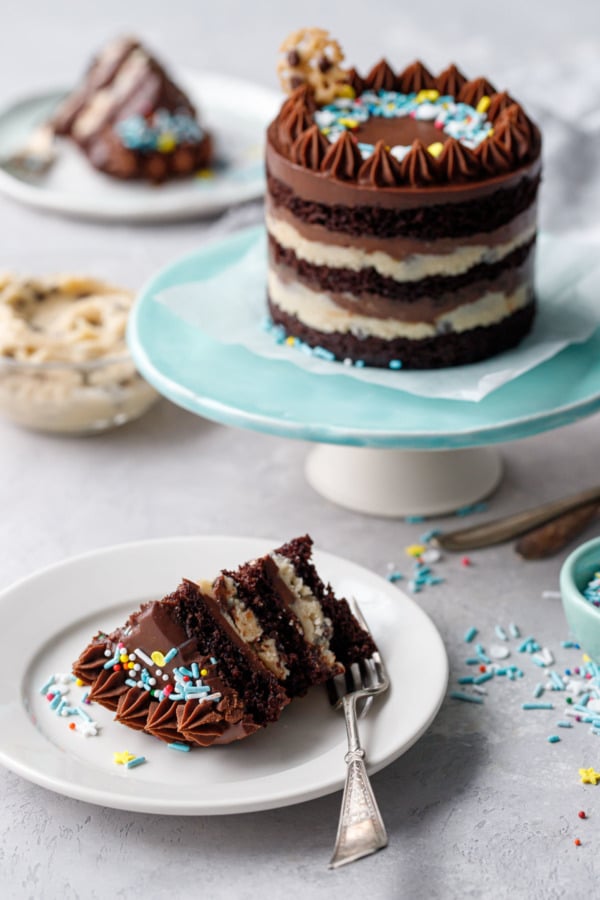
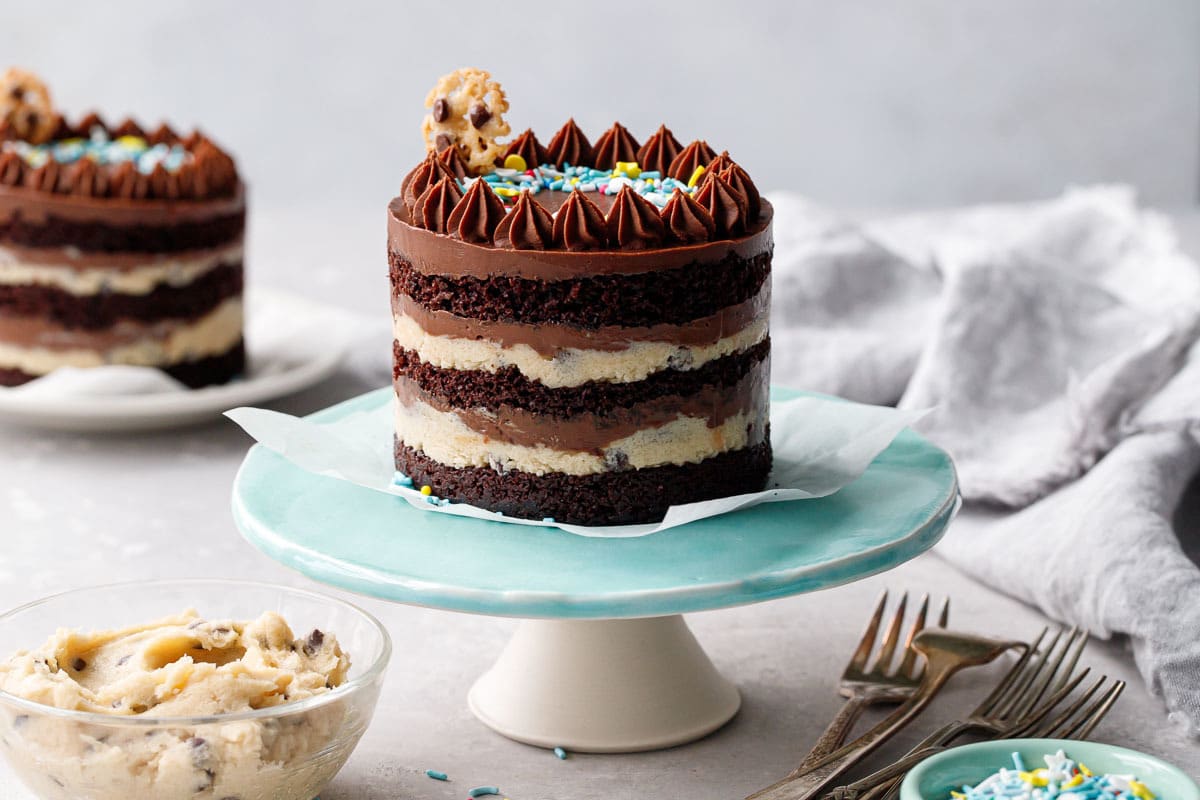
Adorable mini-sized naked cakes with gorgeously defined layers of moist chocolate cake, whipped cookie dough, and rich chocolate ganache.
Naked cakes are undoubtedly impressive, especially for how easy they are to assemble (no finicky frosting to deal with on the outside). This chocolate and cookie dough creation is no exception!

Save this recipe for later!
Another year, come and gone.
Not much celebration happening this year for Taylor’s 38th birthday, but the fact that it was just the two of us doing the celebrating doesn’t mean I skipped the cake (I mean, what kind of wife would I be then?)
Because it’s Taylor, the cake is always chocolate, but I do my best to mix it up a bit in a way that doesn’t get too weird for him, but still gives me a unique recipe to share with y’all here (two birds, right?)
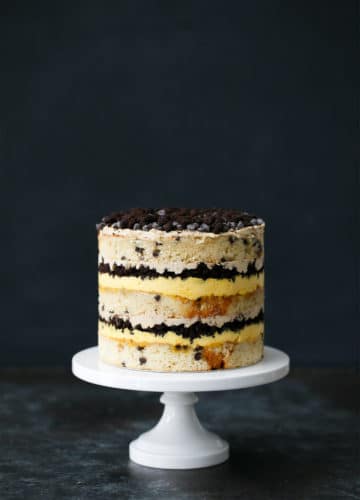
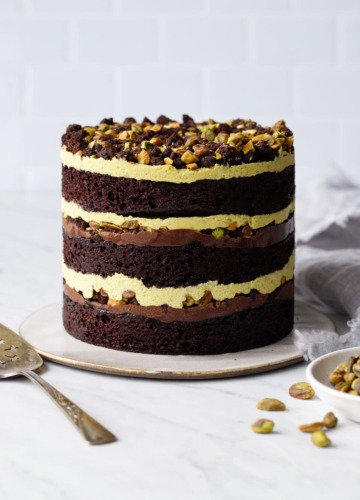
I’ve made Milk Bar-style naked cakes (ala Christina Tosi) twice before, once following a recipe straight out of her cookbook and the second piecing together a few different parts to create a chocolate-pistachio-masterpiece. Actually, I did make a third one at some point that included freeze-dried strawberries and pop-rocks and, while good in theory, left a bit to be desired in terms of presentation and execution (maybe I’ll revisit it someday).
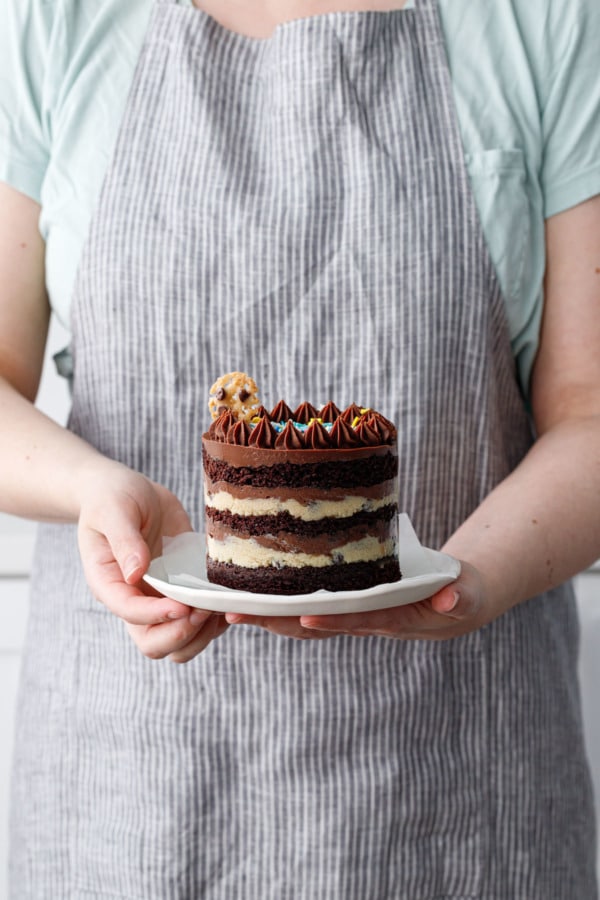
This year I’ve taken the basic idea of the naked cake and miniaturized it, making two adorable 4-inch cakes that are perfect for two (well, if we’re being honest, the cake is so rich that each mini cake is more like 4 servings, but who’s counting?)
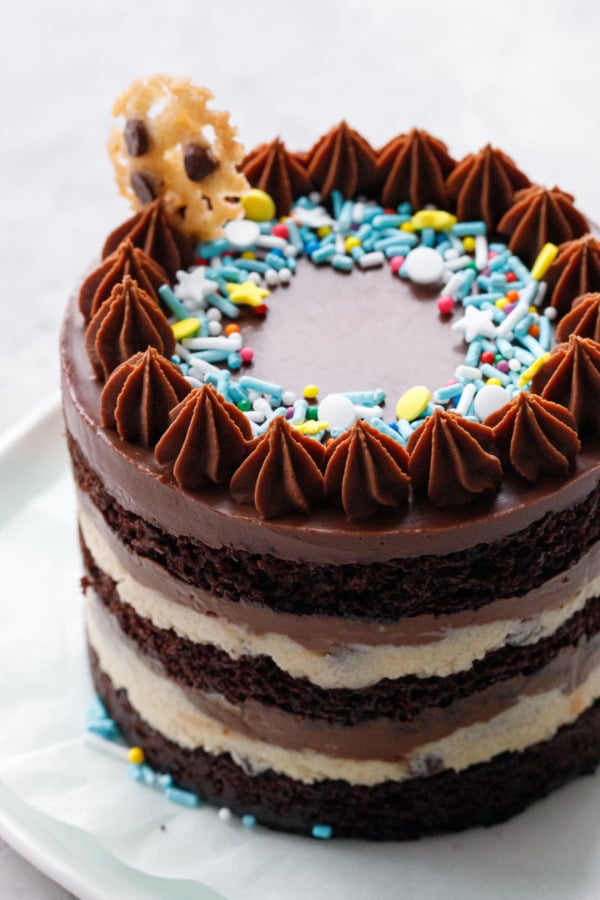
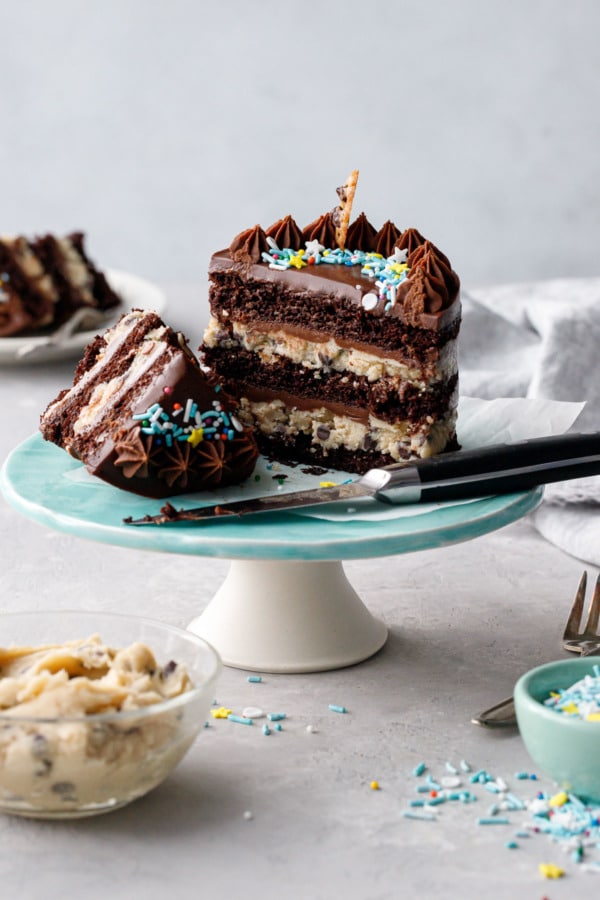
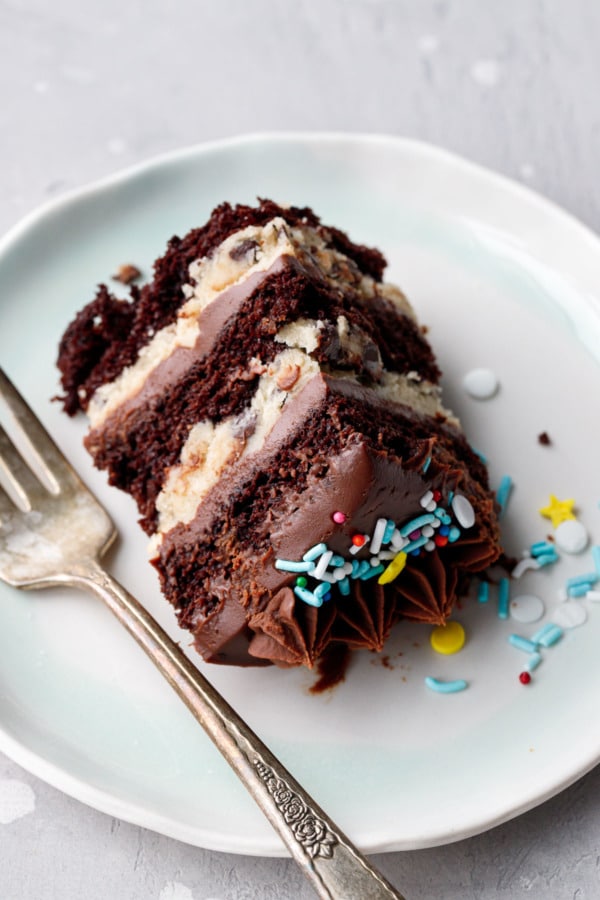
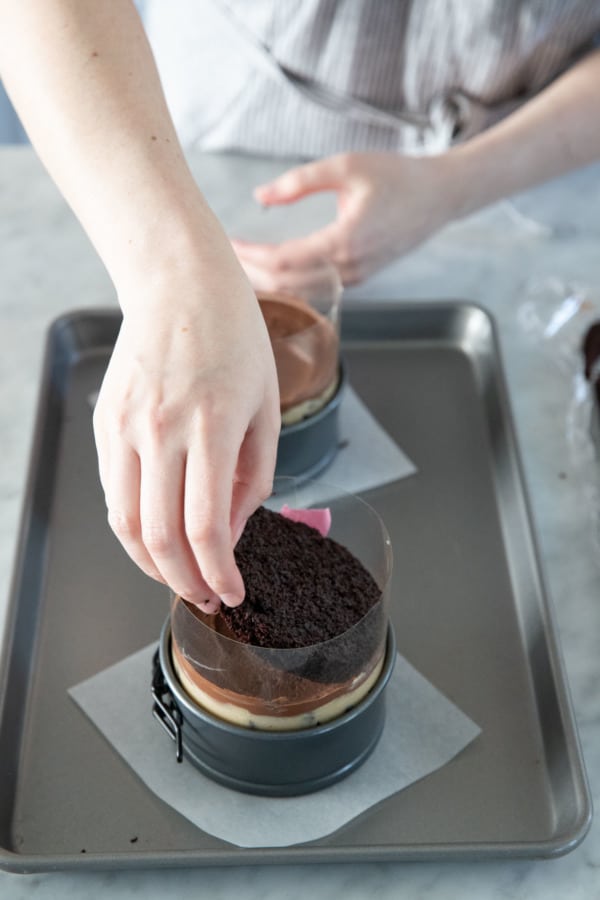
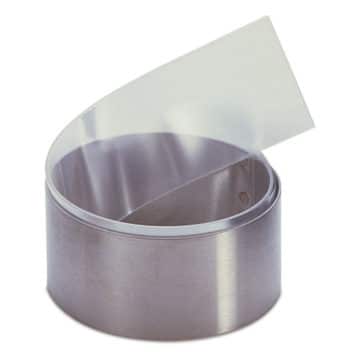
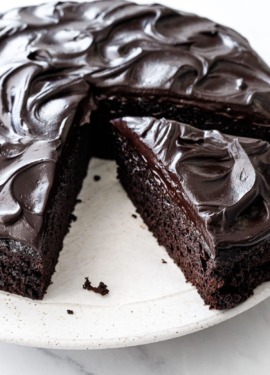
The layers include a moist chocolate cake, creamy dark chocolate ganache, and a creamy whipped cookie dough studded with chocolate chips (eggless and safe to eat raw!) Assembling the cake in a ring of acetate makes for perfectly defined layers, like a core sample of sedimentary rock (but so much tastier).
The result? Well, let’s just say I almost wished I had made a full size cake because it was so darn good we devoured the little ones in no time.
I actually made two versions of this cake, identical but for the final form of the ganache, both traditional and whipped. While the whipped ganache was delightful, I ultimately decided to use regular ganache as it’s easier to assemble (just pour it on top of the cookie dough layers), and also to preserve the sheen on the top of the cake.
Yes, I’m superficial like that. So sue me.
If you want to do a whipped ganache, up the cream to 8oz. Let the mixture cool until it starts to thicken, then take a balloon whisk and whip it until thickened.
A lot of whipped ganache recipes call for an electric mixer, but that’s really overkill. I was able to whip the ganache to a pipeable consistency un probably 30 seconds by hand. You really don’t need to overdo it.
That said, it doesn’t stay shiny. Or at least, I haven’t figured out the trick to keep it that way.
(I also have yet to figure out the trick to slicing one of these cakes cleanly. In this case, the mini chocolate chips tend to stymie the knife, preventing a super clean cut, though not quite as much as the chocolate crumbs in the pistachio version. But still, despite the mess, there’s no denying it’s gosh darn delicious.)
This recipe makes two 4-inch, 3-layer cakes.
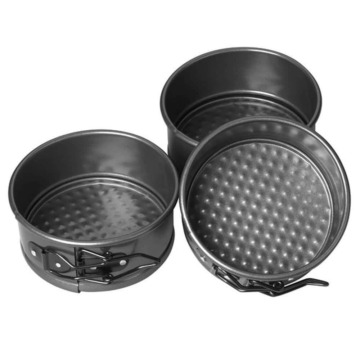
I used mini springform pans as my frames (without the bottoms), but you could use pastry rings as well, set on a base of parchment or a cake board for ease of movement. Either one, lined with 3-or-4-inch-wide strips of acetate, will work just fine here. If you have smaller pastry rings I think you’ll be fine, you can probably eek out three 3-inch cakes.
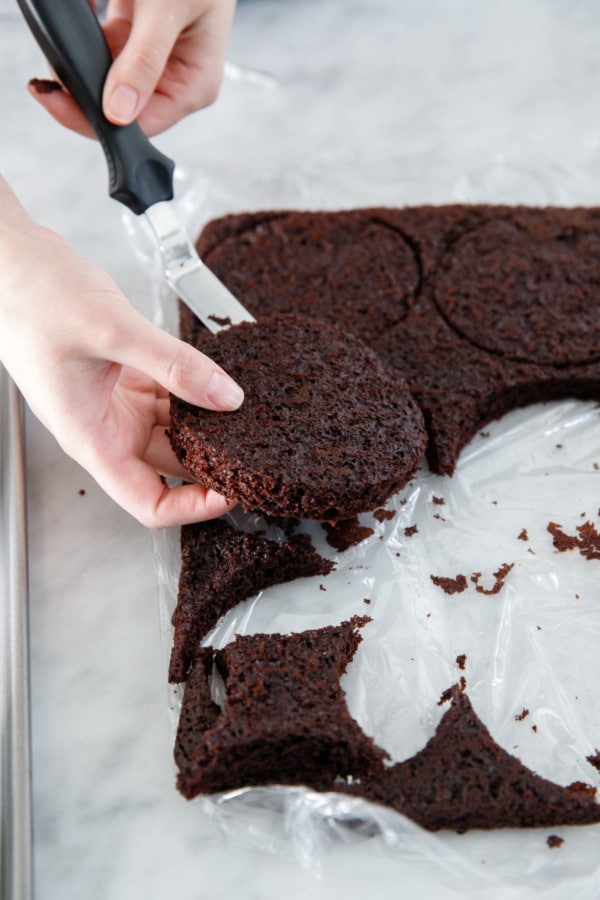
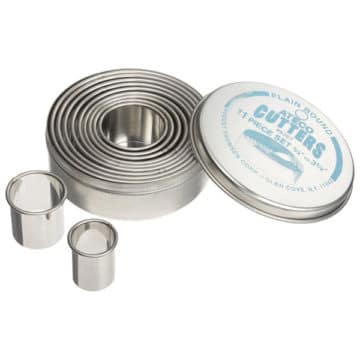
You’ll also want a round cutter the exact same size as your ring. As it turned out, the container of my round cutter set was exactly 4 inches (the largest cutter inside was only 3.75″). The edge of the tin worked perfectly to cut my cake rounds.
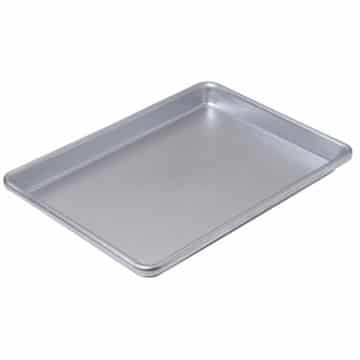
Though it’s a smaller scale than my other 6-inch cakes, the cake itself is actually baked in the same size pan, just with half the quantity of batter. This produces thin layers of chocolate cake that are perfectly proportional to the other layers.
If you want to make a 6-inch layer cake, double just the cake portion of the recipe. Bake it in the same quarter sheet pan (bake for 15 to 20 minutes), then assemble using a 6-inch cake ring. Doing this will give you thicker overall cake layers, but similar size layers of ganache and cookie dough (you don’t need to double those parts).
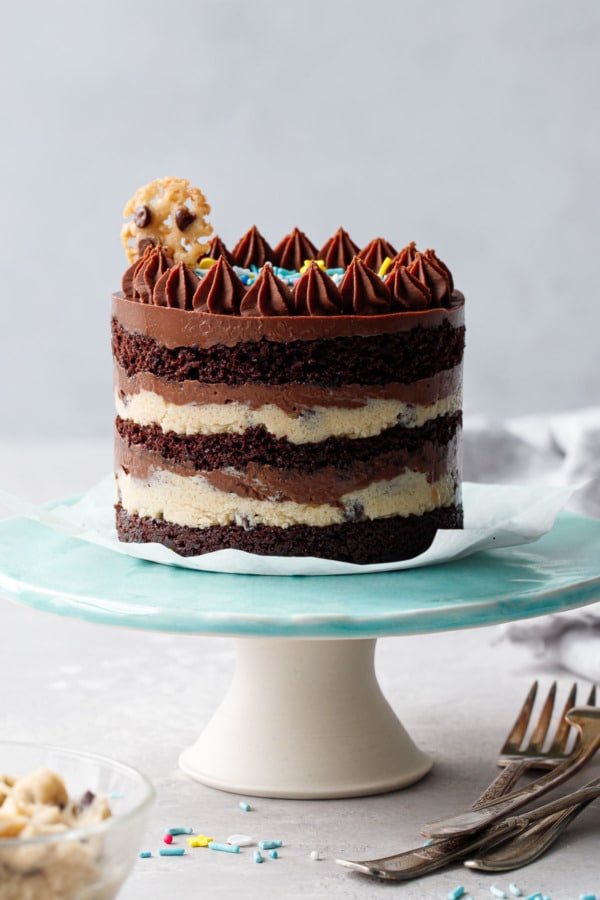
The little cookie tuile on top? Total accident. I divvied off a few little balls of the raw cookie dough to use as a garnish (planning to bake them up into cookie crisp-esque miniature cookies). I’d done it before in my book, but clearly the super soft dough I used here had other plans, as it spread out into a crispy lace puddle not unlike a florentine. Still, I wasn’t entirely displeased, and cut them into perfect rounds while they were still hot. Once cool, the lacey discs were thin and crispy and actually quite delicious!
If you want to achieve something similar: spoon out a tablespoon or so of cookie dough before you add the cream. Add a spoonful of flour and pinch of baking soda to the dough, then chill for 30 minutes until firm enough to roll into 1/4-teaspoon balls. Place on a parchment or silicone-lined baking sheet. Press 2 or 3 mini chips on top of the dough balls and bake at 350 degrees for 5 minutes. As soon as they come out of the oven, use the rim of a large piping tip or a 1″ round cutter to cut the melted cookies into rounds while they’re still hot. Let cool completely, then carefully lift off the parchment with an offset spatula and carefully position on your cake.
I recommend leaving yourself enough time to fully chill the cake. Overnight in the fridge or a few hours in the freezer should do it. If it’s not fully chilled the acetate won’t peel off cleanly (the soft ganache especially is rather sticky).
While you do need to keep this cake refrigerated, I think it’s best served at cool room temperature, so let it sit for 30 minutes or so after peeling off the acetate and before serving.
I mean, how cute would these be for Valentine’s day, topped with some heart-shaped sprinkles of course! (The actual sprinkle medley I used here is called Vanilla Cupcake, though it appears to be discontinued… still, plenty of other adorable options for you to choose from!)
Mini Chocolate & Cookie Dough Naked Layer Cakes
Ingredients
For Chocolate Cake:
- ½ cup / 100 g granulated sugar
- ½ cup / 62 g all-purpose flour
- ¼ cup / 30 g Dutch process cocoa powder, sifted
- ½ teaspoon baking soda
- ¼ teaspoon baking powder
- ¼ teaspoon kosher salt
- 1 large egg
- 6 tablespoons / 90 g full fat buttermilk
- 3 tablespoons / 40 g light olive oil or grapeseed oil
- 1 teaspoon vanilla extract
For Ganache:
- 6 ounces / 170 g chocolate, finely chopped
- ¾ cup / 170 g heavy cream
- 1 tablespoon corn syrup
For Cookie Dough:
- ½ cup / 113 g (1 stick) unsalted butter, at room temperature
- ⅓ cup / 66 g granulated sugar
- ⅓ cup / 70 g brown sugar
- 1 teaspoon vanilla extract
- ⅓ cup / 42 g all-purpose flour, heat treated if desired*
- ½ teaspoon kosher salt
- ¼ cup / 60 g heavy whipping cream
- ⅓ cup / 60 g mini chocolate chips
Instructions
For Chocolate Cake:
- Preheat oven to 350 degrees F. Line the bottom of a (9-by-13-inch) quarter sheet pan with parchment; lightly butter bottom and sides.
- In a mixing bowl, whisk together sugar, flour, cocoa powder, baking soda, baking powder and salt until evenly incorporated.
- In a small bowl or 2-cup glass measuring cup, whisk together egg, buttermilk, oil and vanilla. Pour into bowl with dry ingredients and mix until just combined and no streaks of flour remain.
- Scoop into prepared baking sheet and spread into an even layer (it will be quite thin, just try to get it as even as you can. I find an offset spatula to be the best tool for this).
- Bake for 9 to 10 minutes or until top is springy.
- Place pan on a cooling rack and let cool completely. Once cooled, the cake can be tightly wrapped with plastic wrap and refrigerated overnight or frozen for up to 1 week.
For Cookie Dough:
- Cream butter and sugars with an electric mixer on medium-high speed. Add vanilla and salt. Mix in flour until incorporated. (At this point, if you want to make the cookie tuiles for decor, pull out a spoonful of dough for that before adding the cream).
- Add heavy cream and beat until light and fluffy, scraping down the sides of the bowl as needed. Mix in mini chocolate chips.
For Chocolate Ganache:
- Place chopped chocolate in a heat-proof bowl.
- Heat cream in a small saucepan over medium-low heat until it just starts to steam and barely bubble around the edges (do not let it boil).
- Pour hot cream over chocolate and let sit for 30 seconds, then start gently whisking, working in concentric circles starting in the center until smooth and glossy. Whisk in corn syrup. Let cool for 15 minutes or so, whisking occasionally (it should still be loose and pourable at this point, but no longer warm to the touch).
To Assemble:
- Invert the cake onto a fresh piece of parchment paper; peel off the parchment from the bottom of the cake. Use a 4-inch cutter to cut out 6 circles.
- Place your ring molds on squares of parchment or small cake boards a sheet pan. Line the inside of the each ring with 1 strip of acetate.
- Gently lower the first cake layer down into the bottom of each ring.
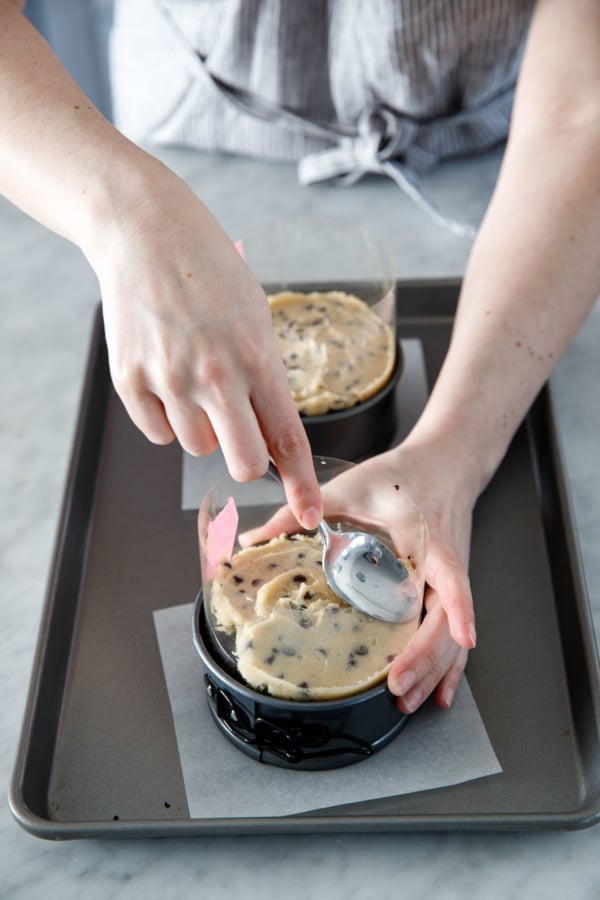
- Use the back of a spoon to spread one quarter of the cookie dough as evenly as possible over the cake. Spread completely to the edges.
- Pour a generous 2 tablespoons worth of ganache on top of cookie dough, spreading it to the edges.
- Set a second cake round on top of the ganache, and repeat with additional layers of cookie dough and ganache.
- Nestle the remaining cake round on top. Cover the top of the cake with a final layer of ganache. The remaining ganache can be used for decoration; let it cool completely until it's thick enough to pipe. Transfer to a piping bag and pipe a decorative border around the edge of the cake. Add sprinkles as desired.
- Place the cakes in the refrigerator and chill for a minimum of 12 hours to set the cake and filling. You can also cover and freeze the assembled cake for up to 2 weeks (if frozen, put it in the refrigerator to thaw the night before you want to serve it).
- At least 1 hour before you want to serve the cake, place the cake on a platter or cake stand. Gently remove the cake from the cake ring and carefully peel off the acetate. Let sit at cool room temperature for 30 minutes or so before slicing and serving. The finished cakes can be refrigerated, wrapped in plastic wrap, for up to 3 days.
Notes
- To heat-treat raw flour, measure out a bit more flour than you'll actually need in your final recipe and place in a microwave safe bowl. Microwave on high for a minute or so, stirring every 20-30 seconds, until a digital thermometer inserted into the center of the flour reads 165 degrees F. You can also spread the flour in a baking dish and bake at 350 degrees F for 3 to 5 minutes or until it reads 165 degrees F. Let the flour cool completely before using, and then sift it to remove any leftover chunks.


I made this for world baking day, used your idea but was experimenting with a different chocolate sponge recipe . I loved how all of this came together ! I didn’t have chocolate chips so I roughly chopped up chocolate for the cookie dough layer and I made my ganache with dark chocolate so it was perfectly balanced and I kept my cake at room temperature and found that it was easier to slice then! It’s only been 24 hours since and there’s only a quarter piece left of a six inch cake ! I love your recipes and this is my second recipe that I’ve tried of yours!
Amanda – to help with clean cuts I boil water and then let the knife soak in that for a couple of minutes…wipe the knife clean and then I cut my cake. The heat helps create a smooth cut even with the chocolate chips.
Hi! I tried to do this recipe but the cookie dough cream has the sugar too granulated and I cream it a lot!it doesnt feel good in mouth, what was wrong?? Thanks
The crunch of the sugar granules is one of the defining characteristics of cookie dough, in my opinion! (The sugar only ‘melts’ when the cookie is baked, so the dough is always a bit grainy, no matter how much you cream it). Not sure if you used a coarse sugar like turbinado, this would change the texture quite a bit. You could swap in a superfine sugar if you preferred a smoother texture.
I love this!! A great idea for small family like mine!
Absolutely love the recipe! I didn’t have a few items but happy that 1 cup of milk and 1 Tbs of vinegar is a buttermilk substitute and I used avocado oil! So delicious! Thank you!
Hi, I want to make this for my daughters birthday but I’d like to make this into a two layer 8 inch cake. How should I scale up this recipe? For the cake, ganache and cookie dough? Thoughts on doing ganache all around as the icing? Thank you so much!
You may be ok simply doubling it, bake the cake in two 8-inch cake pans. Although I have not tested quantities, so I’m not sure exactly how the thickness of the various layers would compare.
If you want to coat the outside with ganache, you’d need a much stiffer ganache (as written, it’s meant to be soft at room temp). Maybe a 2:1 chocolate to cream? Or you could always frost it with my favorite fudge frosting (https://www.loveandoliveoil.com/2018/02/chocolate-cake-fudge-frosting.html) I think that’d be lovely!
If I want to make this into an 8″ layered cake, how should I scale this recipe up by? A friend’s birthday is coming up and I’d like to make this cake. I’ve made your pistatchio layered cake and it was amazing.
A double batch may give you enough for a two 8-inch layers, though I really can’t say for sure since I have not personally tested it. Sometimes I’ll fill up my various cake pans with water to mimic batter, then pour them into another size pan to see how the depths compare. Might be helpful in converting this recipe!
This looks absolutely divine.
Hi, what’s the ideal substitute for buttermilk?
My favorite swap is milk/sour cream (1 cup buttermilk = 3/4 whole milk and 1/4 cup sour cream).
Thanks a lot! will be making this for my son’s birthday :)
I don’t see any note for the * after the heat treated flour. Not sure what this means. Thanks
Sorry about that, it’s there now! Basically just an extra precaution to make the flour safe to consume raw.