
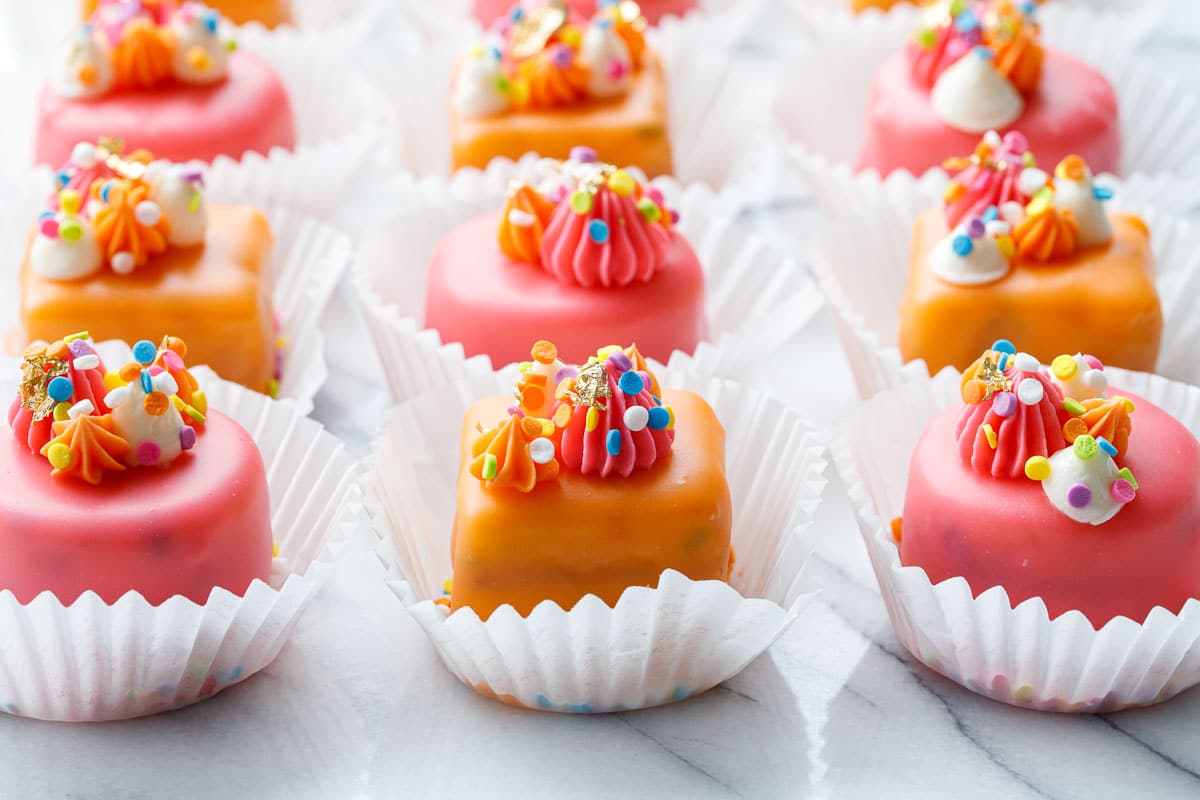
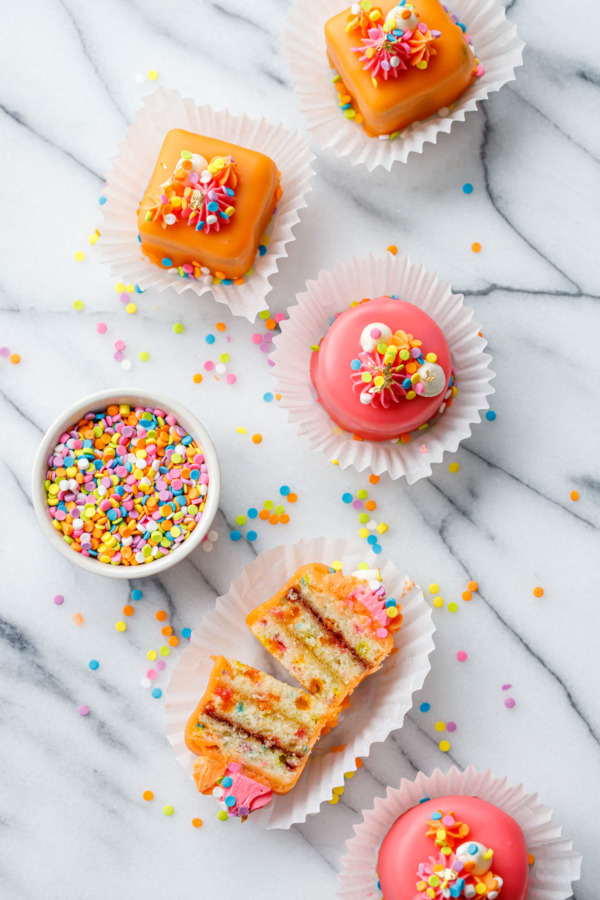
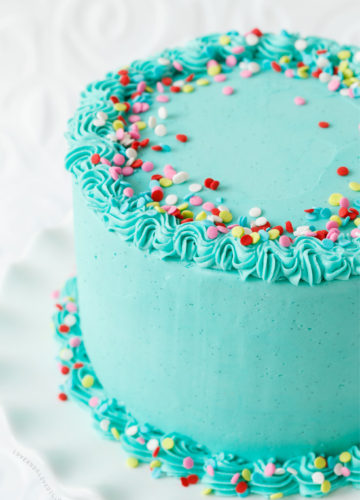
Traditional petit fours get a sprinkle of fun: tart apricot and raspberry jam sandwiched between layers of rich, almond pound cake dotted with rainbow sprinkles, all covered in a colorful poured fondant glaze.
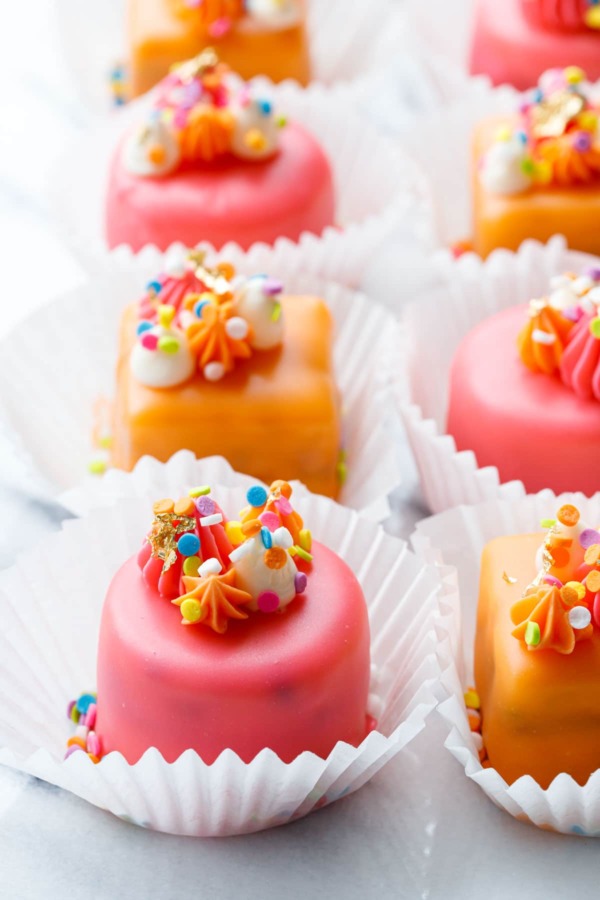
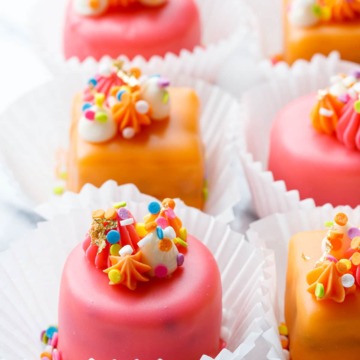
These adorable confetti petit four cakes are as fun as they are delicious! Glazed with a traditional poured fondant, but decorated not-so-traditionally with colorful buttercream accents, rainbow sprinkles and edible gold leaf.
Save this recipe for later!
Funfetti petit fours… aka funfetti fours. Get it?
I often draw on wordplay as inspiration for my recipes, coming up with the name of the recipe well before I fiddle with flavors or processes. Case in point: strawciatella ice cream; strawbanero jam; ampersandwich cookies.
So I knew I wanted to make funfetti fours for some time now, I just needed to figure out how to make it happen.
(Also, Taylor suggested that next time I should make Tom Pettyfours. 😂 He gets me.)

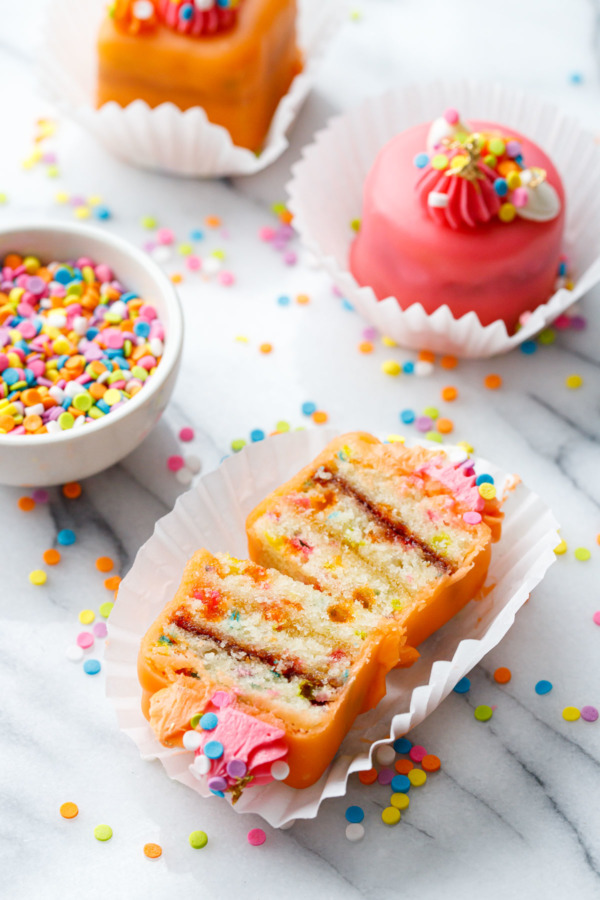
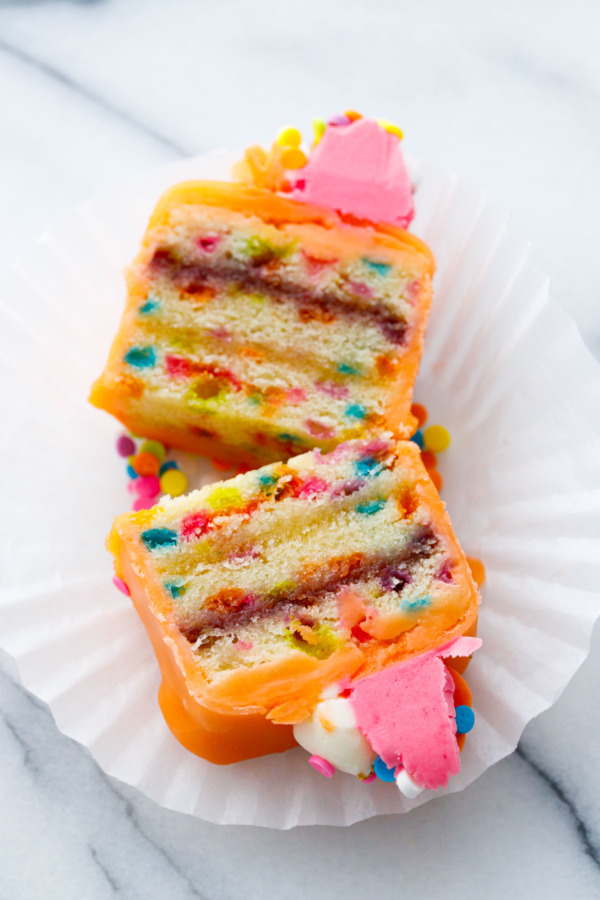
The cake itself is a rich, almond pound cake. It’s quite dense, but you want a cake that will hold its own against the thick glaze. Since many petit fours include a layer of marzipan in the middle, I figured I’d kill two birds and make the cake itself basically marzipan cake (yum!) I added a generous amount of rainbow sprinkles to the cake to give it that funfetti effect.
In between the three thin layers of cake are two jam layers; I opted to do one layer of raspberry and one of apricot because I liked how the different colors looked. You could certainly use just one kind of jam, or even fill them with buttercream (although I really like the hint of tart fruit that the jam brings).
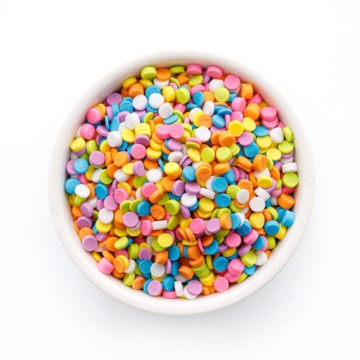
My favorite sprinkles for funfetti cakes are confetti quin sprinkles, as they hold their shape better when baked (nonpareils and jimmies tend to bleed) and they add a delightful bit of crunch to the final cake.
These Sweetapolita pastel quins are my current favorite, the pastel colors come through beautifully in the final cake.
Also, today happens to be Sweetapolita herself – Rosie’s birthday, so this sprinkle-filled confection seemed like a perfect way to celebrate! To celebrate, today only you’ll get a free 4oz “Love Rosie, xo” sprinkle mix on any order over $25. Also, don’t forget to use code LOVEANDOLIVEOIL15 to get 15% off your order any time!
The assembly process is quite ingenious actually (check out this video from JoyofBaking for a great intro to how it’s done). You bake a very thin layer of cake in a half sheet pan. Trim the edges, then cut it into 3 equal size pieces. Layer on your jam and stack the pieces, creating a rectangular three-layer cake.
I recommend covering and weighting the cake (I used a second cookie sheet with a few pounds of butter evenly distributed on top), then refrigerating it overnight. This will help the layers fuse together and will also even out any unevenness in the layers.
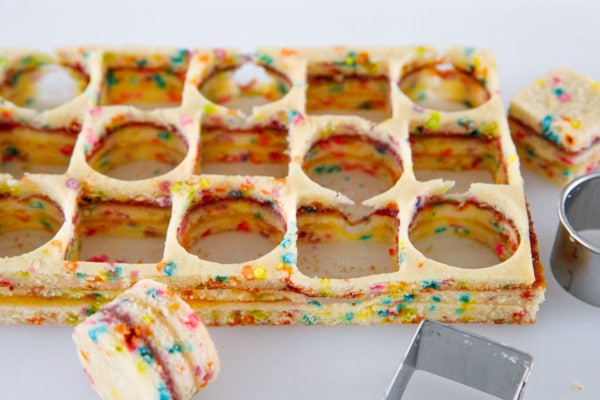
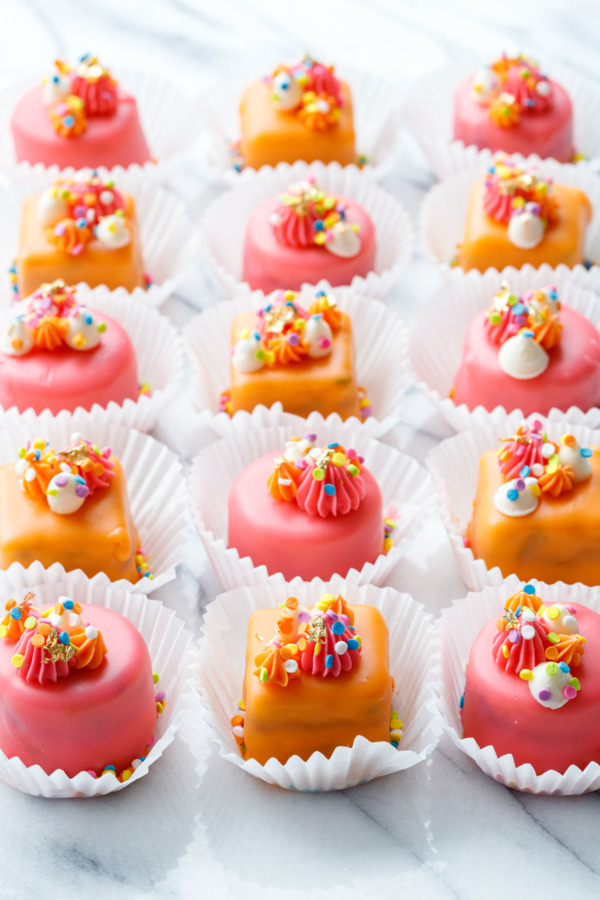
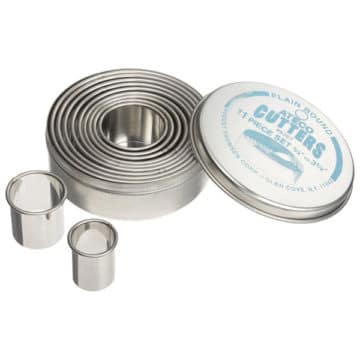
The next day, cut out your individual cakes. I like using cookie cutters, even for square cakes, as it allows me to get perfectly uniform shapes. I used a 1.75″ round cutter and a 1.5″ square cutter.
As for the scraps… well… I don’t doubt you’ll find a use for them. 😉
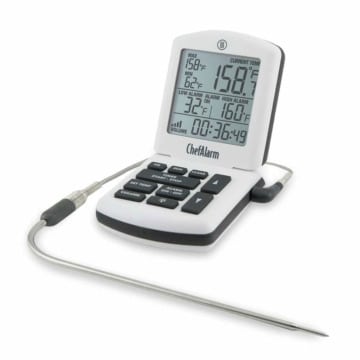
The glaze recipe is a traditional poured fondant glaze, made with sugar cooked to the soft-ball stage. I’ve seen recipes for shortcut poured fondants using powdered sugar or even white chocolate, but I really wanted the traditional flavor here. And honestly, if you’ve got a food processor and an accurate candy thermometer (I like this probe thermometer which can be clipped onto a saucepan and submerged in the boiling sugar – set the alert to your desired temperature and it’ll tell you when it’s ready) it really isn’t that difficult or time-consuming (the glazing process itself is the hardest part, and that goes for the cheater glazes too).
Tips for Glazing Petit Fours:
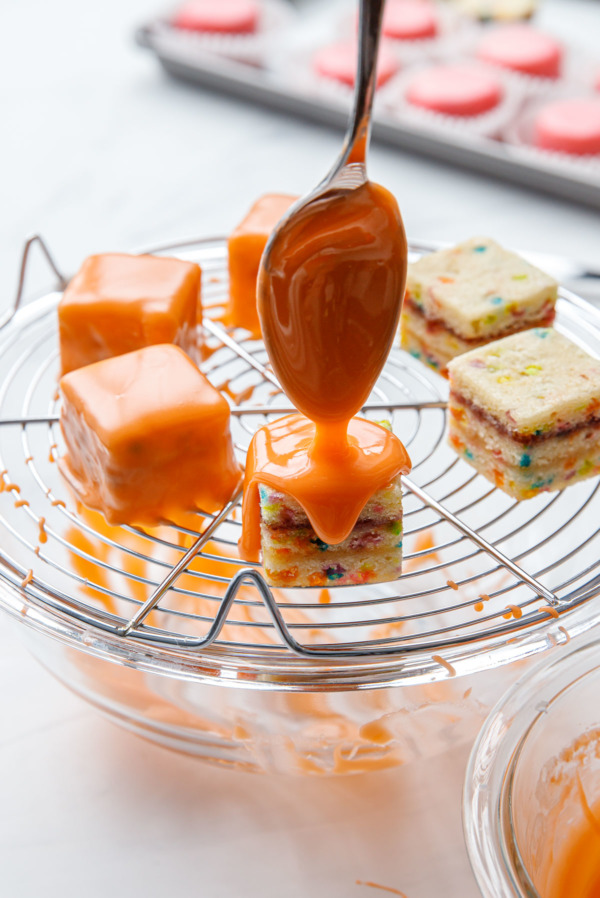
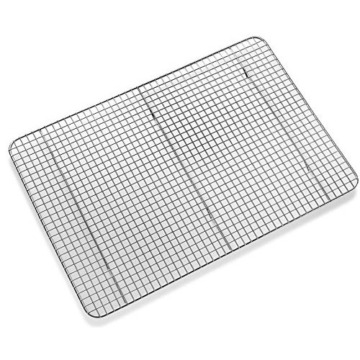
• Place a wire rack over a bowl instead of a sheet pan; this makes pouring off the overflow much easier.
• The glaze recipe makes exactly the amount of glaze you need for 18 cakes (about 1 3/4″ in diameter). I was able to glaze about 6 in one color, then emptied the overflow, reheated it, and glazed 3 more. It would be much easier with a lot of extra glaze; if you prefer, you can increase the quantity of the glaze recipe by about 150% so you have plenty of glaze to work with). Just know you’ll have quite a bit leftover at the end.
• The glaze sets up really fast, so you have to work quickly. Pour on more glaze than you think you need so it covers all the sides in one go; try not to do a second layer as it’ll make for a much thicker layer of glaze in some spots.
• If you want to add sprinkles directly on top of the glaze, add them immediately after glazing before the glaze has a chance to set. This is why I did the buttercream, so the sprinkles would have something to stick to!
• While I used cookie cutters to make my cake shapes, you could certainly just cut the stacked piece of cake into even squares. THAT SAID, I found the round cakes much easier to glaze than the square ones. The glaze flows much better over the curves vs the corners (and my squares had slightly more rounded corners than if I had cut them). Just keep that in mind. :)
• I have also seen recipes that call for dipping the cakes in the glaze instead of pouring it, which might be easier for square shapes. If you decide to do it this way, I recommend freezing your cut cakes thoroughly before glazing so they don’t fall apart.
Full disclosure: petit fours are not quick or easy, but then again I’ve made other desserts that are just as, if not more complicated and you guys have tackled those with surprising skill. So I have no doubt you’ll conquer these too. :)
I recommend dividing your work into a few days, for your own sanity. The glaze can also be made ahead of time (store at room temperature in an airtight container or zip-top bag). It will set up quite firmly, so you’ll need to gently reheat it on the stovetop or in short bursts in the microwave until it’s fluid once again.
Day 1: Make the cake. Let it cool, then cut and layer it with the jams. Cover tightly with plastic wrap and place a flat-bottomed plate or cookie sheet on top to weight the cake down a bit.
Day 2: Cut out individual cakes. Make the glaze and cover the cakes (this is the most time consuming part) then decorate as desired.
The cakes, once covered with fondant, keep surprisingly well, so feel free to make them 2, 3 or even 4 days ahead of time. You can also freeze the unglazed cakes for up to 1 month, no need to even thaw them before you glaze.
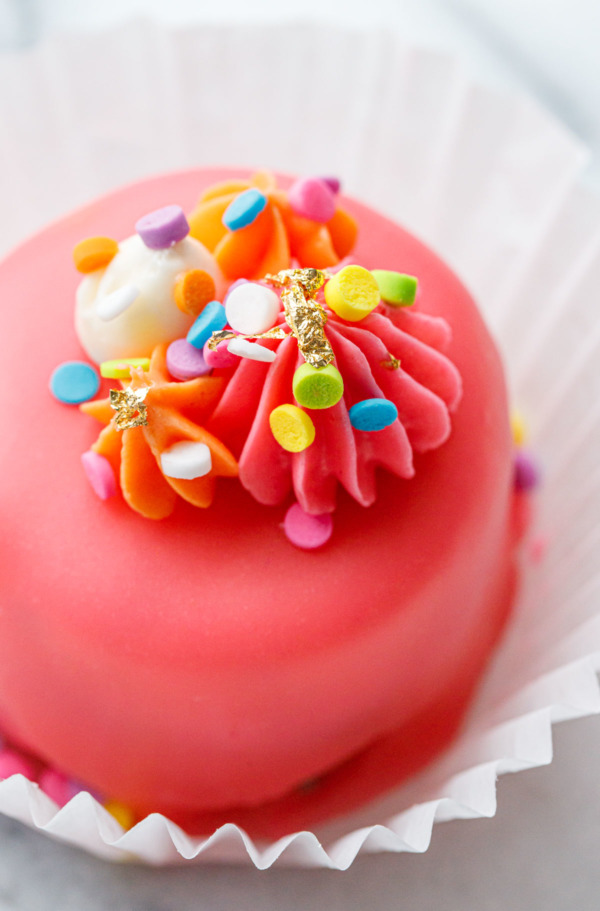
I debated long and hard over how to decorate these… whether to color the glaze or keep it white and whether to decorate them with buttercream or keep it simple with just sprinkles. As you can see, I obviously decided against simple.
I piped on some differently shaped buttercream dollops (achieved using different shape piping tips) in pink, orange and white, added more rainbow sprinkles, and finished it off with a bit of edible gold leaf because I had a jar and was dying to use it.
Overall I’m pretty chuffed with how they turned out.
And now I must force them on all my neighbors because lord knows if I consume this much sugar myself we’re all in trouble. Luckily my neighbors are more than willing recipients. :)

Funfetti Fours (Birthday Cake Petit Fours)
Tart apricot and raspberry jam sandwiched between layers of rich, almond pound cake dotted with rainbow sprinkles, all covered in a colorful poured fondant glaze.
Ingredients:
For Cakes:
- 8oz (227g) almond paste, broken into pieces
- 2/3 cup (133g) granulated sugar
- 10 tablespoons (140g) unsalted butter, at cool room temperature (plus more for brushing)
- 1 teaspoon vanilla extract
- 4 large eggs (190g or 3/4 cup)
- 2/3 cup (85g) all-purpose flour
- 1/4 teaspoon kosher salt
- 1/2 cup (80g) confetti quin sprinkles
- 1/4 cup apricot jam
- 1/4 cup raspberry jam
For Poured Fondant Glaze:
- 2 1/2 cups (500g) granulated sugar
- 1/2 cup filtered water
- 1/4 cup (98g) corn syrup
- 1/4 teaspoon kosher salt
- 1/4 teaspoon almond extract
Directions:
- Preheat your oven to 375 degrees F. Butter a half sheet pan (approx. 17-by-12-inches). Brush bottom of pan with melted butter (about 1/2 tablespoon worth) and then adhere a piece of parchment paper on the bottom of the pan.
- To prepare cake batter, in the bowl of a stand mixer fitted with the paddle attachment or a large mixing bowl, beat almond paste and sugar until evenly combined and no large chunks of almond paste remain. Gradually add the butter, 1 tablespoon at a time, and continue to beat on medium-high speed until very light and fluffy (about 2 to 3 minutes), scraping down the sides of your bowl as needed. Mix in vanilla extract.
- Add eggs, one at a time, beating well after each addition. Add flour and salt and mix on low until just combined. Fold in sprinkles.
- Spread batter into an even layer in prepared pan. The batter will not rise much, so be sure the top is as level as possible. Bake for 15 to 18 minutes or until top is springy to the touch, edges are lightly browned, and a toothpick inserted into the center comes out clean.
- Remove from oven let cool on a wire rack for 10 minutes. Run a knife or spatula around the edges of the cake; gently slide the cake (and parchment paper bottom) onto a wire rack to finish cooling.
- Meanwhile, gently heat the two jams on the stovetop or briefly in the microwave; strain to remove any big chunks of fruit or seeds (I added back about 1/4 of the raspberry seeds, but left the rest out as I wanted the jam less seedy).
- Trim off the the rough edges of the cooled cake as desired, then cut the cake into three equal rectangles. Flip one piece onto a baking sheet lined with a clean piece of parchment. Peel off the parchment backing. Spread 1/4 cup of the apricot preserves evenly over the top of the cake. Gently flip a second layer of cake on top of the apricot preserves. Peel off the parchment backing, and spread the raspberry jam evenly on top. Finally, flip the final layer on top of the raspberry, lining up the layers and pressing lightly to adhere.
- Cover the whole cake tightly with plastic wrap. Place another baking sheet or a flat-bottomed, heavy plate on top of the cake to compact and fuse the cake layers. Refrigerate until firm (at least 2 to 3 hours or overnight).
- Once the cake is firm, cut into desired shapes (I used a 1.75″ circle and a 1.5″ square cutter). Arrange on a baking sheet, cover, and place in the refrigerator or freezer while you make the glaze.
- To make glaze, combine the sugar, salt, water and corn syrup in a medium saucepan and stir until sugar is evenly moistened. Bring to a boil over medium-high heat. Once mixture starts to bubble, cover saucepan for 2 minutes; the steam buildup will help wash any stray sugar crystals off the site.
- Remove cover and place a candy thermometer into the saucepan, making sure it is not touching the bottom. Continue to cook until mixture reaches 238 degrees F or the “soft-ball” stage.
- Remove from heat and transfer the hot liquid to the bowl of a food processor fitted with a steel blade. Let cool to 140 to 150 degrees, about 30 to 45 minutes.
- When cool, add almond extract and process for 2 to 3 minutes until glaze transforms from a clear liquid to opaque white.
- Transfer to a microwave safe bowl (or bowls if you want multiple colors). Stir in food coloring as desired.
- To glaze, arrange a few cakes on a wire rack placed over a large bowl to catch the over flow (you can use a rimmed baking sheet as well but I find a bowl easier to scoop out the excess to reuse).
- At this point your glaze has likely firmed up. Add 2 teaspoons of water and microwave for 15 to 20 seconds, then stir until smooth and pourable. You want the glaze to be thin enough to cover the cakes easily, but thick enough to form an opaque layer. If glaze seems too thick, add more water, a teaspoon at a time, and microwave until warm, then stir until smooth. As you work you can always re-heat the glaze if it starts to cool to the point where it is too thick.
- Spoon glaze over top of cakes on wire rack, working quickly to cover the entire cake and letting the excess drip off into the bowl below. Repeat with remaining cakes. Let cool for 5 to 10 minutes or until glaze is set, then use an offset spatula to remove cakes from rack and transfer to paper wrappers for easy storage and transportation.
- If desired, you can decorate the tops of the cakes with royal icing or dollops of buttercream (I used 1/4 size batch of my favorite whipped American buttercream, cut with 1/4 cup or so of shortening for stability), sprinkle with more rainbow sprinkles, and even add a flake or two of edible gold leaf.
Cake adapted from Joy of Baking; glaze from Sprinklebakes.
All images and text ©Lindsay Landis / Love & Olive OilDid you make this recipe?
Let us know what you think!
Leave a Comment below or share a photo and tag me on Instagram with the hashtag #loveandoliveoil.


These are adorable! In pastry school our chefs made Petit Fours so boring and uptight. These are soooo much fun!!!
Question – for the glaze, if you don’t add food coloring, will it be white? I want to make these for a bridal shower so I’d prefer them to be white. But, if necessary, I can add a different color too. Was just curious.
Yes, it is white before adding food coloring. It might be slightly more transparent though, so the layers inside could show through a bit. You can also add some titanium white food coloring to brighten the color.
I’ve made these before and they taste like they’re from a professional bakery, love them! I’m wanting to do some more for Easter but with lemon curd and raspberry jam. I would want to refrigerate them after they are assembled because of the curd filling … will the glazed cakes hold up well in fridge or will the fondant get too “wet?”
I think you’d be ok chilling them; it might just get a bit sticky with condensation when it comes out. You could also make and refrigerate/freeze the interior cakes ahead of time, then glaze the day of.
Or… try an eggless curd (thicken with cornstarch), which shouldn’t need to be chilled. Something like I used for the centers here: https://www.loveandoliveoil.com/2023/03/pistachio-meyer-lemon-mousse-cakes.html (could leave out the gelatin).
The best recipe in the town. I made this cake weekend, thanks for sharing your recipe. This cake will surely make your day special.
Tried the recipe yesterday and i loved it. I came here back just to say thanks.
This is the best cake I have had. I made this cake yesterday, thanks for sharing your recipe. This cake make your special day.
I love your recipes and have made many.
I have a question – what is the reason you use filtered water specifically in desserts?
Tap water can often have high levels of minerals or other chemicals like chlorine that can impart an undesirable flavor in recipes; for this reason when I use water as a final ingredient in a recipe I always get filtered water from our fridge. For things like pasta where the water is drained off that’s not as much of a concern. Obviously if you live in a place with really good water you can ignore this instruction. :)
This is the best cake I have had. I made this cake yesterday, thanks for sharing your recipe. This cake make your special day.
Hi– I was wondering if I could substitute the almond paste for almond extract or something else? I am allergic to almonds but love the flavor, Thanks!
It’s more than just flavor here, unfortunately. I’ve seen pistachio paste that might work instead, or you could make your own too (basically just nut flour, cooked sugar and egg white), but leaving it out entirely would drastically change the texture of the cake.
wow, these are spectacular, would never have imagined using multiple layers like you’ve shown here, bakers are definitely a special breed, thank you
Love this! Gonna give it a try for my bridge group next week. Thanks!