
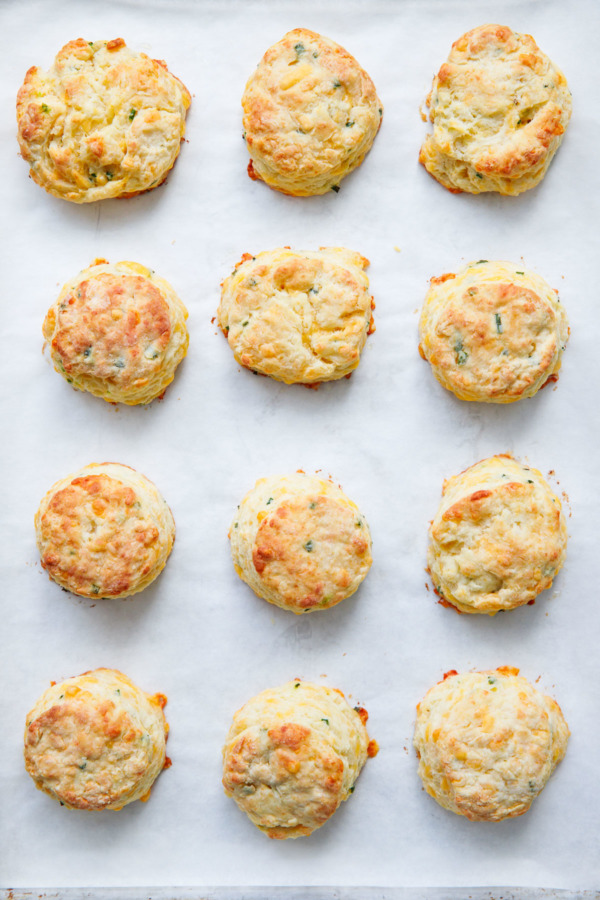
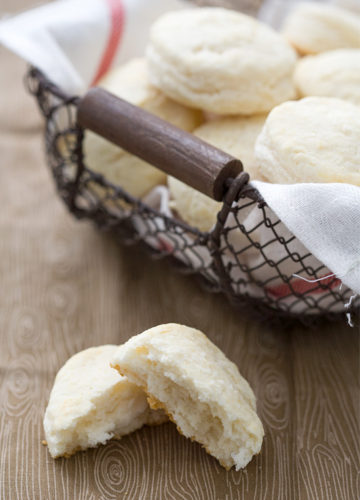
Tender, flaky buttermilk biscuits infused with sharp cheddar cheese and fresh snipped chives, baked until golden brown and then brushed with melted butter. They’d be a perfect flavorful side dish for your holiday table!
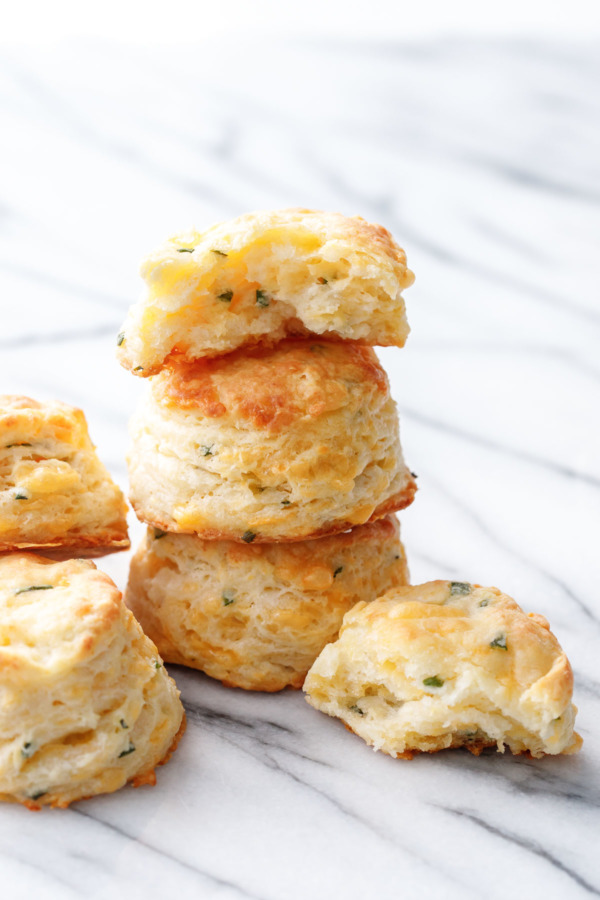
I love me a good biscuit: one that’s light and fluffy with towering tall layers and a tender, buttery finish. These biscuits are all that and more.
I’ve always been somewhat of a biscuit purist, preferring classic buttermilk biscuits to just about anything else.
But when we were tasked with creating a cheese biscuit recipe, it quickly became obvious that cheese is one of the few additions that really make a basic biscuit better.
Let’s just say the cheese has won me over.
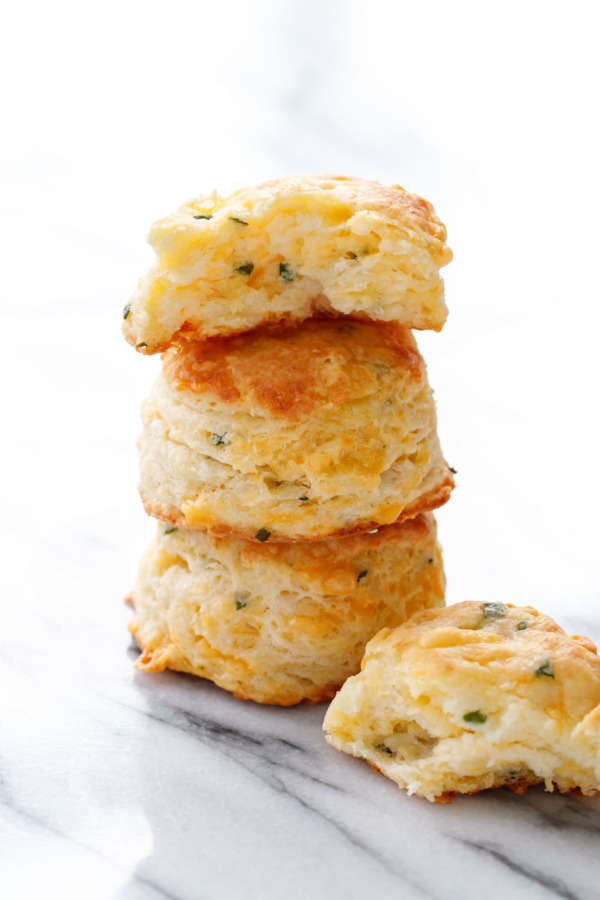
These biscuits are buttery and flaky, ultra light and perfectly cheesy. The fresh chives add a nice pop of flavor to contrast the sharp cheddar cheese.
Sure, they’re perfect for breakfast alongside cheesy scrambled eggs or savory breakfast sausage, but these biscuits blur the lines between meals. But I think they’d be great with a broccoli cheddar soup for lunch, or alongside a hearty beef stew for dinner. Or, you know, thanksgiving turkey and gravy and all the fixings (Thanksgiving should ALWAYS have biscuits, if you ask me).
Tips for perfect flaky biscuits:
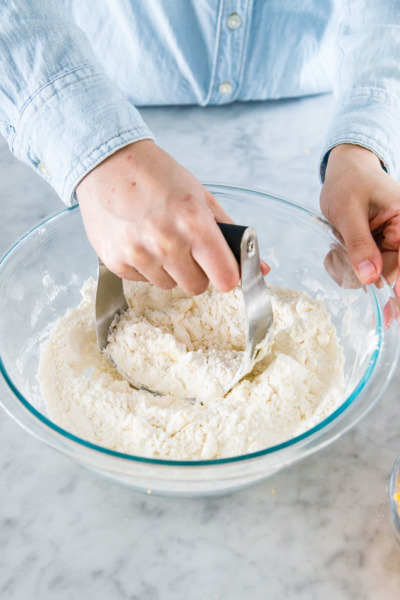
– Keep it cold. Your butter should be chilled, you can even chill the bowl with your flour in it too. If it’s a warm day or you have particularly warm hands, really work the dough as little as possible. If your kitchen is nice and cool you can be a bit more lax about it.
– I prefer using bleached flour for my biscuits, preferably a soft wheat variety (like White Lily). I find it produces a softer, more tender biscuit. You can use self-rising flour if you like (just omit the salt and baking powder), but do know that self-rising flour does expire so if yours is old, throw it out (or add more leavening to be sure your biscuits rise properly).
– Butter is best for flaky layers. If you want more fluffy biscuits, use lard (like these ultra fluffy biscuits) or shortening.
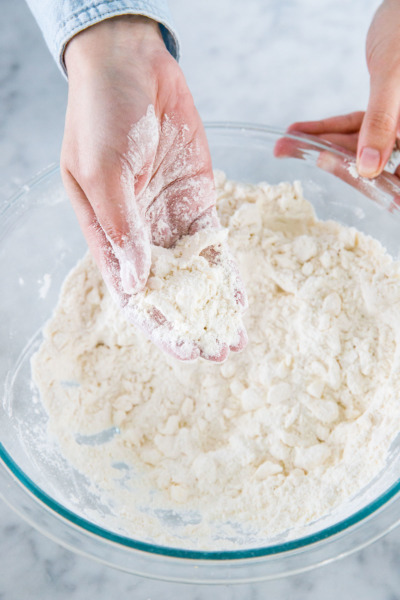
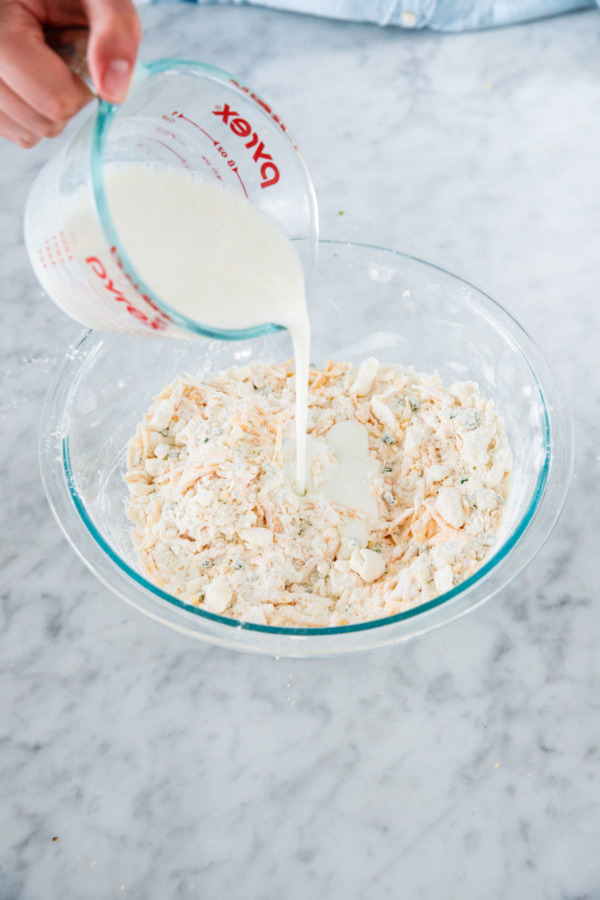
– Don’t overmix the dough, but you really don’t need to baby it either. This recipe involves ‘folding’ the dough a few times, which creates thin layers of butter. That’s what gives you your flaky layers. The overmixing part usually happens earlier, when you cut in the butter (you’re looking for pea sized chunks), and when you mix in the buttermilk (use a fork, and mix just until most of the dry bits are incorporated. Then knead the dough once or twice to bring it together in a ball and pick up the last remaining dry bits on the bottom of the bowl.
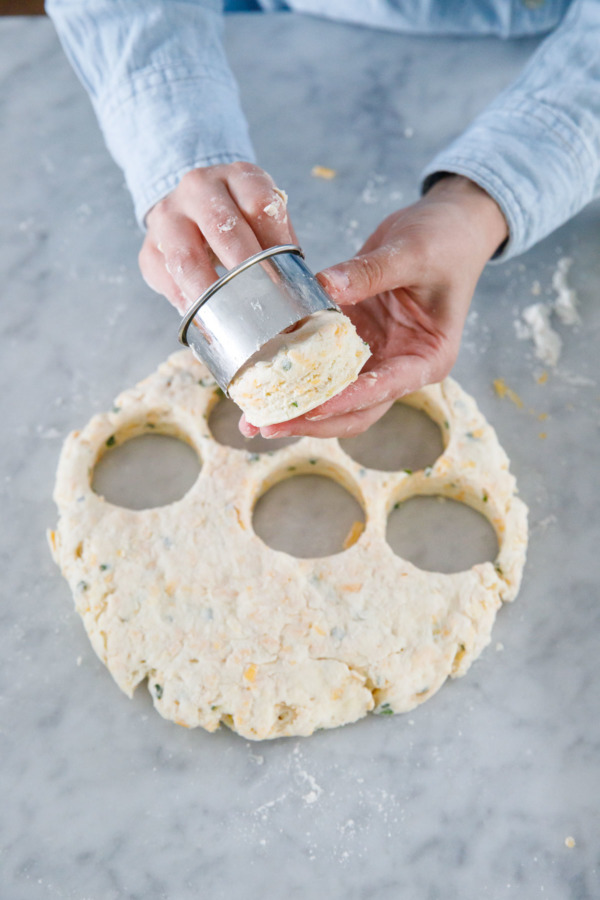
– When cutting your biscuits, for all that is holy, don’t twist the cutter! It shoud be a smooth up and down motion (if your biscuit comes out with the cutter, that’s ok, just press it out with your fingers onto the cookie sheet). When you twist the cutter you are actually pressing some of the open layers together, sealing them and preventing them from rising in the oven.
– For even taller biscuits, you can arrange them in a cast iron skillet so the biscuits are just touching each other. As they bake, the biscuits will support each other, allowing them to rise even higher. That said, if you prefer crispy edges then I’d recommend baking them on a cookie sheet like I have. They might lean a little bit as they rise, but they’ll be evenly golden brown on all sides.
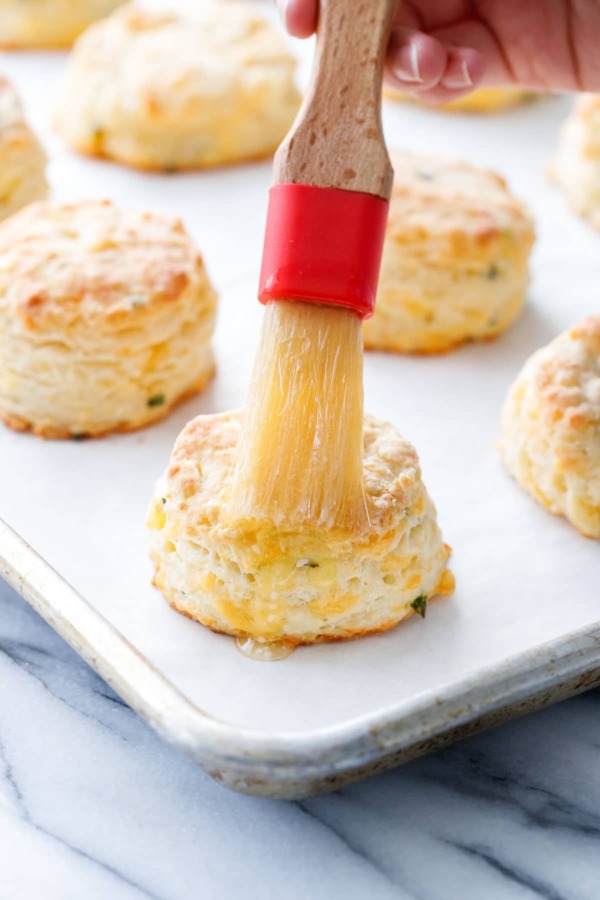
– Brush them with butter after baking. I found that brushing the biscuits with butter, buttermilk or egg before baking resulted in less browning (oddly enough).

We’re partial to Tillamook sharp cheddar cheese (full disclosure, we originally created this recipe for Tillamook as part of our ongoing Instagram partnership, but we thought it was too good not to share here too!)
I highly recommend shredding your own cheese here with a fine or medium sized shred. Too coarse and the cheese will puddle and brown at the bottom of the biscuits.
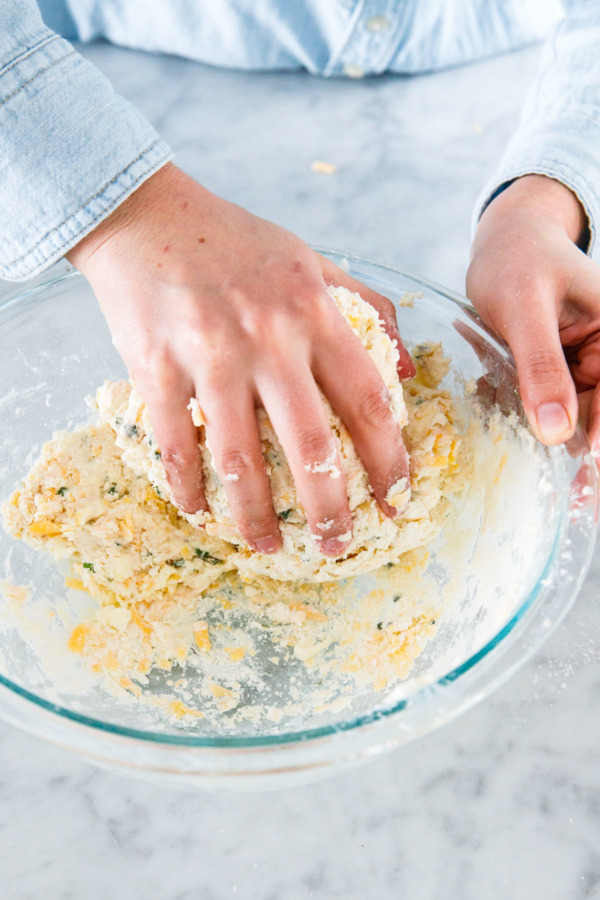
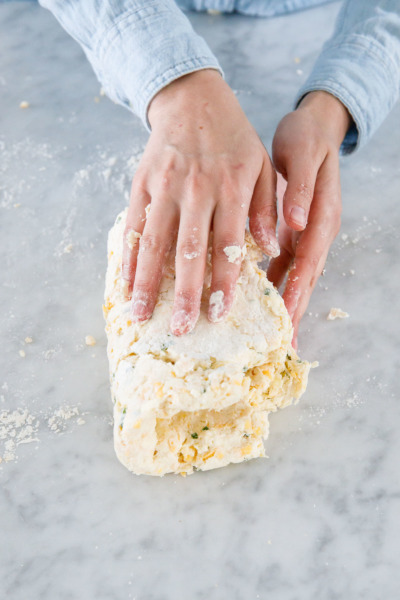

When you first turn it out of the bowl the dough will be quite shaggy. That’s good, it means you haven’t overworked it! From there, pat it out to about 3/4-inch thick, then fold it in half and in half again. Repeat this process 2-3 times.
This is where the flaky layers come from. Much in the same way that layers of butter form layers in say, puff pastry or homemade croissants. As you work, you do want to be sure the dough stays cool to preserve the flakes of butter layered inside.
There’s a fine line between working the dough just enough and working it too much (resulting in tougher, denser biscuits). While you can gather the scraps of dough and make more biscuits (it’d be a shame to waste it, afterall) you will likely see a noticeable difference in the height of this second rolling. Same for a third rolling and so forth. They’ll still be good and all, just not quite as tall and impressive.
Or, you could avoid the re-rolling issue altogether and just cut your biscuits into squares. There are no scraps with squares, afterall. ;)

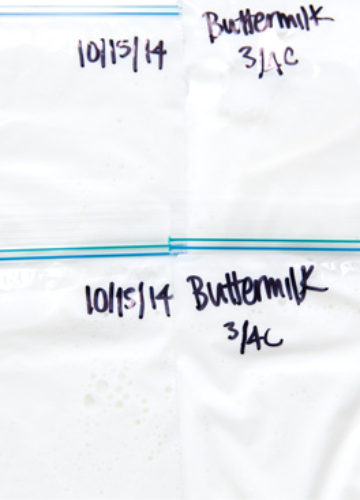
These biscuits will keep pretty well for a few days if you want to make them ahead of time. You can also freeze your biscuits, either unbaked rounds or baked (but not buttered). Freeze the biscuits on a cookie sheet for a few hours until pretty much frozen solid, then transfer them to an airtight plastic bag (don’t forget to date and label it!)
Reheat day-old or frozen baked biscuits in a 350 degree oven until just warmed through, then brush with melted butter.
For unbaked frozen biscuits, they will take a few minutes longer when baking from frozen. Just keep an eye on them and take them out when they are lovely and golden brown all over.

Cheddar Chive Biscuits
Ingredients
- 2 cups / 240 g all-purpose flour
- 4 ½ teaspoons / 18 g baking powder
- 1 teaspoon kosher salt
- 6 tablespoons / 84 g cold unsalted butter, cut into cubes
- 3 ounces / 85 g sharp cheddar cheese, shredded (about 1 cup shredded)
- 1 tablespoon chopped fresh chives, or 2 teaspoons dried chives
- ¾ cup / 180 g buttermilk
- 2 tablespoons / 28 g melted butter, for brushing
Instructions
- Preheat oven to 425 degrees F.
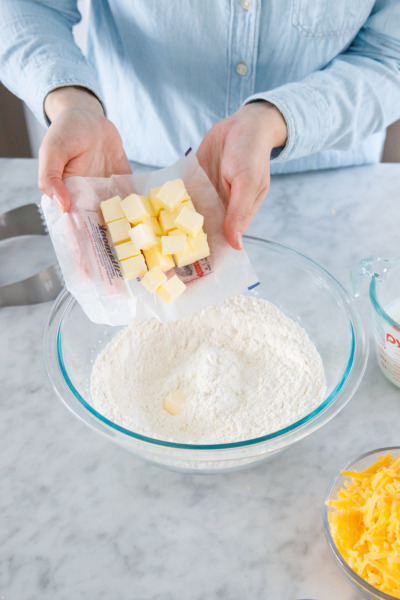
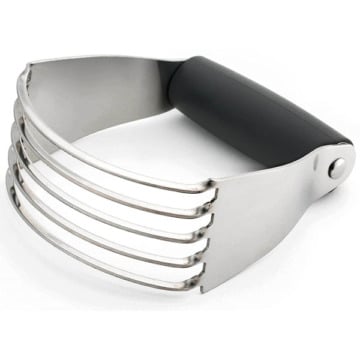
- In a bowl, whisk together flour, baking powder and salt until evenly distributed. Sprinkle over butter cubes, then use a pastry cutter or two knives to break up the butter into pea-sized chunks.
- Add cheddar and chives and toss until evenly incorporated.
- Drizzle over buttermilk and stir with a fork until evenly moistened. Press dough together into a loose ball with your hands.
- Turn out onto a lightly floured surface. Press into a rectangle, then fold in half lengthwise, then fold into quarters. Pat dough out into a rectangle a second time, then fold in half and then and fold into quarters once more.
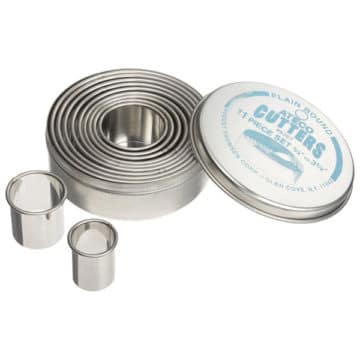
- Pat out into a rectangle approximately 1-inch thick. Using a circular cookie cutter or biscuit cutter, cut into rounds (when cutting, press the cutter straight down and lift it straight up - don’t twist or you might ruin the lovely layers).
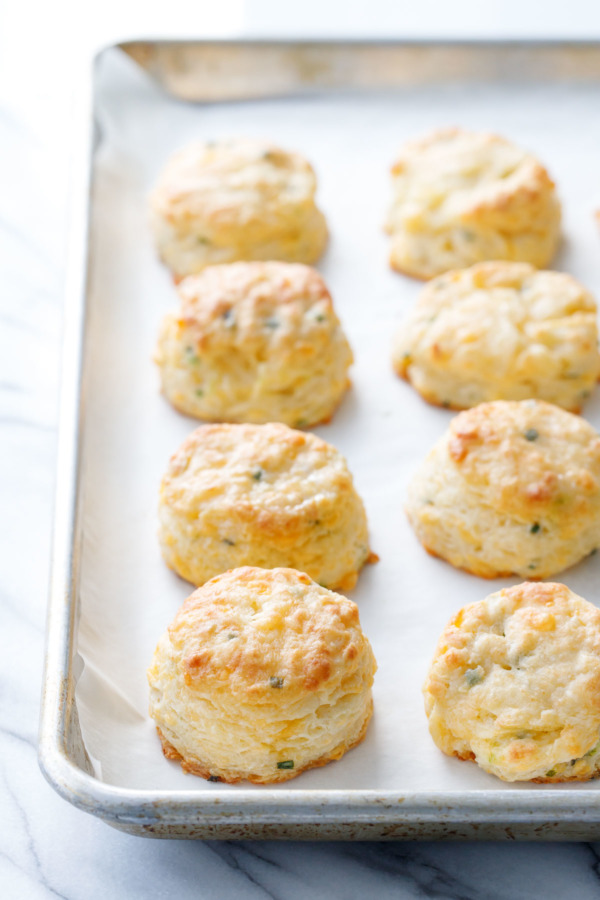
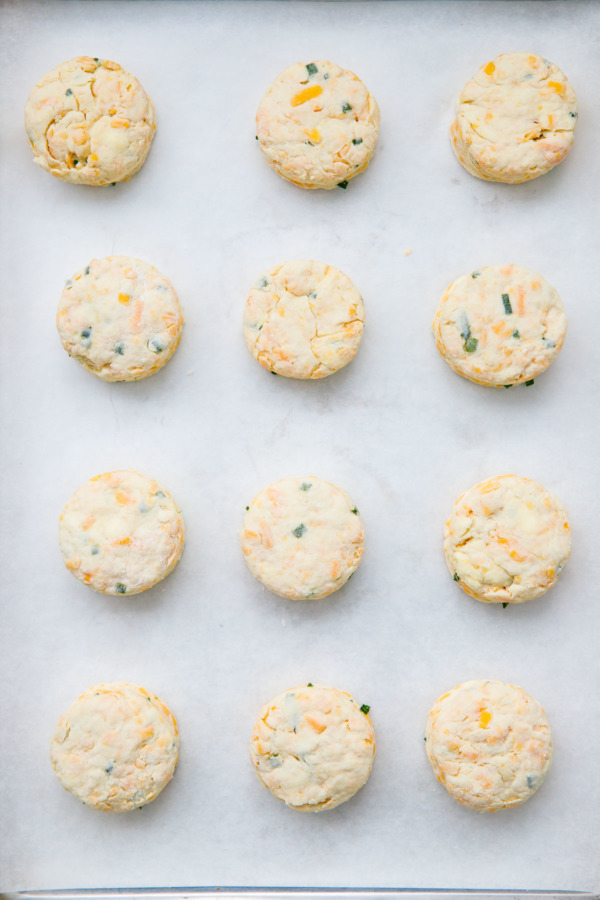
- Arrange biscuits on a parchment lined baking sheet, leaving an inch or two of space between them. Any remaining dough scraps can be gathered together and pressed out again, although keep in mind this second batch won’t be quite as tall as the first.
- Bake for 15 minutes or until tops are golden brown. Remove from oven and brush generously with melted butter. Serve warm.


What size cutter,??
What size biscuit cutter?
I recommend a 2.5 to 3-inch diameter circle cutter, though you can make them as large or small as you’d like.
Excellent recipe! It’s definitely a keeper for my family. Easy to follow directions and the biscuits came out perfect and tasted delicious. My husband couldn’t get enough of them.
Sharp cheddar? Fabulous. I love the look of these biscuits. So flaky, moist, and tender. Can’t wait to make them!