
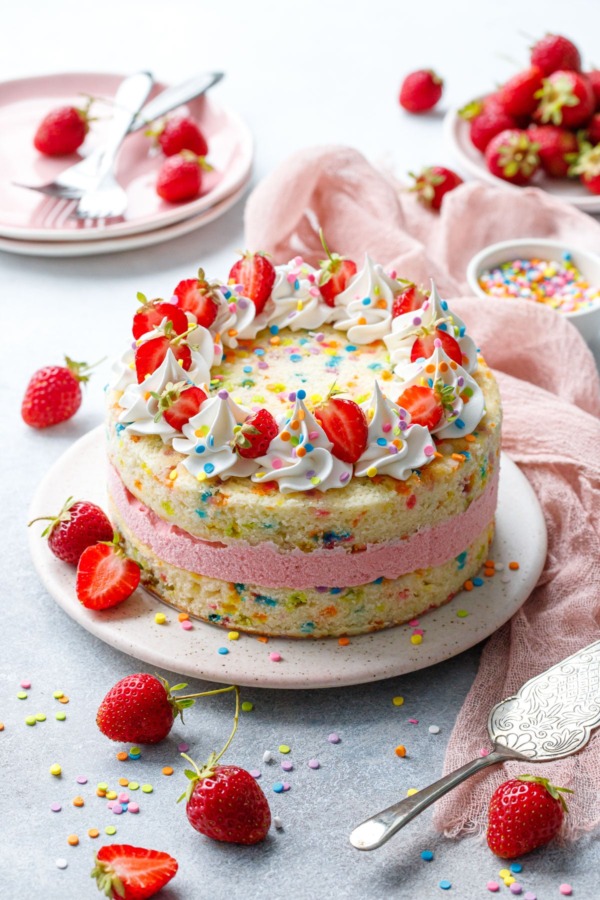
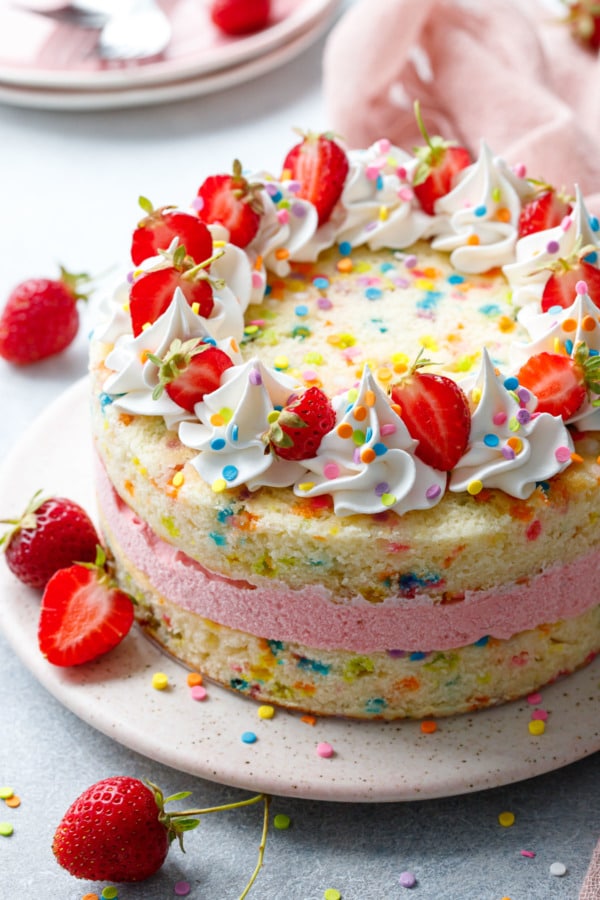
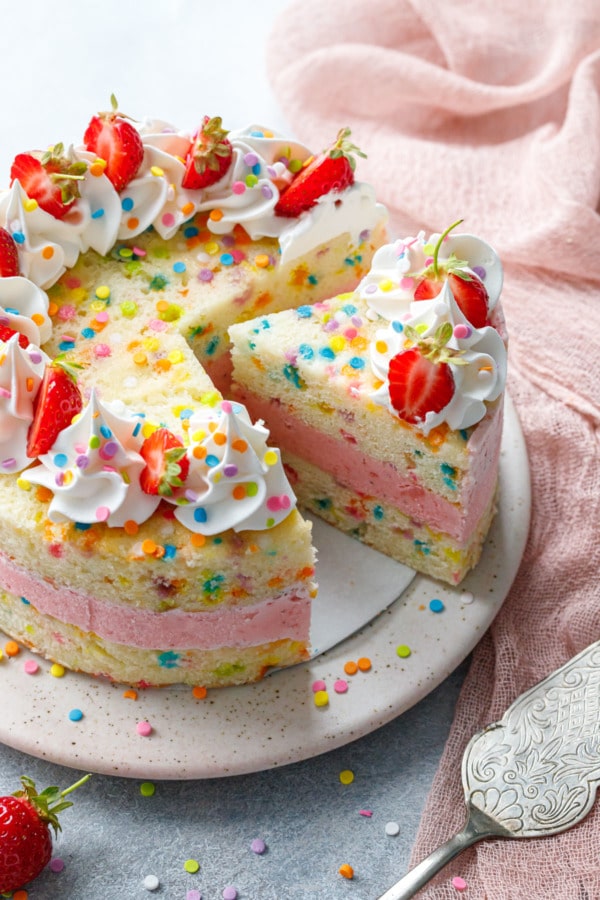
The summer fun has just begun! This colorful strawberry funfetti ice cream cake will have you smiling from ear to ear (or mouth to stomach, rather).
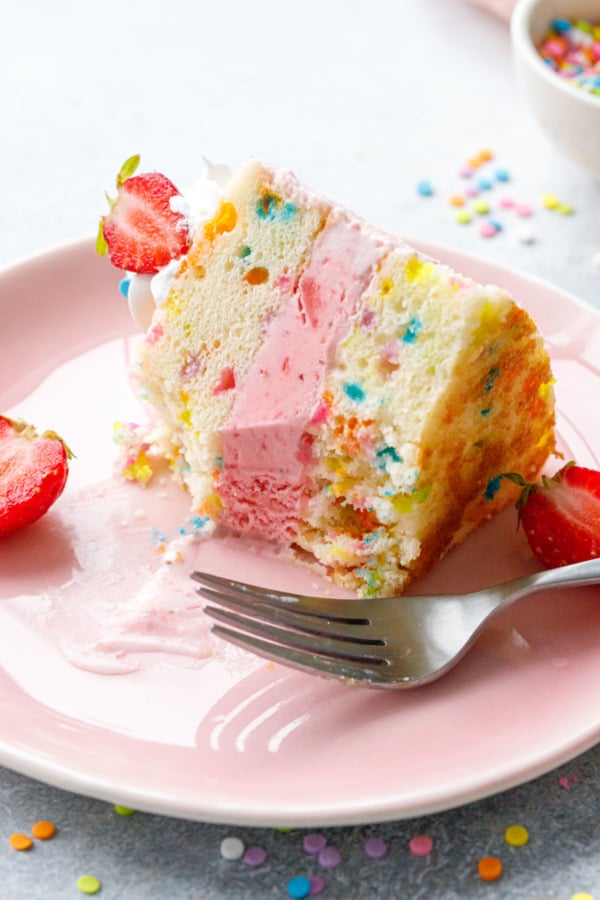
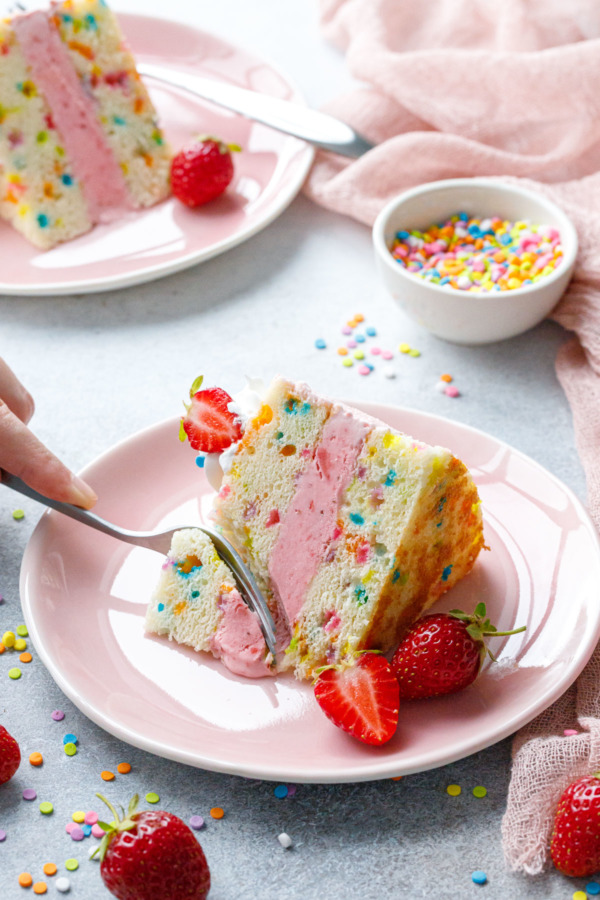
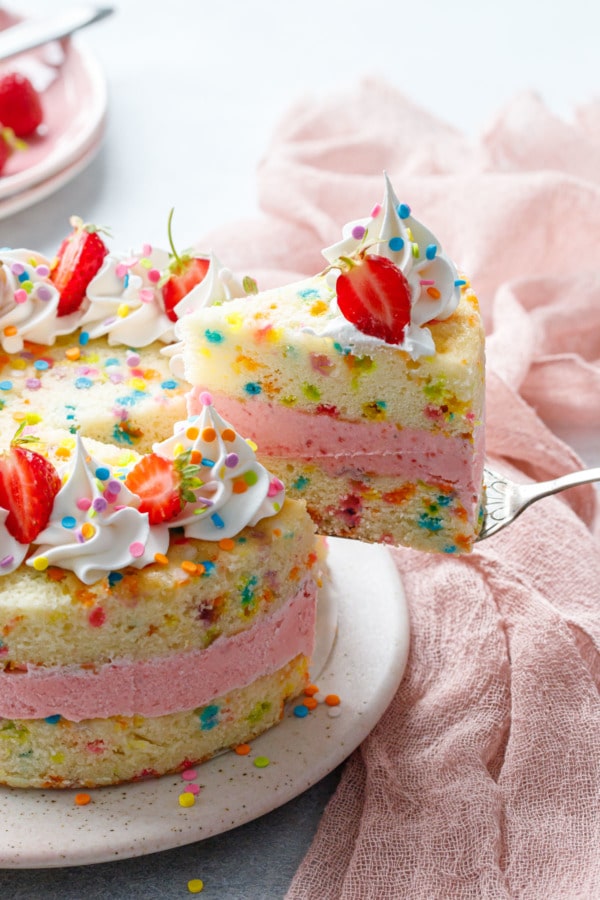
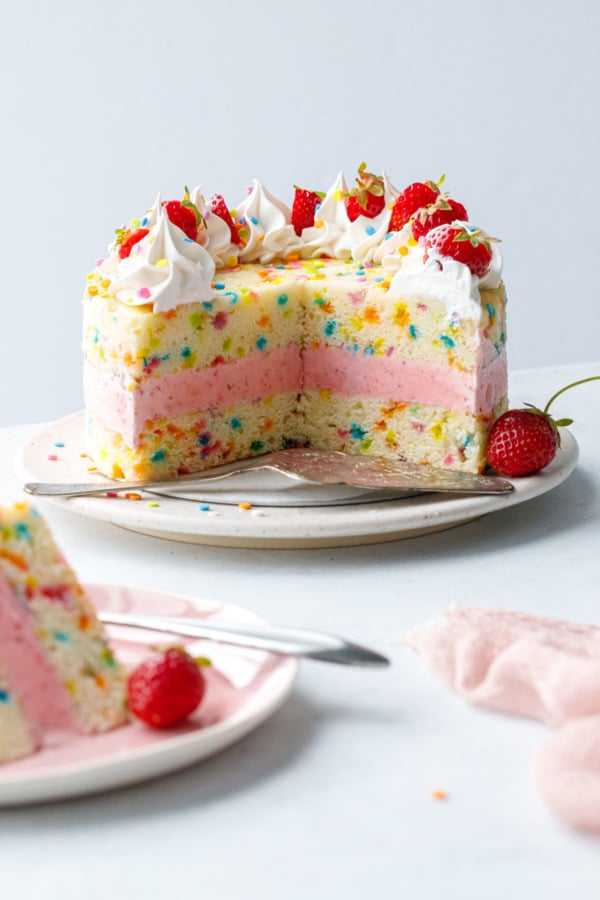
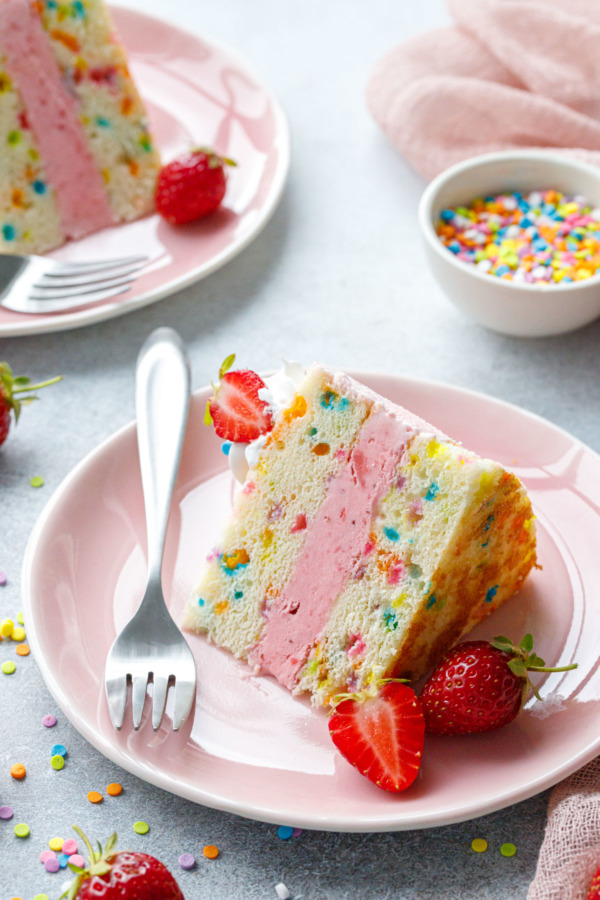
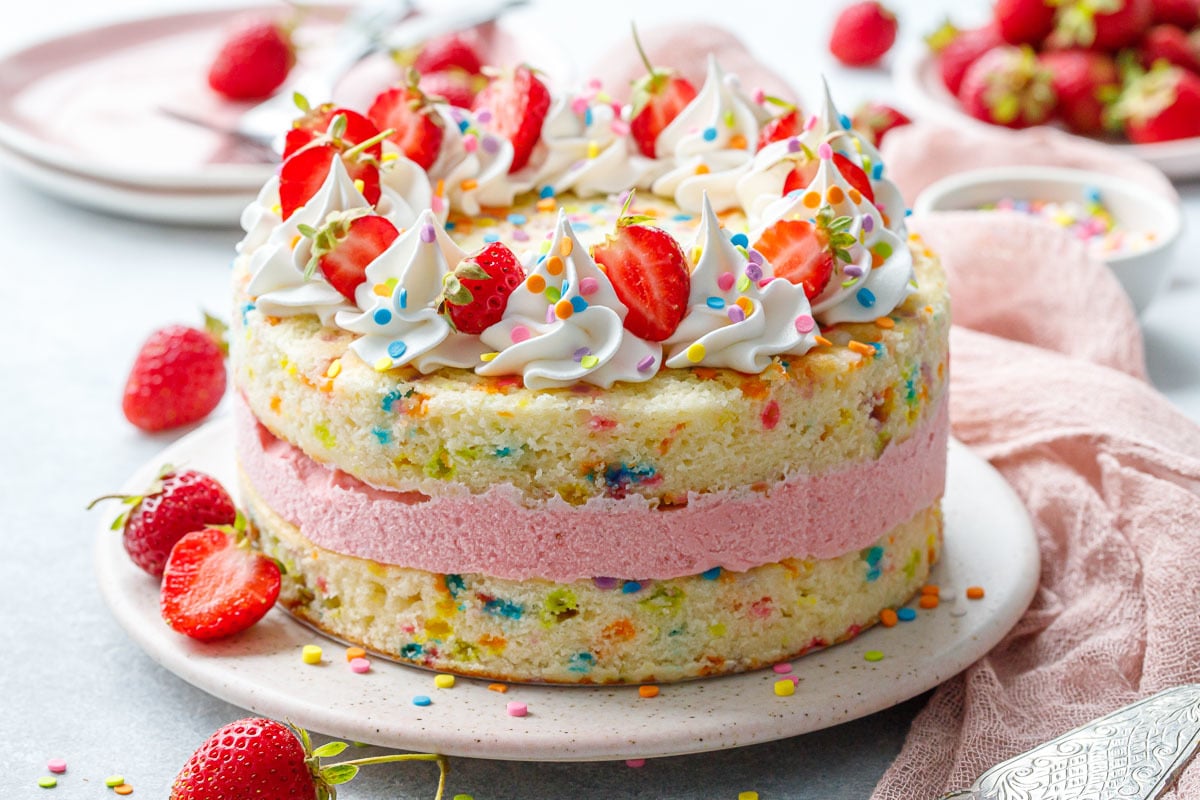
If happiness could be frozen, sliced and eaten with a fork, it’d probably look something like this: a thick layer of freshly churned strawberry buttermilk ice cream sandwiched between moist yellow cake freckled with colorful confetti sprinkles.
Save this recipe for later!
Strawberry season is just about over here in Tennessee, but we managed to make it out to the fields to pick some before the fragile berries are smothered by the summer heat.
The berries were much smaller this year, so it took us a bit longer to pick a full bucket of them, but boy are they delicious. Tiny and sweet and oh so fragrant, I had to consciously restrain myself from eating every other berry that I picked (I’ve given myself plenty of stomachaches from eating too many strawberries, but I never seem to remember this when I’ve got a bucket of ruby red beauties on my arm.)
Honestly I can think of no better way to spend a long weekend then making all the strawberry things, from ice cream and pie to shortcakes and (of course) jam.
This recipe combines two of my favorite things: funfetti cake and fresh strawberry ice cream. It’s bright, fun, and fruity and guaranteed to make you smile.
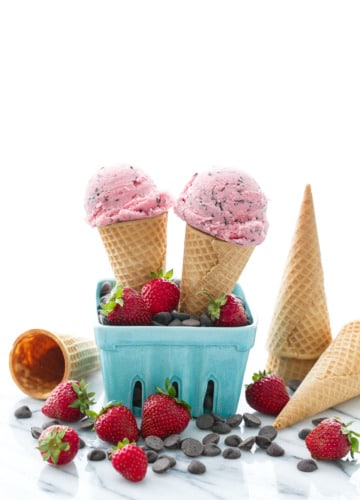
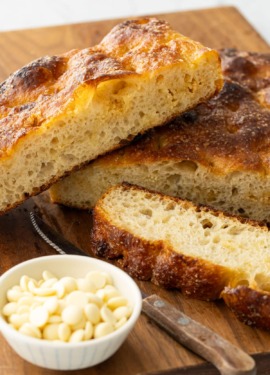
Serve it topped with freshly whipped cream, ripe local strawberries, and even more rainbow sprinkles for good measure (really, can you ever have too many sprinkles?)
The ice cream is homemade, a fresh strawberry and buttermilk ice cream that’s as easy to make as it is to eat (no eggs in sight, which means no cooking and no tempering). Just blend it all up in the food processor and pour it right into your ice cream machine.
That said, you can also use store bought, just grab a pint of your favorite strawberry ice cream (or whatever flavor floats your boat), and let it soften up before spreading it onto your cake layers.
This is a perfect make-ahead recipe; in fact, I recommend starting to bake at least two days before you plan to serve it. You could probably squeeze all the work in the day before, but it’s really best when every component has time to fully freeze, along with the final cake.
Make your cake layers first, let them cool then cut into rounds. Cover or wrap in plastic wrap and freeze overnight.
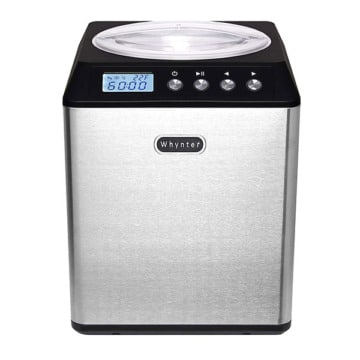
The next day, whip up your ice cream base, processing the berries with cream, sugar, and buttermilk, then pour straight into your ice cream maker and churn until it’s the consistency of soft serve (you can also make the base the day before if you wanted, then churn the day of assembly).
Pull out the frozen cake and assemble, layering the rounds of cake with your freshly churned ice cream. Then cover the whole thing with plastic wrap and freeze it overnight until ready to serve. If you plan to keep it frozen for more than a few days, try to wrap it as tightly as possible to prevent freezer burn.
The assembly process for this ice cream cake is a lot like my other naked cakes. The only real difference is you’re working with frozen cake and ice cream instead of frosting.
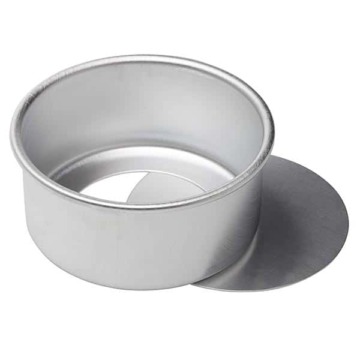
I used a 6-inch round cake pan with a removable bottom (this is my pan of choice for cheesecakes as well, it works so much better than a thin-walled springform pan) or a cake/pastry ring. You can also use a 6-inch springform pan or a silicone cake mold (with silicone, you can pop it right out of the pan once it’s frozen solid, no parchment/acetate lining needed).
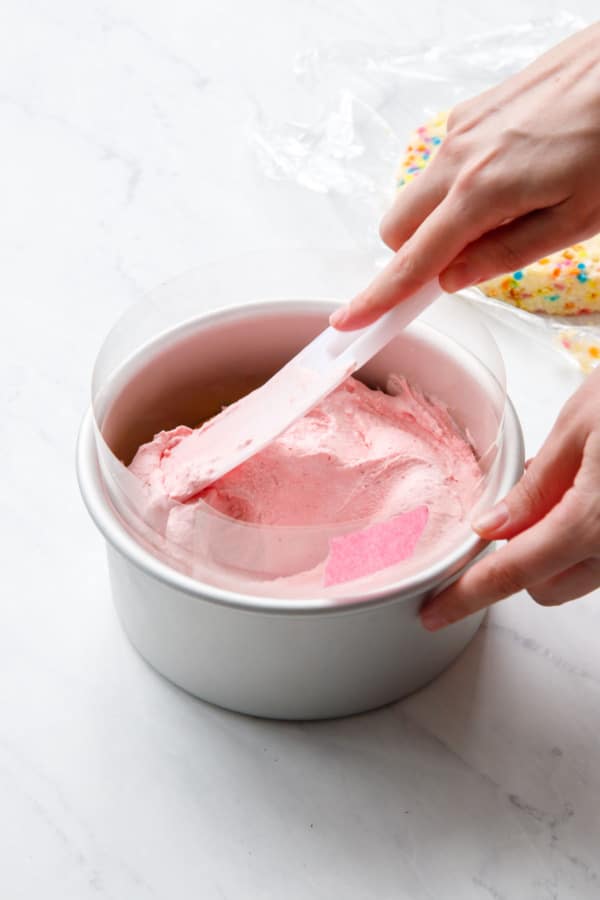
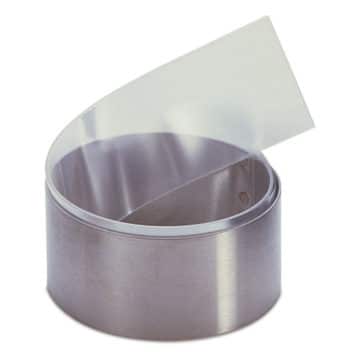
You’ll want to line the bottom of your pan with parchment (this just makes the cake easier to move), and the sides with a 3 or 4-inch strip of acetate.
You can also line the entire pan with plastic wrap, then use the plastic overhang to ‘lift’ the entire thing out of the pan once it’s frozen. With this method you will have some visible wrinkles on the outside of the ice cream layer, since it’s pretty impossible to make the plastic wrap completely smooth.
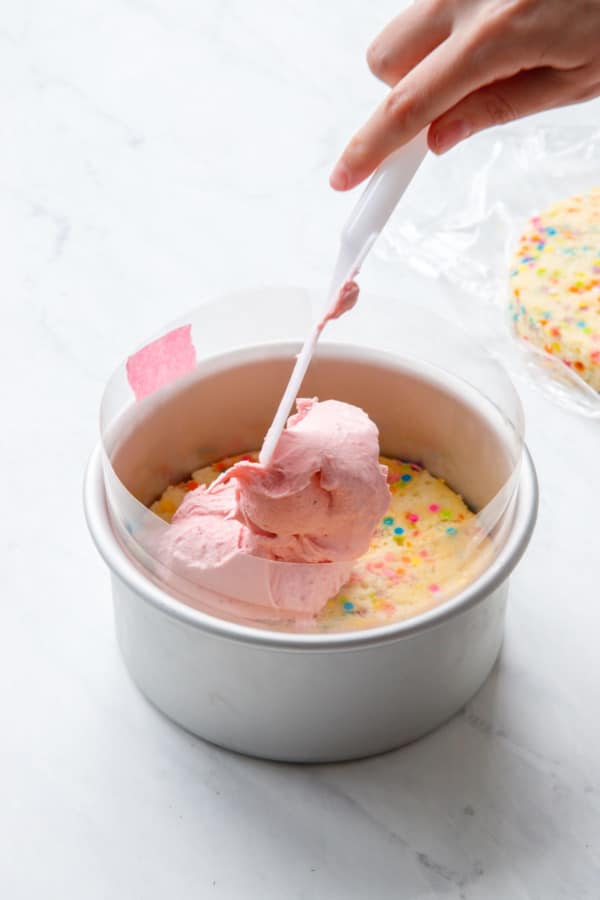

Once you’ve got the lining in place, position the first round of cake in the bottom of the pan, then freeze the entire assembly for at least 30 minutes or more if possible – this ensures the pan is good and cold so your ice cream won’t turn to liquid as you assemble it. Keep the second cake layer in the freezer as well.
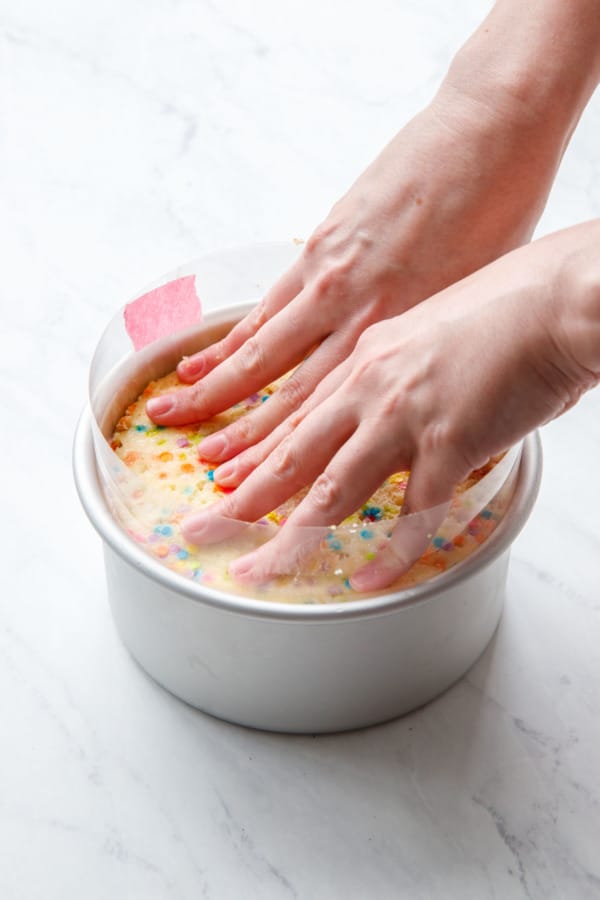
Once your ice cream is churned to the consistency of soft serve, you can start assembling, working as quickly as you can so the ice cream doesn’t melt. Spread about 1½ cups (just shy of a pint) of ice cream on top of the first cake layer, then sandwich the second layer on top, pressing lightly so the ice cream is forced into an even layer.
Lightly cover the whole thing with plastic wrap and place it in the coldest part of your freezer for at least a couple of hours, or ideally overnight.
If you hadn’t noticed, I’m a huge fan of the smaller 6-inch cakes, but if you want to make a larger version, simply double the recipe to make an 8 or 9-inch cake.
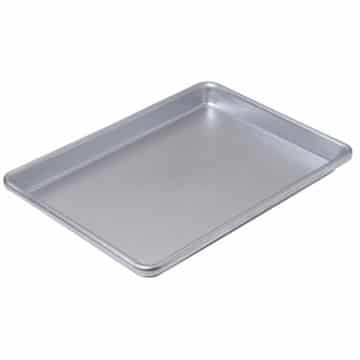
Bake your cake directly in two round pans if you want (they’ll be a bit thicker), or use a half-sheet pan then cut out 8 or 9-inch rounds to fit whatever pan in which you’ll be assembling your cake.
The scraps left over after you trim? Well, I don’t think I have to tell you what to do with those (nomnom). That said, you could also piece them together to make a third layer, giving you an extra tall ice cream cake with 3 layers of cake and 2 of ice cream. It’d be incredibly impressive, that’s for sure!
Let’s talk sprinkles for a sec.
I’ve found the best sprinkles for funfetti cake are, by far, confetti quins (sequins). I like these pastel ones, which is what I’ve used here. Jimmies are your next best bet, though they don’t create the same pockets of color that the quins do. Nonpareils should be your last choice, as their colors tend to bleed quite a bit when mixed into batter, which isn’t ideal.
One important note about the cake: your ingredient temperature is paramount in order to achieve the perfect, cottony texture. You want your butter, eggs, and buttermilk to be the same temperature, ideally around 70 degrees F. Seriously, stick a thermometer in your butter, and your eggs after cracking. If one or the other is significantly cooler, you will not be able to achieve proper emulsification; your batter will look chunky and curdled instead of light and fluffy. It’ll still bake up into an edible cake and will taste quite good, but the texture won’t be as fluffy or uniform (the larger chunks of butter melt and create pockets of air in the final cake).
Remember to take out your butter, eggs, and buttermilk at least an hour before baking. Then cream the heck out of the butter and sugar, until it is very pale and fluffy, like buttercream. Add the eggs, one at a time, mixing each one completely before adding the next. You’re creating an emulsification here, which takes time, so don’t rush it. Seriously. Whenever I mess up a recipe it’s usually because I was impatient: I didn’t let my ingredients come to temperature or I didn’t chop my chocolate fine enough for my ganache or used too high heat to cook my custard… all mistakes that could have been avoided if I’d just slowed down.
Have patience, plan ahead, and you’ll be rewarded with a perfect, moist and fluffy cake.
Strawberry Funfetti Ice Cream Cake
Ingredients
For Strawberry Buttermilk Ice Cream:
- 8 oz / 227 g fresh or frozen strawberries, hulled
- 1½ cups / 360 g heavy cream
- ⅔ cup / 133 g granulated sugar
- ½ cup / 120 g buttermilk
- 1 tablespoon lemon juice
- 1 teaspoon vanilla extract
- ⅛ teaspoon kosher salt
For Funfetti Cake Layers:
- ½ cup / 113 g unsalted butter, at room temperature
- 1 cup / 200 g granulated sugar
- 3 large eggs, at room temperature
- ½ cup / 120 g buttermilk, at room temperature
- ¼ cup / 54 g vegetable oil
- 1 tablespoon vanilla extract
- 1 ½ cups / 185 g cake flour, sifted
- 1 teaspoon baking powder
- 1 teaspoon kosher salt
- ½ cup / 80 g confetti quin sprinkles
- whipped topping and fresh strawberries, optional, for decoration
- ½ quart strawberry buttermilk ice cream, half a batch of the ice cream recipe as listed, or store-bought
Instructions
- Preheat oven to 350 degrees F. Butter the bottom and sides of a quarter sheet pan; line bottom with parchment paper and lightly butter parchment.
- In a bowl, sift together cake flour, baking powder, and salt and set aside.
- Whisk buttermilk, oil, and vanilla together in a large measuring cup or bowl (ideally with a spout) and set aside.
- Combine the butter and sugars in the bowl of a stand mixer fitted with the paddle attachment and cream together on medium-high for 2 to 3 minutes or until pale and fluffy. Scrape down the sides of the bowl, then add the eggs, one at a time, mixing well until each is fully incorporated, scraping down the sides of the bowl as needed.
- On low speed, add about a third of dry ingredients, mixing until mostly incorporated. Slowly stream in about half of the buttermilk mixture. Scrape down the sides of the bowl. Continue alternating dry, wet, then the rest of the dry ingredients, mixing until just incorporated. Fold in sprinkles.
- Spread the cake batter in an even layer in prepared pan. Give the bottom of your sheet pan a tap on the countertop to even out the layer. Top with a few more sprinkles for good measure.
- Bake for 25 to 30 minutes or until puffed and the center is set. When gently poked with your finger, the cake should bounce back slightly, and the edges should be just started to turn golden brown.
- Remove from oven and cool on a wire rack. Stored in the fridge or freezer, wrapped in plastic wrap, for up to 5 days.
- To make ice cream base, combine strawberries, cream, buttermilk, sugar, lemon juice, vanilla, and salt in a food processor. Pulse 2 or 3 times until combined and mixture turns pink and there are no large chunks of berry remaining. (The ice cream base can be made a day ahead of time, just transfer to an airtight container and chill overnight until ready to churn.)
- To assemble, first prepare your cake pan or mold. I recommend using a 6-inch cake pan with a removable bottom. You can also use a springform pan, or a silicone cake pan if you have one. Line the bottom of the pan with a round of parchment paper, and the sides of the pan with a cake collar (a 3 to 4-inch tall strip of acetate). You can also line the pan entirely with plastic wrap; smooth it out as much as you can, the wrinkles will show on the final cake. Freeze the entire pan while the ice cream is churning until you are ready to assemble it.
- Churn ice cream according to manufacturer instructions until it is the consistency of soft serve. If you are using store bought ice cream, let it soften until it is uniformly spreadable (stir it in the carton occasionally since the outside will soften quicker than the center).
- Remove cake from freezer. Cut out two 6-inch rounds using a pastry ring or large round cutter, or trace around the edges of your cake pan and cut out with a knife. Place one frozen cake layer down in the bottom of prepared pan.
- Spread freshly churned ice cream on top of the first cake layer. Lower the second cake layer on top and press gently to adhere. Cover the whole cake with plastic wrap and return to the freezer until frozen solid, at least 3 to4 hours or ideally overnight.
- Prior to serving, remove cake from pan and peel off acetate. If desired, pipe a decorative border with whipped topping on top of cake, then garnish with strawberries and more sprinkles. Use a warm knife to cut clean slices, wiping the knife between each cut.
Notes
- The ice cream recipe yields a little over 1 quart, you'll use about half of it for the cake. You can also use 1 pint of store bought strawberry ice cream, just soften it until you can easily spread it into your cake pan.
- This recipe makes one 6-inch layer cake. For an 8 or 9-inch cake, double the cake portion of the recipe only and bake in two round pans or in a half sheet pan (then cut out 8 or 9-inch rounds to fit).


Oh I flopped mine. It’s not risen in the middle. 😔
Did it rise, and then sink? Or it just never rose at all? If it rose then sunk, it was likely underbaked and/or overmixed. If it never rose at all, your baking powder may be old and inactive. Also check your oven temp, as if the temperature is off (too high or low) it could affect the bake.
When you want to serve the cake, when do you pull it out of freezer? Does it need to sit for a certain amount of time at room temp?
Just long enough so you can get a knife through it! Maybe 15-20 minutes or so.
I made this on my daughter’s birthday and everyone love it! Thanks for sharing it. :)
this looks so pretty and so much fun! how delicious!
strawberries AND funfetti in an ice cream cake, a four-fecta on the fun meter, love it!
This is so fun Lindsay!