
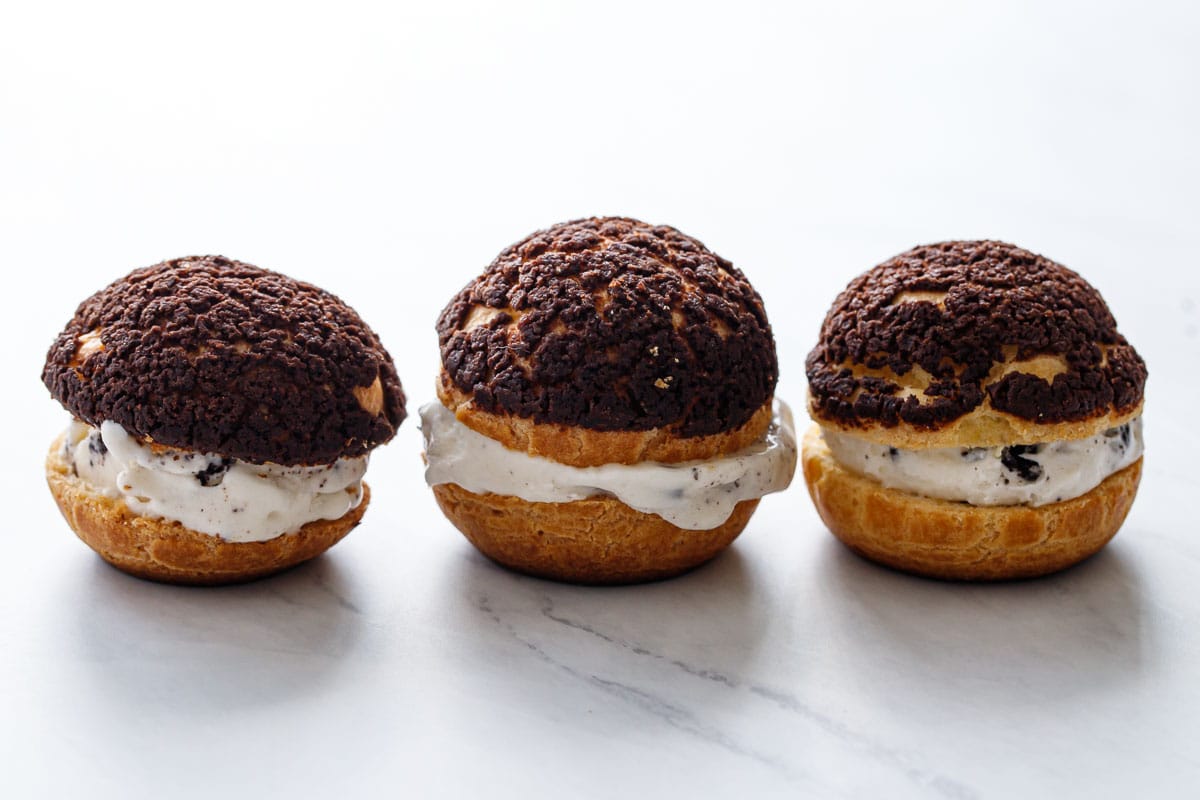
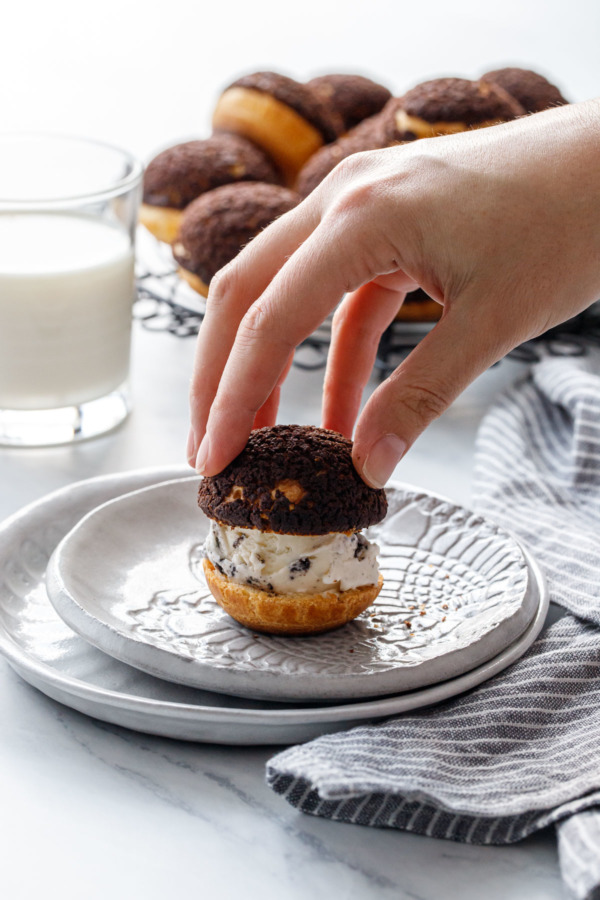
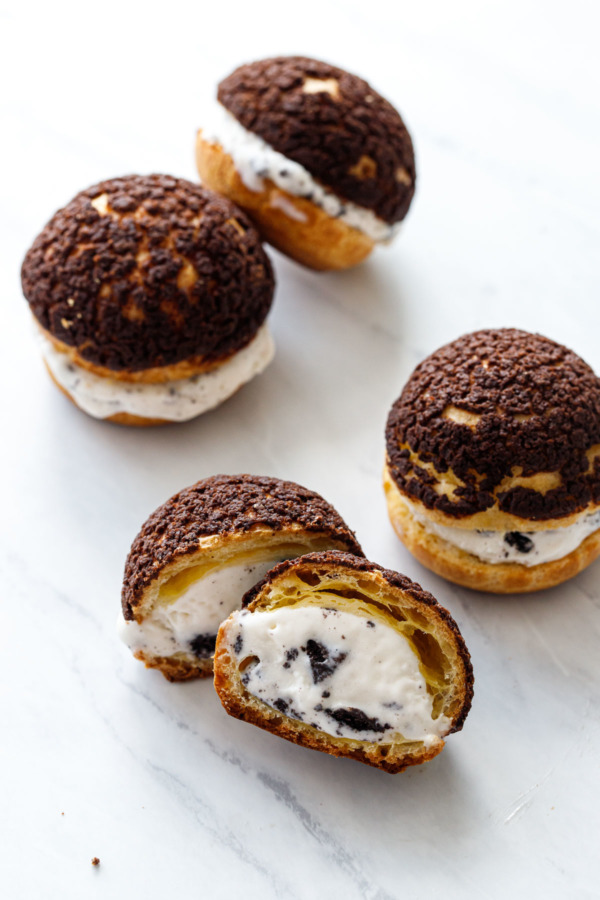
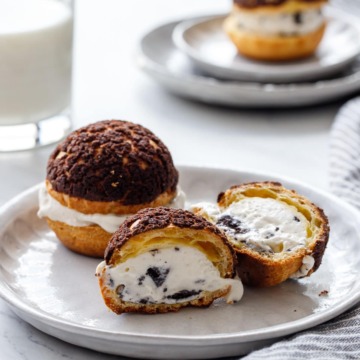
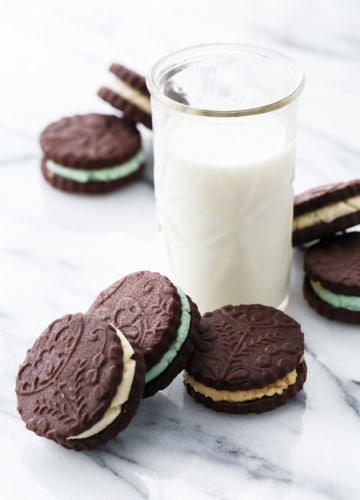
Pastry meets ice cream in these delightfully crunchy, craquelin-topped cream puffs stuffed with cookies and cream ice cream.
Whether you call them cream puffs or profiteroles, these airy ice cream-stuffed pastries make for a truly special treat.
Save this recipe for later!
Aa is the case with a number of my recipes, the name came well before the recipe itself, this one a clever play on words sort of like one of those “Before & After” puzzles on Wheel of Fortune. Cookies ‘n Cream + Cream Puffs = Cookies ‘n Cream Puffs. Get it?!?
So I knew what I was going to call them. Now I just had to figure out how to make it happen.
I first set out to make these Cookies ‘n Cream Puffs with a cookie-infused pastry cream filling. At least that was the original idea.
While my craquelin-topped cream puffs turned out great the first time (surprising as it was my first time making craquelin!) my pastry cream didn’t quite set up as firmly as I would’ve liked. And when I tried to pipe it into the center of the puffs, the chunks of cookies kept clogging up piping tip. I’d squeeze harder to dislodge the clog, and the pasty cream would start oozing out the backside of my piping bag. And when I finally got one filled, the molten pasty cream would come oozing right back out of the hole in which I piped it.
Needless to say, it was a big ol’ mess.
At one point as I was trying to force this too-soft pastry cream into a cream puff, I got frustrated to the point where I just wanted to smash something. And as it turns out, a cream-filled pastry is awfully fun to hulk smash (oh yes I did).
But don’t worry, other than the one that got demolished with my fist, none of that first batch went to waste. I filled the rest with plain (cookie free) whipped cream and brought them to my ceramics class where they were readily devoured.
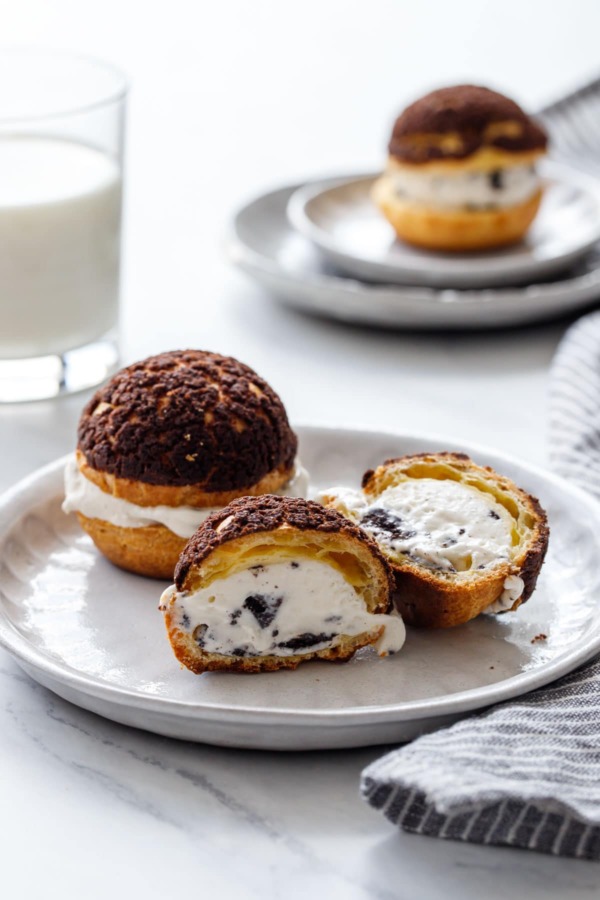
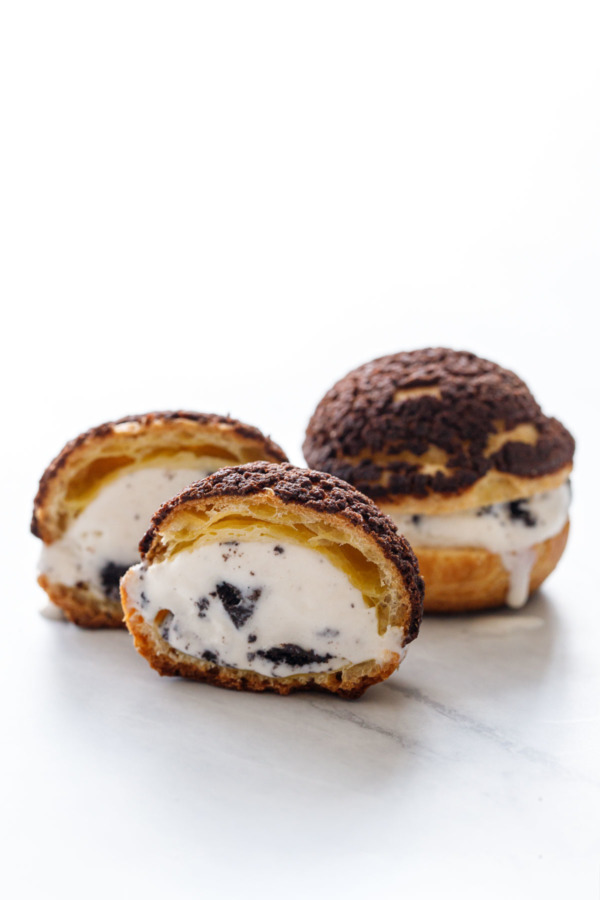
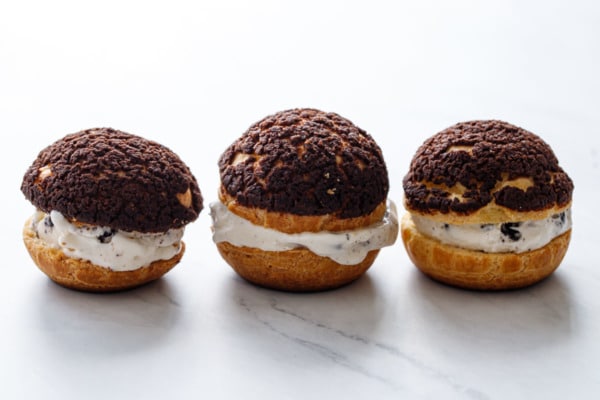
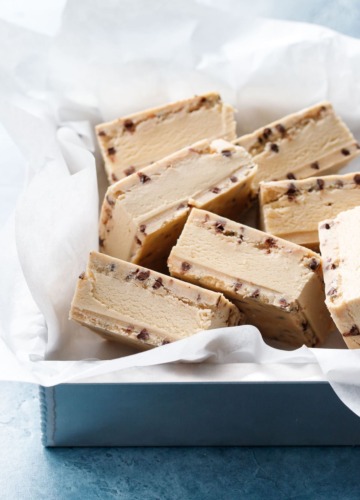
I also froze a handful of unfilled puffs, planning to attempt the filling again the next day. But I didn’t feel like trying (and failing) again, so I ended up just cutting the puffs in half and filling them with a scoop of ice cream. Which turned out to be such a good solution that I did a complete 180 on this recipe, nixing the cream filling entirely in lieu of cookies ‘n cream ice cream.
And ok ok I admit, usually when they’re filled with ice cream they’re actually called profiteroles, but then I couldn’t use my clever name anymore. Ice cream is still technically cream, so cream puffs still works in my opinion.
So there you have it. Cookies ‘n Cream Puffs. Not quite how I originally imagined them, but delicious nonetheless.
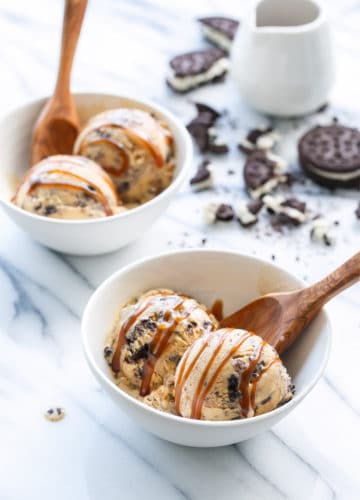
You can certainly use a homemade cookies ‘n cream ice cream (this salted caramel version would be divine), or use your favorite grocery store brand (spoiler: Tillamook is now available nationwide and it is FABULOUS).
I’ll admit that choux dough is not the easiest thing to master. It’s a bit tricky knowing how long to cook the dough after adding the flour (too long and too much water will evaporate, affecting your puff’s ability to, well, puff). Also, and perhaps the trickiest for me, was knowing how much egg to add. I made the mistake the first time of assuming the amount of egg listed in the recipe was a fixed quantity; but found out rather quickly when I tried to pipe mounds of soft, slumping dough that this was not the case.
For me personally, in my humid Nashville kitchen, about 3 1/2 eggs was just about right. If you live in a drier climate or if you use bread flour (which can absorb more moisture than all-purpose), you might need the full 4 eggs. Just add the last bit of egg slowly, a tablespoon at time, and stop as soon as the dough develops a nice sheen to it.
With practice, you’ll definitely have an easier time telling when the dough is ready, so keep at it.

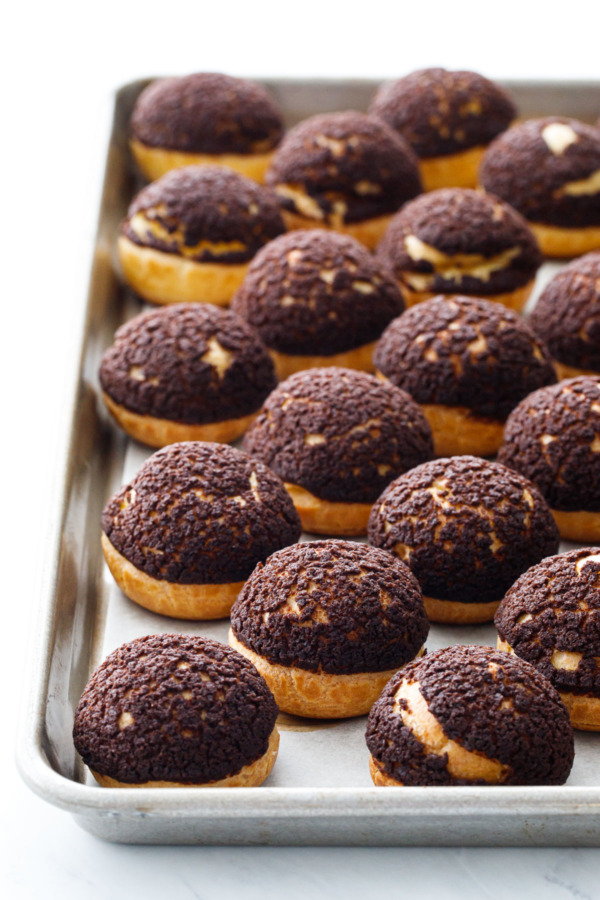
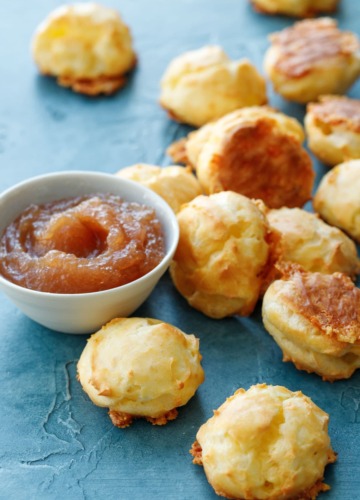
If you’ve never heard of craquelin before, it’s basically a round of cookie dough that gets baked on top of the choux pastry, resulting in a beautiful crackled appearance and delightful crunchy texture. The craquelin also helps the puffs puff more evenly, resulting in perfectly round and visually appealing cream puffs.
Chocolate craquelin tastes awfully like an Oreo cookie too, which ties in perfectly with my cookies ‘n cream concept.
This recipe is for a basic sweet choux, which can be used for cream puffs, profiteroles, or eclairs. Scrap the sugar and you have yourself a more savory choux. Fold in some cheese once the dough has cooked and voila! Gougères. It’s a very versatile recipe once you get the hang of it!
The puffs themselves can also be filled with just about anything, from pastry cream (assuming you get a nice firm set) to whipped cream to ice cream.
I put all my puffs in a zip-top bag and store them in the freezer, where they’ll keep quite well for up to a month. You do lose some of the delightful crunch from the craquelin in the freezer, but it’s easy enough to restore by baking the (unfilled, obviously) puffs for a few minutes – they’ll crisp right up.
Cookies 'n Cream Puff Ice Cream Sandwiches
Cookies ‘n cream ice cream-filled cream puffs with a crunchy chocolate craqelin topping.
Ingredients:
For Craqelin:
- 6 tablespoons (84g) unsalted butter, at room temperature
- 1/3 cup (80g) packed light brown sugar
- 1/2 cup (65g) all-purpose flour
- 3 tablespoons (20g) Dutch process cocoa powder, sifted
- 1/8 teaspoon salt
For Cream Puffs:
- 6 tablespoons (84g) unsalted butter, cut into cubes
- 100mL whole milk
- 100mL water
- 1 tablespoon (12g) granulated sugar
- 3/4 teaspoon (3g) kosher salt
- 1 cup (125g) all-purpose or bread flour, sifted
- 4 large eggs (200mL), at room temperature
- Cookies ‘n cream ice cream (or other flavor of your choice), for serving
Directions:
For craquelin:
- Blend butter with brown sugar in a mixing bowl (you can cream this with a wooden spoon or an electric mixer). Stir in flour, cocoa powder and salt and mix until no streaks of dry ingredients remain.
- Roll out dough to 2-3mm thickness between two sheets of parchment paper or plastic wrap. I found that a bamboo skewer was just about the right thickness, and used two of those set on either side of the dough as ‘guides’ for rolling (just make sure your rolling pin is wider than the guides). Be sure to lift off and reset the parchment every now and then to make sure there are no wrinkles or creases in the dough.
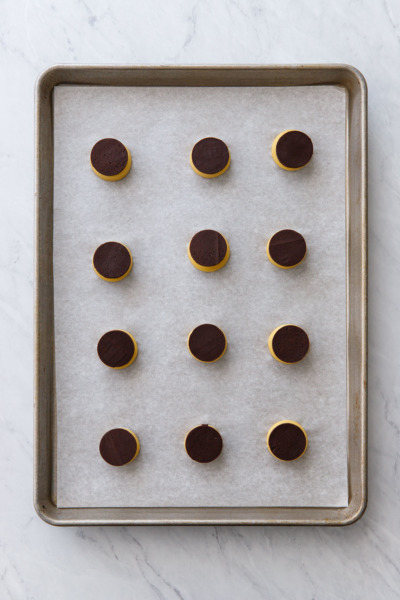
- Place rolled dough onto a flat sheet pan, and refrigerate or freeze for 30 minutes or until firm.
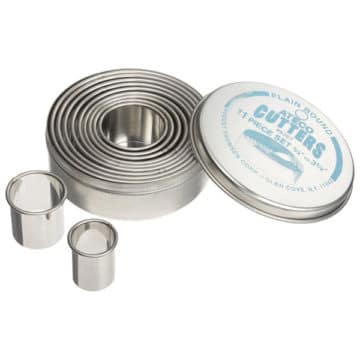
- Cut out 28 rounds of dough using a 1 1/2-inch cookie cutter. Transfer to a parchment lined baking sheet and return to the freezer until ready to use.
For choux pastry:
- Preheat oven to 375 degrees F. Line a light-colored baking sheet with parchment paper. If desired, trace a template onto the backside of the parchment using the same 1 1/2-inch cookie cutter you used to cut out the craquelin. Leave about 2-inches of space between circles to allow for expansion.
- Place butter in a medium saucepan along with milk, water and salt. Stir over medium heat until butter is melted, sugar and salt are completely dissolved, and mixture comes to a boil.
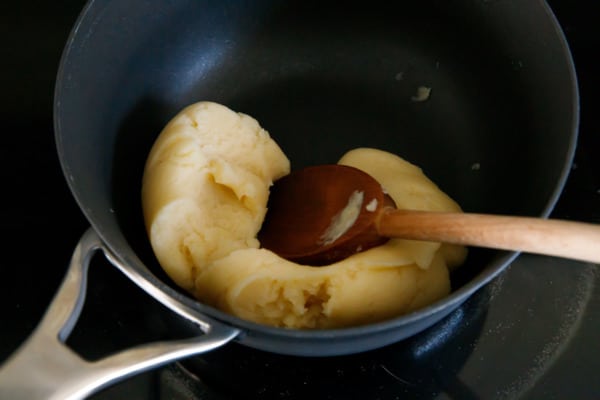
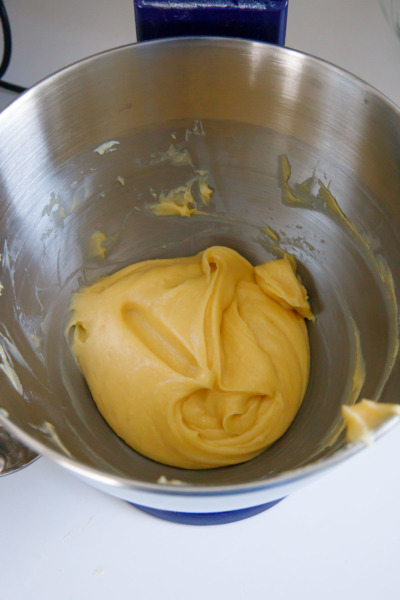
- Remove from heat (leave burner on) and add flour all at once. Stir vigorously with a wooden spoon for about 45 seconds until dough comes together in a ball of thick paste without any lumps.
- Return to heat and continue to stir for about a minute until dough pulls away from the sides of the pan and a thin film (if using a stainless pan) or small droplets of oil (if using nonstick) appear on the bottom.
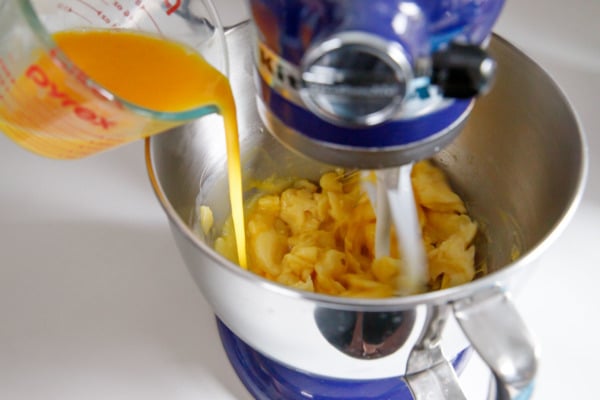
- Transfer dough to the bowl of a stand mixer and let cool to about 160 degrees F.
- While the dough is cooling, whisk the eggs together in a bowl or glass measuring cup; this will make it easier to add a little bit at a time.
- When dough is cooled, turn on mixer to low speed. Add about 1/4 of the whisked egg (about 50g or one egg’s worth) to the mixing bowl. The dough may seem clumpy and slimy at first, but continue mixing until the egg is completely incorporated before adding more.
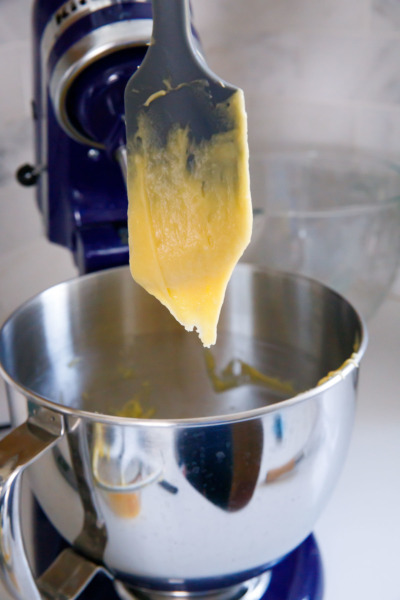
- Start checking the consistency of the dough after about 3 to 3 1/2 eggs — you’re looking for a dough that is thick and glossy but will still hold its shape when piped.Add more egg as needed to reach this consistency (I ended up using about 3 1/2 eggs); if you are using bread flour, it can absorb more egg than all-purpose. I found the best test for doneness was to swipe my finger through the dough: if the sides of the channel hold their shape, and the dough has a nice sheen to it, you’re good (and you don’t want to add any more egg). You can also insert a spatula upright into the dough, stir it around a bit, then lift it straight up; the dough should break into a nice V shape off the end of the spatula. If it breaks roughly without a point, you might need a bit more egg. If it falls off the spatula in ribbons, well, you’ve added too much. Unfortunately if you add too much egg and your dough is too soft, you DO NOT add more flour (this will ruin the dough completely).
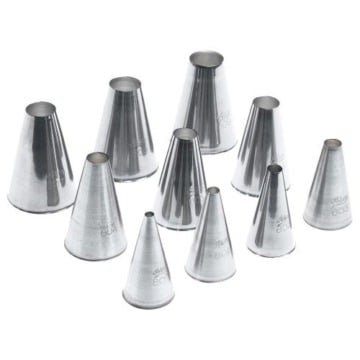
- Fit a large piping bag with a 1/2-round tip (I used an Ateco #806 tip). Twist the bottom right above the base of the tip and tuck the twisted bit into the tip itself. This will keep the dough from flowing out before you’re ready. Place the bag tip-first into a drinking glass, folding over the top edges of the bag down over the top of the glass.
- Transfer about half of dough into piping bag. Cover the remaining dough until you’re ready to use it.
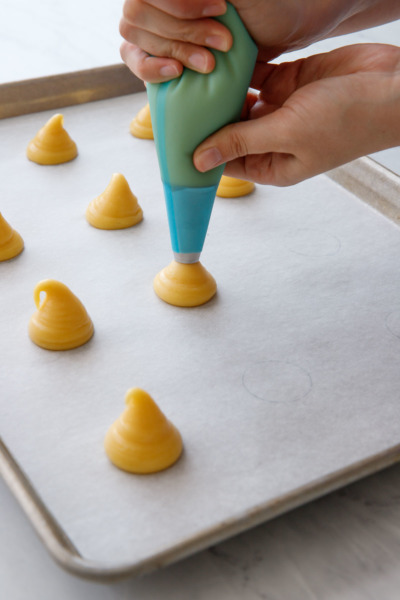
- Pipe dough onto prepared cookie sheet, holding piping bag upright and keeping the tip touching the surface of the dough as you go. Lift straight up at the end (don’t worry about the peak now, we’ll fix that later). Repeat with remaining dough.
- Dip your finger in water and gently tap down the peaked tip of each cream puff. Top each with a frozen round of craquelin dough (only take out the rounds you need for this pan; they get very soft when they thaw which makes them hard to handle).
- Bake cream puffs for 20 minutes. Open the oven to release some of the steam, and rotate the baking sheet to ensure even cooking. Continue to bake for another 8 to 12 minutes or until bottoms are nice and golden brown (if you prefer crispier puffs, bake them on the longer end of the range).
- Remove from oven and immediately poke a thin skewer into the side of each puff to let the steam release. I usually find a natural ‘hole’ at the bottom edge of the craquelin and poke my hole there. Let cool completely.
- Meanwhile, repeat the process with the second half of dough on another parchment-lined cookie sheet.
Assembly:
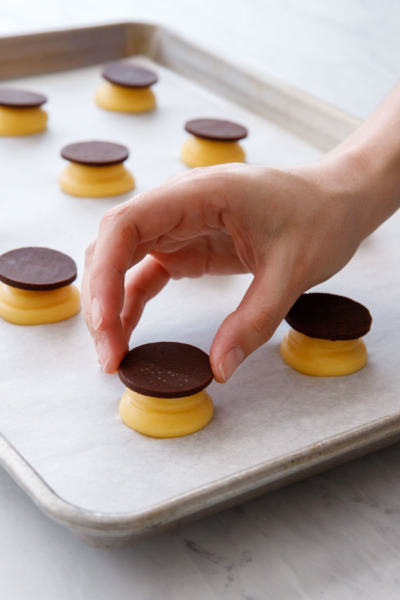
- Using a small serrated knife, gently cut around the base of each cream puff, right at the bottom edge of the craquelin topping to split the cream puff into two pieces.
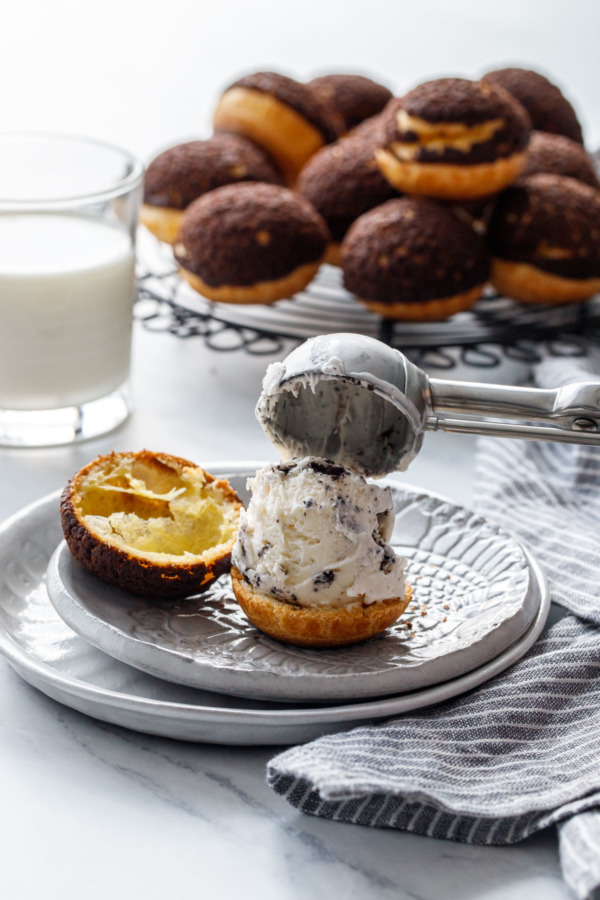
- Scoop a medium-sized ball of ice cream (I used a medium cookie scoop for this, a regular ice cream scoop was just a bit too large) and place it on the base of cream puff, then place other half on top. If your puffs are mostly hollow as they should be, you should be able to cover most of the ice cream with the top of the cream puff, letting the ice cream fill the entirety of the hollow space.
- Serve immediately, or return to the freezer until ready to serve.
- Unfilled cream puffs can be frozen in a zip top bag for up to 1 month. They’ll be a bit softer once they thaw, so if you want to re-crisp them before eating, arrange on a baking sheet and bake at 350 degrees F for 10 to 15 minutes.
Did you make this recipe?
Let us know what you think!
Leave a Comment below or share a photo and tag me on Instagram with the hashtag #loveandoliveoil.


Oi ! Fiz o Choux como na receita . ficou maravilhoso ,mas os meus grudaram no papel na hora de tirar e uns ficaram sem o fundo . Porque sera que aconteceu isso??? Obrigada pela receita
These look sooooo good, I am going to have to make them asap!!
really inspired cream puffs, wow, beautiful even, thank you
These are amazing Lindsay!!!
OMG!!! What a great idea! The puffs would be so light fluffy right? Have to try this
Oh my gosh, these look amazing! I need them in my life asap!
Oh my gosh these cream puffs look amazing!