Love and Olive Oil
Nutella Brownie Mousse Cake with Milk Chocolate Mirror Glaze

Nutella Brownie Mousse Cake with Milk Chocolate Mirror Glaze

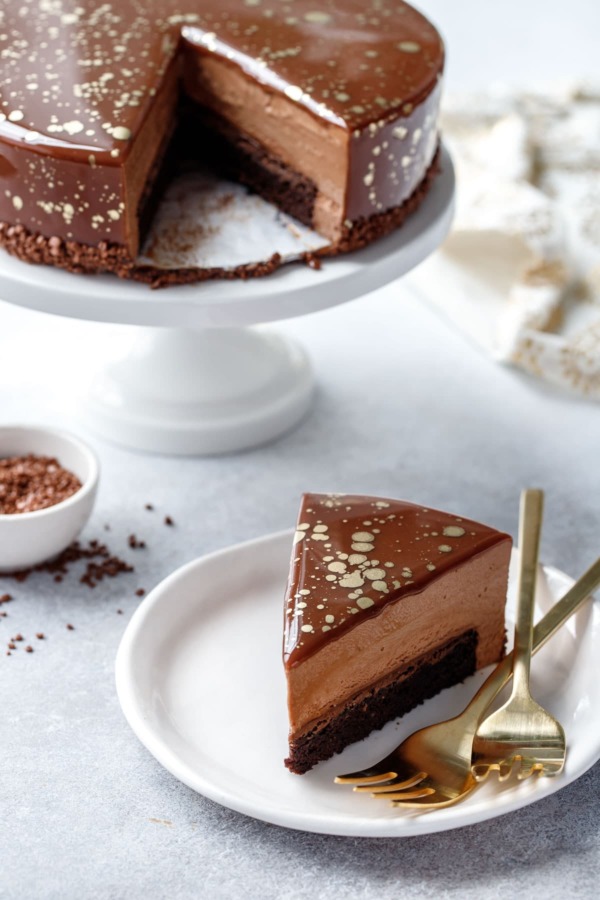
Pillowy milk chocolate and Nutella mousse surrounds a rich cocoa brownie slathered with creamy Nutella. If that’s not impressive enough, the whole thing is enrobed in a gorgeous milk chocolate mirror glaze and decorated with an edible gold splatter.

This stunner of a cake is sure to impress your friends and family this holiday season, and with some well-planned time management, is really much easier than you might think.

Milk Chocolate and Nutella Brownie Mousse Cake with a gorgeous Chocolate Mirror Glaze

I’ve been wanting to make a chocolate mirror glaze ever since I made those blueberry mirror glazed cakes this past summer (can you blame me for wanting to mirror-glaze everything? Too pretty!)

As it turns out, you can easily make milk chocolate or dark chocolate mirror glaze simply by swapping out the white chocolate. Everything else about the recipe is identical, as is the process.

Nutella Brownie Mousse Cake with Milk Chocolate Mirror Glaze and edible gold splatters

While I normally say, when it comes to chocolate, go dark or go home, in this case milk chocolate is the star (and I wouldn’t have it any other way). Paired with Nutella, it makes for a uniquely sweet dessert with layers of contrasting textures and complimentary flavors.

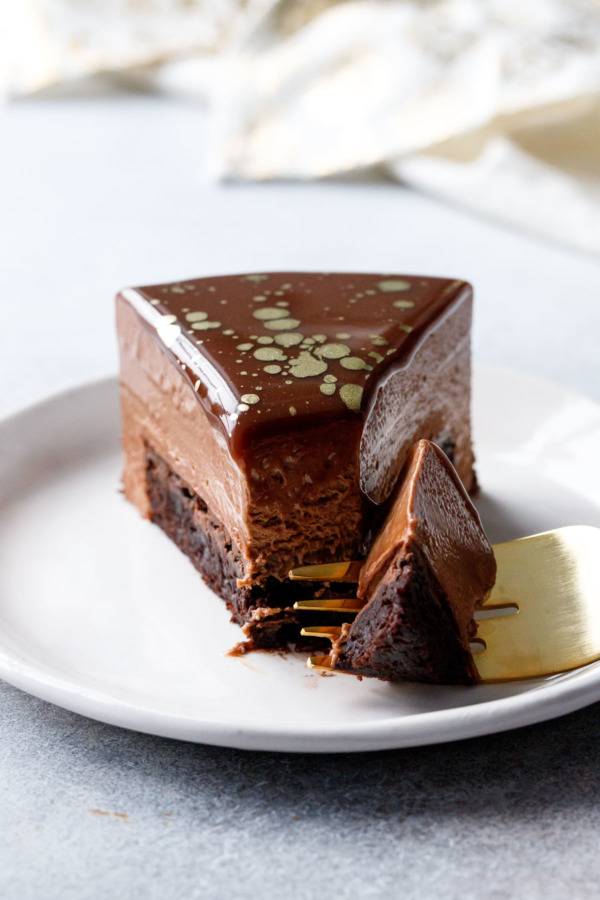
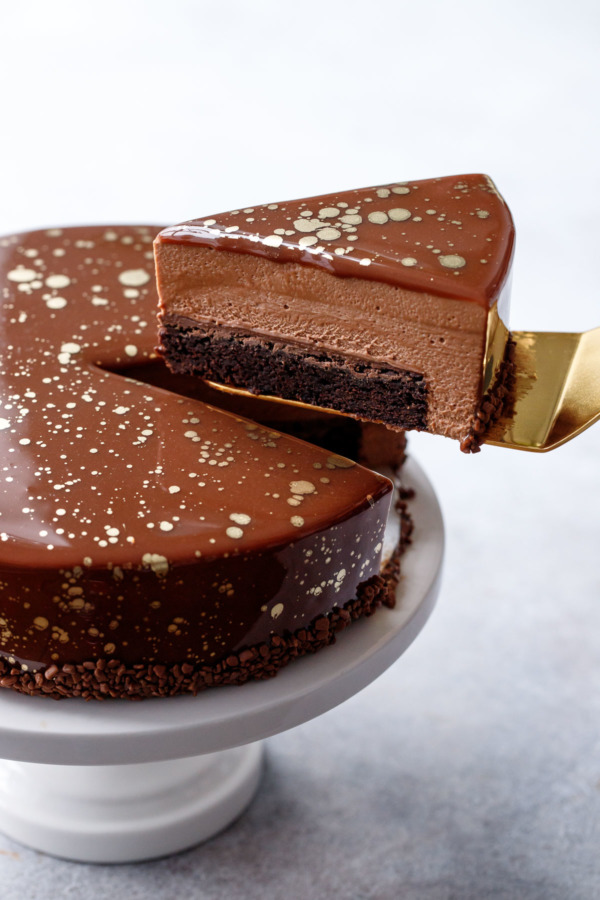
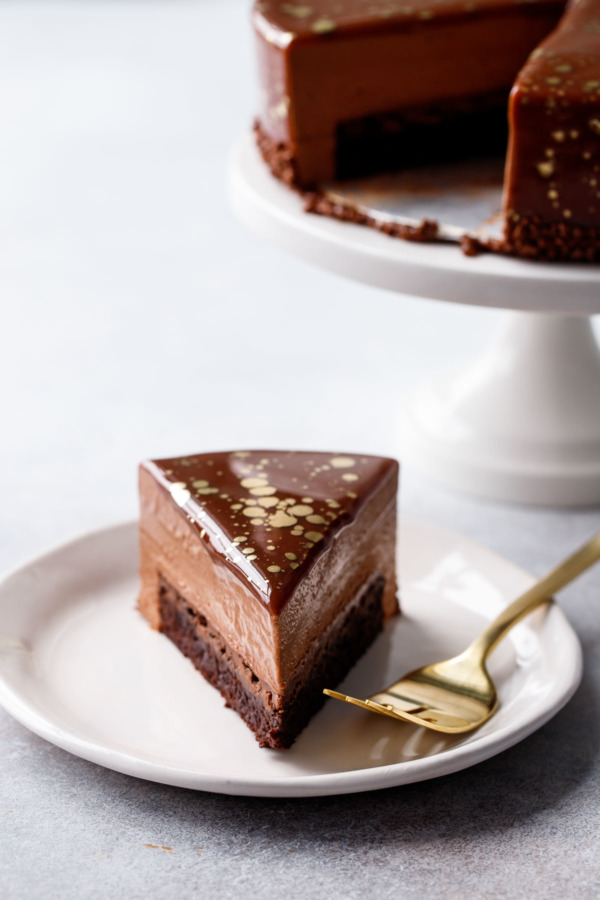
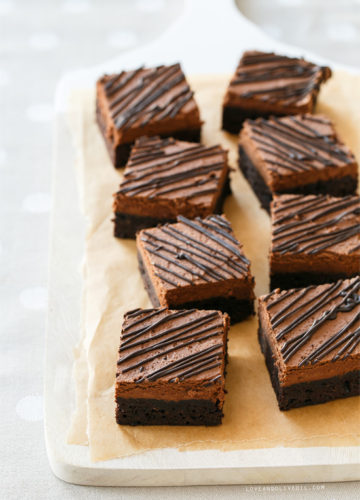
Just look at those luscious layers, each one good on its own, but great in combination.

A rich cocoa brownie slathered with a layer of creamy Nutella.

A light and airy milk chocolate Nutella mousse. If there were such thing as a Nutella cloud, this is what it’d taste like.

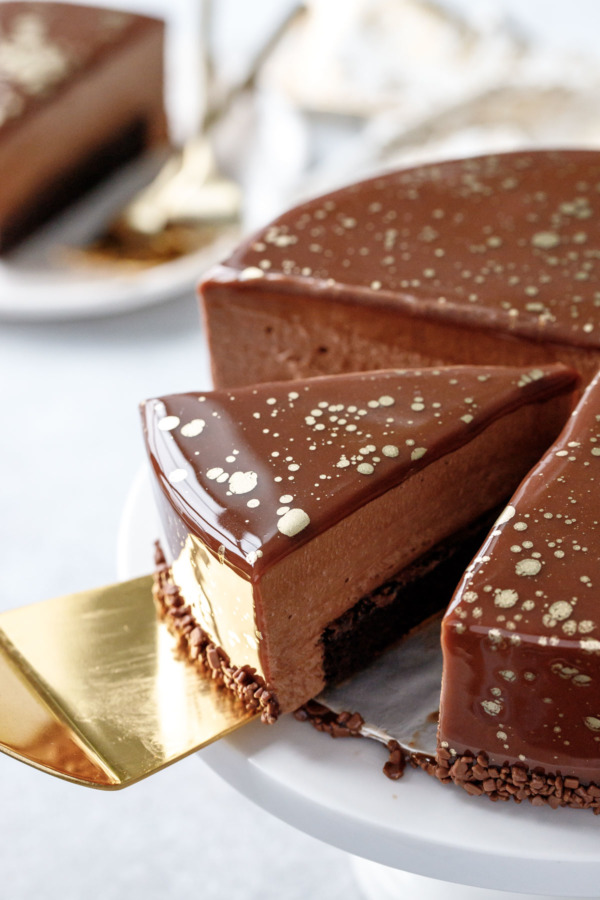
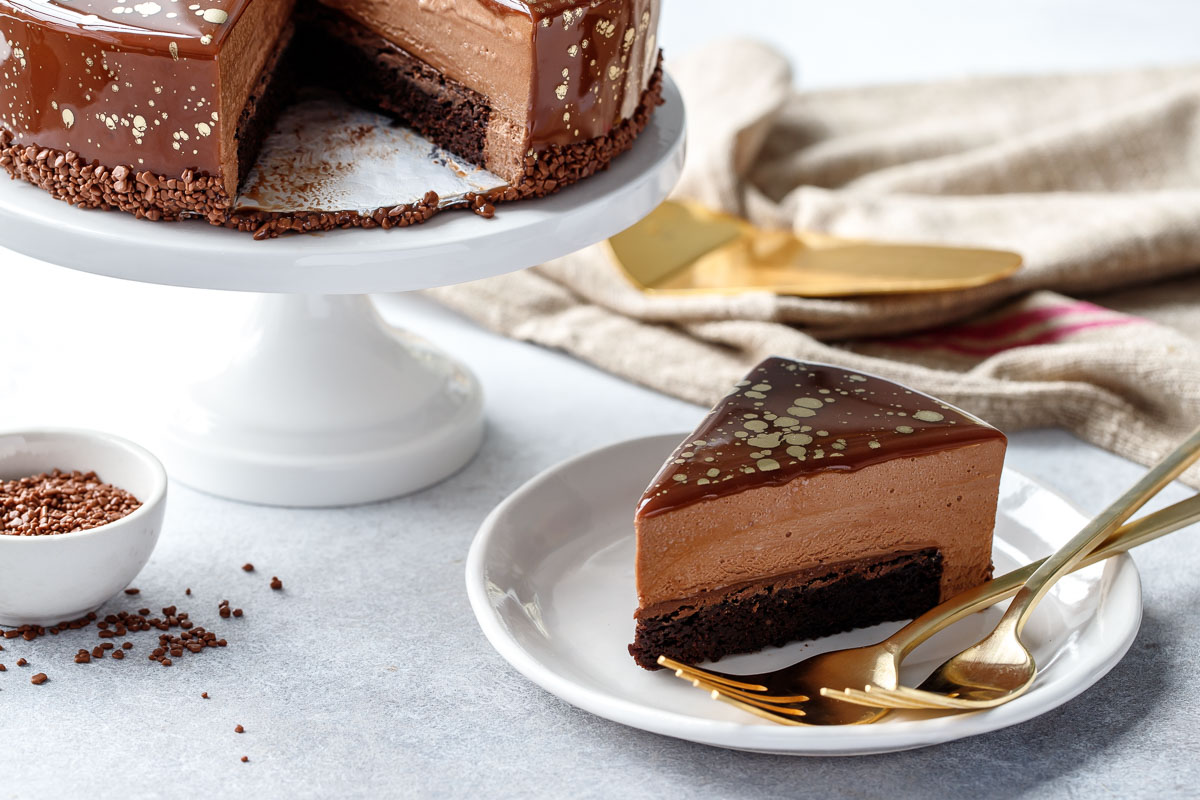
And finally, a stunning milk chocolate mirror glaze to finish it off, complete with gold splatter detail and milk chocolate flakes around the edges.

A milk chocolate mirror glaze makes this Nutella Brownie Mousse Cake look store bought.

Like most of my creations, this one wasn’t perfect the first time around. My first attempt featured an ultra fudgy brownie (I’m #teamfudgelike, no question about it). Of course, the one time I’m not actively trying to get a shiny crust, my brownie comes out of the oven sporting the most beautiful paper thin crackly crust. It was so pretty it almost deserves its own post (and maybe I’ll give it one soon). Figures, I only get a shiny crust when I’m going to be covering it up with Nutella anyway. Ah well.

Anyway, I tried to assemble the cake upside down, so the perfectly smooth bottom of the silicone pan would end up being the top of the cake. But as I set the dense brownie round on top of the still-liquid mousse, it slowly started to sink until it was enveloped entirely by the mousse.

I pretty much assumed it’d keep sinking and I’d end up with brownie sticking out of what should be the top of the cake.

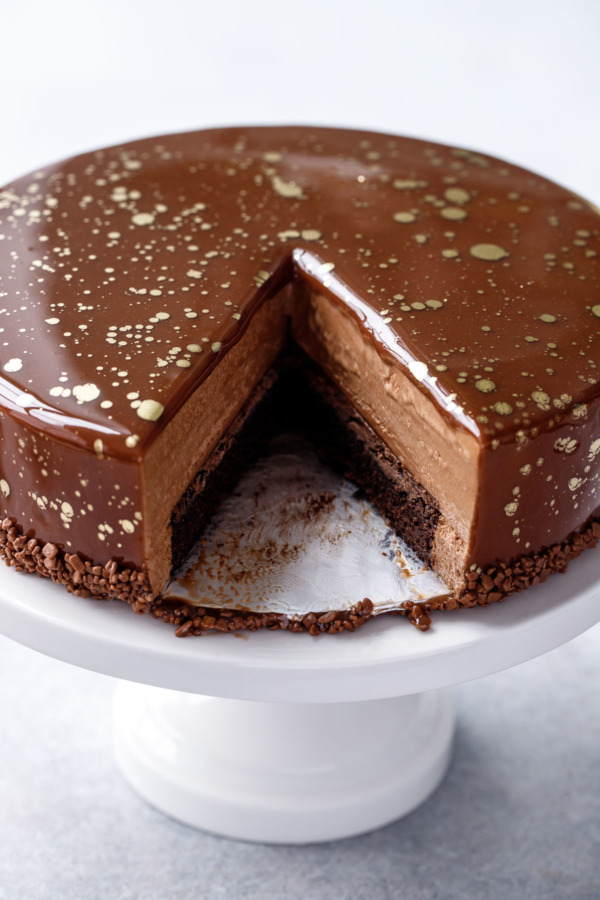
But when I finally cut into it, I discovered the brownie had somehow migrated to the exact center, with a perfect layer of mousse on both the top and the bottom. It actually looked pretty darn cool, even if it wasn’t intentional.

Unfortunately, as pretty as it was, the placement just wasn’t practical. The dense brownie required quite a bit more pressure to cut through than the fluffy mousse, squishing the lower bottom of mousse out the sides in the process.

The second time around, I went for a lighter, less dense brownie (perhaps the only time you’ll find me intentionally making a cake-like brownie, but it really made the most sense here) and also changed the assembly process so the brownie would end up on the bottom of the cake. This way, even though the brownie is still much denser than the the mousse, you can actually cut a slice out of it without making a big ol’ mess.

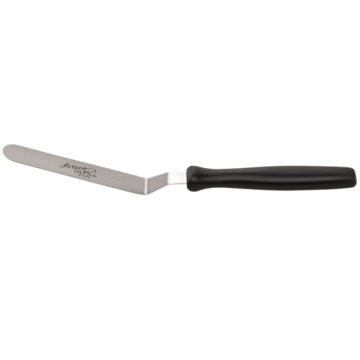
The one caveat to assembling it this way is that you can’t take advantage of the perfectly smooth top created by the silicone cake pan. Instead, the exposed top of the mousse is the actual top of the final cake, so you want your mousse to be as smooth as possible. Luckily the mirror glaze is pretty forgiving, so things like small divots or bubbles will get covered up, but if your edges are rough or your top isn’t perfectly level, that could cause problems for you later. I used a warm offset spatula to smooth things out a bit before glazing.

The chocolate mirror glaze makes this mousse cake extra impressive, a perfect holiday dessert recipe! I know you want a bite of this Nutella Brownie Mousse Cake!

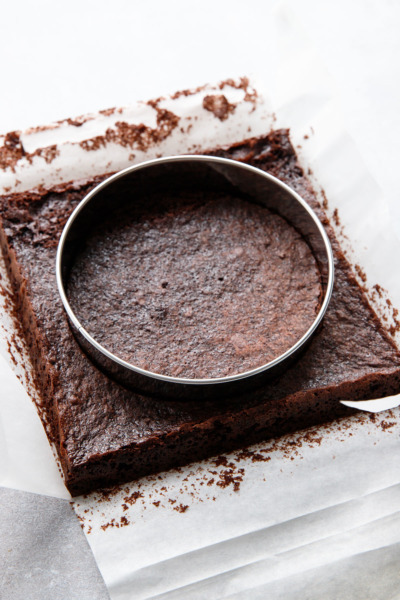
The first step is to make your brownie, then cut it into a circle about 1-inch smaller than your final cake. This will allow the mousse to fill in the spaces around the edge and make for perfectly smooth sides.

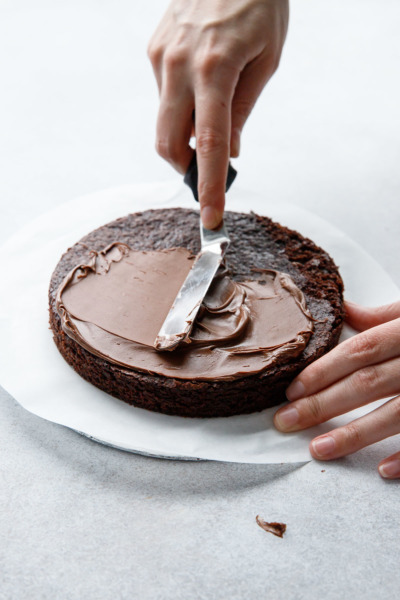
Oh, I also spread a layer of Nutella onto my brownie, because why not?

Pop the Nutella-covered brownie into the freezer for a bit while you prepare the mousse.

Pour nutella mousse over brownie, then freeze.

The mousse is simply whipped cream folded into a milk chocolate and Nutella ganache. I reinforced the mousse with a little bit of gelatin to help it hold up more sturdily against the glaze.

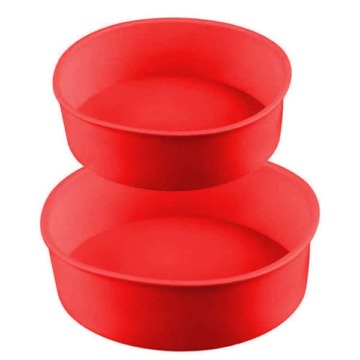
A silicone cake pan is really the best way to make smooth-sided mousse cakes. Once frozen, you can peel away the silicone leaving a perfectly smooth cylinder ready for glazing.

You could also use a springform pan or a deep pastry ring lined with a strip of acetate like I did here. Your cake won’t be quite as smooth around the edges once you peel off the acetate, so I recommend running a warm offset spatula around the edges to smooth things out a bit more.

How to make a milk chocolate mirror glaze

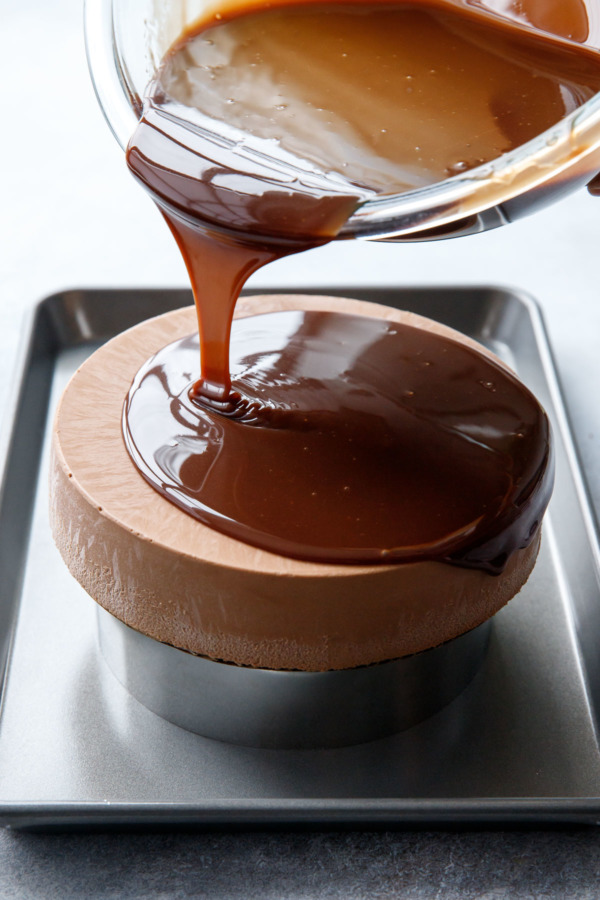
Set your cake on a cake round or a piece of cardboard just barely smaller than the diameter of your cake (if it is larger, the glaze won’t flow off cleanly).

Elevate the cake off the cookie sheet (and the purpose of the cookie sheet is to catch the excess glaze that flows off. This can be scraped off and reused!) I used the same 6-inch pastry ring that I used to cut out my brownie, but something like a large ramekin or heavy soup bowl would work too, just as long as it’s smaller than the diameter of your cake and plenty sturdy to keep the cake firmly in place.

When it comes to a mirror glaze, temperature is key. The glaze is perfectly pourable around 94 degrees. Warmer than that and it’d flow off the cake too thinly, cooler and it might not flow off at all. Use an accurate instant read thermometer and stir the glaze until it reaches the ideal temperature before pouring it over your cake (if the glaze gets too cool, microwave it in short bursts at 50% power to bring it back up to temperature).

Edible gold luster paint splatter

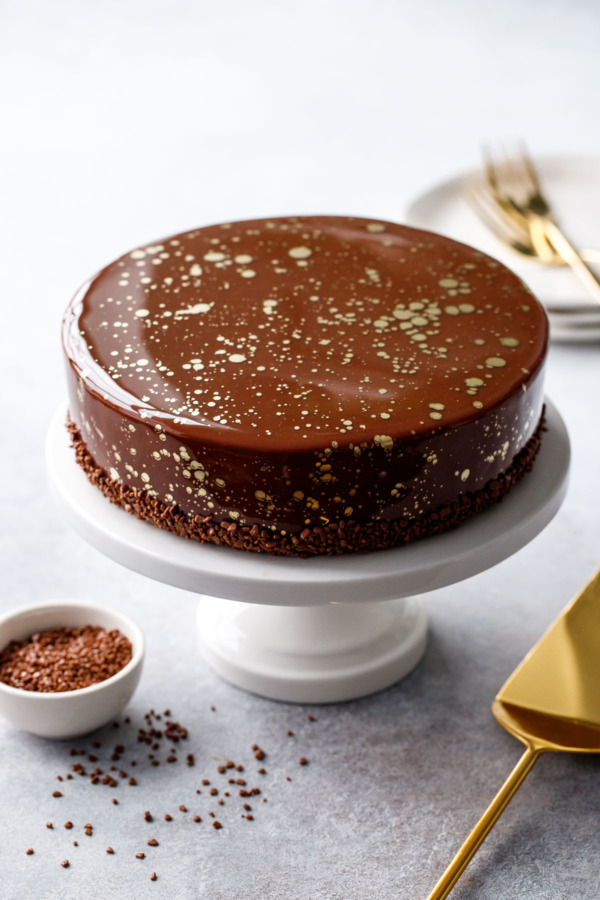
I wanted to keep the decoration simple to emphasize the striking mirror glaze, but just the glaze on its own still seemed a bit boring to me.

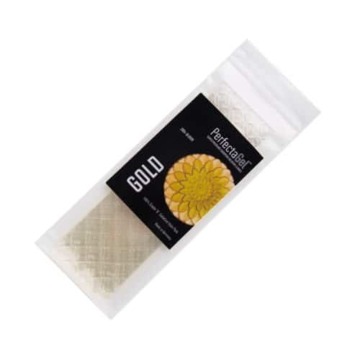
I had a little pot of gold luster dust, which I turned into edible gold paint by mixing it with a little vodka (you don’t need much, like 1/4 teaspoon max for the whole cake). Then I channeled Jackson Pollock as best I could and splattered gold all over the cake (and my face and the floor and probably the cat too). I was super pleased with the final result!

Tip: Rather than violently slinging your brush towards the delicate cake, instead hold the brush a 4-5 inches off the surface of the cake and gently tap the paintbrush (an inch or two below the brush head works best) with a wooden spoon to direct the splatters (mostly) towards the cake. You’ll definitely still make a mess of things, but hopefully the majority of the splatters will end up on the cake.

Cloudlike milk chocolate nutella mousse with a rich chocolate brownie, covered in a shiny chocolate mirror glaze.

This ridiculously impressive, but surprisingly doable dessert is more than manageable if you split the work into 3 or even 4 days (you need at least 2 days since the mousse needs an overnight freeze before glazing, but can certainly start up to 5 days ahead of time if you really want to get a jump on things).

By dividing the work into easily manageable chunks of time, less than an hour of active time each day, and you’ll be surprised at how easily this cake comes together.

Day 1: Make the glaze. The longest part of the whole process is waiting for the glaze to cool to the ideal temperature. You can make the glaze up to 5 days ahead of time and store in an airtight container or zip-top bag in the fridge until you’re ready to use it. For storage longer than 5 days, the glaze can be frozen in an airtight bag with all the air removed (or use a vacuum sealer if you have one).

Day 2: Make the brownie. Let cool completely (or even overnight). Cut into a round and spread with Nutella, then freeze for at least 30 minutes before assembling.

Day 3: Make the mousse and assemble the cake. Freeze overnight.

Day 4: Rewarm your mirror glaze and pour over the frozen cake. The finished cake will keep just fine overnight in the fridge too (the mirror glaze seals everything quite nicely and keeps it from drying out).

Nutella Brownie Mousse Cake with Milk Chocolate Mirror Glaze Recipe

This stunner of a confection would be the perfect centerpiece to your Christmas or New Year’s party! It’s already dressed to the nines with its mirror-like glaze and metallic gold splatters, all it needs is a reason to celebrate.

I mean, really, have you ever seen a prettier cake?

Nutella Brownie Mousse Cake with Milk Chocolate Mirror Glaze

Nutella Brownie Mousse Cake

Pillowly milk chocolate and nutella mousse surrounds a rich chocolate brownie and a layer of creamy nutella. If that's not impressive enough, the whole thing is enrobed in a gorgeous milk chocolate mirror glaze.
5 stars (5 reviews)

Ingredients

For Brownie:

  • 4 tablespoons / 56g (1/2 stick) unsalted butter
  • 2 tablespoons / 28 g vegetable oil
  • 1 cup / 200 g granulated sugar
  • 2 large eggs, at room temperature
  • 1 teaspoon vanilla extract
  • ½ cup / 70 g all-purpose flour
  • cup / 35 g Dutch-processed cocoa powder, sifted
  • ½ teaspoon baking powder
  • ¼ teaspoon salt
  • 2 tablespoons / 30 g whole milk
  • ¼ cup / 85 g Nutella

For Nutella Mousse:

  • 2 sheets leaf gelatin*
  • 1 ½ cups / 355 g heavy whipping cream, divided
  • 6 ounces / 170 g milk chocolate, chopped
  • ¼ cup / 85 g nutella
  • pinch fine sea salt

For Milk Chocolate Mirror Glaze:

  • 6 sheets leaf gelatin*
  • 1 cup / 200 g granulated sugar
  • cup / 200 g light corn syrup or glucose syrup
  • ½ cup / 120 g filtered water
  • ½ cup / 150 g sweetened condensed milk
  • 7 ounces / 200 g milk chocolate, finely chopped

Instructions

For Brownie:

  • Preheat oven to 350 degrees F. Line an 8-by-8-inch baking pan with lightly buttered parchment paper.
  • Melt butter and vegetable oil in a small saucepan or in the microwave on medium heat. Pour into mixing bowl with sugar and stir until paste-like. Add eggs, one at a time, whisking until completely incorporated before adding the next. Mix in vanilla.
  • Whisk together flour, cocoa powder, baking powder and salt. Add to bowl with butter mixture and stir until almost fully incorporated and just a few streaks of dry ingredients remain. Add milk and stir until smooth.
  • Pour into prepared baking pan. Bake for 25 to 30 minutes or until a toothpick inserted near the center comes out mostly clean with a few moist crumbs attached. Place pan on a wire rack and let cool completely.
  • When brownie is cool, lift out of pan using parchment paper as handles. Cut into a 6-inch circle (about 1-inch smaller than the size of your final cake). Spread a thin layer of Nutella on top, then place in freezer for at least 30 minutes or overnight.

For Mousse/Assembly:

  • Cut gelatin sheets into 1-inch strips and submerge in cool water for at least 5 minutes to soften. If using powdered gelatin, sprinkle 2 teaspoons over 2 tablespoons of cool water to soften.
  • Melt chocolate and nutella in a double boiler or in the microwave on short 30 second intervals at 50% power.
  • Heat 1/2 cup cream in a small saucepan over medium heat until it just begins to bubble around the edges. Remove from heat and add gelatin (if using leaf gelatin, squeeze out as much water as possible first) and whisk until completely melted. Pour over chocolate and Nutella. Gently whisk, starting in the center and working in small concentric circles, until a smooth and shiny emulsion forms, then gradually whisk in larger circles until all the cream is completely incorporated and mixture is smooth. Stir in a pinch of sea salt.
  • In a clean bowl or the bowl of a stand mixer, beat remaining 1 cup cream until it holds soft peaks. Add 1/3 of cream to the chocolate mixture and fold to lighten, then add the entire chocolate mixture to the bowl with the cream and fold until fully incorporated.
  • To assemble, place your frozen brownie round into the bottom of an 8-by-2-inch deep silicone cake pan, Nutella side up. Pour mousse over top of brownie. Place silicone cake pan on a hard, flat surface, and firmly tap it a few times against the counter to remove any air bubbles and even out the top surface. If necessary, use an offset spatula to spread the mousse into as smooth and even a surface as possible.
  • Place entire cake into freezer and let freeze until completely firm, at least 6 hours or overnight if possible. Remove from silicone pan. Smooth out any rough spots with an offset spatula if necessary. Place, brownie side down, on a cake board or other solid surface and put back in the freezer until ready to glaze.

For Mirror Glaze:

  • (Mirror glaze can be made up to 5 days ahead of time; store in an airtight container in the refrigerator and rewarm to ideal temperature before using. This recipe makes enough glaze for two 8-inch cakes).
  • Cut gelatin into 1-inch strips and submerge in cool water for at least 5 minutes to soften. Place milk chocolate in a heat-proof bowl and set aside.
  • Combine sugar, corn syrup, and water in a saucepan and bring to a boil over medium heat until sugar is completely dissolved and mixture is clear.
  • Remove from heat, then add gelatin (squeeze out as much water as possible first) and whisk until dissolved. Whisk in sweetened condensed milk. Pour hot mixture over chopped chocolate and let sit for 30 seconds, then stir until chocolate is completely melted and mixture is smooth (you can also use an immersion blender if you have one to expedite this process, just try not to mix air bubbles into the glaze if possible).
  • Let glaze cool, stirring occasionally, until glaze reaches approximately 95 degrees F on an instant-read thermometer. The glaze needs to be the correct temperature or it will not form a thick enough layer on the outside of the cakes.
  • When the glaze reaches about 94 degrees, remove your cake from freezer and place on a cookie sheet, elevated off the sheet using something slightly smaller in diameter than the cake itself so the glaze can drip off (I used the same 6-inch cake ring I used to cut out my brownie). You can always rewarm the glaze if it gets too cool (do so gently over a double boiler or in very short intervals in the microwave).
  • Pour glaze generously over cake, taking care to ensure there are no bare spots left. Allow the excess glaze to drip off for 5 or 10 minutes, then gently scrape the edges to remove any remaining drops or built up glaze. If desired, splatter with edible gold luster and press some chocolate sprinkles around the bottom edge. Carefully transfer cake to cake stand or serving plate and refrigerate until ready to serve.
  • Let sit at room temperature for 15 minutes before serving. For perfect slices, dip a large knife into hot water to warm it before slicing, and wipe off the blade completely between each cut. Glazed cake will keep uncovered in the refrigerator for up to 5 days.

Notes

  • * To substitute powdered gelatin, use 1 teaspoon of powdered gelatin for every 1 sheet of leaf gelatin called for in the recipe. Instead of softening the gelatin in cold water and then wringing it out, sprinkle the gelatin over a few tablespoons of cool water to allow it to soften, then add the whole mixture to the hot liquid to dissolve.
All images and text © for Love & Olive Oil.

Did you make this recipe?

Let us know what you think! Leave a Review below or share a photo and tag me on Instagram with the hashtag #loveandoliveoil.

There may be affiliate links in this post. We are a participant in the Amazon Services LLC Associates Program, an affiliate advertising program designed to provide a means for us to earn fees by linking to Amazon.com and affiliated sites.

Leave a Reply

Your email address will not be published. Required fields are marked *

Did you make this recipe? Leave a review!


83 Comments

  1. It was delicious except I felt like I could taste a gelatin aftertaste in the glaze. I used powder instead of sheets.  Mane I got the substitution wrong? Could I add a bit of vanilla to the glaze? 

  2. I’ve had this recipe bookmarked for a few years and had a reminder each year before my birthday to make it. I kept putting it off, but finally made it this weekend.

    It was simply marvelous! Not terribly complicated, really, and well worth it. I do agree with others, it definitely needs double the mousse. I didn’t have enough ingredients to make more though, so I just. went with it. Could be a new annual tradition for me!

  3. Such a show stopper. I made this for my daughters birthday and everyone said how amazing it was. I did do a extra layer of nutty ganache on top of the nutella layer which meant i needed a bit more of the mouse because it was a little bit taller but just made another half of the mouse mixture. It tasted amazing and was a lot easier then I thought. Definitely recommend doing over the several days. Thank you I can’t wait to make it again.

  4. Hi
    For the glaze can we substitute the gelatin sheets for gelatin powder and what is the recommended quantity of powdered gelatin 
    Thank u

  5. Hello, I was planning on doing this and was wondering if I can remove the chocolate chips and use only Nutella instead? Or will that affect the consistency? Thank You 

  6. Alex here – Lindsey, I just made this lovely cake. I wanted to mention that the recipe for the mousse is only 1/2 of the amount of mousse needed to model the same dimensionality in the height for the mousse. I had to make double the mousse recipe to bring the mouse up to the top edge of the 8″ springform pan. I used the same brownie and pan sizes as you mention. By my background I am a chocolatier and chocolate maker. I’ll pass on to you my recipe for a shiny mirror glaze that is much simpler and less messy. When I make my Boston Cream Pies I top them with a dark chocolate or milk chocolate glaze. Ingredients: dark or milk chocolate 8 oz. Light corn syrup 4 tbsp. Heavy whipping cream 8 oz. Directions: Bring cream and corn syrup to a simmer. Remove from heat and pour over the chocolate. Whisk (or fold) gently till smooth trying to avoid adding air bubbles. Then pour the chocolate glaze over the cake letting the excess drip either decoratively down the sides or all the way down to completely cover the mousse to the bottom. I hope you do try this on something. I think you will find that the chocolate glaze by itself without the added gelatin and the sweetened condensed milk , will be less of a drippy oozy mess as the caramel glaze version tends to become too thin as it continues to migrate down the sides.

    • Lindsey – I’m going to walk back my comment above on the glaze I put on my Boston Cream Pies. I have to say that the glaze on your cake is definitely the shiniest. Except for the amount of the mousse not being enough your recipe for this cake turned out fantastic. I used a different final decoration than the gold splatter. Will be serving this cake tomorrow night as part of the tasting accompaniment for an Into to Wines Class… with the Wines of Australia. They grow a tremendous amount of hazelnuts in Australia so I renamed the cake Australian Hazelnut Mousse Cake. I would post a pic but I don’t see a link.

  7. This. Is. Delicious. My new favourite. Thank you!!

  8. For the glaze, can I use 6 tsp of powder gelatin instead of sheets???

  9. Hi
    Just wondering could i make the mousse first and set it about 3/4 of the way so the brownie doesn’t sink into the mousse

    • You could try although it may be kind of hard to accurately gauge the quantity so that the brownie layer is flush with the very top. I found working inversely was much easier overall!

  10. Hi I love this recipe! I’m going to try it this week but I wanted to know if I can use a spring for pan with wax paper to assemble because I don’t have acetate and Amazon won’t deliver till Sunday and I’m making the cake for Saturday. 

    • I wouldn’t recommend waxed paper… parchment, maybe? but I have not tried it personally and I’d guess you won’t get very clean edges this way.

  11. Hi, is it possible to make this recipe into small dome spheres? If yes, should I freeze the mousse first before I put the brownie on top of the silicone dome mold?

    And should I also make the brownie thinner?

  12. Ok got it! I tried this cake before in an 8-inch, it was fabulous! We loved it!!! It came exactly like yours. So now I’m trying a bigger one for a party. I did try your blueberry glazed mini cakes too, it was too good! Flavors were amazing and sweetness was well balanced. Thank you for posting these recipes. 

  13. I want to make this cake in a 10 or 10.5-inch round pan, should I double the recipe for the mousse? Or make it 2 1/2?

    • You’ll want to google around for cake pan volumes, but I think a 10-inch round pan is just under double the volume of an 8-inch round. You shouldn’t need to double the glaze though, I think that part makes plenty!

  14. I made this cake. I’ve been wanting to try an entremets with a mirror glaze for a long time now and for my birthday this year, decided I was going to challenge myself. I used your recipe above but added a dark chocolate hazelnut crunch layer between the nutella and mousse layer. It was incredible! Thank you so much for putting so much detail into your recipe. It allowed an amateur home baker to make something very similar to what you showed above. I made some mistakes but learned so much and can’t wait to try it again. Thank you!!

  15. Hi! This Cake looks like chocolate paradise!!!!!
    I need this cake as a centrepiece and I wanted to know how long this could stay out of the freezer and if this cake melts when out?
    Your organized schedule just hit the spot!!!!!!

  16. Hi!! I want to make this cake and i was wondering if we buy the 2 pack silicon cake pans can we use the smaller one for the brownie and the larger one for the mousse? ( Small: 6 inch Large: 8 inch

  17. Do you think it would be possible to add a second layer of a light sponge or chiffon cake as an extra layer in the middle? Or do you think this would disrupt the dessert by either putting too much pressure on the mouse or giving the cake too many different textures?

  18. I will definitely do that :D. Thank you soo much ! I really love your blog ! Btw I was trying the brownie scraps and they tasted SO GOOD ! I’m definitely making this again!(without mistakes lol)

  19. Hi , I made a mistake by making the brownie part and mousse the same day and I’m not sure how I can assemble it later because I still have to cool the brownies, so do you have any recommendations on what I can do ? Thank you very much :D

    • Try putting the brownie in the freezer to cool it down. The cake needs to be assembled right away after making the mousse otherwise the gelatin will set and you won’t be able to pour/spread it into the mold.

  20. What would the equivalent in grams be for this recipe?
    I will certainly try it

    • I’ve included gram weights for most of the ingredients, others (like cream) you can easily find conversions online!

  21. This recipe looks fabulous! Can’t wait to try it out. Could you please confirm the gelatine sheet you have used, was it a gold or silver?

  22. Can I half the glaze measurements so it’s just enough for one 8 inch cake?

    • It’s always helpful to have more mirror glaze than you think you need, because you’ll need to pour a few layers to get a full coat, even though much of it will drip off. Any excess (assuming it doesn’t have any bits of mousse in it) can be reused, and refrigerated or frozen for later use.

  23. I’m making this now as I type. I’ve just put the mousse in the freezer. But I’m concerned. It was way more liquid than your picture appears to be. I followed exactly. I’m wondering. Should the chocolate Nutella ganache been cooled before starting with the whipped cream? There was no note of it. And I’m afraid I may have just made ice cream instead of mousse. 😔

    • Ganache isn’t usually very hot (very gentle heat is required so as not to break the chocolate). Mine was lukewarm at most when I folded in the cream. If yours was warmer it’s possible that’s why the mousse felt thinner. You may have also under-whipped your cream, over-folded in the cream (which would have deflated some of the air), or I’ve found some brands of heavy cream are higher/lower in fat and can affect the stability of the whip.
      Regardless, it should still freeze perfectly fine and taste perfectly delicious, just might be a wee bit denser when you cut into it!

  24. I will planning to start making it from this Friday.. would be glad to know if i dont have sheet gelatin for Glaze, how much gelatin powder should I use ? 

    • 1 sheet of gelatin equals 1 teaspoon of powdered (bloom it first in some cool water, then melt it for 5 seconds in the microwave before mixing it in).

  25. Just made this for my daughter’s birthday.. It was a success! So very tasty. Your instructions were superb.

  26. This is a fantastic recipe turned out really well. I wanted to add some baileys or fragelico to the mousse do you know if it will still hold up if I add the liquid 

  27. I only tried the mousse and was soooo good. If I use a 9*13 in pan doubling the recipe would be ok?

    • You might want to do some volume calculations to be sure… maybe 2 1/2 times the mousse just to be sure? Otherwise the mousse layer might just be a little bit thinner.
      Also, keep in mind that square/rectangle shapes are much harder to glaze than rounds. If you were planning to glaze this you may want to use a larger round pan instead (a 10-inch round pan might be a better option for a double batch in this case!)

  28. What is the equivalent for heavy whipping cream in the UK? I know to use double cream for your heavy cream but I don’t think our whipping cream is the same as your heavy whipping cream.

    • Not sure exactly what the equivalent is, but whatever you’d use to make homemade whipped cream. It just needs to have enough fat to whip up to medium peaks.

  29. This recipe looks so delish and I made a small batch with just 6 spheres – everyone in the house gobbled them up and wanted more. :)
    I am planning to make this for a party this weekend but I know it’ll get warm in the room so not planning to put this on the display from the very beginning.
    1. Should I freeze it before serving or will this stay good in the fridge and I should take them out maybe 15mins before serving?
    2. Can I use a plain vanilla sponge instead of the brownie as the base?

    Thank you so much for this amazing recipe!!

  30. Thank you so much for the recipe. The cake cake out amazing 🥰. Do you think I could make this cake with agar agar instead of gelatin? Also can you provide instructions on how to get the speckled look with the wooden spoon again. I don’t think I could follow that. 

    • Agar may work for the mousse part (I haven’t tried it personally) but I would NOT recommend substituting the gelatin in the glaze. A mirror glaze is a very specific formula and it relies on gelatin for the proper consistency and sheen. 

  31. Loveandoliveoil, i am in love with you! I made this case and came out perfect, just like your pictures. You are very organized person, the break down of 5 day different steps is awesome. Not sure how can I share the picture of my cake. Thank you so much

  32. I really don’t understand how in the photos it shows that you’re pouring the mousse onto the brownie facing up, however when you peel it off it’s flipped? Can you please explain in detail how to arrange the brownie / mousse / silicone before freezing!? Thank you!

    • Sorry, realized I had two sets of photos and may have mixed them up a bit – the first time I made this I set the brownie on top of the mousse, and it sunk to the middle, so I revised the process so the brownie goes into the pan first, then the mousse gets poured on top (in which case the cake won’t be flipped). Basically, however you do it, just keep the brownie on the bottom. :)

  33. This looks incredible! I’m planning on making this for my birthday but my boyfriend is allergic to hazelnuts and therefore nutella. How would you alter the mousse recipe with this left out?

    • Maybe try one of those chocolate almond spreads instead? They’re very similar in consistency. Even something like cookie butter might work though it’d be a very different flavor profile.

  34. Thank you for an amazing recipe. I wanted to ask if can substitute milk chocolate with white chocolate , weight by weight. If not could you specify how much white chocolate to be used for the glaze. 
    Thank you 

  35. Can this be made using chocolate cake instead of a brownie?

    • I think so, as long as the overall diameter/height was the same, so you may need to scale your recipe accordingly!

  36. Thank you so much for your quick reply.
    I was worried that it would only last a couple of hours so that’s good to know.

    Thank you and  can’t wait to try it because it looks and sounds absolutely delicious 😍 

  37. Hi I would like to make this cake but have to deliver it about 2 hours away and I was just wondering how long the mirror glaze will stay looking perfect on the cake once put together? 
    So could I make it in the morning for it to be served that night? 

    Thank you 😊 

  38. Hi..going to try this cake soon..but will use powdered gelatin instead of leaf gelatin..when and how do I mix it in with the other ingredients…thanx🙂

    • The recipe notes have instructions for using powdered instead. It’s incorporated at the same time, you just want to be sure you soften it first in a bit of cool water. Enjoy!!

  39. I have found that Perfecta Gold is 3 sheets for 500 ml. I need 6 sheets for 500 ml in the Netherlands. So I use 4 sheets instead of 2!

  40. This seems wonderful to me, before I start, a question: I live in the Netherlands so I’m not sure if the gelatine sheets have the same weight. What is the weight of the gelatine sheets? (With us 12 gelatine sheets weigh 20 grams / 0.7 oz)

    • I used Perfecta Gold 200 strength, looks like 2g per sheet. I think the weight would depend on the strength of the gelatine as well?

  41. Hi, I was just wondering, if the brownie is supposed to be at the bottom of the mousse, with the Nutella spread facing up, how can it be placed in the silicon mold first? The perfectly smooth edges of the silicon mold would be on the bottom on the cake (with the brownie base showing) once the silicon mold is peeled of, no?

    Shouldn’t the brownie go in last on set mousse?

    Thanks!

    • Most mousse cakes are prepared like you describe, however when I tried it, the brownie was simply too heavy and sunk to the middle. Oops. Hence the revised method. If you’re careful spreading in the mousse, you can still get a perfectly smooth top this way too. :)

  42. Hi, I would like to know, if the mirror glaze is made ahead of time, would  it then have to come to the
    95 Degrees F. temp ‘again’ when reheated and used . Thanks 

  43. Hi!
    I was thinking is this freezable? Without the mirrorglaze..

    • The mousse base must be frozen at least 24 hours before glazing. So you could certainly make it and keep it frozen for a couple weeks at least!

  44. I made this recipe and was a hit!! But i had to make a 1/2 more of the mousse and the brownie too…. it was perfect!!! Thanks for sharing

    • Guessing your pans were probably larger than mine, in which case 1 1/2 times the recipe would probably be just right. :) So glad you enjoyed!

  45. Could you just bake the brownie in a round spring form pan? Thank you!

  46. This cake is absolutely mouthwatering ? So beautiful!

  47. wow just stunning… beautiful and delicious i bet.

  48. This is a work of art and absolutely stunning! It’s a chocolate lover’s dream and so count me in for a huge slice!

Did you make this recipe? Leave a Review »