

 Everybody loves bagels. You guys are no exception, making this month’s challenge the most popular one yet! It’s a good thing, too, I was worried you guys would never forgive me for the whole mozzarella thing.
But seriously, how can you not love bagels? Sesame seed or poppy seed or everything, smothered with cream cheese and lox or fried eggs or peanut butter or jam. When you make them from scratch you can truly make them any way you like.
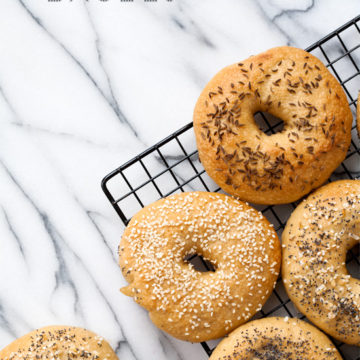
I was pleasantly surprised with how easy these were. I splurged on some good yeast, and borrowed some of Taylor’s barley malt syrup (from brewing). This addition does double duty, adding a nice extra touch of sweetness to the bagels as well as helping to condition the dough. Seeing as we couldn’t agree on what to top them with, we went with a variety of poppy, sesame, and caraway seeds as well as a couple everything bagels per Taylor’s request. The final product was maybe a little bit flat, perhaps (despite them passing the “float test” with flying colors) they could have proofed a little bit longer.
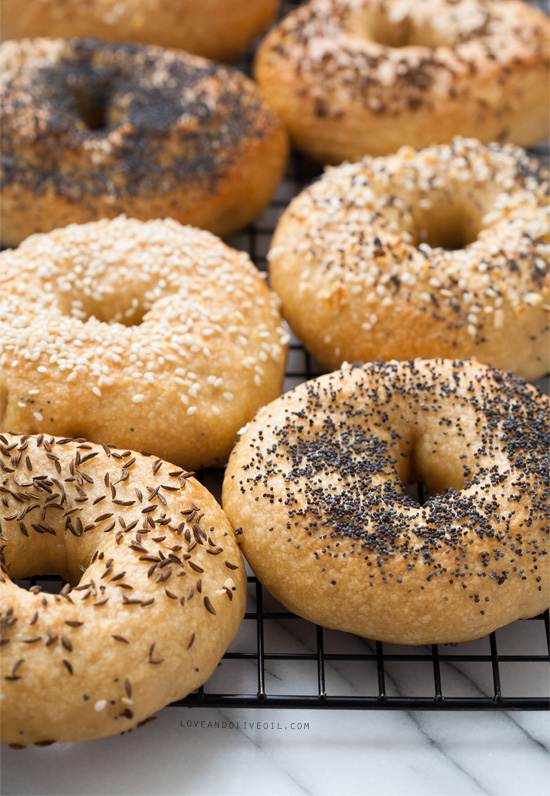
Regardless, fat or flat, and despite their wonky shapes, the texture is delightfully crisp on the outside and satisfyingly chewy on the inside. They are perfectly imperfect in their chewy perfection.
I’m trying something new this month (a challenge on top of a challenge, if you will), and created a short video of the bagel making process. It’s rough, for sure, but I thought that seeing first-hand how it all goes down would be a great incentive for a timid cook to go for it. And definitely let me know what you think, if you like the addition of the videos it’s something I’ll definitely try to do more often! Maybe I’ll even say something next time.
Be sure to click through to see the video as well as readers’ amazing creations!
The recipe below is from Peter Reinhart’s Artisan Breads Every Day via Epicurious, and will make about 8 bagels. I encourage you to visit the original as they have many resources on bagel-making in general. I’ve printed an abbreviated version here mostly for my own reference (since my linked croissant recipe has since gone behind a pay wall and is no longer accessible, I wish I had posted it there too).
Homemade New York-Style Bagels
Ingredients:
For Dough:
- 1 tablespoon barley malt syrup, honey, or rice syrup, or 1 teaspoon diastatic malt powder
- 1 teaspoon instant yeast
- 2 teaspoons kosher salt
- 1 cup lukewarm water
- 3 1/2 cups unbleached bread flour
For Poaching liquid
- 2 to 3 quarts water
- 2 tablespoons barley malt syrup or honey
- 1 tablespoon baking soda
- 1 teaspoon kosher salt
For Toppings:
- Sesame Seeds
- Poppy Seeds
- Caraway Seeds
- Dried onion and garlic, rehydrated in warm water
Directions:
Day 1:
- To make the dough, stir the malt syrup, yeast, and salt into the lukewarm water until dissolved.
- Place the flour into the bowl of a stand mixer fitted with the dough hook attachment. With the mixer on low speed, slowly add the liquid and mix for about 3 minutes or until dough comes together. If the dough is too dry add another tablespoon or two of water as needed. Let rest for 5 minutes.
- Knead for 3 to 5 minutes (with the dough hook or by hand) or until dough is stiff yet supple and just barely tacky. If the dough seems too soft or overly tacky, knead in a little more flour as needed.
- Place the dough in a clean, lightly oiled bowl. Cover with plastic wrap,and let rise at room temperature for 1 hour or until doubled in size.
- Line a sheet pan with parchment paper or a silicone mat and spray lightly with cooking spray.
- Divide the dough into 8 equal pieces, then form each into a ball by rolling it on a clean, dry work surface with a cupped hand.
- Poke a hole through the center of the ball to create a donut shape. Holding the dough with both thumbs in the hole, rotate the dough with your hands, gradually stretching it to create a hole about 2 inches in diameter.
- Arrange shaped bagels on prepared baking sheet. Mist with cooking spray or brush with a light coating of oil. Cover tightly with plastic wrap and refrigerate overnight or for up to 2 days.
Day 2:
- Preheat your oven to 500 degrees F. If you plan to top your bagels with dried onion or garlic, rehydrate by soaking in water to cover for at least 1 hour before applying.
- Remove the bagels from the refrigerator and immediately check whether they are ready for baking using the “float test”: drop one bagel in a small bowl of cold water. If it sinks, fish it out, shake it off, return it to the pan. Let your bagels proof for another 15 to 20 minutes, then test them again. When the bagels float to the surface, they’re ready.
- Fill a large pot with 2 to 3 quarts of water, making sure the water is at least 4 inches deep. Cover and bring to a boil, then lower the heat to maintain at a simmer. Stir in the malt syrup, baking soda, and salt until dissolved.
- Gently lower each bagel into the poaching liquid, taking care not to overcrowd the pot. Boil for 1 minute, then flip each bagel over using tongs or a slotted spoon. Boil for another minute, then transfer back to the sheet pan, domed side up. (If you need to oil the parchment again, definitely do so, otherwise the paper will stick to the dough as the bagels bake.)
- Sprinkle on a generous amount of seeds or other toppings on to the still-damp bagels.
- Lower the oven temperature to 450 degrees F and bake for 15 to 17 minutes, rotating the pan half-way through baking, until golden brown. If the bottoms are getting too dark before the bagels are done, place another pan under the baking sheet to insulate and prevent the bagels from burning.
- Transfer bagels to a wire rack and cool for at least 30 minutes before serving.
Recipe from Peter Reinhart’s Artisan Breads Every Day via Epicurious.
All images and text ©Lindsay Landis / Love & Olive OilDid you make this recipe?
Let us know what you think!
Leave a Comment below or share a photo and tag me on Instagram with the hashtag #loveandoliveoil.
You guys really stepped it up this time, and your bagels are beautiful! I see cinnamon raisin was quite popular, as were the traditional poppy/sesame seed, but you guys also got creative with flavors like asagio, pesto, and even s’mores (woah).
Seriously, bravo! Your enthusiasm for this challenge makes me even more excited for next month when we tackle… something else. :) What, you didn’t think I was going to tell you NOW, did you? Patience, grasshopper.


I’m not quite understanding why it is that you refrigerated the bagels. Or why you TIGHTLY put plastic wrap over them.
I have always wanted to make bagels! I will have to try them this weekend. Might have to add some chocolate chips into the batter!
Oh wow, these look perfect! I just love fresh bagels :)
I made homemade pretzels last year and it was a similar process — a bit time-consuming but SO worth the results!
Those look fantastic!
Thank you for doing this challenge and for posting my results! I’m so glad I was finally pushed to make bagels since I’ve been wanting to for so long. It was so much easier than I thought :)
So many participants! I am sorry I missed this one. I love your challenges and I am sure the next one will be super fun.
LOVE the video!! and i adore your mint green shorts :) i’m so mad i didn’t have time to do this challenge, i must do it sometime this year. i love bagels and i’m sure homemade ones are even better!!
Loved the video. Do you think the bagels can be frozen / refrigerated AFTER the boiling stage? Theoretically, that would mean freshlybaked bagels available with no fuss…. any thoughts on that?
I’d probably freeze them right after shaping. Then remove from the freezer, and let them thaw overnight in the refrigerator, and follow the instructions as usual. You could probably also freeze the completely baked bagels, but not sure how they’d compare to fresh.
Oh yes, I love bagels. Homemade version sounds like somethig I’ll make.
The video was a fantastic idea. It helps when you see how something you think is extremely difficult to make , is made and it helps you take the huge jump and attempt to make bagels yourself!
Congratulations Lindsey! You’re bagels look delish!!!
I’ve never made bagels but I’ve eaten a truckload. You make it look really easy.
I love the video. I’m a visual learner and now I’m ready to make BAGELS! thanks for the nudge.
So many beautiful bagels to choose from! Love the video..definitely looks easier than I had previously imagined!
I love bagels! Seeing everyone’s fabulous results makes me want to tackle them myself!
This was one of my favorite challenges yet! I love the video in the post too. I can’t wait for next months challenge!
Oh my gosh these are amazing! This definitely make the feat of making bagels a little more attainable.
Your bagels are so beautiful! And I totally love the video – I am intimidated by making bagels, but that made it seem much more approachable.
Aww man, homemade bagels sound like so much fun!! Love this recipe!
Oh I totally want to make these now!!! I just have to get the malt syrup. I made pretzels FOREVER ago and it was the same boil and bake process, and I had quite the victory parade for myself when they were done (and tasted amazing)! My dad would LOVE these!! And your video is SO adorable!! I want that music playing while I bake!
I really wanted to take part, but in between job and holidays (Yay!) I did Not make it. The results look great! Will tackle it coming week.
Thanks for the video, would have been quite interesting for the mozzarella :)
I’ve been dying to make bagels but haven’t been able to find a recipe I really trust. I think I’ll be trying this one out though!
I am so impressed that so many people made bagels. They look amazing!
Everyone’s bagels look great! Mine are maybe the silliest/misshapen of them all. Ha. But still good. Can’t wait to see next month’s challenge. It was a lot of fun.
These look so perfect!! I’m still too scared to try homemade bagels
I LOVE homemade bagels but I never want to get up early enough to have them ready for breakfast. Second day they just aren’t as good. But still better than store-bought!
I have made this exact same bagel recipe. It is so good!! I loved you fun video and your bagels looks perfect!
Love your challenges, keep em coming
I did the challenge, too. I posted about it and linked to you. I guess you didn’t see it.
http://www.averiecooks.com/2013/07/easy-homemade-cinnamon-raisin-bagels.html
Your bagels look great! Thanks for the fun challenge this month!
The video is helpful…it seems like a lot of work when you could just buy them, but at the same time, I’d love to try making bagels myself, and I’m leaving this one with a boost of confidence to do so!
I love how many people participated this month, they all look great!