
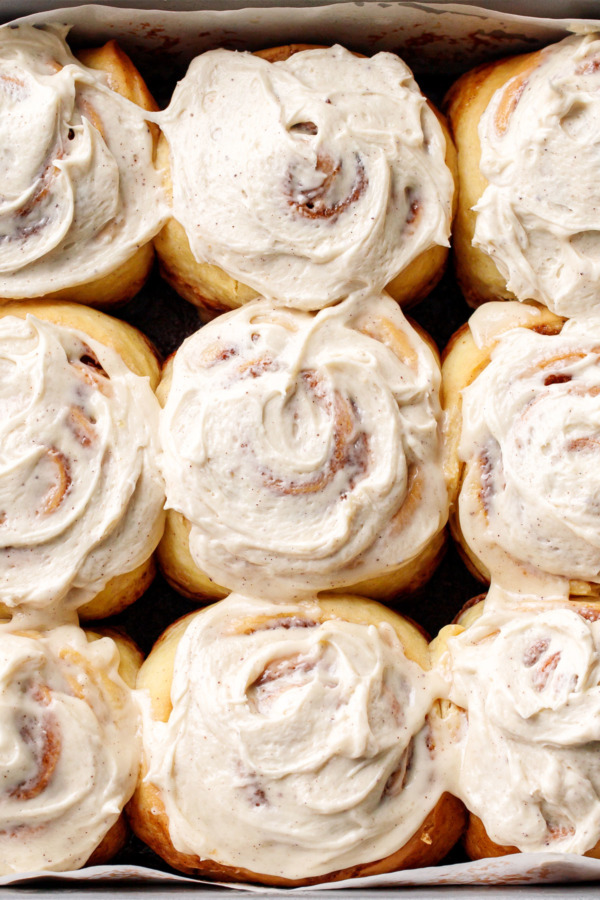
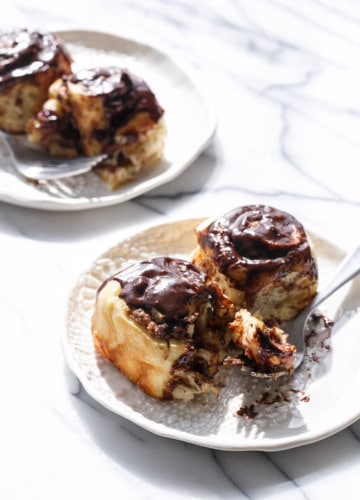
Make your morning magnificent with these pillowy-soft cinnamon rolls infused with nutty brown butter in the dough, filling, AND frosting. They’re everything you want in a classic cinnamon roll, and then some!
Take your classic cinnamon rolls up a notch with brown butter! Its nutty, caramel-like flavor adds a new level of depth to these soft and pillowy rolls. Topped with a fluffy cream cheese frosting (also made with brown butter) for a breakfast treat you’ll simply adore.
Save this recipe for later!
Good morning indeed!
There’s something nostalgic about a classic cinnamon roll, whether your memories involve a pop can (that still, to this day, makes me flinch whenever I open it), a local bakery in your hometown, or one of the aromatic bun shops in malls or airports.
Whatever your memories involve, chances are that you’ve had a hard time replicating that with homemade versions. Or maybe that’s just me?
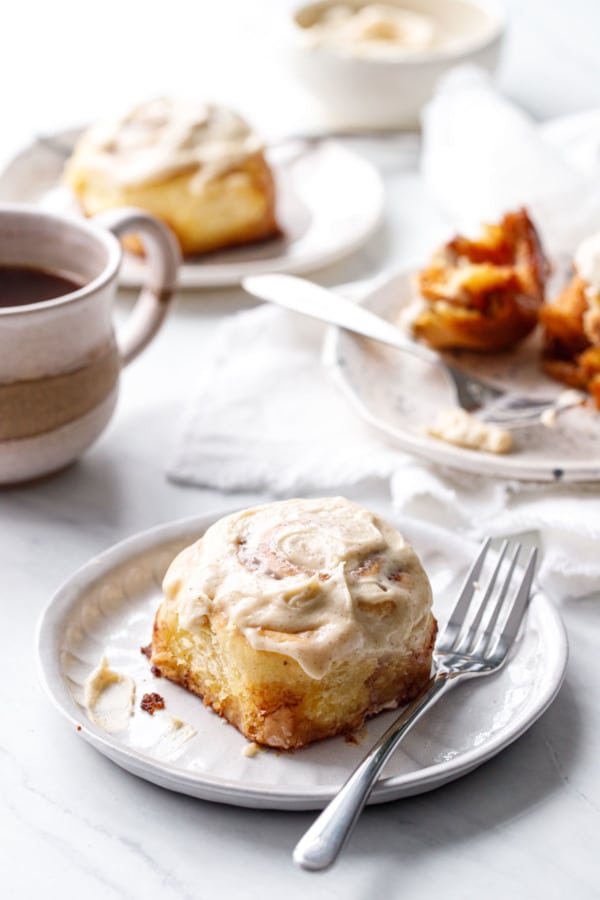
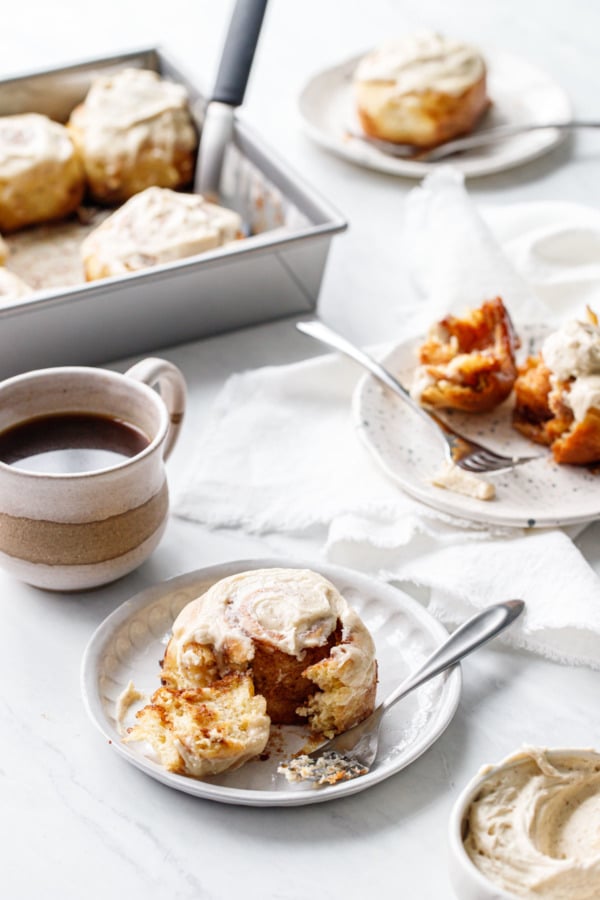
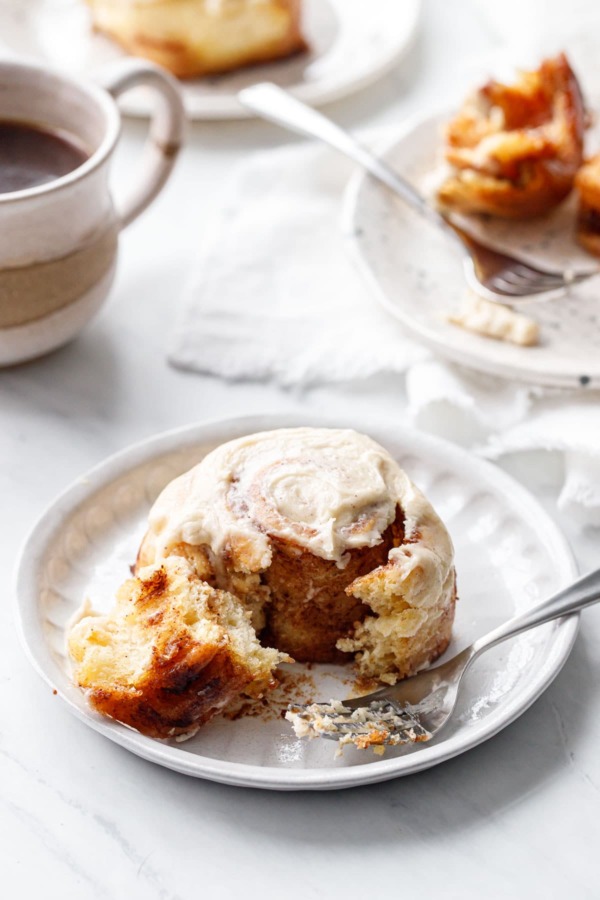
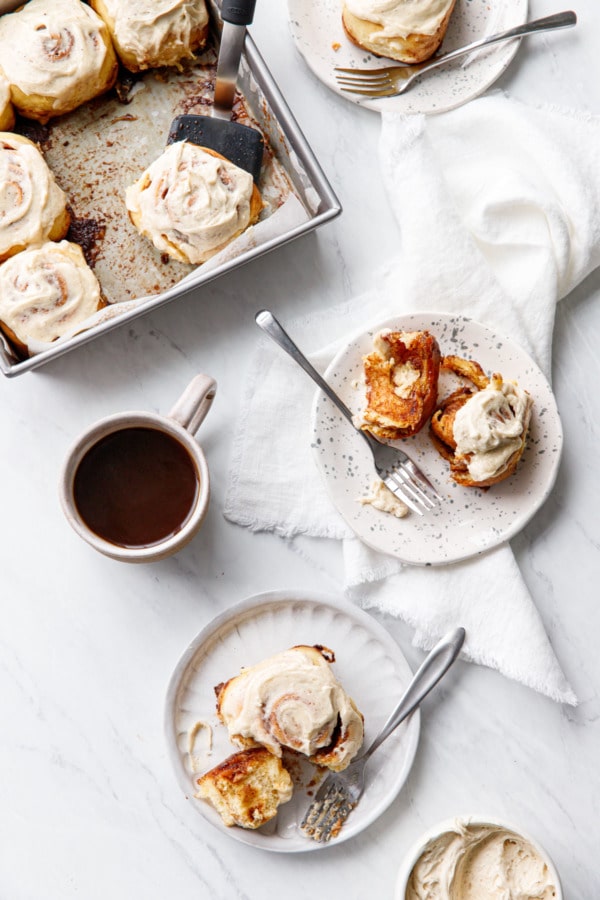
Needless to say, this recipe is as close as I’ve gotten to what my tastebuds remember. From the gooey centers to the just-shy-of-too-sweet frosting, with ample amounts of cinnamon sugar rolled up in a pillowy soft dough, these brown butter cinnamon rolls are perfect served with a cup of bitter brew.
The secret to these stellar cinnamon rolls is most definitely the brown butter: its nutty, caramel-like flavor compliments and enhances the cinnamon and adds a sumptuous depth of flavor and subtle savory notes to contrast the sticky sweetness.
This recipe has a higher proportion of filling to dough than many recipes. So much so that it’s almost indecent. Let’s just say this recipe certainly doesn’t skimp on the cinnamon!
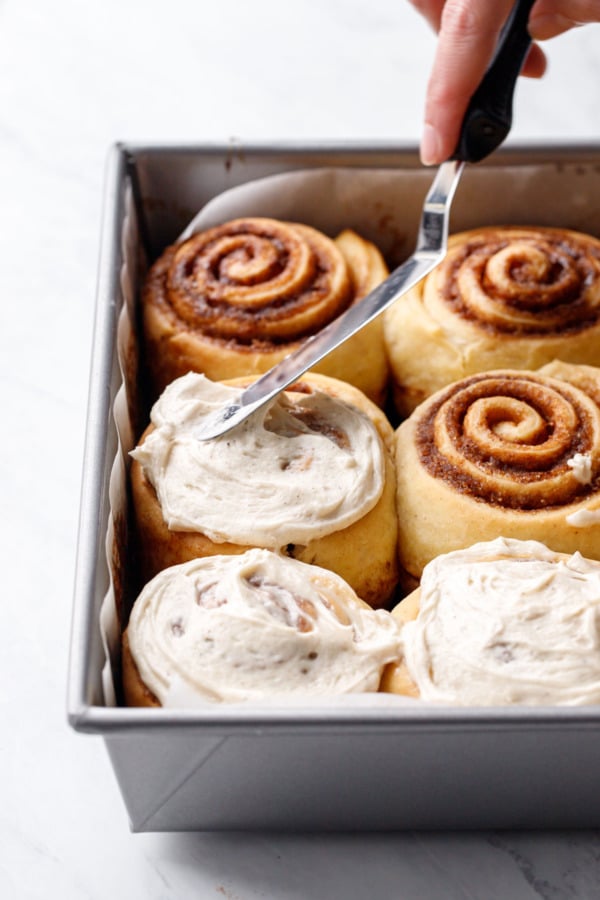
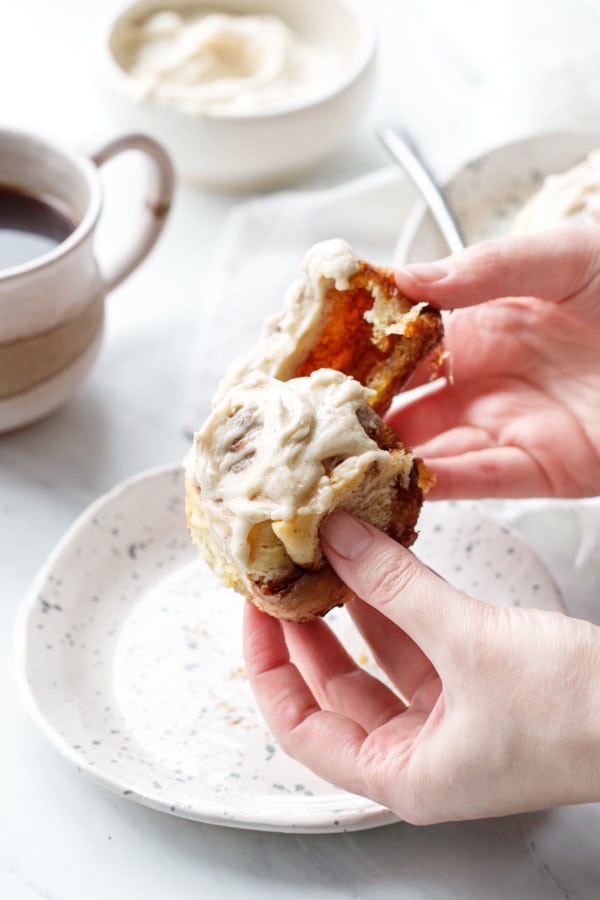
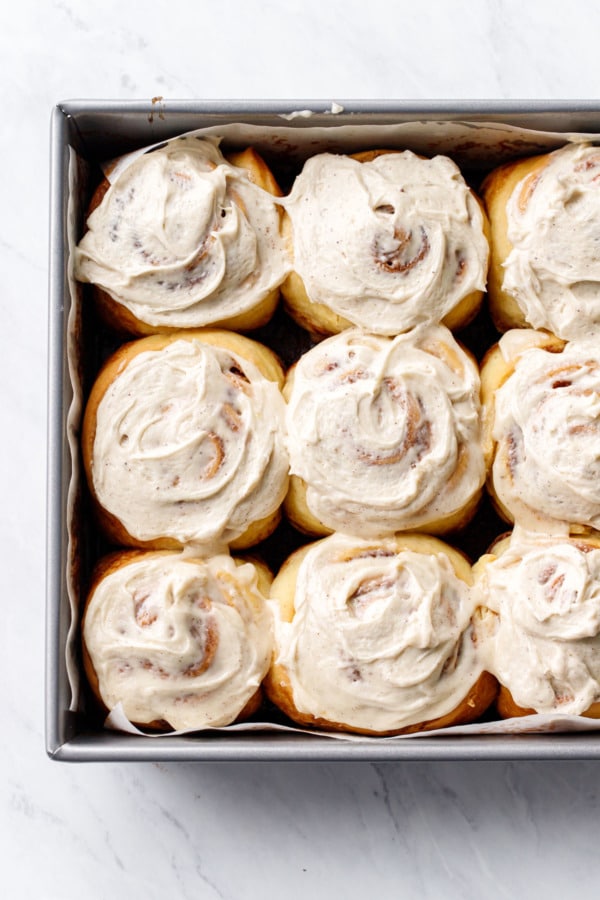
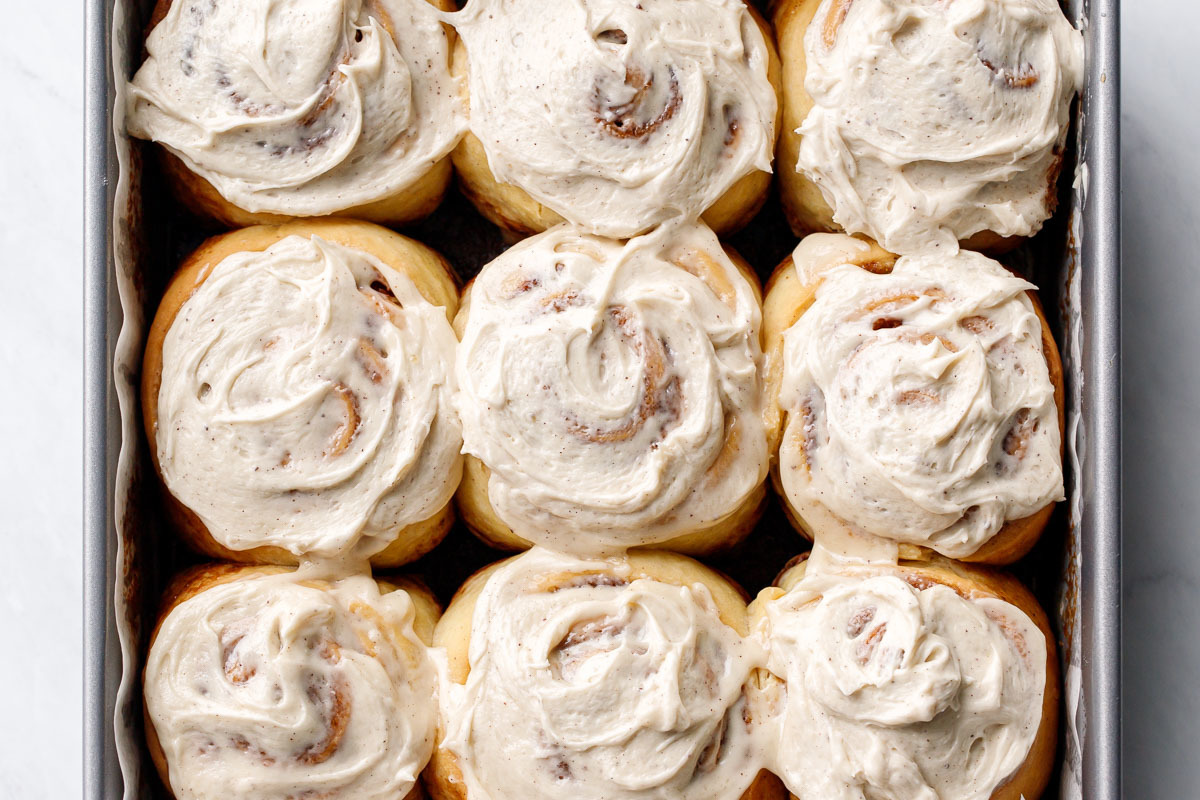
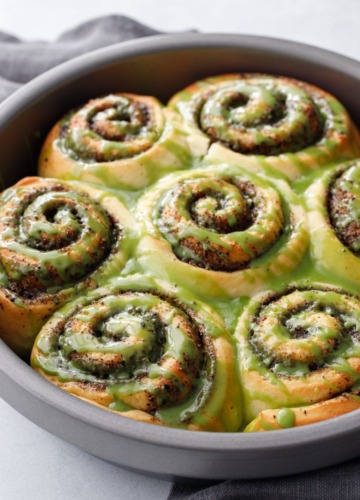
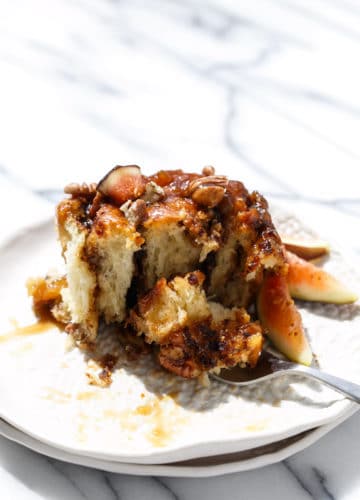
As it bakes, this extra thick layer of filling melts and caramelizes, more concentrated towards the bottoms of the rolls as the molten sugar flows in the heat of the oven: a gooey gradient with an almost sticky toffee-like chew that’s downright devilish, and only gets more intense as you peel back the layers.
As for the cream cheese frosting… (because what’s a cinnamon roll without frosting? A sticky bun. That’s what.) In this case the brown butter cream cheese frosting is the finishing touch that makes these cinnamon rolls sing.
Now, let me just say that I am not usually a fan of cream cheese frostings. To me, cream cheese belongs on bagels, and that’s it. Anything sweet that tastes strongly of cream cheese just turns my stomach (this is also the reason I am not a fan of ‘no-bake’ cheesecakes—they taste like straight up sweetened blocks of cream cheese—no thank you).
But in this case, the rich, toasty flavor of the brown butter dominates, resulting in a frosting that’s creamy and rich without tasting strongly of cream cheese. The cream cheese in this case is more of a filler than a flavor driver, adding structure and substance to the frosting without needing so much sugar (the tang of the cream cheese also helps to cut the sweetness of the powdered sugar). Add a hint of vanilla and you have the perfect frosting for cinnamon rolls.
I also imagine this frosting would be downright amazing with mascarpone (which has a comparably creamy texture with a more subtle flavor, which is why I regularly use it in place of cream cheese in many recipes).
Brown butter love.
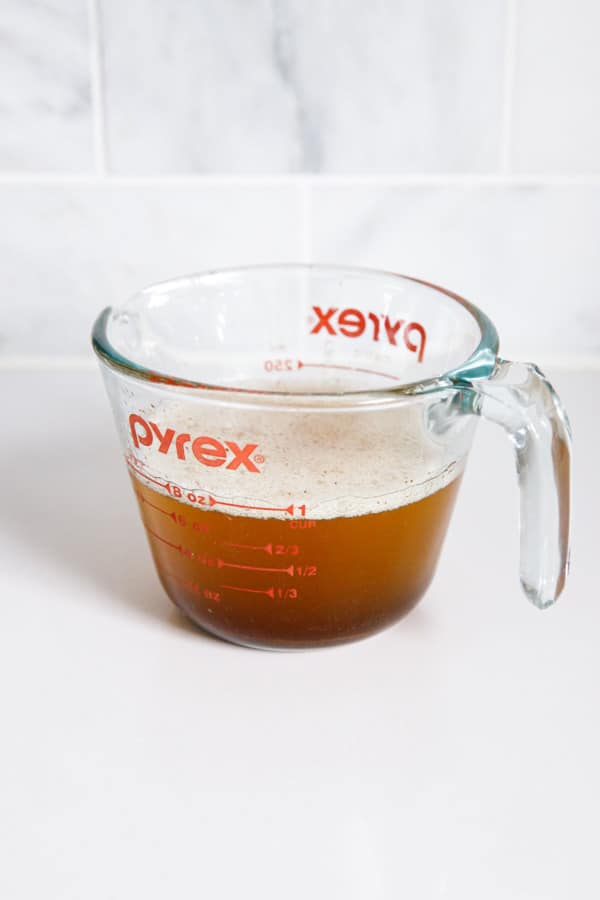
Brown butter is butter that has been browned (obviously) on the stovetop, until the milk solids turn golden brown and all remaining water present in the butter has been cooked off. It has a unique flavor, nutty and almost caramel-like, and can be used in both sweet and savory applications (hello, mashed potatoes of my dreams).
This is a classic cinnamon roll recipe for the most part, but I’ve replaced the regular butter in the dough, filling, and frosting (go big or go home, I say!)
You’ll notice the recipe calls for you to start with 2 1/2 sticks of butter (20 tablespoons), but only uses 15 tablespoons between the dough, filling, and frosting. That’s because you’ll lose about 25% of the volume during the browning process. Starting with more than you need ensures that you have plenty of brown butter for all the steps of the recipe.
Different butters may vary slightly in the final yield, butters with a higher fat content will have less liquid loss during browning. I used a standard American butter (Trader Joe’s organic unsalted butter, specifically), but a higher quality European butter may yield more than 15 tablespoons.
The frosting portion of this recipe, where the remaining butter is used, is flexible though, so whatever you have left, be it 3 tablespoons or 5, can certainly be used in the frosting without any adverse effects.
Once you’ve made your brown butter, I like to divide it up right away before it solidifies. You’ll need to separate it out into 3 different bowls: 1/4 cup for the dough, 1/2 cup for the filling, and then the rest (about 3 tablespoons or so) will go in the frosting. Be sure to stir the liquid butter as you measure, and don’t pour or spoon just off the top, to ensure even distribution of the toasty brown bits.
Whatever you’re not using that day go ahead and cover and refrigerate. The brown butter used in the dough can be any temperature (it gets melted into the tangzhong anyway), and the butter in the cinnamon sugar filling is melted as well. Only the butter for the frosting needs to be at a specific temperature when you use it (soft room temp), and that’s easy enough to do with your microwave’s soften setting or a few short intervals at 50% power. Or, if your butter is melted at the time, set it up quickly in the fridge or freezer for a few minutes (stirring every 5-10 minutes to ensure it cools evenly).
Let’s talk about our fillings: wet or dry?
There are two schools of thought when it comes to cinnamon roll fillings, one I’ll call the Dry method and another the Wet. Both have their advantages, as well as their faults.
Dry
Soften butter until it is nearly but not totally melted (the consistency of warm peanut butter). Use a pastry brush to spread a thick layer of butter evenly over the entire piece of dough. Sprinkle dry filling (sugar blended with cinnamon) evenly over top, then pat down or gently run a rolling pin over the surface to pack and stick the filling to the butter.
I find this method infinitely easier to get an even layer of filling versus trying to spread a thick paste over a fragile dough, since you’re just brushing on the soft butter, then sprinkling the dry ingredients over top.
This method, however, is a bit harder to roll up, since the filling is somewhat loose. It’s also messier to slice for this same reason.
Wet
Add brown sugar and cinnamon to melted butter, forming a grainy paste. Spread this out onto your rolled dough.
While I find it this method a bit tricky to spread the paste into an even layer (you end up with patchy parts that are slightly thicker or thinner), the thick paste gives the dough more structure, making it easier to roll up and slice cleanly.
This method also allows you to ultimately have more filling, since it’s easier to build up a thicker later of paste versus loose sugar. So if you like extra gooey, extra cinnamony rolls, this method is for you.
Do I think there’s a difference in the final result? Not really, though I haven’t directly compared them side by side.
This recipe could technically be made either way, even though I’ve written it using the wet method. Same ingredients, same proportions, just a matter of whether you mix the sugar/cinnamon in with the melted butter or spread it on first and then sprinkle.
Roll with it.
Similarly, there are also two different techniques when it comes to the rollup.
I’ve always used the roll-and-slice method for my cinnamon rolls, where you roll up the big log of dough and filling and then try to slice through the thing without mangling it. The dental floss trick makes for the cleanest cuts this way, as opposed to using a knife.
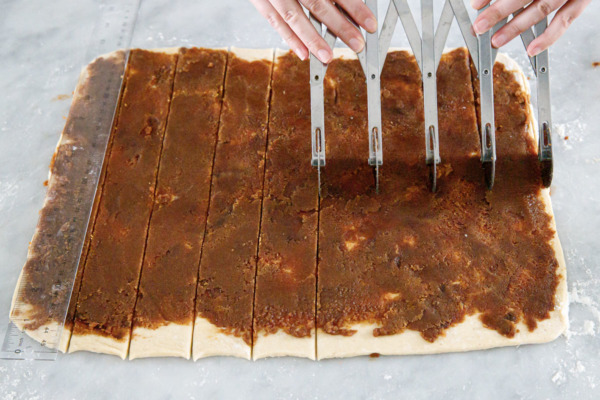
But recently I saw a new technique from Matt on Instagram (skip to around the 2:00 minute mark to see what I mean) where you slice strips of dough first, and then rolled them up into individual rolls. This definitely works better with the wet filling method, since the dry tends to crumble out the sides when rolled up.
It helps if you have one of these handy tools to cut even strips (though you can also use a ruler and a pizza cutter). My strips were larger than Matt’s, more like 1¾” thick, which makes for taller overall rolls.
Both methods are much easier with cold dough, which is why I like to make my dough the night before, refrigerate it overnight, and then shape it in the morning. While you could let the dough rise at room temperature, and shape the rolls the night before (making for a quicker bake in the morning), I much prefer working with chilled dough.
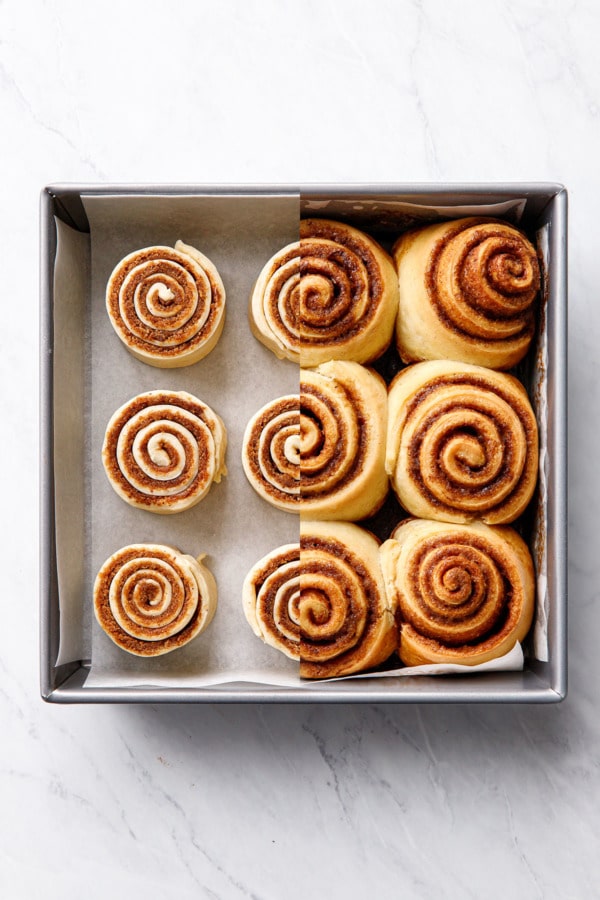
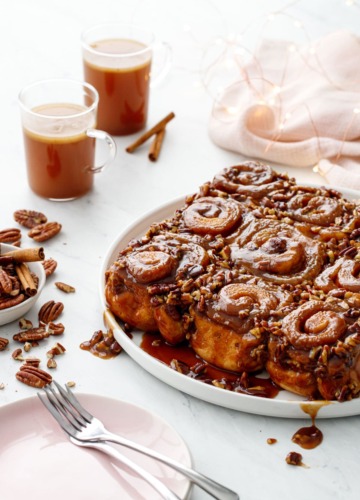
Cinnamon roll math can be a complicated beast, and you have to think about the final shape and size of your rolls as well as what pan you will be baking it in (which will determine how many rolls you need to make—a square pan will fit more rolls than a round one, for instance).
While the dough proportions are nearly the same as this recipe, you’ll notice I instruct you roll it out to a larger size rectangle here (12×16 instead of 10×15). This allows you to make 9 rolls (instead of 8 to bake in a round pan). A thinner layer of dough also means more spirals and a higher filling to dough ratio. If you are baking your rolls in a round pan, you may want to follow the sizing outlined here. Or, you could make 9 rolls as directed, bake 7 in the round pan and 2 in their own individual ramekins or muffin cups.
Like these other cinnamon roll recipes, this recipe uses what’s called a Tangzhong, a Japanese technique wherein a bit of the flour is hydrated beforehand, allowing the dough to absorb extra water and resulting in an extra-pillowy bread dough. I’ve found this to be the best method to get super soft and tender cinnamon rolls.
Timing wise, while you can technically make this recipe all in one go, chances are you’ll be serving it in the morning, in which case starting it the day before is ideal.
I personally prefer to chill the dough and then shape the rolls the next morning, since a cold dough is much easier to work with.
However, if you want freshly baked cinnamon rolls ASAP as soon as you wake up, you may prefer to shape them the night before. In which case, make the dough, let it rise at room temperature for about an hour or so, then and fill and roll. Lightly cover and chill the shaped rolls overnight. The next morning, just pull the pan out of the fridge right when you wake up (or at least an hour or so before baking), to let them come to room temperature and puff a little bit before baking.
The frosting can also be made ahead of time if you want, or you can throw it together while the rolls are in the oven.
Brown Butter Cinnamon Rolls
Ingredients
For Brown Butter:
- 1¼ cup / 282 g (2½ sticks) unsalted butter
For Tangzhong:
- 3 tablespoons / 42 g water
- 3 tablespoons / 42 g whole milk
- 2 teaspoons / 16 g all-purpose flour
For Dough:
- ¼ cup / 56 g brown butter
- ⅓ cup / 80 g whole milk
- 1 large egg, at room temperature
- 2 cups / 250 g all-purpose flour
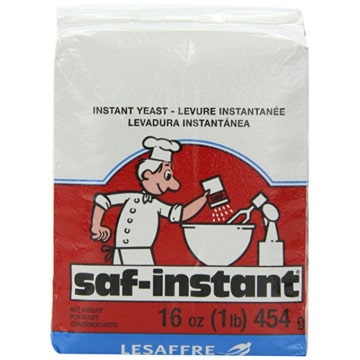
- 1 ½ teaspoons / 5 g instant dry yeast
- 1 tablespoon / 13 g granulated sugar
- 1 teaspoon kosher salt
For Filling:
- ½ cup / 113 g brown butter, melted
- ¾ cup / 160 g brown sugar
- 2 teaspoons / 4 g cornstarch
- 2 tablespoons / 16 g ground cinnamon
- pinch fine sea salt
For Frosting:
- 3 tablespoons / 42 g brown butter, softened
- 2 oz / 60 g cream cheese, softened
- 1 cup / 120 g powdered sugar, sifted
- ½ teaspoon vanilla paste or extract
- pinch fine sea salt
Instructions
For brown butter:
- Melt butter in a saucepan (if you have a light colored one, it'll be easier to gauge the color) set over medium heat, stirring occasionally. Once the butter stops sputtering and the foam subsides, keep a close eye on it. Continue to cook, stirring occasionally, until the solids on the bottom turn golden brown. Remove from heat.
- While the butter is still melted, divide it into 3 smaller bowls, one with 1/4 cup (4 tablespoons, for dough), one with 1/2 cup (8 tablespoons, for filling) and the rest (about 3 tablespoons) for the frosting. I like to stir the butter frequently as I measure it out, a tablespoon at a time into each of the 3 bowls, so the brown bits get distributed equally among them.
- The 1/4 cup bowl you'll be using right away; the other two you can leave out at room temperature for a few hours, or, if you'll be shaping and baking the next day, cover and refrigerate overnight. Remember the get out the butter for the frosting ahead of time so it has time to soften up a bit.
For dough:
- Start by preparing your flour paste or tangzhong: combine water, milk and flour in a small saucepan set over medium heat. Whisk gently until no clumps remain. Continue to whisk until the mixture thickens to the consistency of thick paste, about 2 to 3 minutes. Remove from heat.
- Add butter and gently whisk until incorporated (it will still look a little greasy/separated), then whisk in milk until smooth. Add in the egg and whisk until fully incorporated. At this point the mixture should feel lukewarm, not hot, to the touch.
- In the bowl of a stand mixer fitted with the dough hook, whisk together the flour, yeast, sugar and salt to combine. Pour in the lukewarm flour paste, and mix on low speed until mixture forms a shaggy dough, about 1 to 2 minutes. Increase speed to medium-low, and mix until dough is smooth and elastic, but still somewhat sticky, about 10 minutes. Add more flour only if absolutely necessary (a softer initial dough will result in a softer final product).
- Shape the dough into a ball (lightly oil your hands if necessary) and place in a lightly greased bowl. Cover with plastic wrap or a kitchen towel and allow to rise in a warm place until doubled in volume, about 1 to 1 1/2 hours. Alternatively, if you want to bake your rolls the next day, tightly cover the bowl with plastic wrap and pop it in the refrigerator to rise slowly overnight (my preference, as cold dough is so much easier to work roll out and shape).
For Filling:
- Melt brown butter in a small bowl. Add sugar, cinnamon, cornstarch and salt and stir until evenly incorporated.
To Assemble:
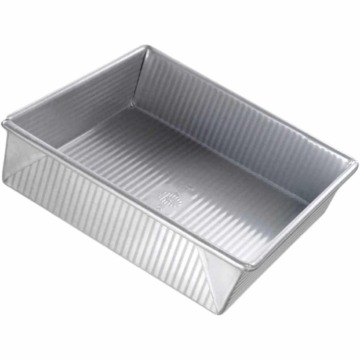
- Spray a 9-inch square cake pan with cooking spray or line with parchment paper. You can also use a muffin tin to bake rolls individually, or bake them spread out on a sheet pan for crispier rolls.
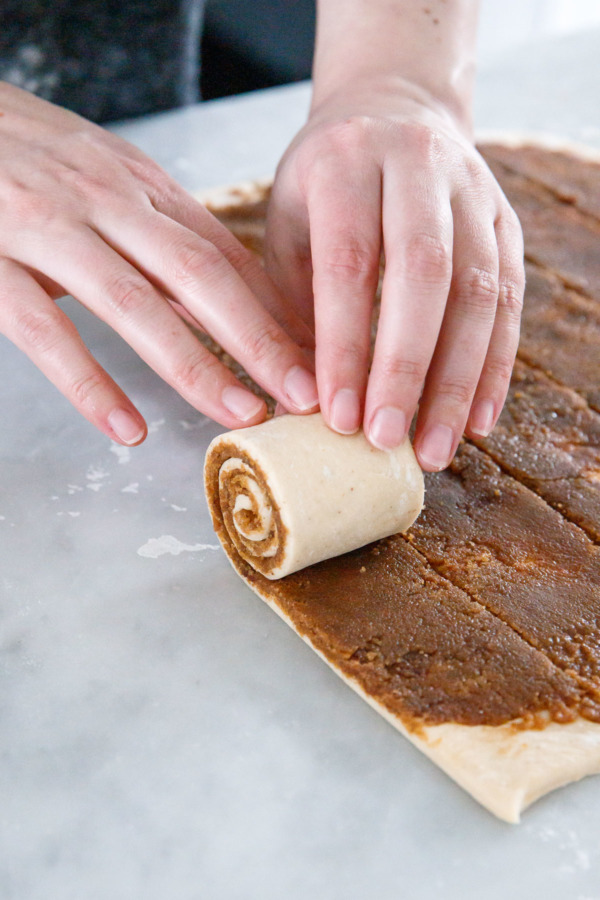
- Turn dough out onto a lightly floured work surface. Pat into a rectangle, then roll out evenly into thin rectangle approximately 12-by-16-inches in size. You want this piece to have an even overall thickness, with corners as square as possible.
- Using an offset spatula or the back of a spoon, spread an even layer of filling over dough, leaving a 1-inch space empty along the top long edge.
- Working with the long edge nearest you, start to roll up the dough fairly tightly, taking care not to stretch out the ends too much. Pinch along the edge of the dough to seal the seam, then roll the seam so it is face down. If your dough was not refrigerated, you can chill the roll at this point for 15 to 20 minutes to firm it up and make cutting easier.
- Using a ruler, measure out where you will cut your rolls, using a small knife to mark the cuts. For a 9-inch square pan, I cut 9 rolls (approximately 1¾-inch wide), but if you are using a round pan you might want to cut 7 or 8 for a more even arrangement. Use a sharp serrated knife to cut the rolls. You can also wrap a piece of dental floss or fishing line around the dough, which will create perfect, clean cuts.
- Alternatively, you can use the slice-and-roll technique as I did, and cut strips of dough first (use a multi-blade pastry cutter tool or a ruler and pizza cutter to cut straight lines), then roll up individual rolls one at a time.
- Place rolls into prepared baking pan, evenly spacing rolls with a bit of space between them. Lightly cover and set pan in a warm spot until rolls are noticeably puffed, about 45 to 60 minutes.
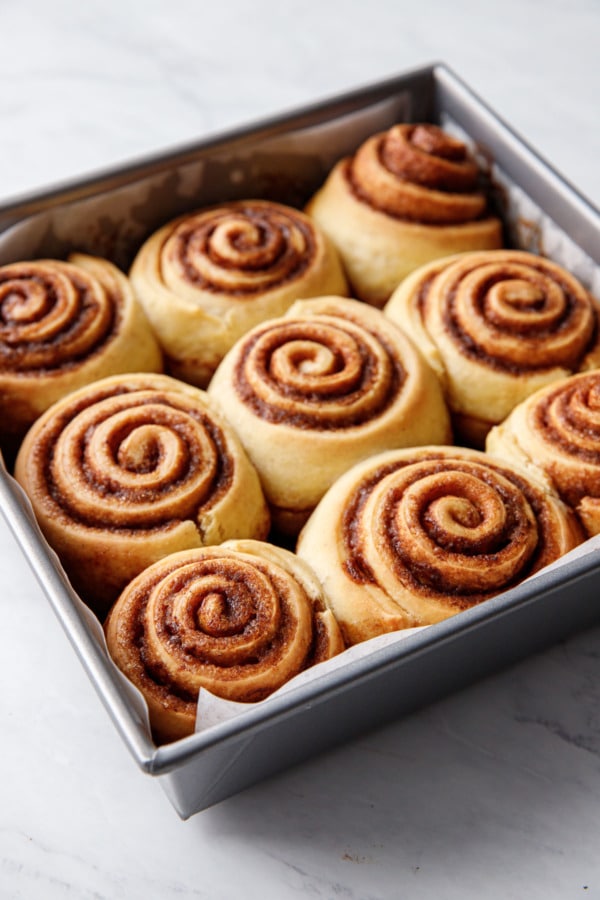
- Meanwhile, preheat oven to 350 degrees F.
- Bake for 35 to 40 minutes, or until tops are lightly golden brown and filling is bubbly (to be precise, the center of the dough should read about 190 degrees F on an instant-read thermometer). If your rolls are browning too quickly, you can tent them with foil and return to the oven to continue baking.
For Glaze:
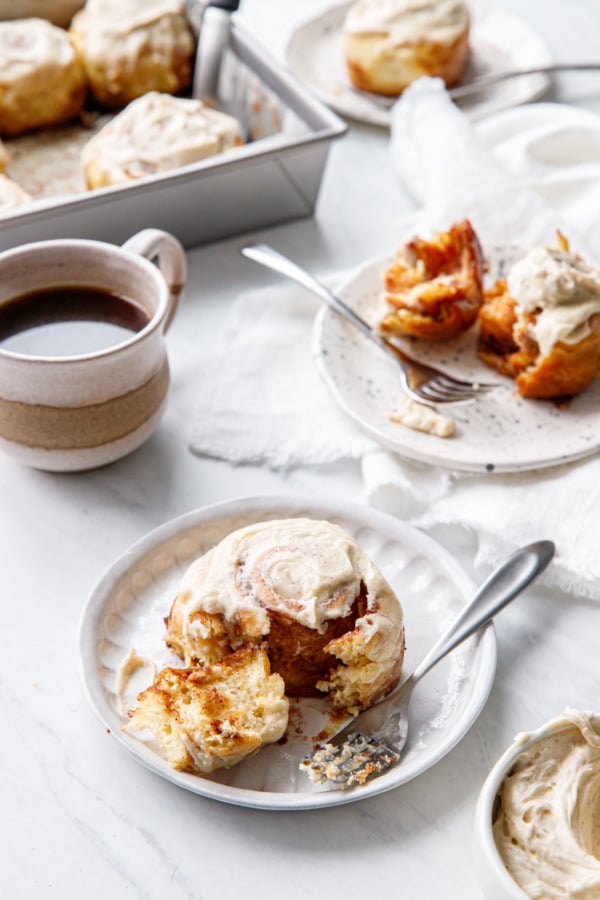
- While rolls are baking, make the frosting. Cream softened brown butter and cream cheese with an electric mixer until smooth. Add powdered sugar and beat until light and fluffy, about 2 to 3 minutes. Add vanilla and salt to taste. If necessary, add more powdered sugar and/or a splash of room-temperature cream to thicken or thin to desired consistency.
- Let rolls cool for about 10 minutes, then generously spread frosting on top. Serve warm. Rolls will also keep well for a few days, tightly covered or in an airtight container. Reheat in the oven or microwave prior to serving.


Your recipe looks great and I would like to Bake these individually in muffin tins, how long do you think i should Bake them for?
Honestly I’m not quite sure as I’ve never baked them that way myself. The outsides will be golden brown, the center should read 190 degrees F on an instant read thermometer.
Cinnamon rolls are my favorite! My mouth is watering just thinking about this recipe. It’s ideal for an afternoon tea. thank you for your recipe!
I’ve never thought of making cinnamon rolls but this recipe doesn’t sound so difficult. Definitely worth trying out with the kids!
another gteat weekend inspiration dessert for me, and nice to look forward to too, for that one day I allow myself these kinds of wonderful cinnamon rolls. always a sucker for cream cheese
What’s the purpose of cornstarch in the filling?
To thicken it slightly and keep it from leaking.
These look decadent!