
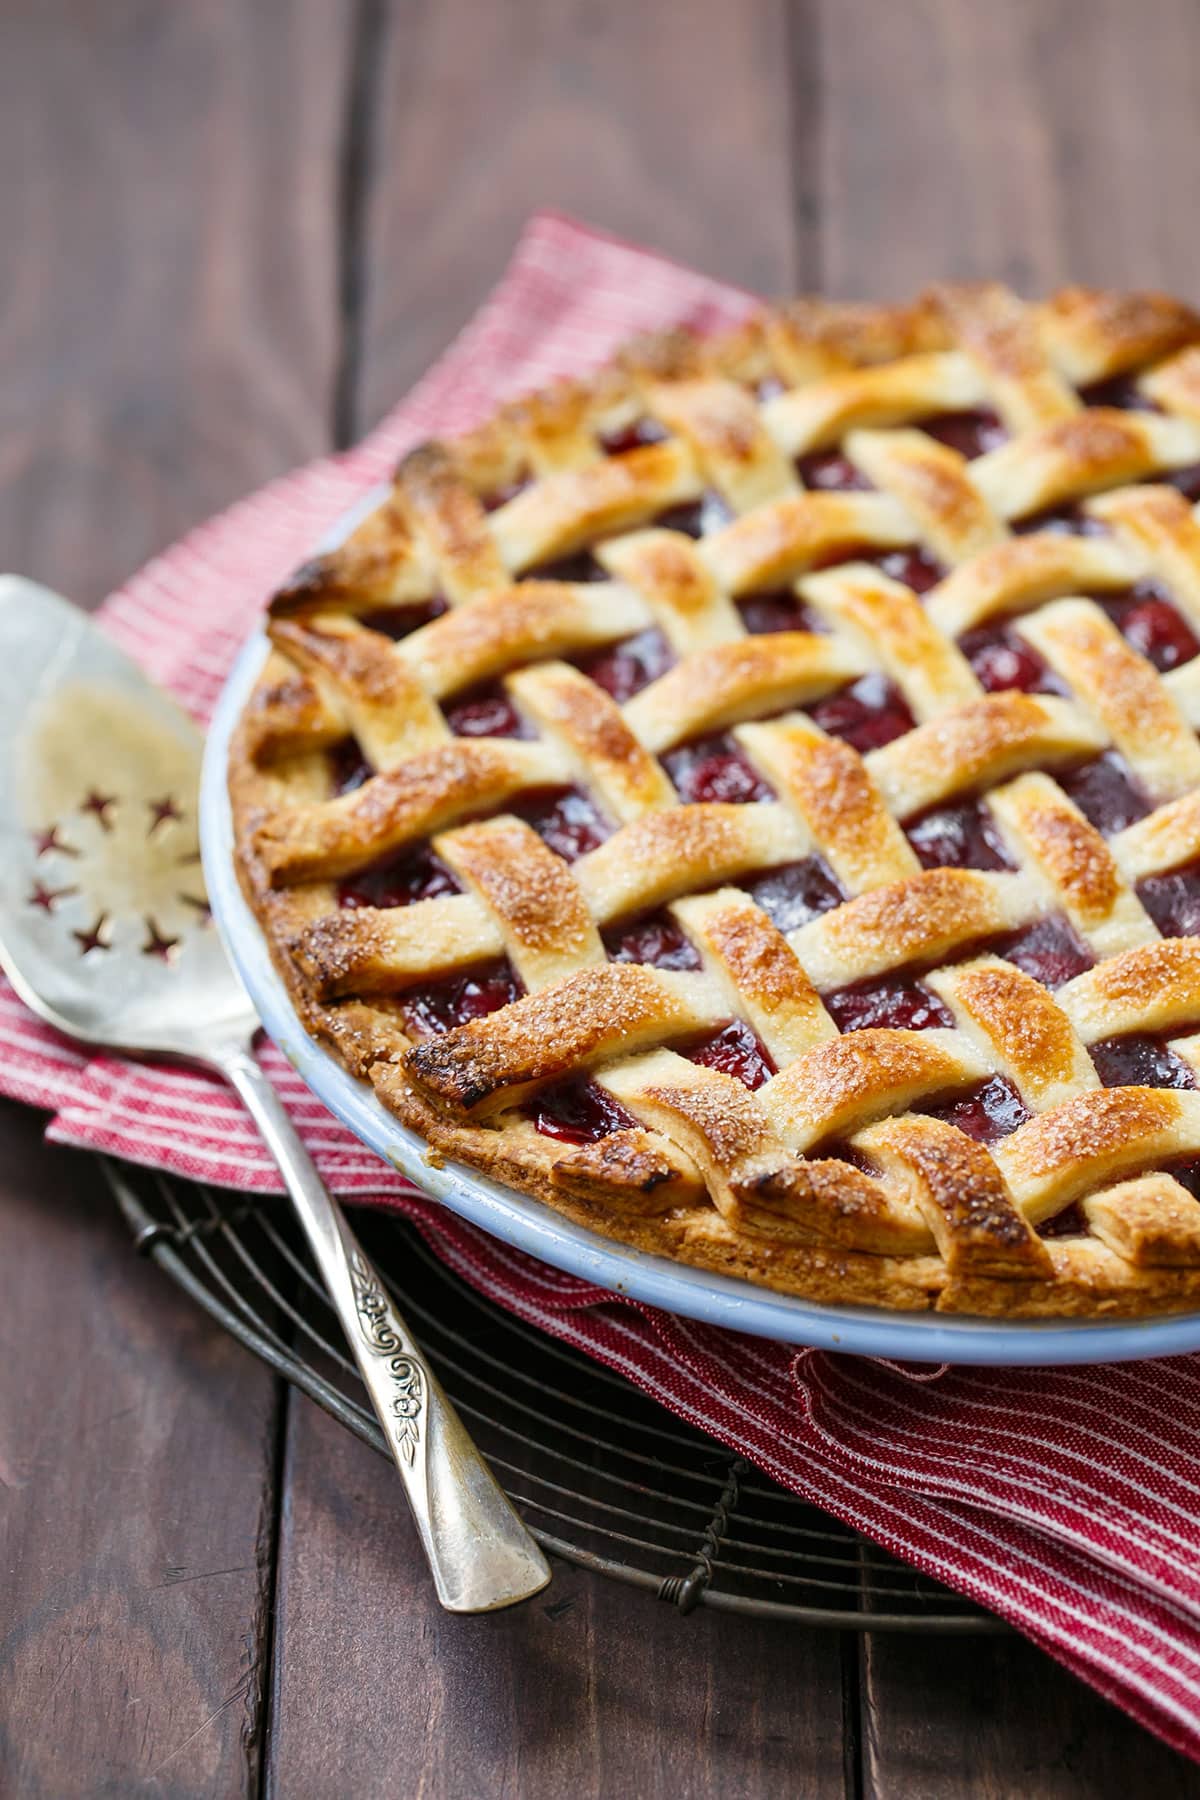
A classic tart cherry pie made with frozen tart cherries (or fresh, if you can find them!) and a cornstarch thickened filling for the perfect gooey, not soupy, finish.
Save this recipe for later!
Cherry pie has always been one of my ‘bucket list’ recipes, along with caramel and macarons and other dishes that I’ve since tackled (or plan to tackle) in the Kitchen Challenge series.
My main obstacle was a pretty big one, the main ingredient in fact: tart cherries (aka sour or pie cherries). Despite our amazing local produce here in Nashville, the hot and humid climate simply isn’t ideal for cherry trees. And, unlike their sweeter cousins, they are notoriously hard to transport, so you don’t often see fresh ones of the regions where they are grown.
Mark down reason #1 I am jealous of Michigan.

Frozen tart cherries are sometimes easier to find, although I’ll be darned if I’ve looked at every grocery within a 10 mile radius and haven’t spotted them yet.
Even my go-to source for hard-to-find food stuffs told me that he could only get them in 40 pound bags.
Uh, no.

Sometimes, though, the universe listens. Shortly after I put it out there that I was desperate to find tart cherries locally (along with the more exotic passion fruit), I got a friendly email from the Cherry Marketing Institute, looking for a few recipes featuring the fickle fruits.
Whether they saw my tweet or simply felt the energy I had put out into the ether, I’ll never know. Needless to say, I enthusiastically said yes, and shortly thereafter a precious package of frozen tart cherries arrived on my doorstep, just ready to be made into pie.
I immediately thawed out a bag and got to work developing a recipe for a classic cherry pie. Sure, you can add things to it if you’re looking for something ultra unique, a splash of bourbon or some citrus zest or whatever else you fancy. But my goal here was simple: to make a basic, classic, and utterly fantastic tart cherry pie.
With my troubled history with pie crust, the fact that I attempted a lattice-top pie is pretty darn brave on my part.
Clearly I’m a glutton for punishment.
Oddly enough, it was the filling that gave me the most trouble this time, refusing to thicken or over-thickening into a gluey mess. I tested cornstarch, flour, and tapioca. I tested various amounts and even combinations of each. I tested simply folding the thickener in with the cherries and sugar and baking it, but what ultimately worked for me was cooking the filling first on the stove and then pouring it into the crust. That small head-start made all the difference.

3 days, 4 pies, and 8 pounds of tart cherries later, I declared cornstarch the ultimate winner.
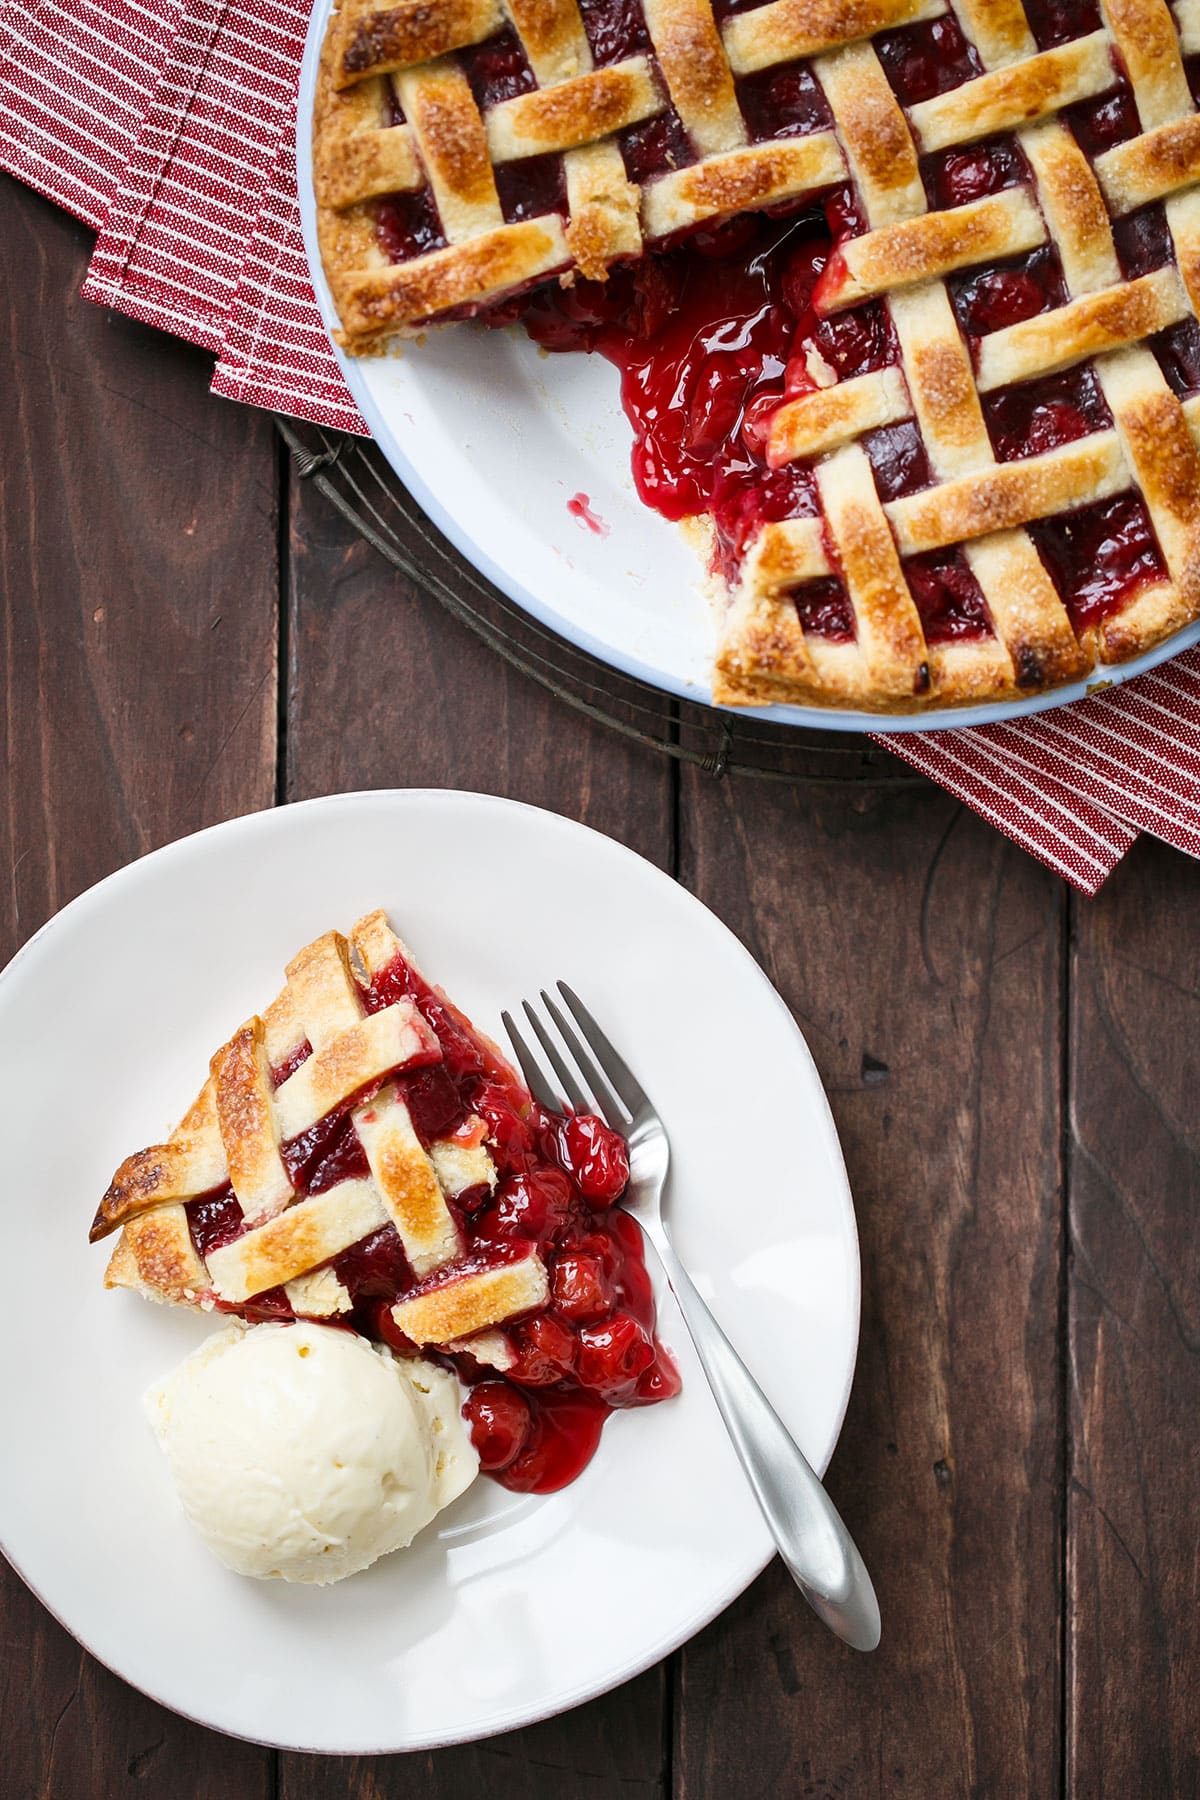
Flour thickened nicely on its own without any pre-cooking, but the filling was slightly cloudy in appearance and had an equally muddled flavor that I didn’t love. Tapioca starch, with its crazy thickening super-powers, turned into some sort of cherry glue with a texture more like a fruit snack than cherry pie filling (although people swear by it, so take that as you will). Cornstarch, however, once I established the need to pre-thicken it on the stove, baked up beautifully clear, with a clean, neutral flavor that let the cherries shine. As long as you don’t cut into the pie too soon, you’ll end up with a perfectly structured pie with just the right amount of ooze.
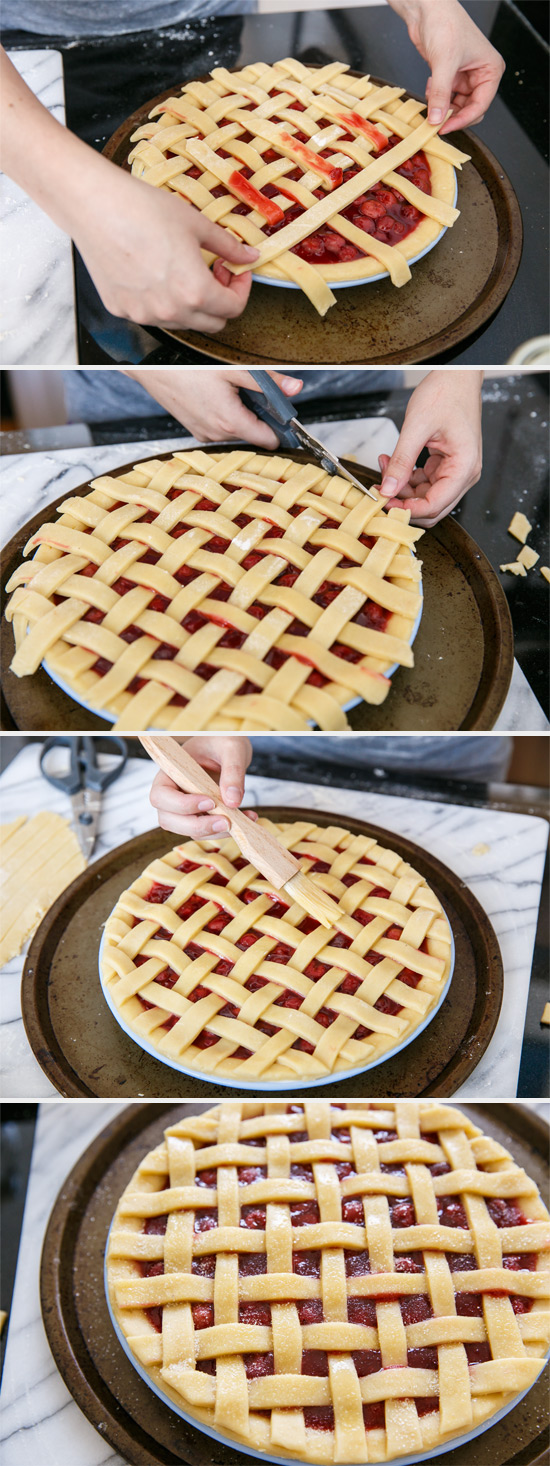
Turns out the lattice is much easier than I expected. The edge-crimping still stumps me though, and the first few pies I made were sad excuses for pies, in more ways than one. I finally resigned myself to the fact that I cannot crimp a pie crust to save my life, gave up trying, and went about finding an alternative finishing method. Turns out the easiest possible technique produced the cleanest result: I simply trimmed the crust and the lattice to the edges of the pie tin with a pair of kitchen shears. That’s it. No folding, no crimping, no problem.
Note: if standard pie crust gives you trouble, try pulsing 2/3 of the flour with the butter until it comes together into a paste (you’ll feel like you are overprocessing, but that’s ok!) Break up the paste and spread it evenly around the food processor, then sprinkle with remaining flour and give it 5-6 short pulses. Then transfer the dough to a bowl, sprinkle with ice water, and press and fold with a rubber spatula until just incorporated. The dough will be stickier than you may be used to, but after chilling for 1-2 hours it will be perfectly workable.

If you’re like me and are having a heck of a time locating pie cherries for your bucket-list pie, check out this list of tart cherry growers and processors with online ordering options.
This recipe can also be adapted to use canned tart cherries, just treat them as you would thawed frozen cherries, thickening the cherries with their juices as instructed. If you can get your hands on fresh tart cherries (you lucky dog, you!) simply whisk the cornstarch with a tablespoon or two of cherry juice and add it to the saucepan with the cherries.
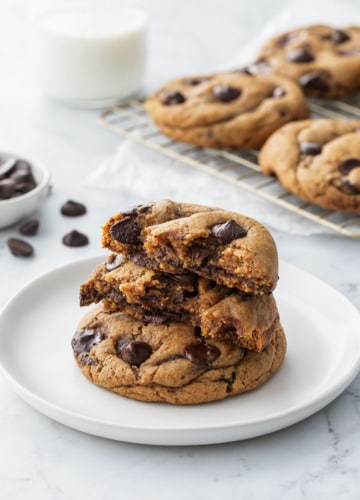
And stay tuned, as now that I’ve conquered the elusive tart cherry pie, I’ve got a few more tart cherry recipes in the works that you’re going to love just as much.
How do you like them apples cherries?

Tart Cherry Pie
Ingredients
For Crust:
- 2 ¼ cups / 281 g all-purpose flour
- ½ cup / 56 g almond flour
- 3 tablespoons / 36 g granulated sugar
- 1 teaspoon kosher salt
- 1 cup / 227 g 2 sticks very cold unsalted butter, cut into pats
- 4-5 tablespoons ice water, as needed
For Filling:
- 6 cups / 900 g frozen tart cherries
- 1 cup / 200 g granulated sugar, divided
- 3 tablespoons / 24 g cornstarch
- 1 teaspoon lemon juice
- ¾ teaspoon almond extract
- 1 large egg
- 1 tablespoon milk
- turbinado or raw sugar, for sprinkling (optional)
Instructions
- FOR CRUST, combine flour, almond flour, sugar, and salt in the bowl of a food processor and pulse to combine. Spread butter pats evenly over surface. Pulse until butter is broken up into pea-sized crumbles, about 20-25 short pulses. Sprinkle with a few tablespoons of water and pulse on low speed, drizzling in more water until dough just starts to come together. You may not need all the water. Divide dough into two equal balls (each should weigh about 12 ounces); wrap tightly in two layers of plastic wrap, flatten into disks, and refrigerate at least 1 hour or overnight.
- Remove one disk of dough and let sit at room temperature for 5 minutes to soften slightly. Roll out on a lightly floured surface to a 12-inch circle. Gently ease the dough into a 9-inch-round pie pan. Trim edges flush with the edges of the pan (or slightly longer if you want to crimp the edges). Refrigerate for at least 30 minutes.
- FOR FILLING, toss frozen cherries with 1/2 cup of sugar. Place in a fine mesh strainer or colander set over a bowl to catch any juices. Let sit, stirring occasionally to redistribute the juices, for about 1 hour or until cherries are mostly thawed and 1/4-1/2 cup of liquid has drained out the bottom.
- Dump drained cherries into a saucepan with lemon juice. Whisk remaining 1/2 cup sugar and cornstarch into reserved cherry juice until smooth and no visible cornstarch chunks remain. Fold into saucepan with cherries. Cook over medium-high heat, stirring gently and scraping the bottom and sides of the pan, until mixture comes to a boil and juices have noticeably thickened, about 1-2 minutes after the mixture begins to bubble. Remove from heat and stir in almond extract. Pour into chilled crust and return to the refrigerator.
- Whisk egg and milk together in a small dish and set aside. You will need this to brush the crust later.
- On a lightly floured surface, roll out second pie crust to a 12-inch circle. You can use this as a solid top, or, to create a lattice top, cut circle into 14 1/2-inch-wide strips. First brush the edges of the crust with egg wash. Arrange half of the strips vertically across the top of the pie, with the longest strips in the center. Gently fold back every other strip to a little past the center. Place one long strip of dough horizontal to the other strips across the center of the pie. Unfold the folded strips to lie flat on top of the horizontal strip. Fold back the strips that weren’t folded back last time, place another horizontal strips, then unfold again. Repeat until the lattice is complete. Press down edges of lattice lightly to adhere. Trim to the edge of the pie pan (or, if you have extra overhang, fold and crimp). Brush lattice with egg wash and sprinkle with raw sugar (if desired).
- Refrigerate pie while you preheat your oven to 400 degrees F. Set pie on a baking sheet (to catch any overflow) and bake in the middle rack for 35 to 40 minutes or until crust is golden brown and filling is bubbly. If, after about 20 minutes or so the edges of the crust are already browned, cover the edges with a thin strip of foil to keep them from burning.
- Remove pie from oven and place on a wire rack to cool completely. Don’t be tempted to slice into it early or you’ll end up with a juicy mess. The pie needs at least 3 hours to properly set. You’ll know when it’s completely cooled when the bottom of the pie pan is no longer warm to the touch.
- Slice and serve at room temperature with vanilla ice cream.


Just wanted to let you know you can usually find 5 lb bags of
frozen tart cherries at Gordon Food Service (GFS)
I found that I have more success with the addition of cornstarch if I mix the starch with 2-3Tblspns water and then add it to the boiling cherry mix in the pot while stirring constantly. Usually for 6 cups of cherries with juice I add 2 flat Tblspns mixed with 3 Tblspns water. As soon as the mix thickens turn off the heat. cover the cherry mix in the saucepan with a sheet of plastic so no skin appears and the next morning it is like a beautiful jelly and cold it is easy to add to the shell and bake.
Made this pie today with 6 cups of fresh 🍒. Sooo good. Made for son and family for Father’s Day. Need to practice weaving lattice. A delicious cherry pie. Will be my new recipe for cherry pie! Thank you!
OMG….wonderful pie! I think it’s the cherry juice that is drained and thickened that makes it!
Absolutely fantastic!!
Made this for the family gathering and it was an instant hit !!
Your instructions were fabulous- well written and easy to follow. Thank you !!
I live in Michigan’s U.P. and have a tart cherry tree on our property right by the house. I didnt think it was growing fruit anymore and was shocked when I saw all the cherries about a week ago! My husband and I went to work picking those babies. I set aside enough for a pie and flash froze the rest. I then went on the hunt for a great tart cherry pie recipe to make from scratch. Mind you I have avoided pies all together as it seemed so daunting to me. I ended up making the dough for the crust and lattice a little differently than yours but followed the filling directions; except I used vanilla extract since my crust didnt have any of the almond flour. Holy Tart Cherry! It turned out AMAZING! I even did the lattice top, to my dismay, I didnt mess it up. Beginners luck? Its got to be…
Very long story short, thank you! Without stumbling upon this post, I really would have been stumped. Your directions were clear and concise and no step was missed. I plan on making this again over the weekend with your crust recipe as well so I’m really looking forward to it.
Now, I must pie sit before I blink and it all ends up in my sweet husbands tummy. ;)
Thanks again!
This makes me so happy to hear! Congrats on a successful pie (and color me jealous of your cherry tree! I so wish I had one!)
It’s my boyfriends dads birthday and his favorite pie is cherry, so here I am! I have a different crust recipe that I used which includes butter and lard, we have tons of lard from a pig we raised this year.
I used dark tart cherries from the frozen section of Costco. My pie pan is 9.5″ and I used the whole bag, about 8 cups of cherries. So, I tweaked the sugar and corn starch accordingly. I used a bit of lemon zest instead of juice, and the filling is some of the best I’ve ever had.
Attempted the lattice crust for the first time ever which didn’t go great! I know for next time to keep my crust super cold and roll it out thicker. I couldn’t pull the pieces back to build the lattice so I just laid the other direction right on top LOL (you gotta do what you gotta do…)
Now the hard part, waiting until its cool to get into it! Luckily we are going out for dinner, so it will be ready to eat when we get home! I’ll be printing and saving this one, thanks!
Can the frozen cherries be substituted for fresh?
I have not tried it personally but you should be able to use fresh or frozen cherries here!
This recipe works great with fresh cherries, but expect you’ll get a lot more liquid out. Don’t be tempted to put more of it back in or you’ll have a watery pie.
That extra liquid (which has some of the sugar in it) mixes well with water (or sparkling water) for a refreshing summer drink.
I raise tart cherries and love this recipe. I made double crust pie and it was juicy, while not runny. No soggy bottom crust either. We even waited the recommended 3 hours to cut.
Hey! Your recipe is great. I did it but the dough i used were different (flour, butter, powdered sugar and egg) but the crust was something hard. So i wanted to know how hard was the crust you did.
I have made this cherry pie three times now. Each time I followed the recipe as well as the assembly instructions of the lattice crust top carefully. BTW, one must do that lattice, it is a wonderful statement of a master pie maker. Your pie was the first pie I ever baked and I made it for my wife because her absolute favorite dessert is Tart Cherry Pie, and she deserved a treat, and it turned out brilliantly. Expect some traffic to your webpage because I recently posted photographs of mine with a link to this page on Facebook so all of my friends can make one. Thank you for taking the time to perfect this recipe and share it with others, like me, a first time Master Pie Maker. DW
For folks with nut allergies, would you recommend substituting vanilla extract for the almond extract in the filling, or omitting the extract altogether? Thanks!
Sarah–I am not Lindsay :) but thought I’d weigh in. One of my sons has a tree nut allergy. One year I made cherry pie with vanilla instead of almond extract. It was ok, but not as good as the traditional cherry pie. My son didn’t love the pie anyway, so now he just eats other pies at Thanksgiving. :)
Gorgeous! What stunning photos of your beautiful lattice crust.
My daughter’s mother-in-law has a tart cherry tree in Murfreesboro! Some years it doesn’t produce well, but when it does she has a zillion pounds of them. Tiny, and so tart they’ll make your mouth pucker :-). They make the BEST cherry pies! So, plant yourself a tree – you’ll have to fight the birds for them and they’re the devil to pit, but totally worth the trouble. And if they’ll grow in the ‘boro, they’ll grow in Nashville!
If we hard a yard I’d totally plant one. Alas… condo living isn’t exactly conducive to fruit trees. Oh well. :)
Yep, a cherry tree is a little big for container gardening. If Sharon has a bumper crop next year, maybe you can come down to pick some for a blog post :-). When it’s really producing, she’s usually looking for volunteers, lol. My husband and I picked a couple of years ago when the crop came in while they were on vacation — it was so worth the effort even in the June heat!
That might be the most beautiful lattice I’ve ever seen! With all those pies you’ve made sounds like you should’ve gone with the 40 pound bag! ;)
This looks absolutely perfect, and delicious! :)
All your diligence paid off! What a gorgeous pie!!
I live on Michigan, cherry capital of the world, and I only found sour cherries once this year. So disappointed! But I made good use of them and also crossed sour cherry pie off my list. Cornstarch always wins for me.
Gorgeous pie!!! My favorite. I would say you nailed it!
Here in south central PA our sour cherry crop was entirely wiped out by frost. Broke my heart.
What an absolutely beautiful pie!! I’ve been lucky enough to get a bunch of tart cherries this summer by doing U-picks (while on vacation, because both places were 4+ hours from home), but last summer I was astounded that, living in Michigan, I could not find a single fresh tart cherry! Elusive little buggers, huh?
Hi, made this last night? The filling was great, but the dough was too pasty couldn’t really work with it, doing the top layer was almost impossible as it kept breaking into my hands, had to add half a cup of flour to make it more firm.. Any ideas what went wrong with it? It was at least 3 hrs in the fridge.
Thanks
This looks soooo beautiful and delicious! Your lattice work is just amazing, I totally need to make pie like this!
Cherry pie is my favorite, but I’ve never made it ~ this sounds like a fool-proof recipe and looks divine!
I was a Michigander for 23 years and never learned to like cherries, at this point I don’t think I will ever enjoy them. Your pie, however, is perfection itself!
Costco has wonderful dark tart cherries!!!
I bet that almond flour really adds a nice, deep flavor to the crust. Beautiful lattice work! I’ll be waiting around for the leftovers :)
This pie looks just perfect!
I stalked our farmers market like a mad woman on the prowl for tart cherries this year and was finally rewarded when I showed up at the crack of dawn. SO worth it (I baked a tart cherry pie too!) I loved hearing about the different methods you tried to perfect it. Thanks for taking us on this sweet (or should I say tart?) journey with you!
What a perfectly gorgeous pie with the lattice on top! You make it seem so easy that anyone would want to try… Pinned for later!
That is one mighty fine looking pie crust! Yum!
It looks absolutely perfect!
Holy Pie Crust! That should be on the cover of Pie Monthly! Beautiful….
I just recently realized that we live in the same city now (I moved back to Nashville this year) and I got so excited when I saw this blog. Tart Cherries in Nashville- Where do I shop?! Sad that we can’t get the fresh here but thanks for the link to shippers!
Your pie (and lattice work!) looks beautiful, Lindsay. One trick that I learned from America’s Test Kitchen is putting a grated granny smith apple in pie fillings that tend to me runny (blueberry, cherry). The pectin in the apple keeps things together and you can usually use less corn starch. And the apple – because it’s grated – just melts away when cooked and you can taste or see it. You should try it sometime! Just thought I would pass this little trick along!
This is absolutely stunning.
Everything about this is STUNNING. I think these may be my favorite pictures of yours ever (and that is saying a LOT!) :)
What a perfect pie! I’ve never had much luck with homemade crusts either, but this one looks incredible. Can’t wait to see more cherry recipes! :)
This pie is absolutely stunning. Not only do I want a slice of pie now, but I also have the urge to go make a lattice pie ;)
Hi there,
So happy I found your blog. Excellent recipes, great writing, and BEAUTIFUL photography.
Is your friend doing your photography or have you mastered the art? Such a nice job.
I see you use almond flour in crust. Is the texture and taste significantly different than an all-flour crust?
I too love tart cherries but haven’t found a source here in the Northwest land of Rainier cherries (ok, we have Rainiers but they are just as expensive as everywhere else:-( ). Thanks for the link for sources.
Would be great to see photos on weaving lattice. You did a fabulous job.
Enjoy the fruit of your labors! Look forward to reading more about your kitchen cherry adventures!
When I was home in upstate NY I went cherry crazy. I picked tons of sweet cherries, but when it came to the tart cherries I stayed away. I’m an eat-while-I-pick U-pickers and obviously tart cherries are no fun for that area. But I regret not doing it because I so badly want to make a tart cherry pie now!
I’m in love with your pie!
That is one beautiful cherry pie. That lattice looks precision-measured! I agree about the cornstarch, and I too have given up on crimping. No matter how pretty it is raw, it melts into blobs in the oven. But it always tastes good, and that’s what it’s all about.
Well if that isn’t the most amazing cherry pie I ever did see, I don’t know what is!!
What a gorgeous pie! It looks absolutely delicious!
Your lattice crust looks so freaking perfect!!! I’m so envious. Love this recipe!
Cherry pie is on my bucket list too. As well as learning how to make a lattice crust which seems so daunting to me but you made it beautifully!
Your pie is absolutely stunning!! I think next time you’ll just need to come to Michigan to pick them yourself. ;)
Could this look any more perfect? So beautiful!
I’ll admit, I’ll never likely make a lattice pie crust but OMG if I need to have one, I’ll pay you whatever it takes b/c that’s the most beautiful lattice crust Ive ever seen! Pinned!
About 6 mos ago I was sent, get this, 10 lbs of sour cherries. I did everything I could think with them so I was chuckling at your comment they’re hard to come by. I think I still have 2 lbs in my freezer :)