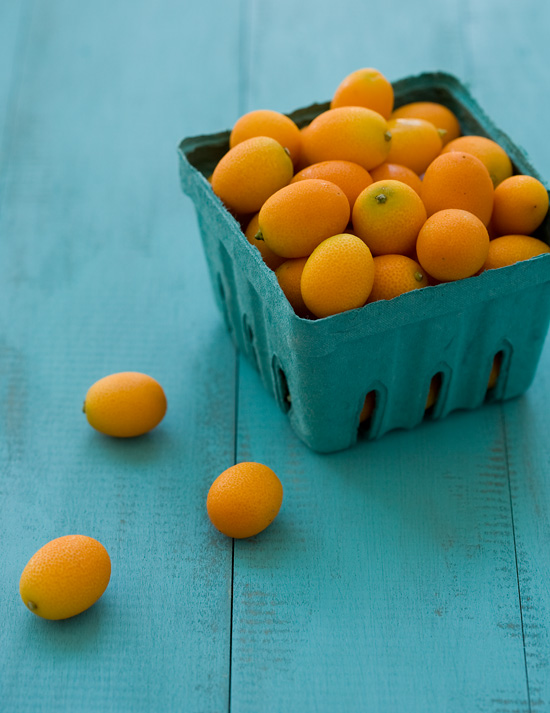
I love using texture in my photos. Whether it be a rough burlap fabric or a distressed piece of wood, it adds so much depth and character to an image. And for those of us who aren’t blessed with a beautiful rustic wood tabletop, we have to resort to drastic measures.
Or not so drastic ones.
My first attempt at a distressed wood background involved getting a long piece of beadboard cut into 2′ lengths, gluing them together, and then painting it white. It worked, but I didn’t love the double grooves of the beadboard. They were too strong and took away focus from the subject. I wanted something a bit more subtle.
On our next trip to the home improvement store, I scoped out some better materials. Lucky for us we went to a different store than our regular one, and there I found some “Pine Board Scants” or “Craft Boards” (signs were conflicting – I don’t know what they were actually called). Basically, it is a 3 1/2″ wide board like normal lumber, but it is only 1/4″ thick. And since my puny little arms are going to have to lift this thing on a regular basis, thinner boards were exactly what I was looking for. They had a variety of different widths, so you could get wider or thinner boards based on your preference. I found these particular boards at Lowes. Home Depot (at least the one we usually go to) didn’t have anything comparable.
This same process can definitely be done with standard 3/4″ thick wood, but your final product will be a lot more bulky, especially if you do the double layer for a reversible background.
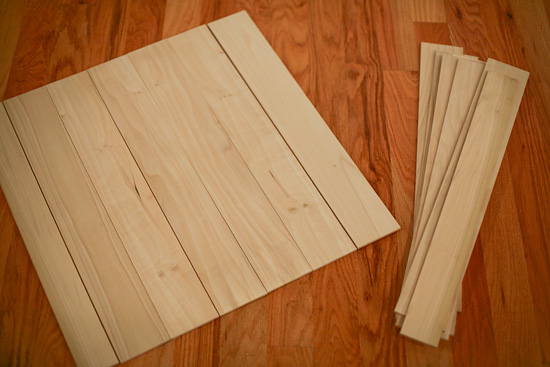
For this specific background you will need twelve 3.5″ wide, 2′ long boards, plus two 2.5″ wide boards to make a perfect square. Arrange half of the boards in one direction, and tape in place. I wanted a very small but still distinguishable gap between the boards, the tape helped keep it in place while I glued.
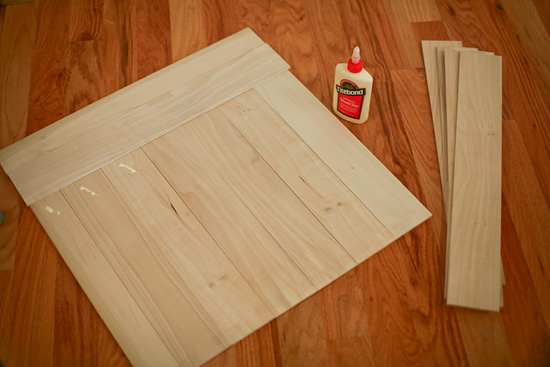
Next, lay the other half of the boards in the opposite direction, gluing in place with wood glue, carefully positioning boards so the gaps are to your liking. Careful not to put too much glue, you don’t want it to ooze through the gabs (or, er, glue it to your floor…)
When the boards are glued in place, put a flat, heavy weight (like an upside down coffee table or a whole lot of books) on top and let dry overnight. You could also use wood clamps if you have them, but basically you just want something that will hold the pieces firmly together until the glue is dry.
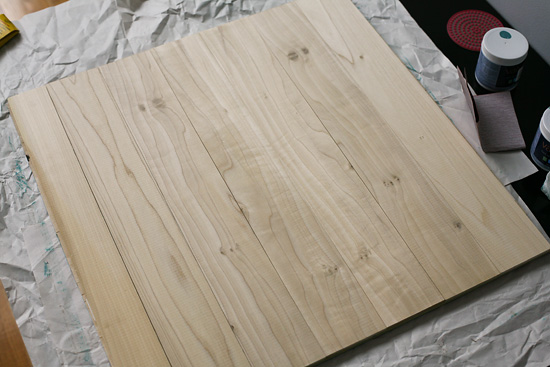
Now it’s ready to paint!
For my paint, I simply picked up a few sample containers of paint. $2/a piece, and more than enough paint to cover my little 2×2′ background. One sort of a medium greenish brown color (called Truffle), white, and then two shades of turquoise. My plan was to make use of both sides of the board, have one painted basic white, and the other a pretty bright turquoise.
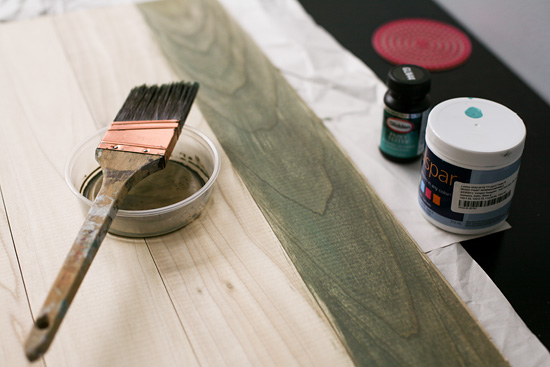
I wanted the wood to look old, not new. Old wood is dark, and I wanted some of that darkness to show through.
Start by watering down your brown paint. I used probably 50/50 water to paint. But I suggest (and this is what I did) testing your finishes first. I started with the end board, since I knew it wouldn’t show too much in the photographs, and then when I was happy with that finish I repeated the same process for the rest of the board.
Water down your paint, and then brush a coat onto each board, one a time. You want full coverage with this layer. Then take a cloth or paper towel and, while the paint is still wet, wipe it off. This will make the paint act more like a stain than a paint. You can see that the overall color is darker, but the wood grain still shows through. Let this layer dry completely before continuing (or if you’re impatient like me, grab the hair dryer).
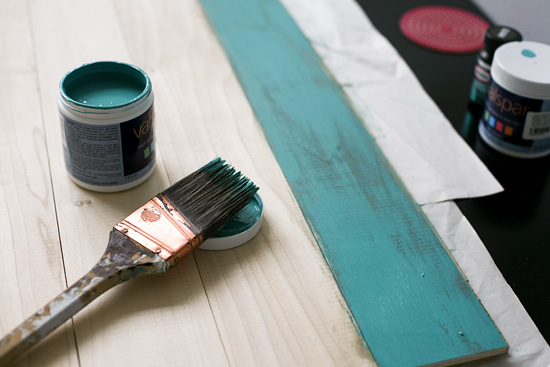
Next, time for color. I decided to use two shades of turquoise for added depth. I started with the darker one. Using a fairly dry brush, lightly brush on the color. You don’t want a ton of paint on your brush; spotty coverage and missed spots are good. Brush strokes are good. Rough is good. Move quickly, and don’t overthink it. You can always add more paint, but you can’t take it off. Again, let this layer dry completely.
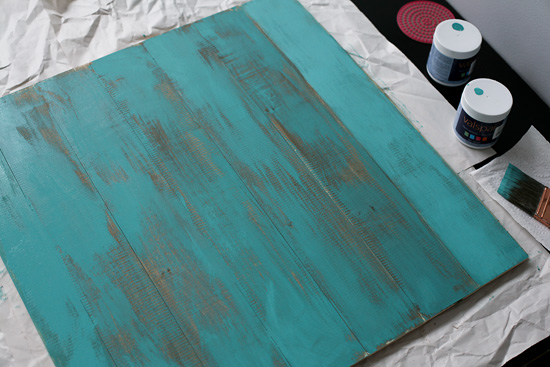
You can then add the second shade if you have one. I used a lighter turquoise, and you can see the difference between the 1st coat and the second. Similar technique, again, you don’t want a solid coat, you want some of that dark brown wood and the darker turquoise underneath to show through.
When all was done and dry, my board had a bit too much sheen to it (samples only came in satin, not eggshell or flat). Easy fix, I just took some fine grain sandpaper to it to dull and further roughen the finish. You can see the final result in the kumquat picture above.
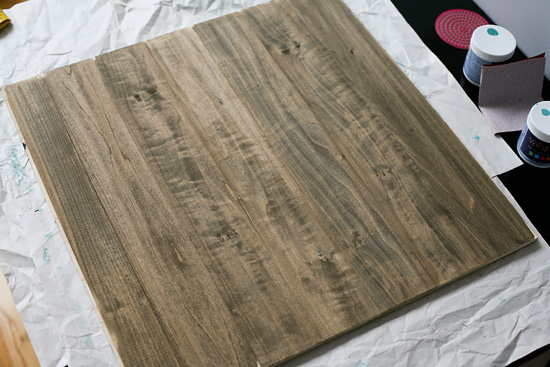
Initially, the plan was to repeat the same process on the back but paint it white. But I was kind of digging the dark stain all by itself, and decided to leave it that way… at least for now. Who knows, I may come back later and continue with the white. Or I may just make a second one altogether.
And there you have it! For about $40, you have a portable, reversible wood backdrop for your photos! Spiffy!
(On a related note, for those of you interested in food photography, you must must MUST check out the new book, Plate to Pixel, by Helene Dujardin of Tartelette. I was lucky enough to meet Helene last month in Orlando, and she is as lovely in person as she seems on her blog. Plate to Pixel is full of uber-helpful information, whether you are just starting out with food photography or already comfortable behind the lens. Do it!)



Thank you for this tutorial … I was desperate, reading here and there that you could not achieve such a look on pine wood. You save me !
I received my copy of “plate to pixel” only two days ago and I think it’s an awesome book !
Love it! Thanks for such a great idea. Makes me want to grab that old door in my garage and use it!
Great post! One tip I have for creating spaces is to use pennies. They are the perfect width for uniform spaces.
Nice tutorial! I have been wanting some boards of wood like this.
For a total beginner like me, this post is incredibly useful! I often feel like there’s so much mystique around food photography techniques – almost as if no one wants to give away their secrets. Thanks for making your gorgeous photography accessible to a newbie like me!
I got so excited when I saw this post! I went to lowes today and got the boards. They are called “craft boards” and cone in a few different kinds of wood, but I liked the grain on the pine the best. The glue is drying on the boards as i type this!
Love this idea! I have one little tip though, if you truly want to make something like this seem ‘old’ – sand it before you paint it. The chatter marks from the milling process (the tiny grooves that run across each board) make it obvious that it’s new to those in the know. :)
Thanks for the tip, Julia! I just got materials to make a second and will definitely sand it down a bit before painting. :)
Okay, I did it! Thank you for this awesome tutorial. I used the white version in my most recent photos of my Lemon Filled Lavender Cupcakes. I would love to know what you think!
Looks awesome!!
Love this! What colors did you use??? I would love to make one of my own in these same colors!!
Thanks!
Lolly
I love this. I actually have some wood in my garage ready to paint. But I’ll have to do the reversible boards too. It’s just finding the time to do it all!
What a great idea! I love this, and love the idea of contrasting textures in photos. It definitely makes a difference.
Love it! My husband is a sales rep for a hardwood flooring company, so he’s been scavenging old re-claimed wood scraps – can’t even wait to have a new backdrop for my photos! :)
Great tutorial Linds! I just put in my order the other day for Helene’s book! Can’t wait to get my hands on it now! :-)
Wow, great tutorial! I’ve been looking in vintage shops for old tabletops, but this is way better and more portable. Thanks for sharing with us. :)
Loving that cheerful aqua version — so pretty! I just made one with some old fence boards but will clearly have to think about some color. Great tutorial!
Thanks for the brilliant idea. I need more interesting backdrops for my pictures
Great job!
Nicely done!
Love the orange with the teal! I so want to make one right now…such a great tutorial!
I need to create a few backdrops! Thanks for the step by step post!
What a great diy project with a step by step how to. Soon you’ll see all your fellow bloggers using this simple easy trick! Thanks for sharing such a lovely idea.
Thanks for posting this – it looks easy and I’m dying for some new textures – I’ll be hitting Lowes next weekend to try it out
Great DIY tutorial…I’ve have been wanting to do this and just needed the extra help. Your information is PERFECT! Thank you!
Very inspirational! Thank you for the tips!
Love the turquoise color you used… so pretty! Can you believe that the post office LOST my Plate to pixel book?!?!? I’m soooo mad at them! I been waiting for it for so long.. and was so happy when amazon send me a note that it was AHEAD of schedule.. not I have to wait for it again!
I second this company
http://www.lemondropstop.com/vinyl-canvas-blend-backdrops-and-floordrops/faux-wood-backdrop-and-floordrop-designs/view-all-products.html
wayyyyyy easier than building something and I too was skeptical of vinyl but these products swayed me.
I found this via David Lebovitz on fb- just in the nick of time. I’m a potter and my blue linen backdrop has suffered the ill effects of living in my deep south (read: humid) basement for the past four years. Time for a replacement. Now I know just what to do, and have the scrap wood to do it. Thank you!
Seriously Lindsay, you are awesome.
Nice color. And that is one purty picture!
I’ve been wanting to make this! Thanks for the lovely photo tutorial!! :-)
What an awesome idea! I’ve been using plain wooden cutting boards from Ikea whenever I wanted a wood backdrop, but I didn’t want to stain or distress them because they’re actually used as cutting boards the rest of the time.
I figured I’d start scrounging around in secondhand and antique stores, but this sounds a lot easier (plus I can pick my own colours). I’ll be rushing to Home Depot this weekend to grab some boards!
Love that shade of aqua blue, BTW. It’s just gorgeous.
How wonderful, Lindsey! I picked up a couple of pieces of square plywood from my dad’s wood-working studio recently but I’ve not taken the time to figure out how to paint and distress them. Your post came at the perfect time. I love the color of the distressed turquoise wood. It’s lovely – and so is the kumquat photo!
what a great idea! I just may have to try it!
Really cool! Thanks for the hot tip.
I love it! I live in a small apartment and I have been trying to figure out how to get a nice background for when I take pictures of my final product, I never thought I would be able to make it! It is small enough that I can find a nook somewhere to keep it, like under the couch (you get creative when you don’t have a lot of space)! Thank you so much for this awesome idea!
wow, this is impressive! I thought it was one of those backdrops you can buy (vinyl) but love that it’s the real thing! you did an awesome job!
I was actually just thinking about doing this. I am glad you posted this! Thanks!
Congratulations on taking such good care of your brushes
That looks amazing!! I’ve been trying to find different things to put in my office and kitchen. Will have to hit the hardware store this weekend…
I’m thinking about your storage challenge. How about those tall skinny shelves that display library books? You could turn the display/storage into a patchwork quilt like collection of your wood squares, a new kind of art ????
Thanks so much for this lesson. I don’t have enough backdrops and my kitchen table / counter gets kind of boring. The trickiest thing is figuring out where to store all these things! But I love that this isn’t too bulky. I bet I could slide it in somewhere.
Excellent demo and great idea. This actually wouldn’t take up too much space, since I’m guessing they can be stacked or stored vertically. And you can use both sides which is a huge plus.
Now I just have to ask: why didn’t you start with a gorgeous lime green one? (wink)
Thanks for the great advice. I am sure my husband won’t mind at all running to the hardware store with me this weekend . I will also convince him to build the board for me (pssst, don’t tell).
The results are a gorgeous photo!
-Brenda
Lindsay,
Wow! You have hit the nail on the head (sorry, I had to) with this one! Awesome info. I think meeting Helene rubbed off a little bit on all of us at FBF. Thanks for this timely (for me anyway) post. Kumquats never looked so good. Thank you.
Thanks for the tutorial! I’ve been wanting to make something like this for a long time, but other tutorials I read seemed too complicated or expensive. Your way sounds super easy! I’m going to head to Lowes tomorrow so I can do this over the weekend.
What a great post!! Love this! Thanks :)
We build stuff all the time at my house, so why this has never occurred to me is, well, beyond me. I have tons of left over bead board and other wood scraps, so I’m going to make several of these. Right now, my food pictures are more lame documentation rather than prettiness. I think this is a step in the right direction! Thanks!
You were already my hero because of all the design work you’ve done for me Lindsay but now you are even more of one! I am obsessed with “making” different wood photo backdrops- I spend way too much time at Lowes and my collection of planks with different stains and such is growing…but this distressing thing is something I’ve tried but without success so far. I am totally trying your method this weekend. THANK YOU!
The biggest question is – where do I put all this wood?! I totally don’t have any storage space for this stuff, but that doesn’t stop me from making it! :)
Let me know how it turns out!!
Check these guys out:
http://www.lemondropstop.com/vinyl-canvas-blend-backdrops-and-floordrops/faux-wood-backdrop-and-floordrop-designs/view-all-products.html
They have a ton of really great textures, all on vinyl. I was skeptical until we ordered some, they look really good!