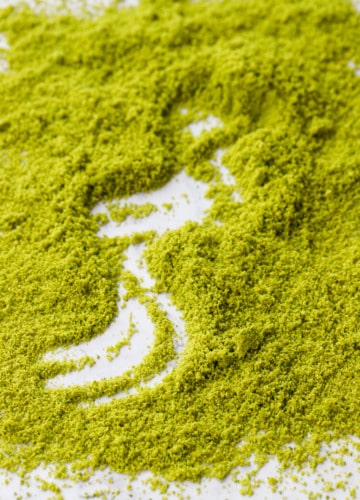
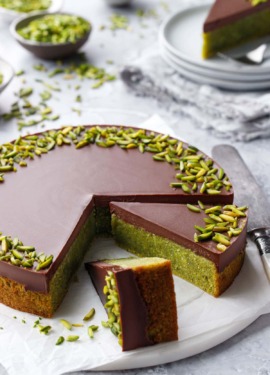
Homemade Pistachio Flour
Pistachio flour provides a nutty flavor and lovely green color in cakes, cookies, and other baked goods and desserts. Making it from scratch is easier...
Pistachio flour provides a nutty flavor and lovely green color in cakes, cookies, and other baked goods and desserts. Making it from scratch is easier...
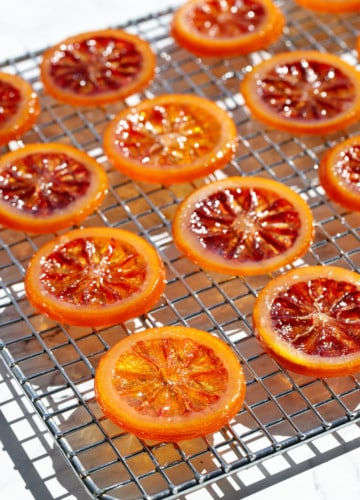
These jewel-like candied blood orange slices have a gorgeous, stained glass appearance, making them the perfect decorations for desserts or drinks, and a sweet and...
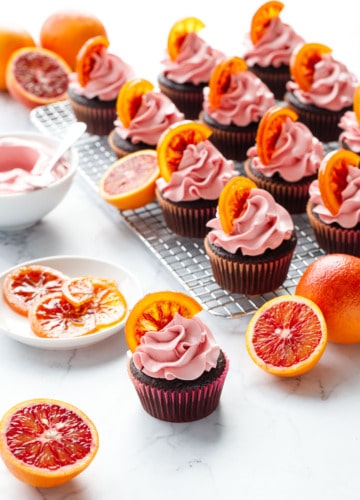
These tender, deeply chocolate cupcakes are made with extra virgin olive oil and freshly squeezed blood orange juice, topped with a swirl of flavorful blood...
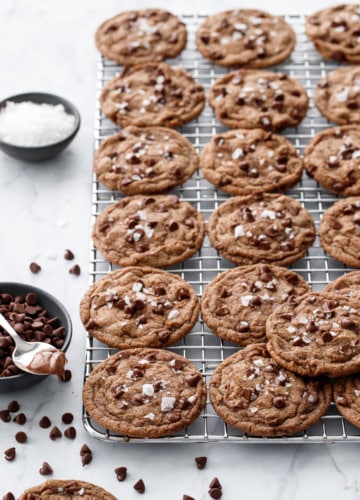
Your favorite chocolate chip cookie with an added bonus of Nutella (I mean, how could you go wrong with a combo like that?) These petite...
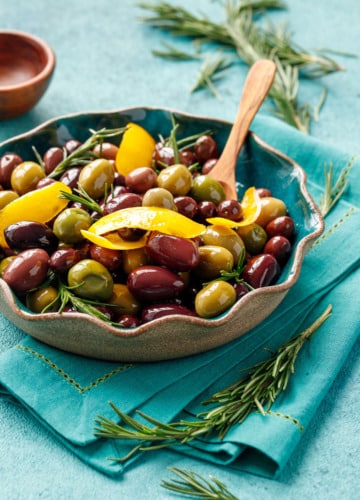
Ordinary olives? No, siree! Take your next antipasto spread from basic to brilliant with these warm sautéed olives with lemon and rosemary. Simply sautéing whole...
Another year come and gone. Can you believe it? Honestly I still catch myself thinking it’s 2021, the fact that it’s going to be 2024...
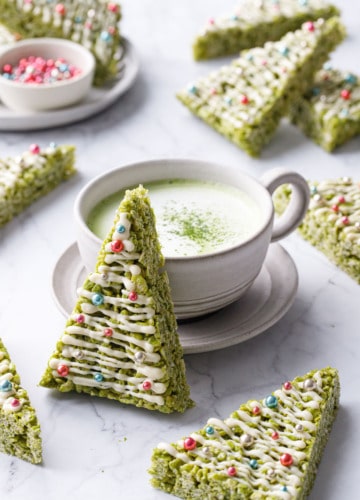
Chewy and gooey and gorgeously green: these festive matcha rice crispy treats are decorated to look like charming Christmas trees, with a natural green color...
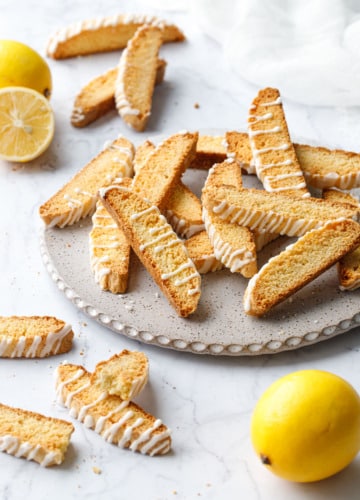
Perfectly crunchy and ever so flavorful, these Meyer lemon biscotti cookies are drizzled with a lemony white chocolate glaze for a gorgeous finish. Biscotti, or...
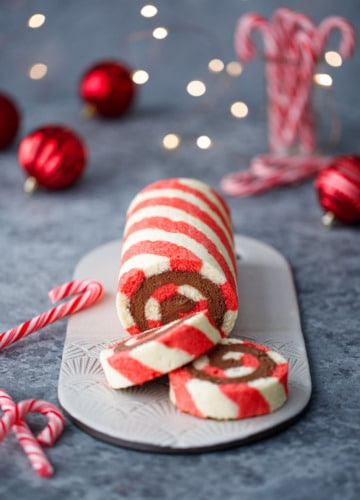
Here’s a perfect addition to your Christmas table: a light and fluffy chiffon cake roll made with red and white striped batter, and filled with...
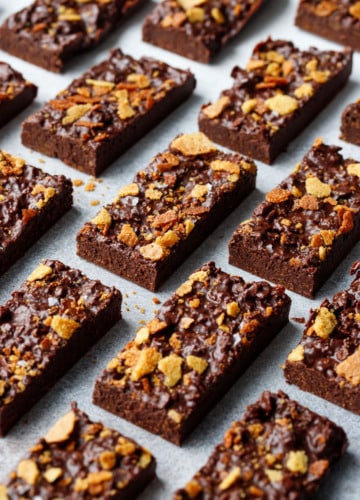
This easy and delicious crunchy candy is a textural delight: made with just 3 ingredients, this no-bake recipe comes together in under 15 minutes (plus...
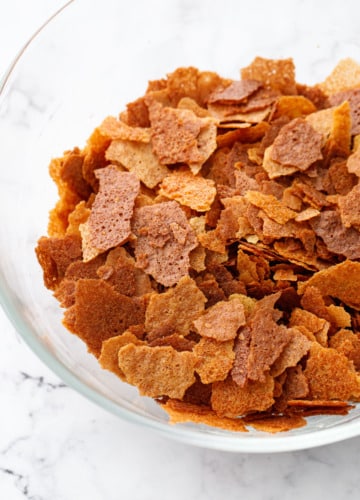
Feuilletine is a pastry chef’s best kept secret, giving professional cakes and pastries that extra something special: a delicate crunch that provides the perfect textural...
Black Friday has come early this year, and everything in the L&OO shop is on sale for a limited time! Here’s your chance to grab...


©2007-2024 All Rights Reserved.
Love & Olive Oil® is a registered trademark of Purr Design, LLC.
Privacy Policy