
Here we have the Jason Bourne of cookies: a cookie with many different names, and ultimately, its entire identity as a cookie is false because, oh hey, it’s actually a cake.
(Luckily, this cookie doesn’t go around assassinating foreign diplomats, bad analogy, but you get my point…)
I’ve seen them called Italian Rainbow cookies, Tricolor cookies, Venetian cookies, Neapolitan cookies, and Italian 7-Layer cookies (when they have chocolate on the top and bottom there are 7 distinct layers, I guess?) With all those different names you can bet it’s got a few fake passports stashed under the floorboards.
I get it’s supposed to be the Italian flag and all, but why are these cookies, no matter what they’re called, always the same 3 colors? Can’t we have a little fun with it for once?
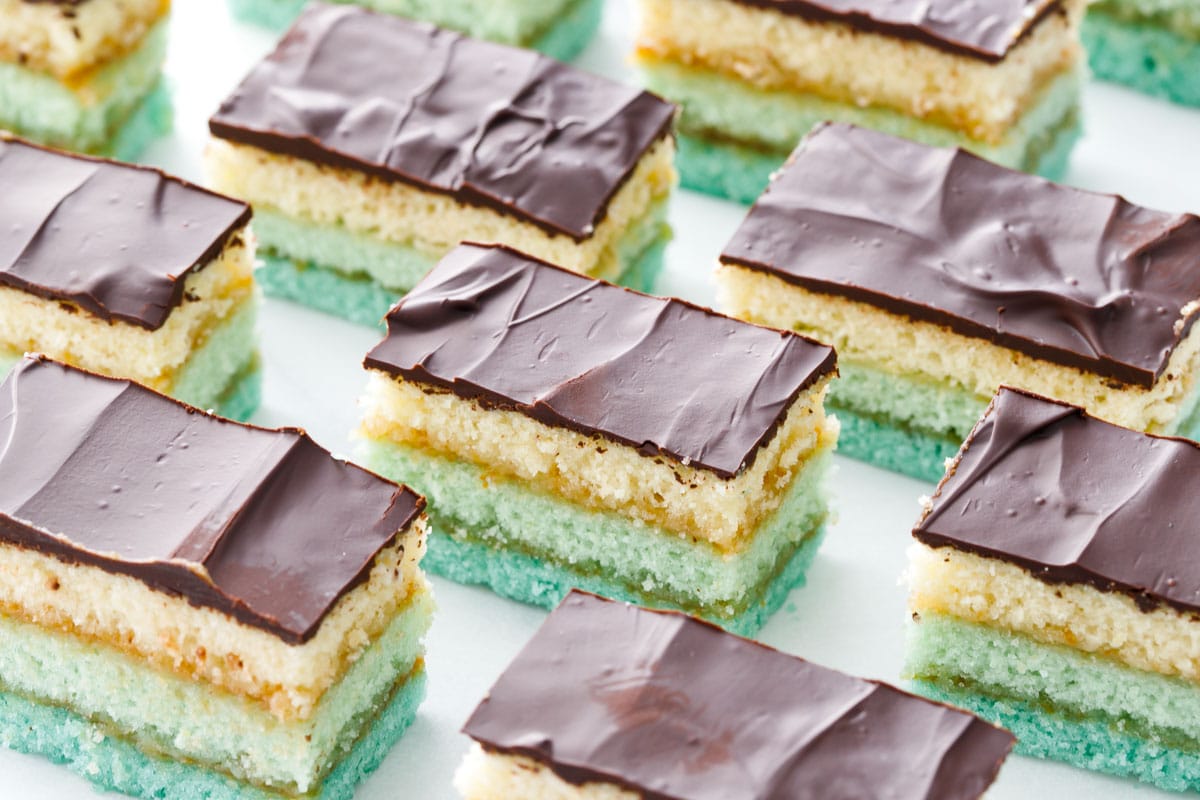
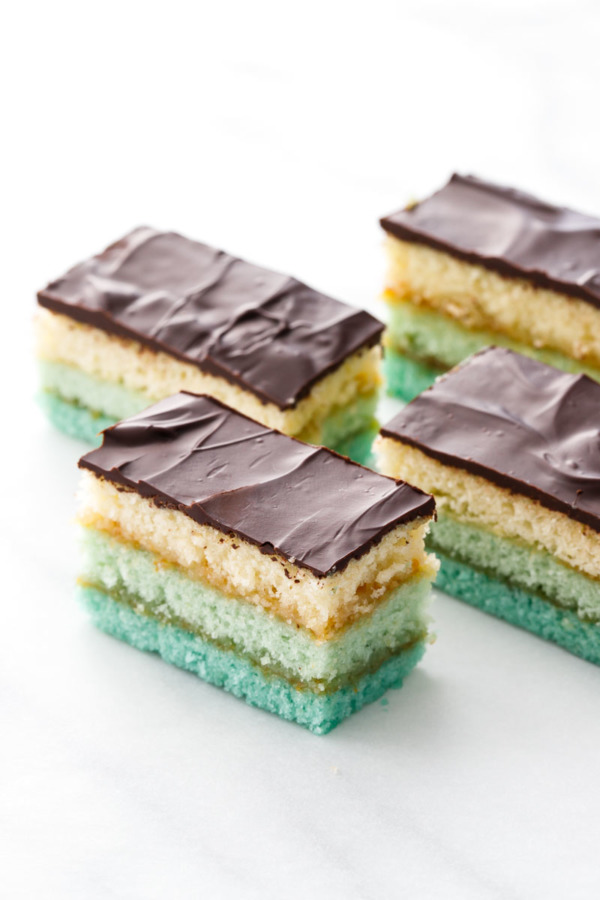
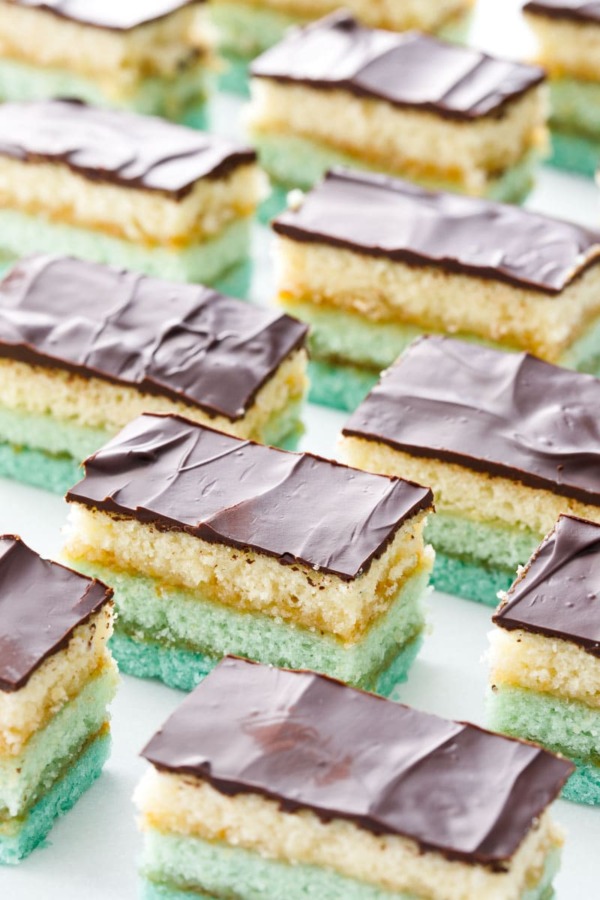
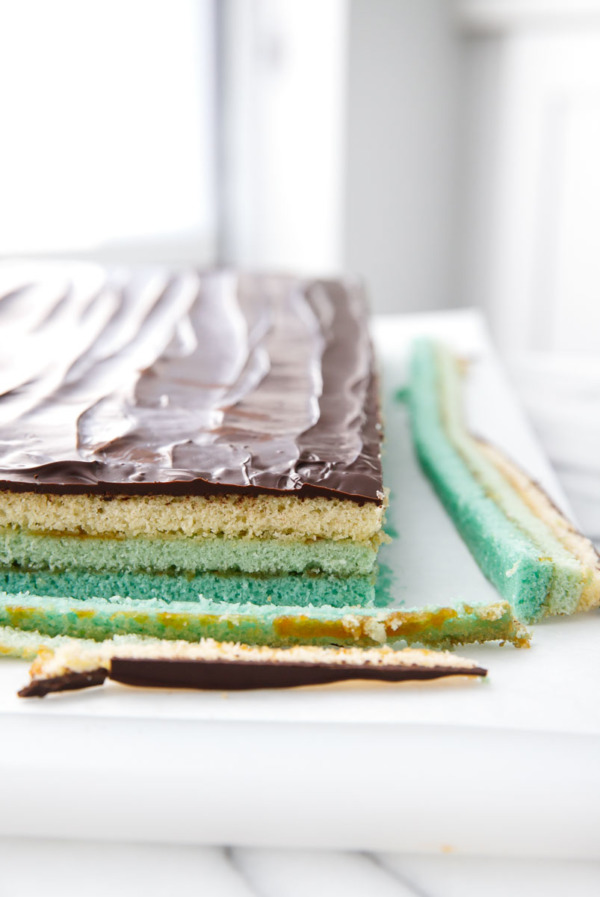
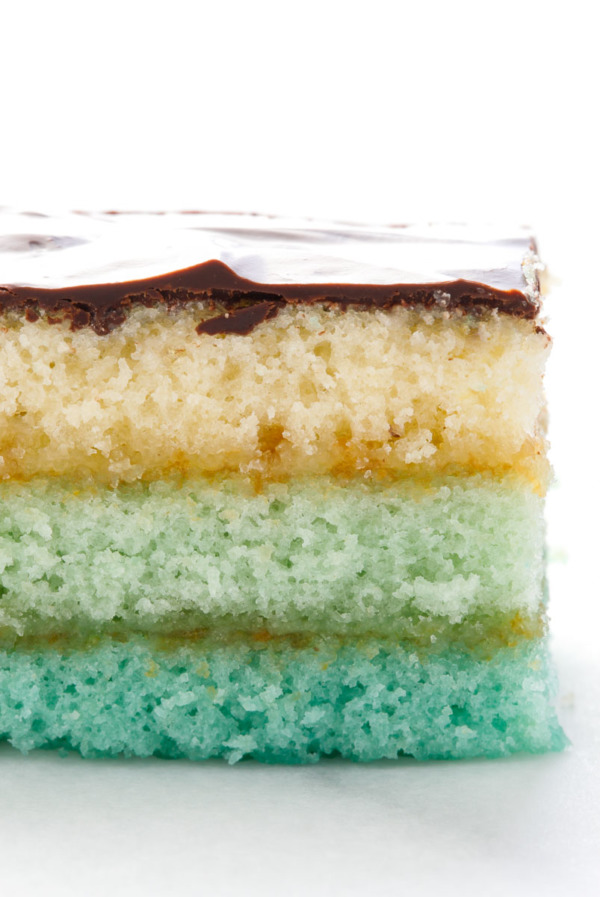
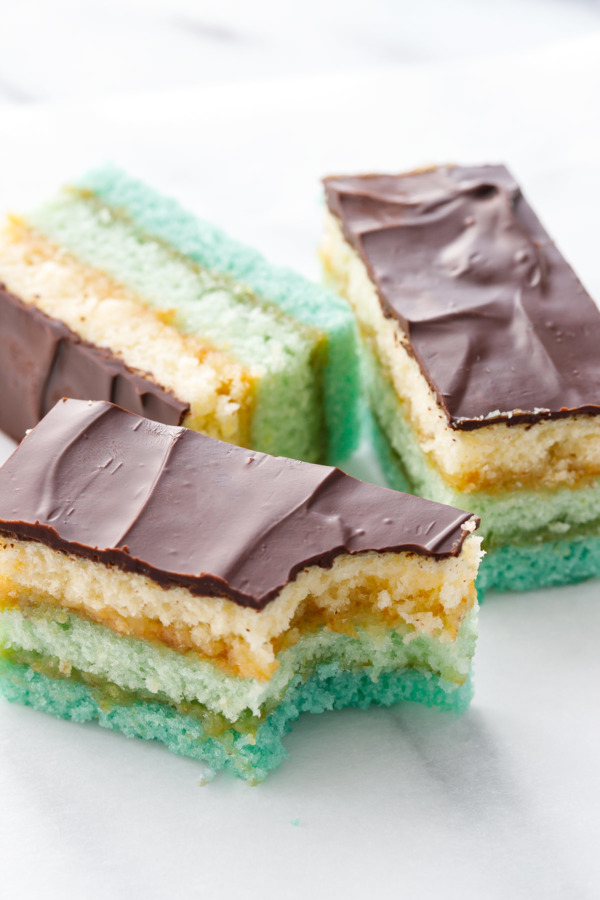
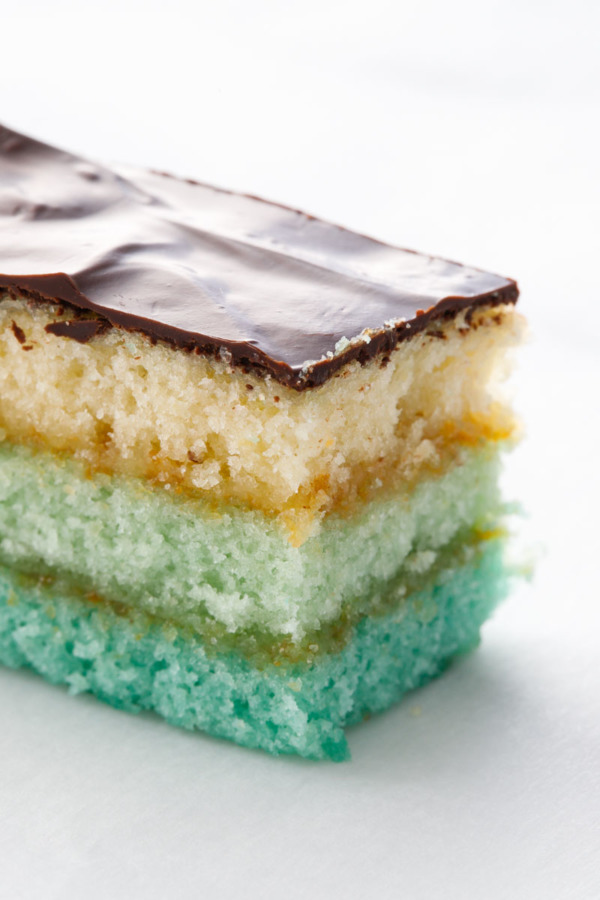
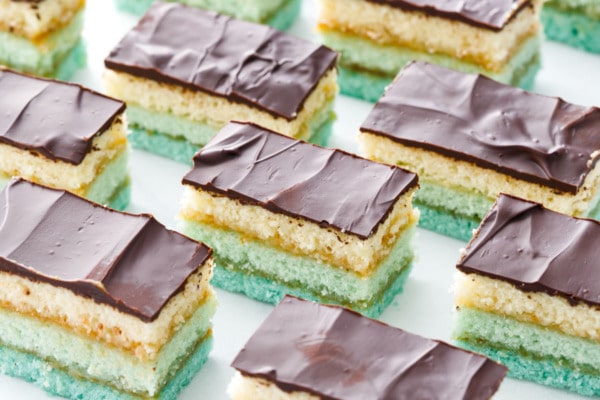
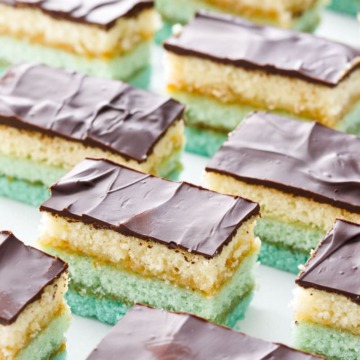
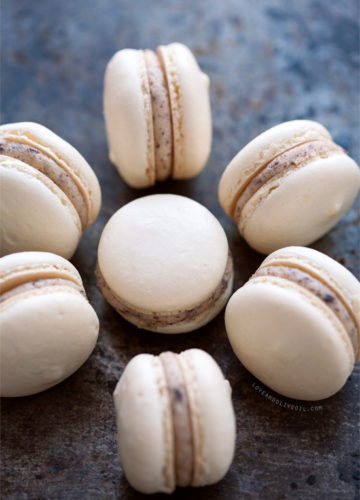
I decided to do just that, eschewing the classic red-yellow-green for a pastel ombre effect in shades of soft turquoise blue.
Let me just say: Taylor LOVED these. He doesn’t always resort to superlatives, but after downing a few of these he firmly declared them the ‘best thing I’ve ever made’… a truth that’s evidenced by just how quickly the entire 13-by-9 pan of cookies disappeared.
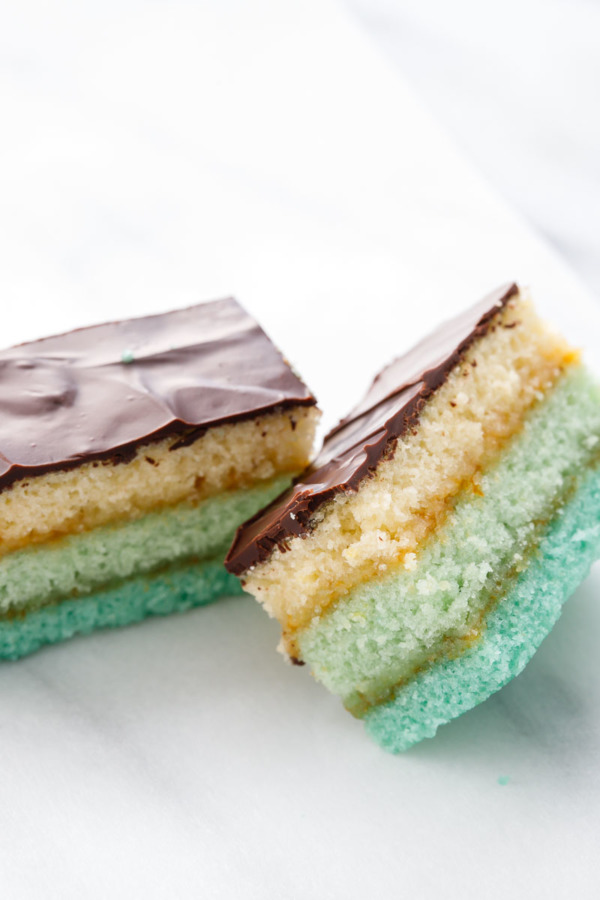
Except he took serious issue with the fact that these are called cookies. Because let’s face it, it’s cake. More like a petit four really than a cookie, with 3 layers of tender almond sponge cake with tart apricot jam in between, and a snappy chocolate glaze. I mean, why are they called cookies anyway? Srsly.
Some may say these cookies are more effort than they are worth, but I found them easier than I expected. The most time consuming part is baking the 3 layers (cooling the baking pan each time, unless you happen to have multiple 13-by-9-inch pans in which case your job will be far easier) and then cutting them into even rectangles (you do have a ruler in the kitchen, don’t you?) But the layering itself was not hard, quicker than assembling a layer cake. And when it’s all done with you end up with a surprising number of cookies, so the effort in terms of overall output is definitely worth it.
The recipe (from America’s Test Kitchen’s newest tome entitled The Perfect Cookie) originally calls for raspberry jam, but I substituted apricot (you’ll find recipes calling for both, so feel free to use either). Other than adding a wee bit of butter to the chocolate glaze, the recipe is pretty much as written in the book. If it ‘aint broke…
One difference between the ATK recipe and others I’ve seen is there is no rest period, where the jam-filled cake layers are often wrapped and chilled and weighted, compressing the cake and almost fusing the 3 layers together. Why they skipped this, I can’t say, but I can see how the compression would make the cake firmer and less cake-like, and chilling would make it easier to slice as well. It’d also be a great way to split up the assembly process into two separate days.
I definitely think I’ll do this the next time I make these (after such a positive reaction from Taylor you can bet I’ll be making them again!)
I did feel my cake might have been slightly underbaked, at least the bottom layer had a tackier texture, sticking to the parchment while I was assembling the cookies. This is probably why the cookies around the edges sliced more cleanly than the cookies in the center. It’s one of those things that’s hard to judge since the cake is so darn thin, and a minute can make a huge difference in under/overbaking the layers. Just keep an eye on them, and as soon as they start to brown around the edges, pull them out of the oven.
Whatever you call them and however you color them… there’s no arguing that these almond-loving layer cookies are are downright delicious.
Italian Layer Cookies
Tender almond sponge cake layered with apricot jam and topped with a snappy chocolate glaze: these typically red,white and green bite-sized ‘cookies’ get a colorful ombre twist!
Ingredients:
- 2 cups (8 ounces) bleached cake flour
- 1/2 teaspoon baking powder
- 1 1/2 cups granulated sugar
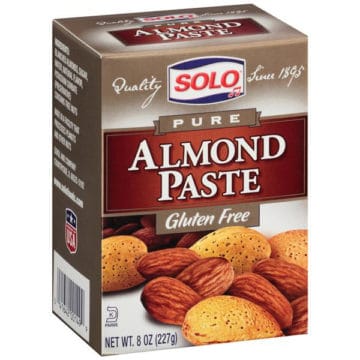
- 8 ounces almond paste, cut into 1-inch pices
- 7 large eggs, at room temperature
- 1 teaspoon vanilla extract
- 1/2 teaspoon kosher salt
- 8 tablespoons unsalted butter, melted and cooled slightly
- food coloring*
- 2/3 cup apricot jam
- 6 ounces finely chopped bittersweet chocolate
- 1 tablespoon unsalted butter
Directions:
- Preheat oven to 350 degrees F; position oven rack in middle of oven.
- Grease a 9-by-13-inch baking pan. Place a 13-inch-wide piece of parchment paper into baking pan, leaving an overhang on the long edges (this will allow you to remove the cookies from the pan after baking). Lightly grease parchment.
- Sift together flour and baking powder; set aside.
- In a food processor, pulse sugar and almond paste until combined and no large chunks of almond paste remain, 20 to 30 seconds. Transfer to the bowl of a stand mixer and add eggs, vanilla and salt. With the whisk attachment, beat on medium-high speed until pale and thickened, about 5 to 7 minutes. Reduce speed to low and drizzle in melted butter, followed by flour mixture, mixing until dry ingredients are just incorporated.
- Divide batter into 3 bowls, about 2 cups or 14 ounces of batter each. Mix in food coloring as desired. (For classic Italian Rainbow Cookies, color one bowl red and one bowl green and leave the last natural. For ombre cookies, leave one bowl natural, one bowl with one drop of food color, and the third bowl with 2-3 drops [or more as needed to achieve desired hue]. You could also divide the batter in half, color one portion, and then measure out one cup of the natural and one cup of the colored batter to mix together to get the middle shade).
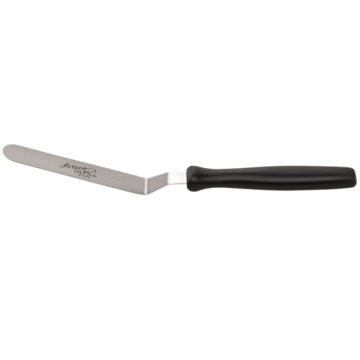
- With an offset spatula, spread the first bowl of batter in an even layer in prepared pan. Bake until top is set and edges are just starting to brown, 10 to 12 minutes. Let cool for 5 minutes, then carefully lift cake from pan using parchment overhang. Place on a wire rack to cool completely.
- Repeat with remaining two colors of batter, letting the baking pan cool completely and lining it with a new piece of parchment for each layer (or if you have more than one 13-by-9 pan you can bake one right after the other).
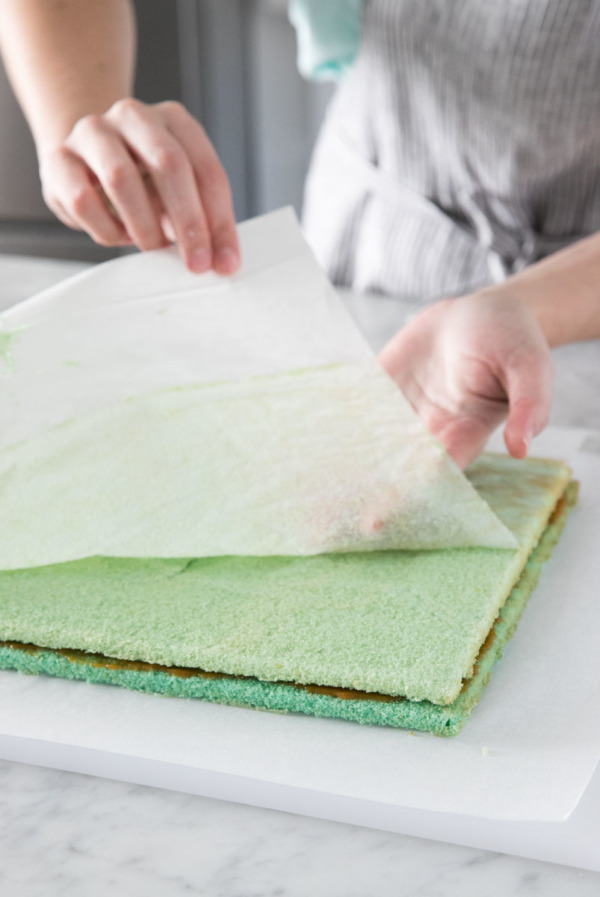
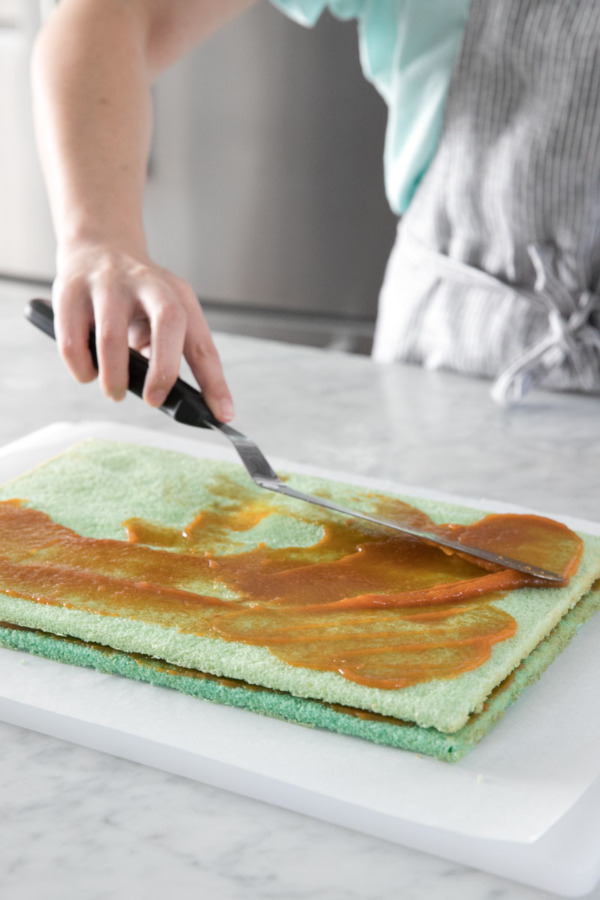
- Once all layers are baked and cooled, invert bottom layer (the darkest color if you are doing ombre) onto a parchment-lined cutting board. Gently remove parchment. Spread 1/3 cup of jam evenly over top of cake. Invert second layer on top, positioning it so edges line up fairly evenly. Remove parchment and spread with remaining 1/3 cup of jam, followed by final layer of cake.
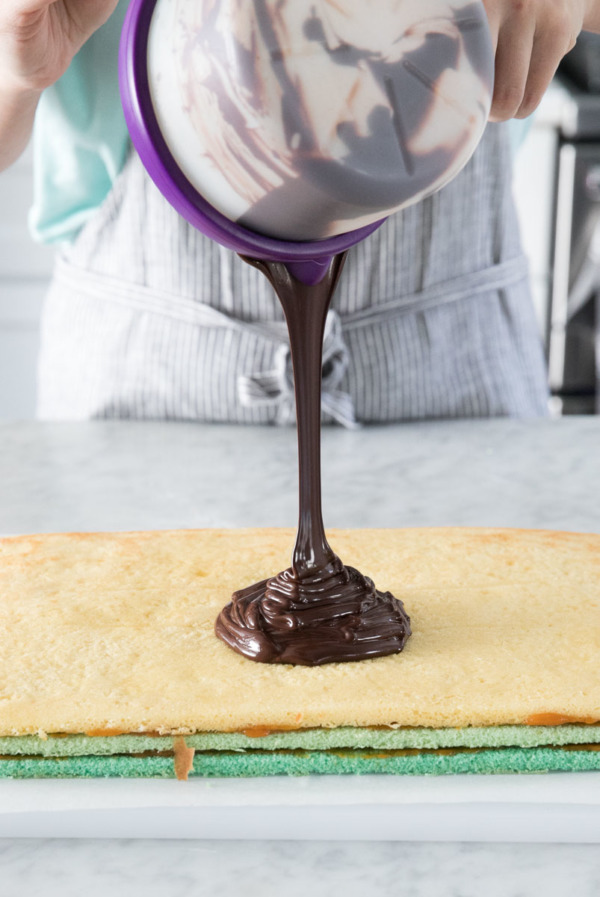
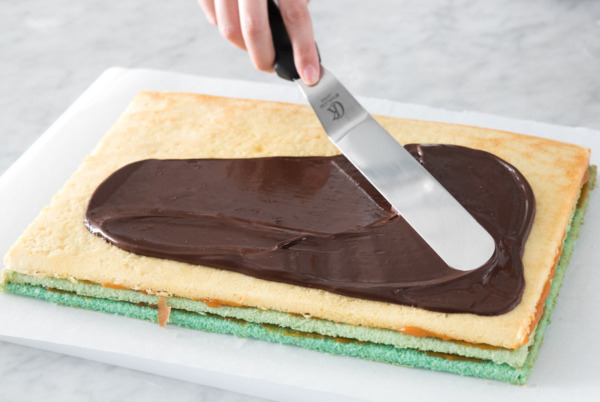
- Gently melt chocolate and butter in the microwave at half power or a double boiler until smooth. Spread melted chocolate evenly over top of layered cake. If desired, you can leave the chocolate smooth on top or you can run a fork through it for a swirled effect.
- Let chocolate set at room temperature for 1 to 2 hours. Using a sharp serrated knife, trim edges, then cut lengthwise into 5 strips (approximately 1 1/2 inches wide) and then crosswise into 12 1-inch pieces.
- Serve immediately, or store cookies in an airtight container for up to 1 week.
*For those curious, I achieved this precise shade of turquoise by using Americolor gel food coloring, one drop of Turquoise and one drop of Sky Blue (trust me, a little goes a long way). For the middle layer, since I couldn’t exactly do half drops, I mixed the food coloring with a tablespoon of the batter then added half of that back into the main bowl.
Adapted from The Perfect Cookie.
All images and text ©Lindsay Landis / Love & Olive OilDid you make this recipe?
Let us know what you think!
Leave a Comment below or share a photo and tag me on Instagram with the hashtag #loveandoliveoil.


What food coloring combo did you use to make these?
See the recipe notes for exactly what I did, it’s a combo of Americolor gel Turquoise and Sky Blue.
Do you know if they freeze well?
I think you can definitely freeze these! The chocolate layer may get a bit sweaty when it thaws but otherwise they should freeze just fine.
Thank you for this recipe – sooo excited to make it this weekend!! The colors you used are very inspiring!
hi! what can i substitute the butter with?
Margarine or vegan butter would be the closest substitute, though I have not tested this personally so I cannot say how it might affect the outcome.
Question; if I didn’t want to make such a large batch, could I bake the three layers in 8×8 pans? I have three of them so it would make my life easier. Also, how long should I bake them if I do it in those pans?
I haven’t tried it personally but you should be able to halve the recipe for 8×8 pans in theory. I’d assume the bake time would be about the same (the cake is so thin it bakes in no time). Side note: the cookies freeze great so if you’re going to put all the work in, you may as well make a full size batch. ;)
Love your choice of colors with these cookies, or cakes! Nice party serving idea too, maybe even a red and green version too, thank you for these!
These cakes/cookies are absolutely gorgeous Lindsay! Again, totally blown away by your photography, just love the simple white background you decided to go with for these, it works brilliantly! I LOVE the ombre effect you achieved, what a showstopper!
PS: I laughed really hard at the Jason Bourne analogy :P
You get the award for the prettiest desserts! The fact that Taylor LOVED these is a big statement since being married to a food blogger comes with the perks of pretty much trying a bazillion recipes over the past decade so whenever I hear ‘best thing you’ve ever made’ from a spouse or child of a food blogger, I know it’s amazing!
These are so pretty Lindsay. I’d love to have a couple for a mid morning snack right now. I’m going to file this recipe to try over the holidays! Wishing you and Taylor a very happy holiday!