

Homemade Horchata
Hello, horchata. You sexy thing you. Horchata is a traditional Spanish or Latin American beverage, made from soaked nuts and/or rice and seasoned with cinnamon....
Hello, horchata. You sexy thing you. Horchata is a traditional Spanish or Latin American beverage, made from soaked nuts and/or rice and seasoned with cinnamon....
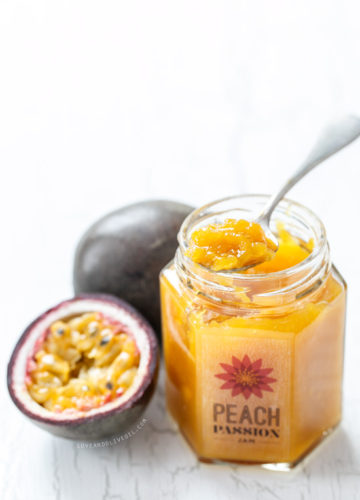
It all started with a doughnut. A milk-chocolate and passionfruit doughnut, to be exact. I’d had passionfruit before, but it never really crossed my mind....
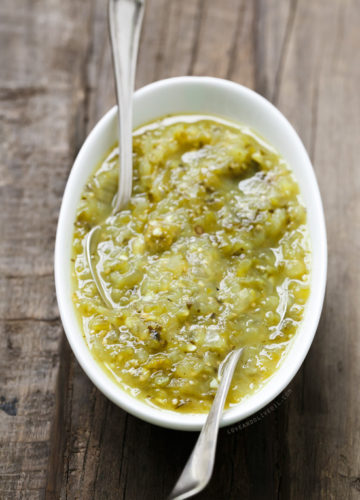
Salsa verde (quite literally, ‘green sauce’) is a green salsa made from tomatillos in place of the usual red tomatoes. Don’t let the name fool...

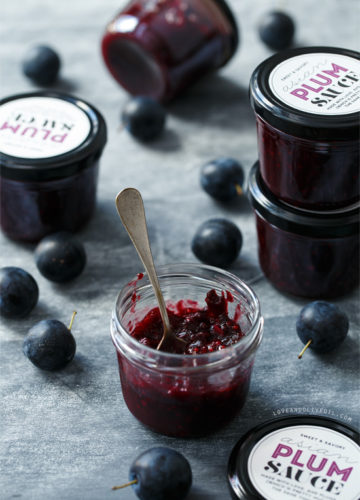
Lesson #1: Just because a recipe is on the internet does not mean you can trust it. There’s nothing more disappointing then following a recipe...

I thought I had Brussels sprouts down. I though I’d already discovered the definitive recipe, the one Brussels sprout recipe to end them all. And...
Have we ever talked about baker’s instinct? You know when you’re baking cookies, chilling on the couch while they bake, and happen to stand up...

I’ve been starting at these photos for days. Sifting through 400+ images and trying to narrow them down. Trying to find the words to express...

You may be wondering why I misspelled pesto. Thanks for feeling the need to kindly correct one of my regularly occurring typos (ahem, MOM), but...

I just got back from Food Blog Forum in Asheville, North Carolina (full recap coming as soon as I can wade through all my photos),...

This is a poor-man’s lobster roll. Not that we’re poor, and not that shrimp is really all that cheap, but it’s a heckofa lot cheaper...

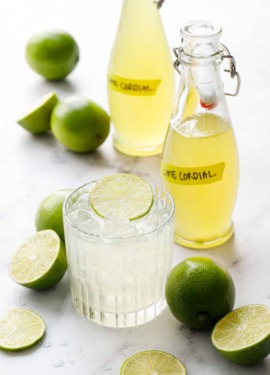
This is a summer sangria if I ever saw one. All that’s missing from this picture is a lounge chair and a warm summer breeze....

I’ve been hoarding fruit. We’ve been blueberry picking and peach picking and would have gone cherry picking if they grew here, so instead I bought...


©2007-2026 All Rights Reserved.
Love & Olive Oil® is a registered trademark of Purr Design, LLC.
Privacy Policy