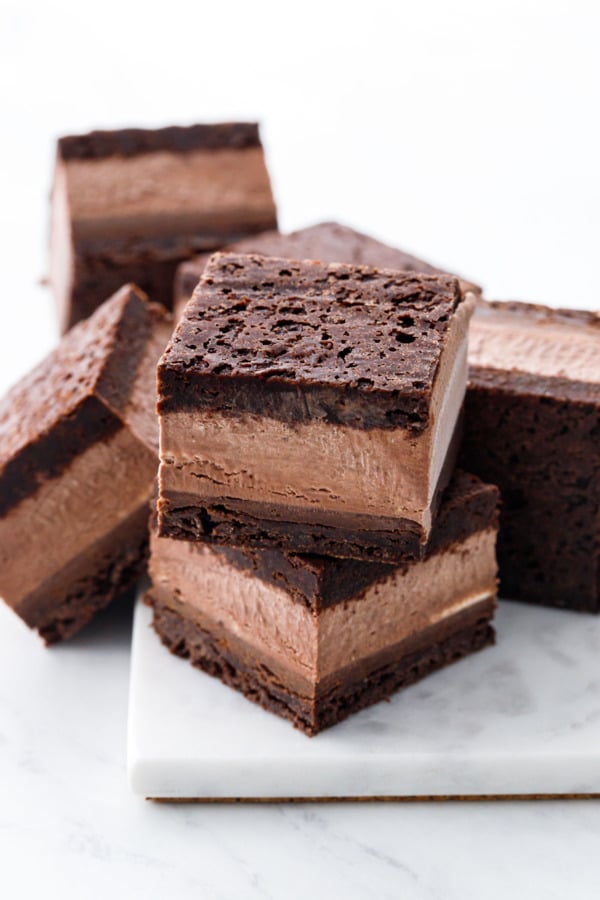
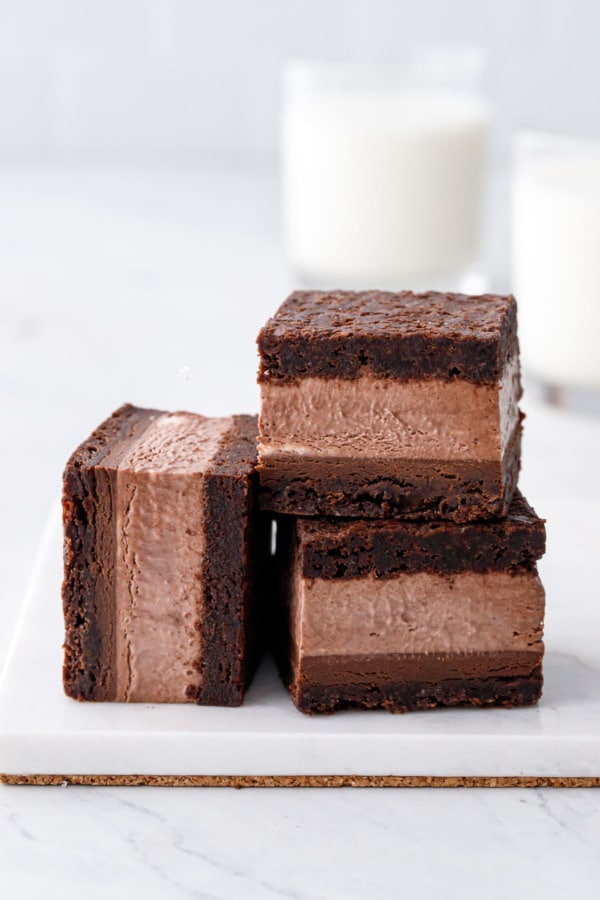
Sweet dreams are made of these malted fudge brownie ice cream sandwiches, with layers of chewy fudge brownie, luscious ganache, and a malted cocoa ice cream.
These brownie ice cream sandwiches are quite possibly one of my favorite recipes, ever. With layers of silky smooth milk chocolate ganache and a light cocoa ice cream that’s no-churn and no-fuss, sandwiched between two layers of thin, chewy brownie, they are as easy to prepare as they are to devour.
Friends, these are ridiculously good.
Like, one of the best things I’ve ever made good. And considering I’ve published over 1,500 recipes (!!) that’s saying something.
Not to mention that for a multi-component ice cream sandwich, they are surprisingly easy to prepare. Which only makes them even better in my mind.
My original intention was to make Cosmic brownie-inspired ice cream sandwiches. I envisioned layers of chewy brownie, silky smooth milk chocolate ganache, and an ultra-rich, brownie batter-like ice cream. Topped off with rainbow bit sprinkles, of course.
The final recipe turned out a bit different than my original vision, with a lighter cocoa ice cream (a better contrast, in both taste and appearance, with the already-rich brownie and ganache), and leaving off the rainbow chips (gasp! I know). But in reality the chips didn’t really add anything visually to the sandwiches, seeing as they were layered in between the ganache and ice cream and only served to mess up the crisp clean cuts.
Not wanting to give up the rainbows that easy, I did experiment with baking the chips into the brownie, and inverted the top layer to show them on the top of the sandwiches, but the actual effect left a lot to be desired. So despite my belief that rainbow sprinkles make everything better, this recipe is a rare exception to the rule. The one thing that may have worked would have been dipping the sandwiches in chocolate and adhering the chips to that, but that seemed like an extra step and hassle that really wasn’t worth it in the end. But hey, you do you.
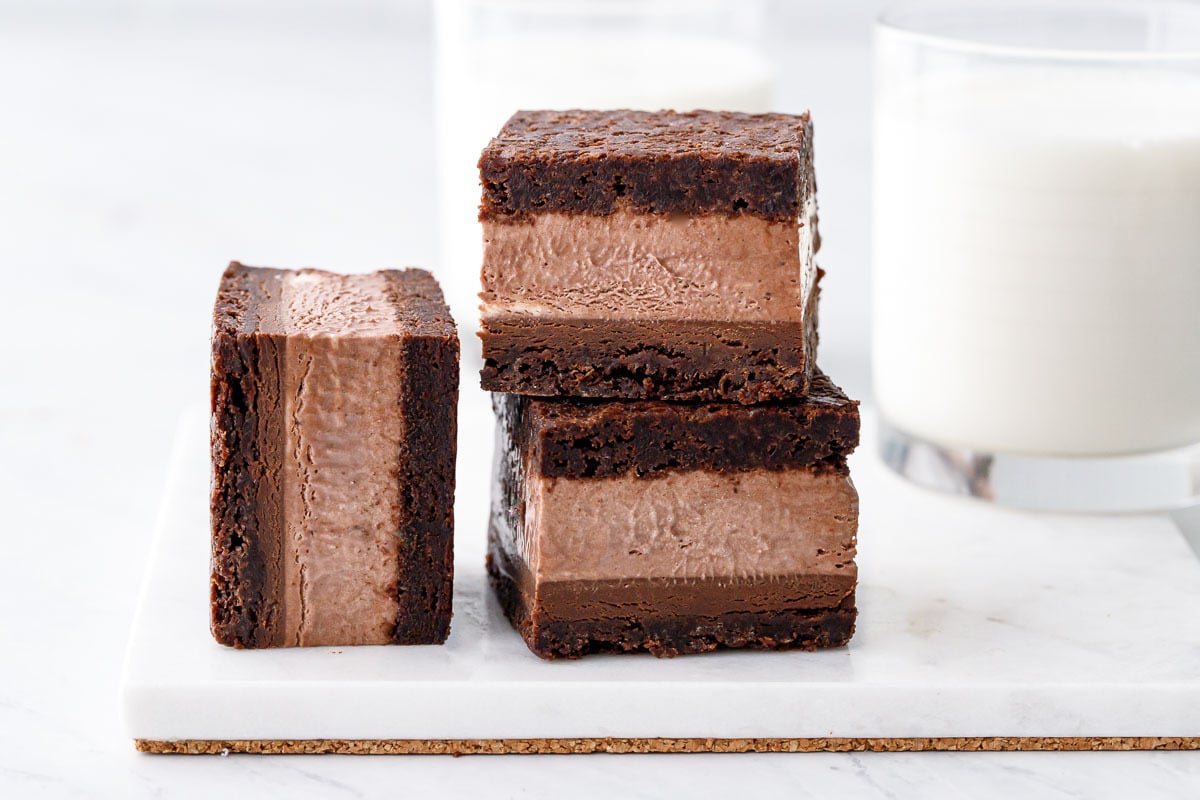
Instead, I leaned in to the deliciousness of the brownie itself, and added a bit of malt powder to the light cocoa ice cream for a bit of nostalgic, milkshake-like flavor. The result is so mind-blowingly good… trust me when I say you won’t miss the rainbow bits in the least.
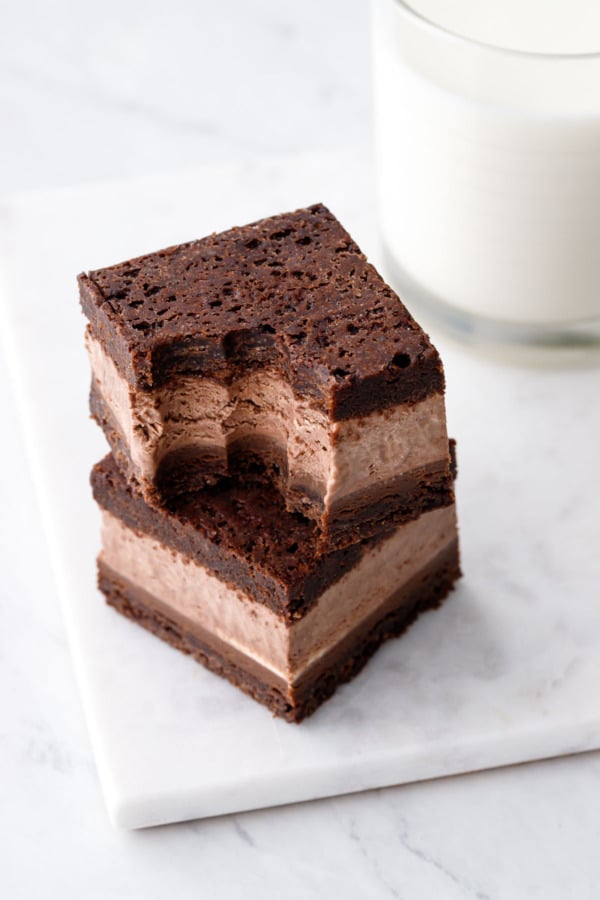
The perfect ice cream sandwich can be many things, but most of all it must be easy to eat. Nothing is worse than biting into an ice cream sandwich only to chomp down on a hard cookie while all the ice cream squishes out the sides.
Ideally, the foundation of the sandwich, be it brownie or cookie or even frozen cookie dough, needs to be soft enough to yield beneath your teeth, allowing you to take bite after bite without any resistance.
This is why you’ll notice the brownie base is quite different from your typical fudgy brownie: it comes together more like a cake (creaming the butter vs melting it), forming a batter the consistency of a fluffy buttercream. While I am not a fan of cakey brownies in general, I’ve found that the dense, fudgy brownies I usually prefer tend to freeze into hard, solid bricks. This can make cutting and eating challenging, something I discovered when initially testing my mudslide ice cream cake (my first test used a basic fudgy brownie recipe, and it was almost impossible to cut let alone eat with a fork). In this case, past Lindsay saved my present self some time, as the brownie base recipe for these sandwiches is basically just a thinner version of the one used for that cake.
This brownie is much lighter in texture; out of the oven it might seem flimsy and delicate (not to mention weird looking—this brownie will not be winning any beauty contests), but it freezes into a delightfully chewy brownie that serves as the perfect foundation for the best brownie ice cream sandwiches you’ve ever had.
How to Assemble
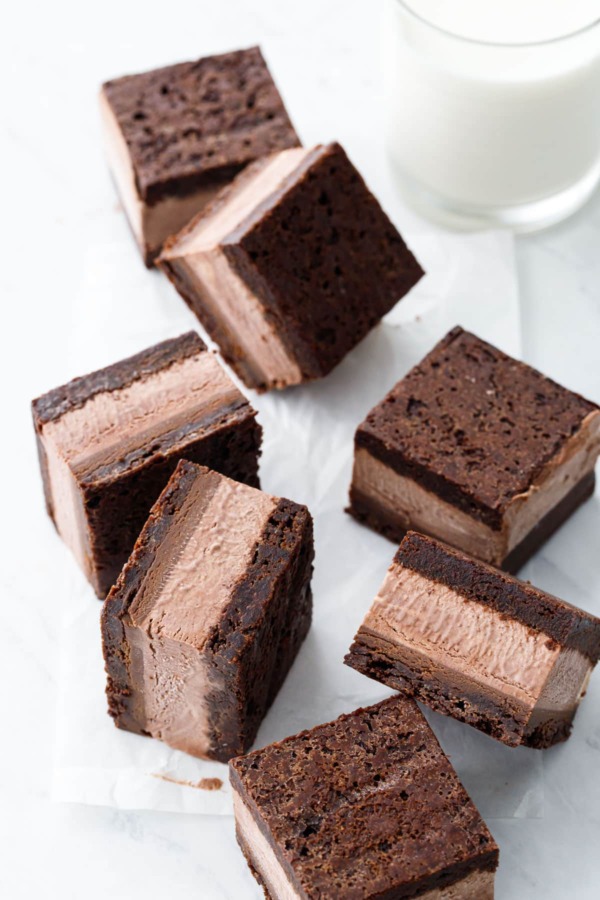
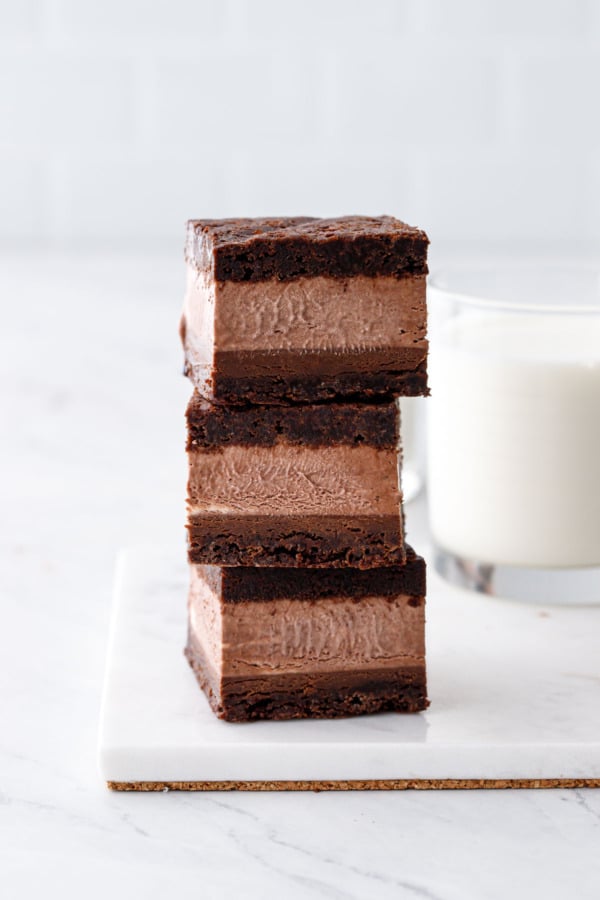
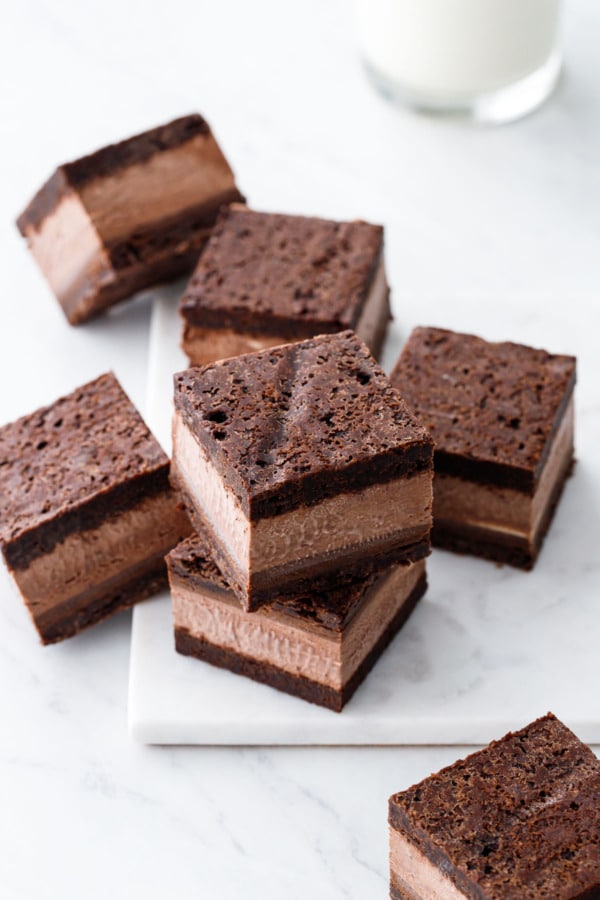
These brownie ice cream sandwiches are assembled in one big block, then cut into squares, as opposed to other kinds of ice cream sandwiches that are assembled individually. It’s a method I’ve used before, that is much easier and less time consuming overall, and results in beautifully defined layers.

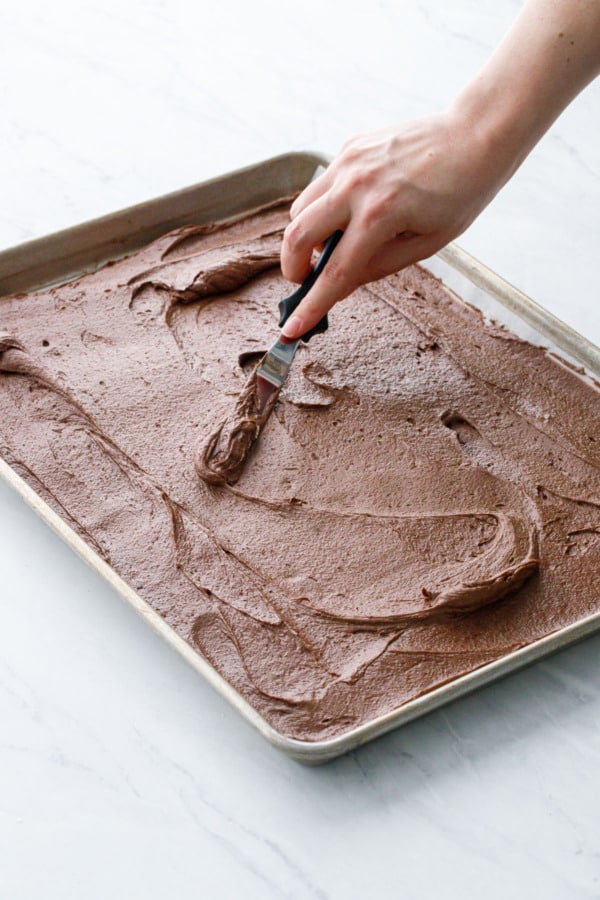
First, make your brownie batter and spread it into a very thin layer in a half sheet pan.
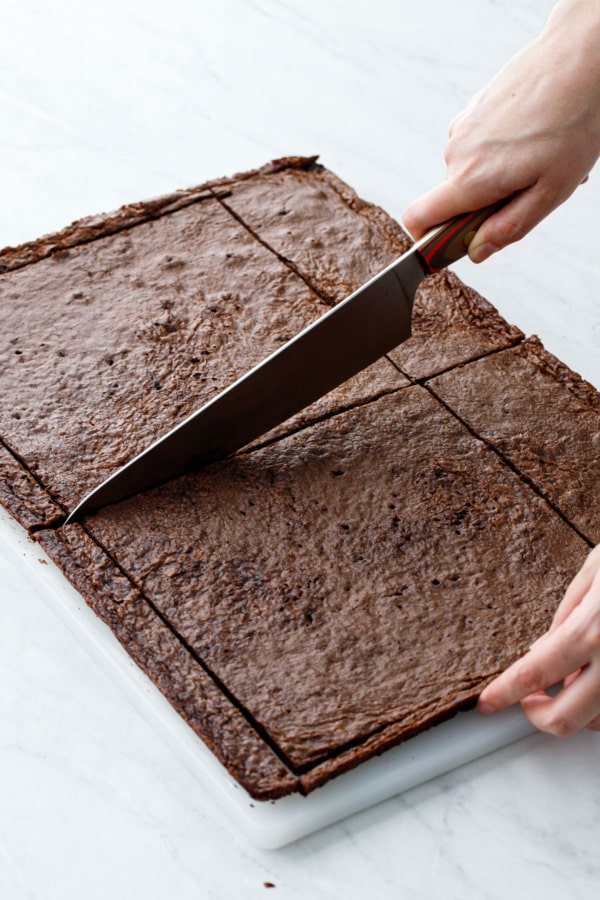
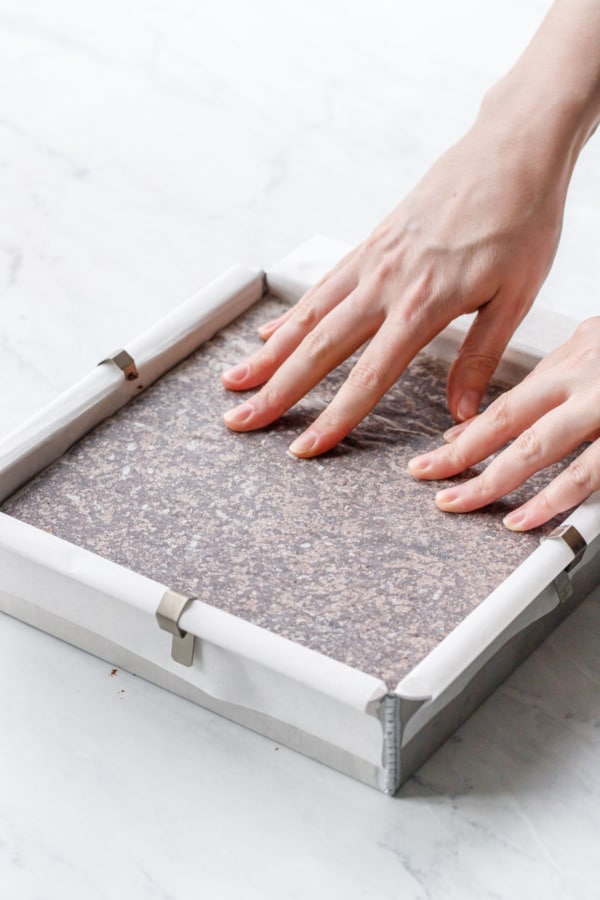
The brownie layer is incredibly thin and delicate. It’s much more manageable when chilled or frozen, so I recommend cutting your squares and then chilling or freezing them before assembling.
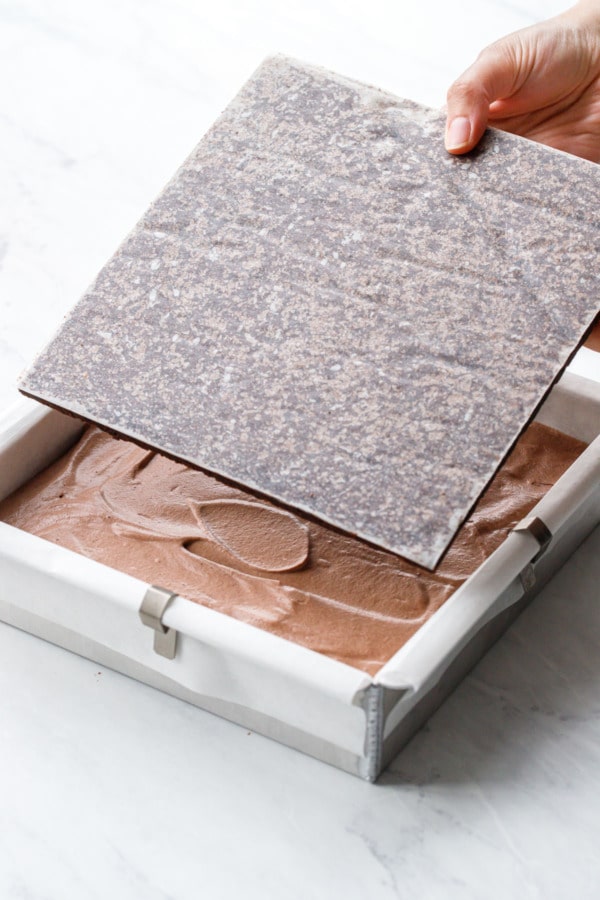
Also, when you cut the squares, cut straight through the parchment: keeping the parchment on the bottom of the brownie makes handling even easier. It also serves as its own cover, ending up the topmost layer of the assembled sandwich so you don’t need to worry about covering the pan in the freezer.
As for the scraps, well, I don’t think I need to tell you what to do with those (yum yum!)
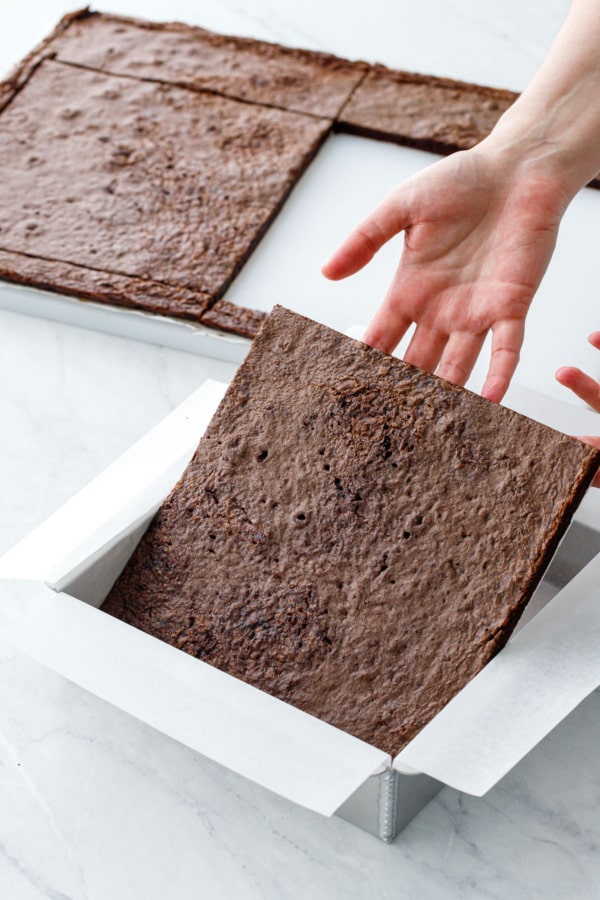
You’ll need a straight-sided 8-inch square cake pan for this recipe, ideally one with crisp, square corners. When you add the parchment paper lining, be sure to leave at least an inch of overhang on every side. I had to use full sheets of parchment, since my normal strategy of cutting a sheet in half doesn’t leave long enough overhangs. You will need these overhangs to use as handles to lift the entire frozen block out of the pan.
Pro Tip: Use the metal clips from Weck Jars to keep the parchment flaps in place. This trick works well for anything baked in a parchment-lined pan!
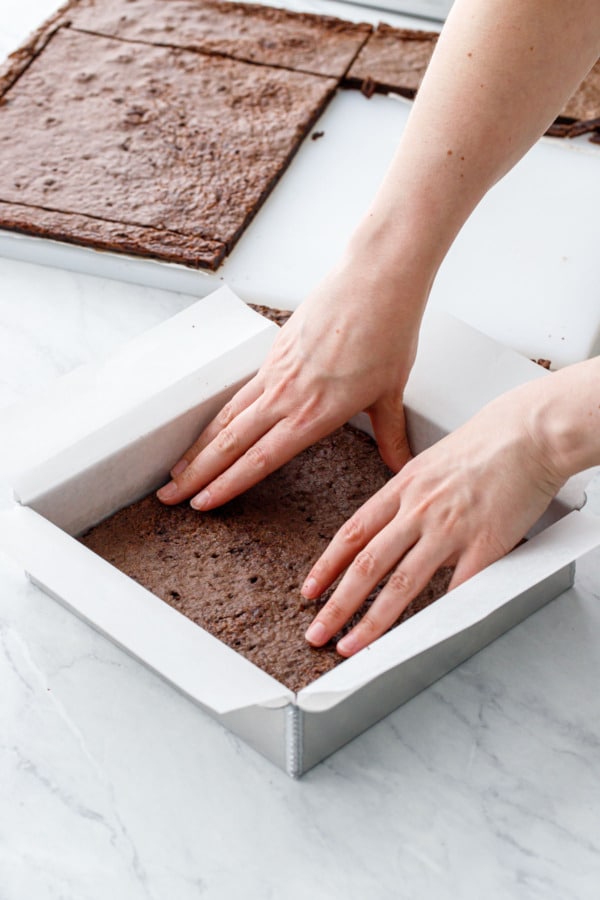
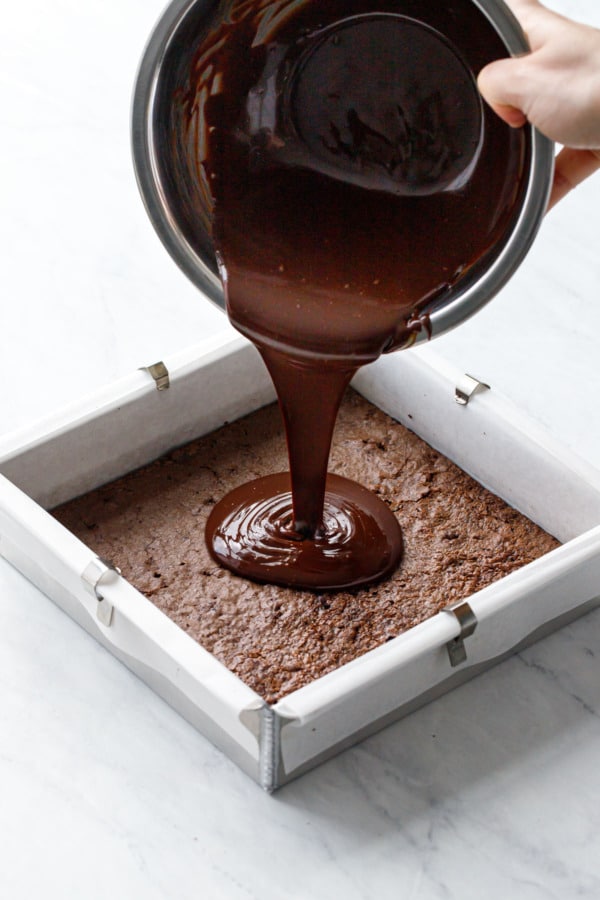
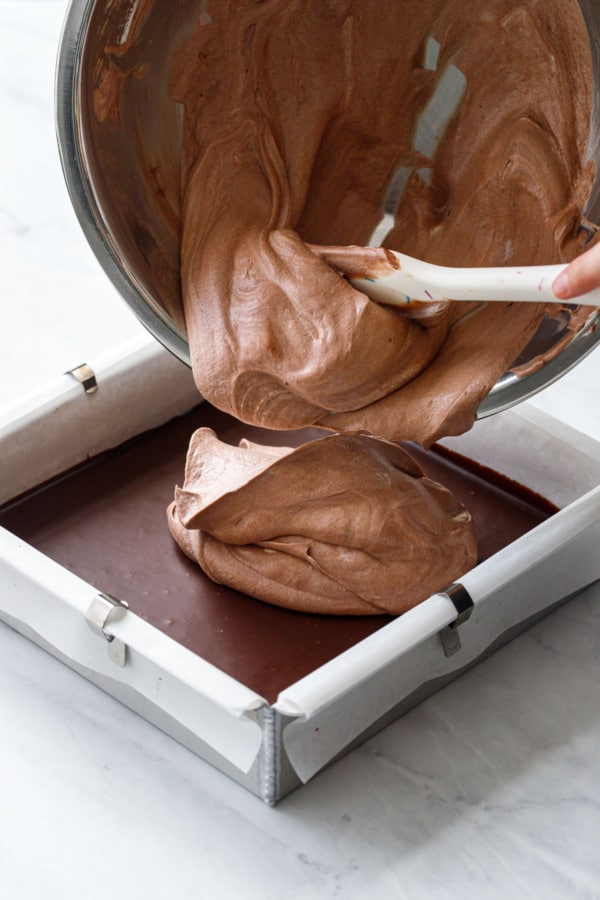
Assemble the sandwiches within the parchment-lined pan, starting with one square of brownie (shiny side up), followed by a layer of ganache. Chill until the ganache is set, then top with the no-churn ice cream. Freeze that for half an hour or so, then gently press the second brownie square (shiny side down, parchment side up) on top.
When it comes time to cut the sandwiches, lift the entire frozen block out of the pan, then peel the parchment off the top, bottom, and sides. Run a large chef’s knife under hot water for a few seconds, pat dry, and make your cut in one smooth movement, sliding the knife out the side. Clean the knife off between each cut to keep the beautiful layers looking clean and crisp.
While I cut my brownies into 16 squares, I found that half a square was more than satisfying for a single serving (not that I couldn’t easily devour an entire square, two even, but I was just as satisfied with half that).

Variations:
I initially pondered making a straight up ice cream, or even an ice cream cake. The sandwich may have won out in the end, but I still think this recipe would work in the other forms as well!
No churn ice cream
You can also make this recipe as a no-churn ice cream recipe instead. Bake the brownie in a 13×9 baking pan to make a thicker brownie (increase bake time to 20 to 30 minutes). Fold cubes of brownie into the no-churn ice cream base, layer with swirls of ganache as you transfer it into the freezer container. In this case, you can definitely add some rainbow bit chips to make it a true Cosmic brownie-inspired ice cream.
Brownie ice cream cake
This recipe can also be prepared in a 9-inch round springform or silicone cake pan.
I recommend using the slightly thicker brownie recipe from this mudslide ice cream cake here (with a larger cake, a slightly thicker brownie layer would be ideal). Cut out two circles from the brownie to match the size of your pan. Double the ganache and ice cream portions, then assemble in layers of brownie, ganache, ice cream, brownie, ganache, ice cream. Top it off with cubes of brownie (cut from the scraps left after you’ve cut your circles), a final drizzle of ganache, and a flurry of rainbow bit chips.
Substitutions & Swaps
Espresso powder
Espresso powder enhances the chocolate flavor, used in such small quantities that you won’t taste a noticeable coffee flavor in the final product. Espresso powder is not the same as instant coffee, which is much milder in flavor and intensity; while it will technically work in this recipe in a pinch, you may want to double the quantity. You can also leave the espresso powder out entirely.
Malted milk powder
Malted milk powder adds a bit of soda-shop flavor to the ice cream layer. Ovaltine is sometimes easier to find and can be used here instead (though it has cocoa in addition to malted milk). This ingredient is optional and can be left out.
Cocoa powder
I always use Dutch-process cocoa powder in my baked goods, as I much prefer the richer flavor and darker color. It can be hard to find in grocery stores though, which is why I recommend buying a big bag online so you always have it on hand. In a pinch, Hershey’s Special Dark cocoa is the closest (this is actually a blend of natural and black cocoas).
The ice cream can be made with natural cocoa if you prefer the flavor, but I don’t recommend using natural cocoa for the brownie layer since it will result in a lighter color and more astringent flavor.
Dark vs milk chocolate
The ganache will work with all dark chocolate if you prefer a richer, more intense flavor. Darker chocolate will result in a firmer ganache, so I might recommend an extra splash of cream to keep it soft and smooth when frozen.
Since the chocolate is the main source of flavor in this recipe, quality makes a big difference. Try to avoid using chocolate chips, as they contain stabilizers and caking agents that will prevent them from melting smoothly (you’re much more likely to end up with a broken ganache, I’m speaking from experience here). Instead, chopped up bars of chocolate, or smaller pieces of high quality chocolate coverture are going to give you much better results. Trader Joe’s pound plus chocolate bars are one of the best deals out there, though if I’m not in the mood to chop chocolate I often use Callebaut callets or Valrhona feves (the later is definitely the priciest option).
Malted Fudge Brownie Ice Cream Sandwiches
Ingredients
For Brownie:
- 6 oz / 170 g dark chocolate (50-60%), finely chopped
- ⅔ cup / 83 g all-purpose flour
- ½ cup / 50 g dark or dutch process cocoa powder
- ½ teaspoon instant espresso powder, optional
- ½ teaspoon baking powder
- ½ teaspoon fine sea salt or kosher salt
- 1 cup / 226 g (2 sticks) unsalted butter, at room temperature
- 1 cup / 200 g granulated sugar
- ½ cup / 105 g packed light brown sugar
- 3 large eggs, at room temperature
- 1 teaspoon vanilla extract
- 2 tablespoons whole milk
For Ganache:
- 2 oz / 57 g dark chocolate (50-70%), finely chopped
- 2 oz / 57 g milk chocolate (25-35%), finely chopped
- ⅓ cup / 80 g heavy cream
- 1 tablespoon unsalted butter, at room temperature, cut into small pieces
For Ice Cream:
- 7 oz / 200 g sweetened condensed milk
- ¼ cup / 25 g dark or dutch-process cocoa powder, sifted
- 2 tablespoons malted milk powder, optional
- 1 teaspoon vanilla extract
- pinch fine sea salt
- 1 cup / 240 g heavy cream
Instructions
- To make brownie layer, preheat oven to 350ºF. Lightly butter the bottom and sides of a half sheet pan (18-by-13-inches); line with parchment paper, leaving at least an inch of overhang on the two long sides.
- In a double boiler or in the microwave on low power, melt chocolate until smooth. Set aside to cool slightly.
- In a separate bowl, sift together flour, cocoa powder, espresso powder, baking powder, and salt and set aside.
- In the bowl of a stand mixer fitted with the paddle attachment, beat butter, sugar and brown sugar on medium-high speed for 2 to 3 minutes or until light and fluffy. Add eggs, one at a time, beating well after each addition. Increase speed to high and beat for another 2 to 3 minutes or until fluffy and increased in volume. Mix in vanilla and milk.
- With the mixer running on low, drizzle in in melted chocolate and mix until just incorporated, scraping down the sides of the bowl with a spatula as needed. Sprinkle dry ingredients over top and mix on low speed or fold in with a spatula until just incorporated.
- Drop dollops of batter onto prepared baking sheet, and spread into an even layer using an offset spatula (it's ok if the batter doesn't go quite all the way to the edges, it'll spread more as it bakes). Bake for 13 to 15 minutes or until top is cracked and edges are slightly darker brown. Place sheet pan on a wire rack to cool completely, then refrigerate for at least 30 minutes (or more) to make the brownie easier to work with.
- While the brownie is chilling, prepare an 8-by-8-inch square baking pan (ideally one with crisp, sharp corners and straight rather than angled sides). Lining the bottom and sides with two 8-inch-wide by at least 14-inch long strips of parchment paper placed perpendicular in the baking pan, creasing the corners and top edges. You should have a good inch or two of overhang; you will need this later to lift the sandwiches out of the pan.
- Carefully lift and slide the chilled brownie onto a large cutting board, leaving the parchment on the bottom. Use a ruler to measure and cut two 8-inch squares (should be exactly the same size as the inside of your baking pan). Use a large knife or a sharp rotary cutter to cut through the brownie and the parchment lining the bottom. Any scraps you can do with as you please (chef's treat!)
- Gently lower one of the parchment-backed squares into the bottom of the parchment-lined baking pan. Put the other square back in the fridge or freezer until the rest of the sandwich assembly is ready.
- To make the ganache, place chopped chocolate in a heat-proof bowl. Warm cream in a small saucepan over low heat until it just begins to steam and bubble around the edges (do not let it boil).
- Pour hot cream over chopped chocolate; let sit for 30 seconds, then gently start to whisk, working in concentric circles from the center out, until chocolate is fully melted and ganache is smooth. Add butter, one piece at a time, and gently whisk until melted.
- Immediately pour still-warm ganache over the first layer of brownie in the baking pan, spreading it into the corners as needed, tapping the pan on the counter to level the ganache layer and remove air bubbles. Refrigerate for 2o to 30 minutes until set and no longer shiny.
- For the ice cream, combine sweetened condensed milk, sifted cocoa powder, and vanilla in a large mixing bowl. In a separate small bowl, dissolve malted milk powder in 1 tablespoon warm water, then mix into cocoa mixture.
- Pour the cream into a clean metal mixing bowl or the bowl of a stand mixer fitted with the whisk attachment. If you like, you can also chill the metal bowl and whisk which will help your cream to whip up nicely. Turn mixer to medium-high speed and whip until cream forms medium peaks (try not to overmix or it will be harder to incorporate into the cocoa mixture).
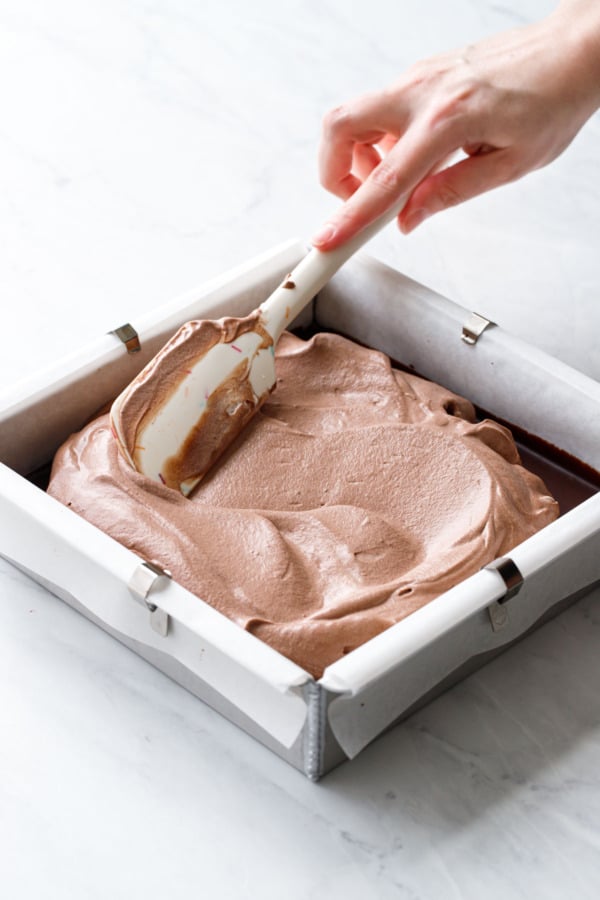
- Spoon in about 1/3 of the whipped cream into bowl with cocoa mixture, folding and gently stirring to lighten up the mixture. Add remaining whipped cream and fold with a large rubber spatula until evenly incorporated and no streaks of bright white cream are visible.
- Pour ice cream base on top of set ganache, spreading into an even layer. Freeze for 30 to 45 minutes or until ice cream layer starts to freeze and firms up a bit. Gently place second brownie square, parchment side up, on top of ice cream, pressing lightly to adhere (don't press too hard or the ice cream may squeeze out the sides).
- Return to freezer and freeze until completely set, at least 4 hours or overnight.
- Before serving, use the parchment paper overhang to lift the entire block out of the baking pan and onto a cutting board. Use a large knife (running it briefly under hot water to make it easier) to cut sandwiches into 16 even squares. Wipe or rinse of the knife between each slice for the cleanest looking cuts. Serve immediately, or return cut squares to the freezer to enjoy later (if storing longer than a day, put them in an airtight container or wrap individually with plastic wrap). Sandwiches will keep for up to 2 months.