Isn’t it amazing to think, that just over a two years ago I was terrified of caramel? Like, honestly truly scared I was going to burn my face off or something. And ruin a few pans while I was at it.
Now I can’t get enough.
I’ve made peach caramels and gingerbread caramels and whiskey caramel sauce and can confidently say my fear of caramel has officially been conquered.
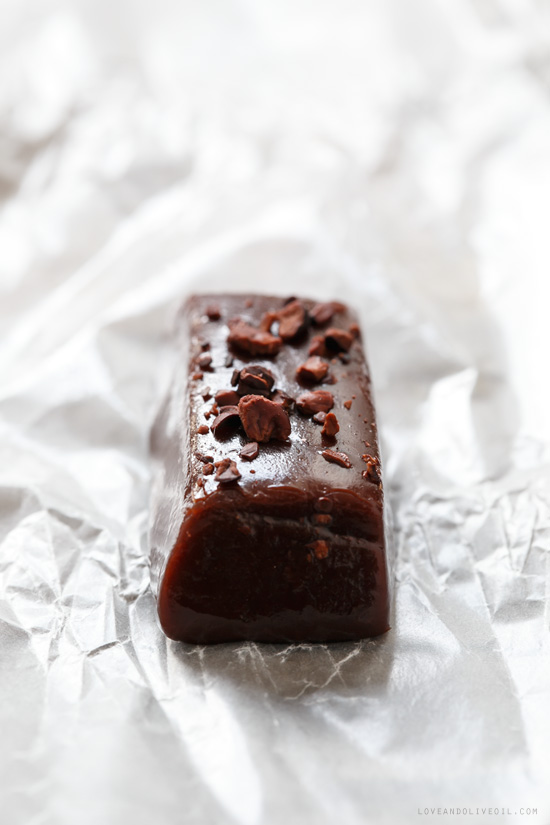
These dark chocolate caramels taste like the convergence of buttery caramel and dark chocolate tootsie roll, soft and chewy and intensely chocolate.
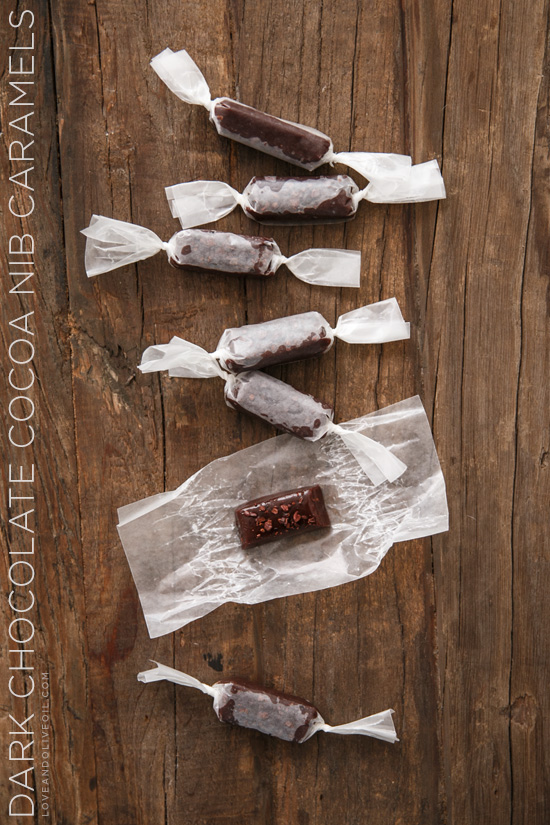
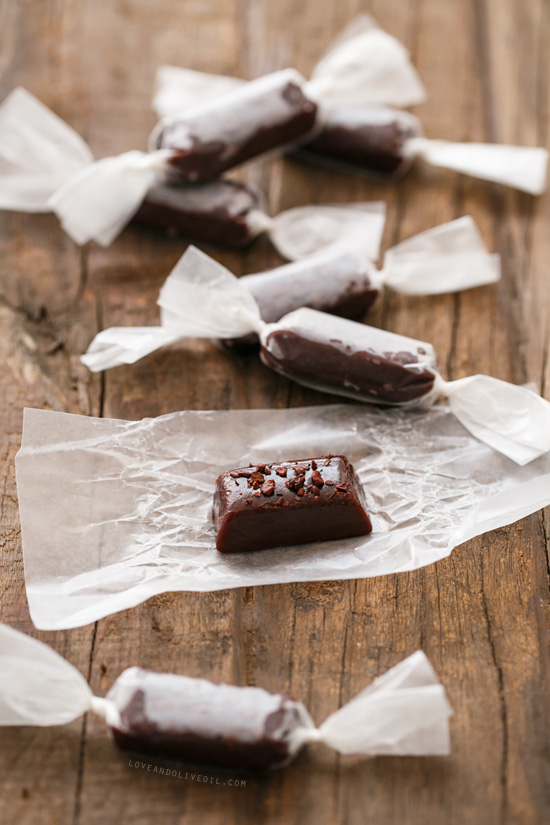
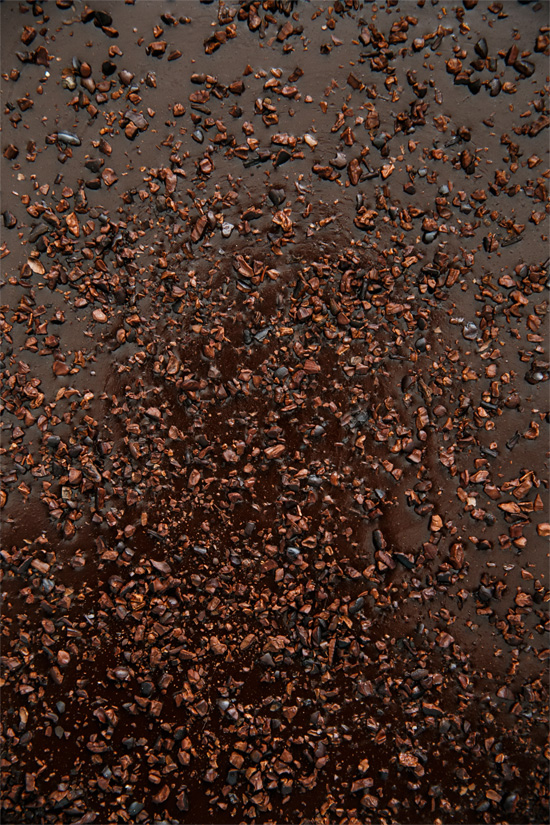
On a whim, I scattered some cocoa nibs I had on hand on the candies as they were cooling, to add a bit of visual and textural interest. Despite the inherent stickiness of caramel, they didn’t stick quite as firmly as I’d hoped, so I had to be careful when cutting and wrapping so as not to lose all of the crunchy bits. But simply adding this one element of crunch to an otherwise smooth confection was a revelation.
I made this batch of caramels with my grandma in mind. We were headed to New York for a few days and planned to stop in and visit her. And if you know my grandma you know that your visits will be that much more appreciated if you come bearing sweets (indeed, there is no question that I am her granddaughter). I had originally planned on baking cookies, but my mom told me the gingerbread caramels that I sent her over the holidays last year were a huge hit. She would carry them around in her pockets, refusing to share with anyone who (dared to) ask. Yup, that’s my grandma for you.
Since she loves chocolate too, I thought that these chocolate caramels would be perfect. And, lucky for the rest of my relatives, one batch made A LOT of caramels, so I had more than enough to go around. Caramels for all!
I tediously wrapped them all in waxed paper and boxed them up in cute kraft candy boxes, arranged them in my suitcase and crossed my fingers that TSA wouldn’t consider them threatening. I’ve had issues with peanut butter, jam, and even a banana before (granted, it was a very sinister looking banana), so you never know. I even threw in some extras fully imagining I’d need to bribe the agents with samples so they’d let me through.
They didn’t even bat an eye.
Ah well, better to be prepared than caught off guard, I say.
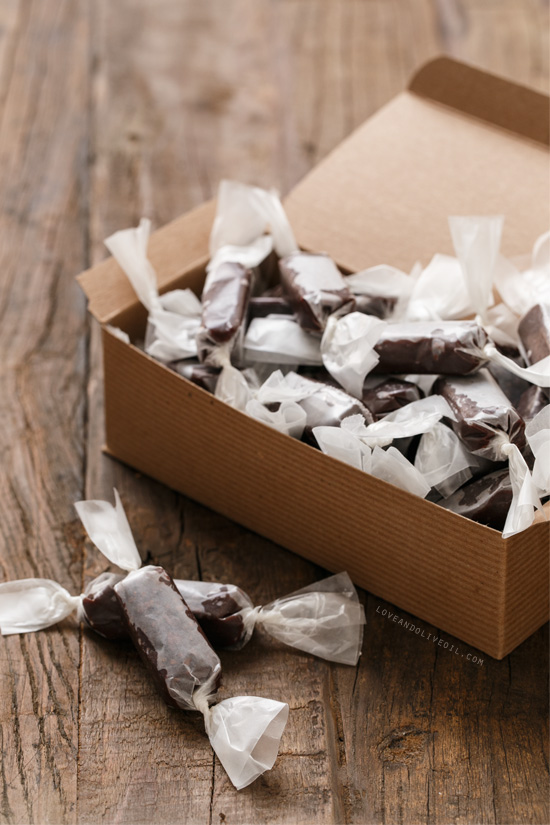
Needless to say, Grandma loved the caramels. Her eyes lit up when I handed her the box. She couldn’t even wait to dig in while we took a picture (said photo features her reluctantly looking into the camera with a partially-wrapped candy in her hand). And I’m betting they didn’t even last a day in her possession.
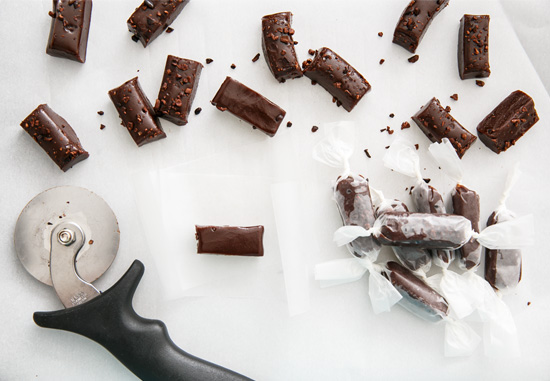
Tip for cutting: I used a lightly buttered rotary cutter, carefully scoring rows with a ruler for guidance, and getting progressively deeper with each cut. Cut and wrap one row at a time, as the cuts will ooze back together if left touching and the candies will spread out the longer they sit. While Martha insists you can’t move the caramels for a full 24 hours, I found they were fine to cut after about 4 (we had a plane to catch, afterall).
Oh, and be sure you leave yourself enough time to wrap them. You don’t think one quarter-sheet pan’s worth of caramel would make a lot, but you’d be wrong. You don’t want to be rigorously wrapping a seemingly never-ending line of candies when you really should be packing for your trip. Not that I’d know or anything… just saying.
Dark Chocolate Cocoa Nib Caramels
The cocoa nibs are optional, you may leave them off if you like. But we love the texture and crunch that they give to these decadent chocolate caramels.

Ingredients:
- 2 cups heavy cream
- 1 1/4 cups light corn syrup
- 2 1/4 cups sugar
- 1/4 teaspoon salt
- 9 ounces bittersweet chocolate, chopped in small pieces
- 1/2 cup (1 stick) unsalted butter, cut into chunks
- 1/4 cup cocoa nibs
Directions:
- Line an 11-by-9-inch baking pan with parchment paper and set aside.
- In a heavy 4-quart saucepan, combine 1 cup cream, corn syrup, sugar, and salt. Bring to a boil over medium heat, stirring occasionally, for 15 to 20 minutes, washing down sides of pan with a pastry brush dipped in water as needed to remove any stray sugar crystals.
- When the temperature reaches 220 degrees, add chocolate and butter and return to a boil. Slowly add remaining 1 cup cream. Cook at a gentle boil, still stirring, until temperature reaches 240 degrees (soft-ball stage), another 30 to 40 minutes.
- Immediately pour mixture into prepared pan (do not scrape the pot). Sprinkle with cocoa nibs. Let stand uncovered at room temperature for at least 4 hours without moving.
- When cool, lift out of baking pan using edges of parchment paper as handles. Using a large buttered knife or a pastry cutter, cut into 1-by-1 1/4-inch logs. Wrap each piece in cellophane or waxed paper.
- Caramels will keep in the refrigerator for up to one month. Let come to room temperature before serving if you prefer a softer caramel.
** I halved the original recipe, which seemed ridiculously huge, and adjusted the cooking times as necessary as a smaller batch will take less time to come to temperature. Even this half-sized batch will still make a TON of caramels, and remember that you’ve got to (tediously) wrap them all individually, so plan accordingly.
Recipe from Martha Stewart.
All images and text ©Lindsay Landis / Love & Olive OilDid you make this recipe?
Let us know what you think!
Leave a Comment below or share a photo and tag me on Instagram with the hashtag #loveandoliveoil.