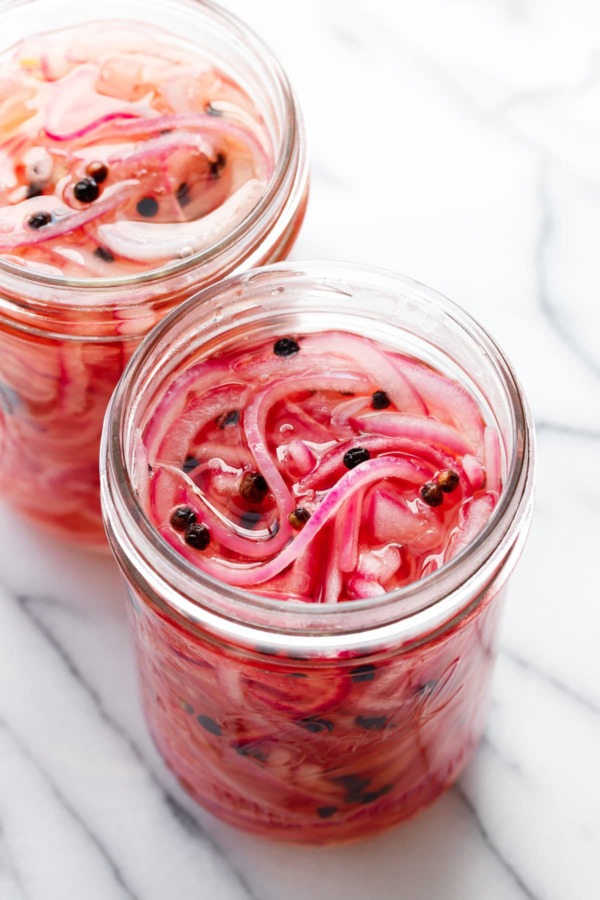
Tart, tangy, and fantastically fuchsia, these pickled red onions are quick and easy and stored in the fridge, no canning required!
Pickled red onions are the perfect garnish for just about anything, from tacos to burgers to grilled chicken and more. They add bright flavor and a kick of acid to any dish they embellish.
Technically, I’ve posted quick pickled red onion recipes before, but always as a part of another recipe (like these pulled pork tacos or these loaded nachos).
But the thing is, this recipe is so easy and so versatile, it really deserves a post of its own.
This is a very basic recipe, with little more than salt, sugar, peppercorns and vinegar.
Consider this a foundation for flavor, if you will. It’s perfect as is, but if you’re feeling frisky can mix it up with some fresh garlic cloves, maybe a sliced red chili or pepper flakes for a bit of spice, mustard seeds or some fresh herbs, even. Or maybe add a spoonful of gochujang for a kimchi-like twist.
You can also mix and match vinegars here. I like to use half white vinegar and half cider vinegar, but red wine vinegar would be lovely as would a little bit of champagne, rice vinegar or even a small splash of balsamic (though you would muddy the gorgeous garnet hue of the onions with that last one.)
Cutting Onions (Don’t Cry)
There are two methods to slice onions, resulting in slices with different shapes and textures.
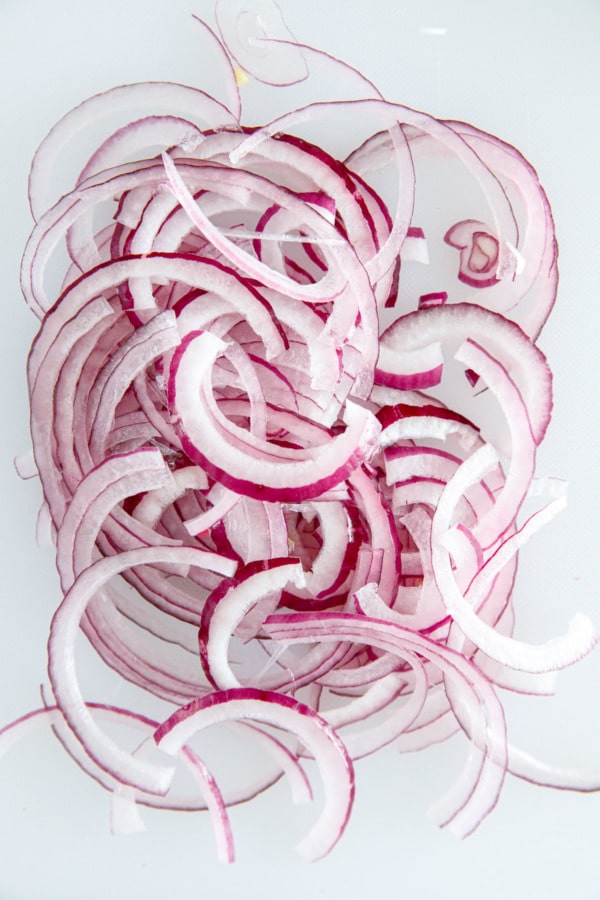
Slice it one way and you’ll get super thin semi-circles; slice it another to produce crescent-shaped spears that have a bit more spine and structure.
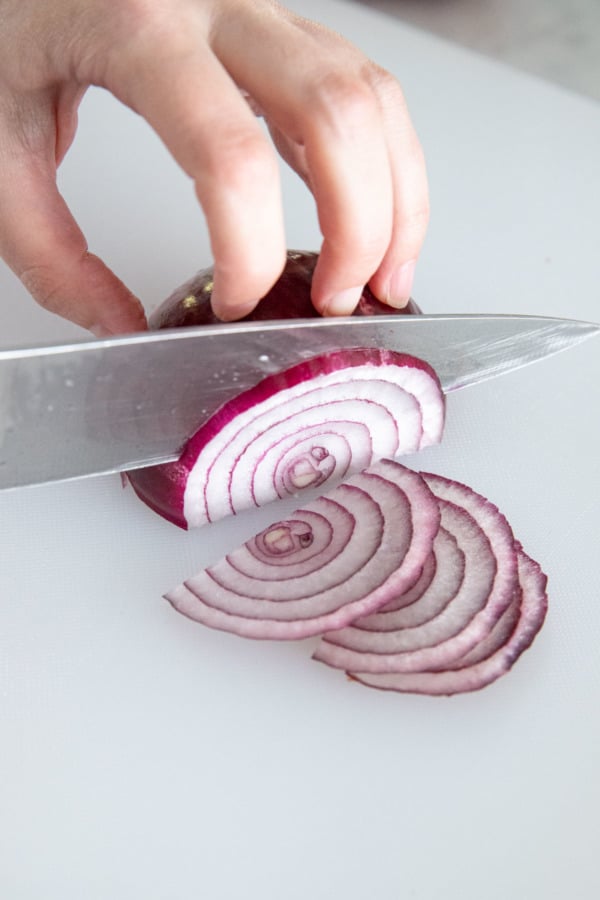
For this first method, cut your onion in half vertically (from the stem end to the root end). Trim off the root end (leave the stem end to use as a handle) and peel back the papery outer layer. Lay the cut side down on your cutting surface, then slice crosswise (parallel to the cut you made to cut off the root end) into thin half-rings. The sharper your knife, the thinner you’ll be able to slice it.
If you skip the first vertical cut you can also make full rings of onion this way, though it’s a bit tricky as trying to stabilize a round onion on a flat surface isn’t easy. A mandoline would be preferable in this case.
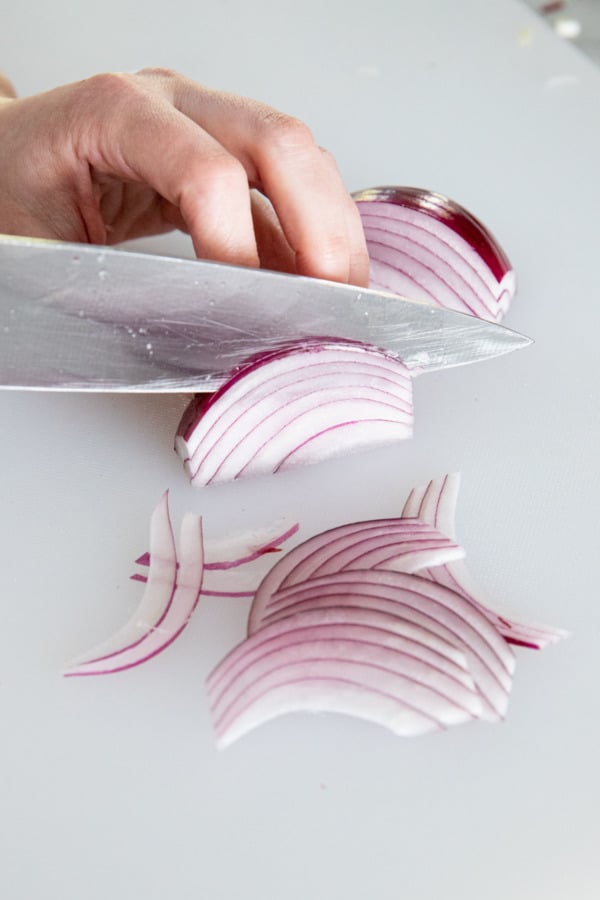
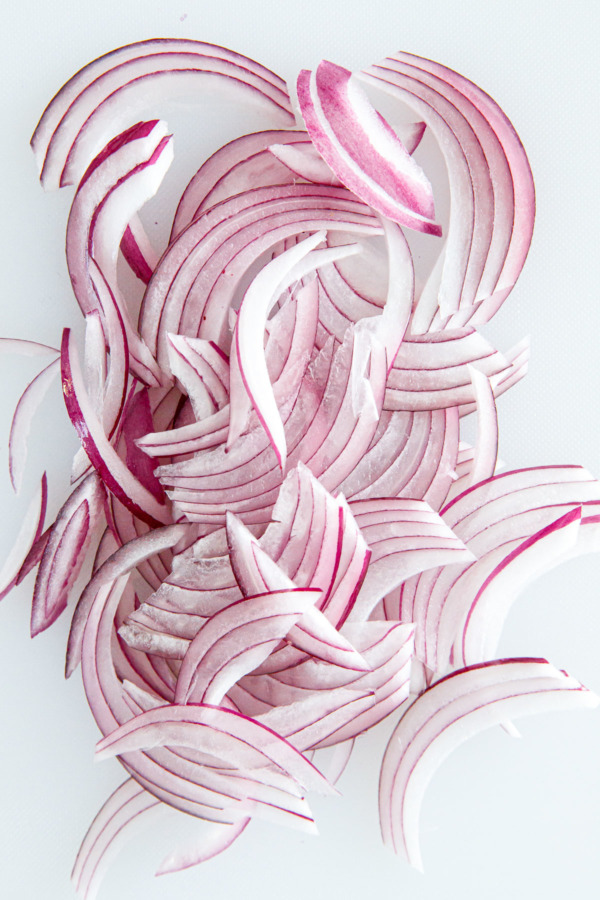
The second method starts the same, by slicing off the stem and root ends, then cutting in half vertically (from the stem end to the root end). Cut off the stem and root ends and peel off the outer layer. If you like, you can cut it in half again in the same direction (to make quarters, essentially), which makes the pieces a bit easier to handle in my opinion. Then cut into thin slices, slicing vertically (from stem to root), creating thin crescents of onion. If you can manage to angle your knife to match the curve, you’ll end up with perfectly tapered crescents, but it can be a bit tricky to do it this way. If not, that’s ok too.
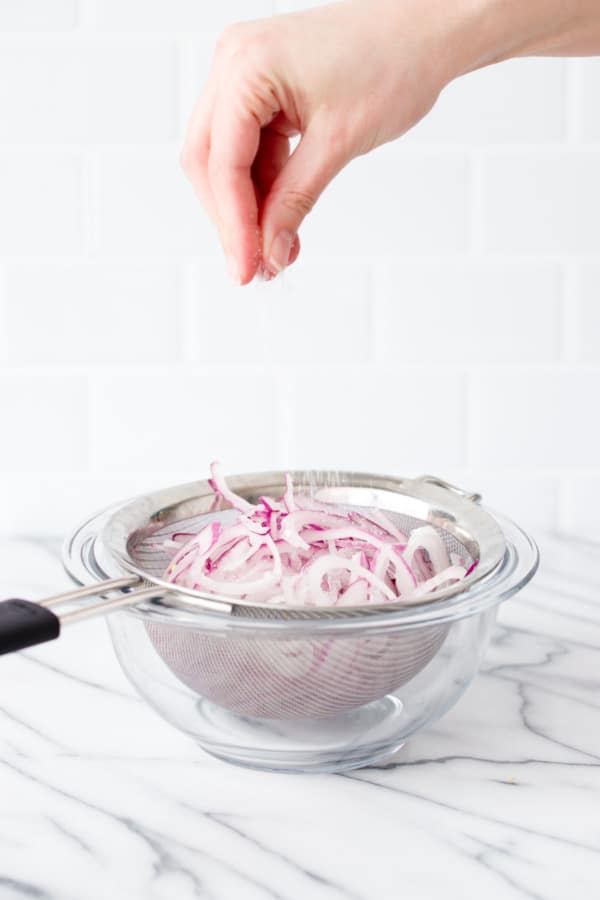
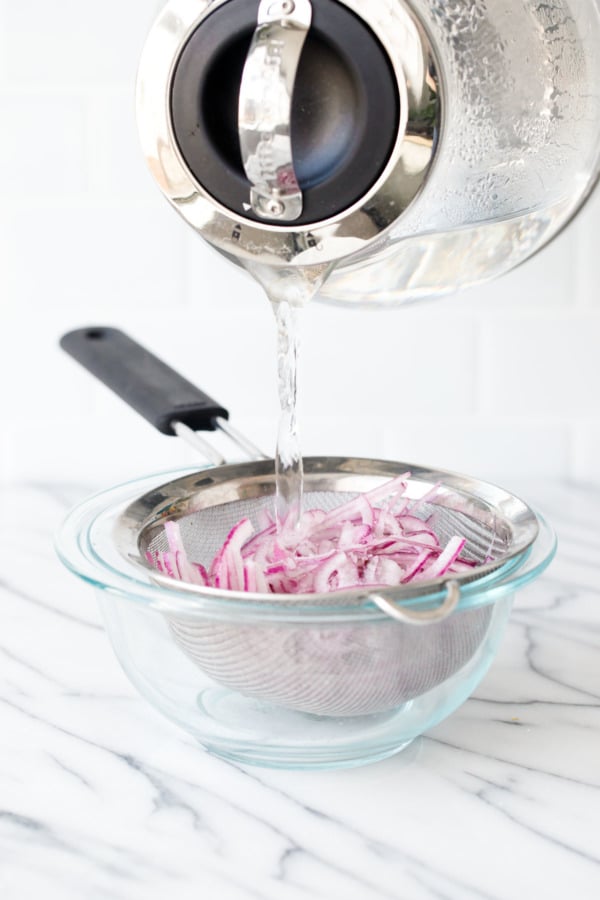
I always like to salt and soak the onions before pickling. This gets rid of the harsh ‘bite’ that often makes raw-onions unappetizing. Soaking them for a short time in hot water softens the onions slightly, priming them for quicker, more thorough absorption of the vinegar brine.
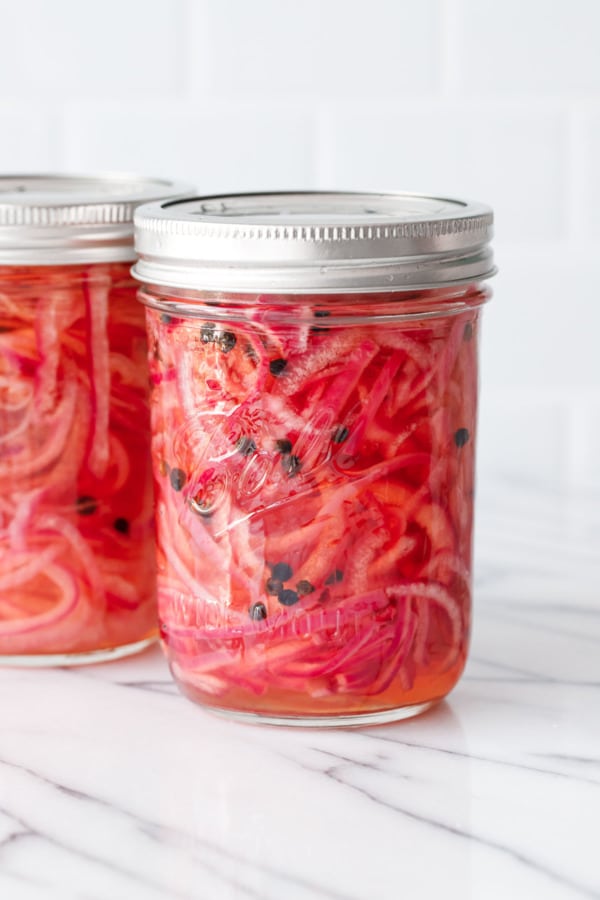
I recommend using wide-mouth pint jars for this recipe; the wide-mouths make things much easier to manage than the narrower mouth ones (the pesky jar shoulders make it hard to get stuff out).
This recipe is designed to be stored in the refrigerator, where the onions will easily last a few weeks. I have not tested this recipe for canning; if you want to pickle onions for long-term storage I’d recommend picking up a canning book like Ball’s Complete Home Canning or checking out the USDA’s National Center for Home Food Preservation resources. Pickles need to have a very specific acidity to be safe for water-bath canning. Use a trusted source, and follow the recipe exactly. This is not the time or place to experiment with recipes.
However, if you’re doing simple refrigerator pickles, because they will be stored in the refrigerator you are safe to experiment to your heart’s content!
(Did know, you can also use this exact same process/recipe for shallots too!)

How to use them
Honestly, you can use pickled onions in so many ways I surely can’t list them all here. Aside from the aforementioned tacos and nachos and other Mexican-inspired dishes like 7-Layer Dip or Black Bean Soup, they’d also be great on burgers or turkey sandwiches, chopped up in a tuna salad, or even piled atop a freshly seared steak or grilled chicken.
Quick Pickled Red Onions
This recipe will fill one pint-sized mason jar, but can easily be scaled up depending on how many onions you have. The seasoning is very basic, feel free to mix it up with other flavors like garlic, chili or mustard seed.
Ingredients:
- 1 red onion (about 8-10oz in size), thinly sliced
- 1 tablespoon plus 1 teaspoon kosher salt, divided
- boiling water, for blanching
- 1 cup apple cider vinegar (or use a mix of cider and white vinegar)
- 2 tablespoons granulated sugar
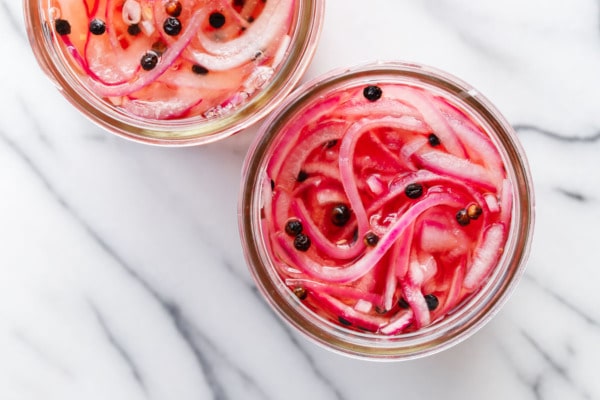
- 1 teaspoon whole black peppercorns
Directions:
- Place thinly sliced onions in a sieve or colander. Toss with 1 tablespoon kosher salt and let sit for 5 minutes, then pour boiling water over top. This will both rinse off the excess salt and help get rid of some of the raw bite of the onion. Drain well.
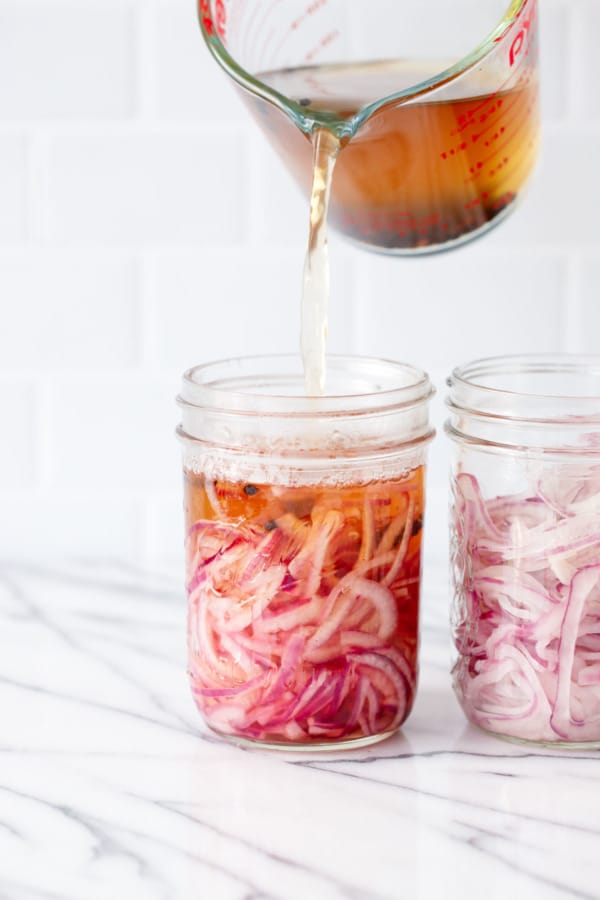
- When cool enough to handle, pack onions into a pint-sized mason jars. The onions should mostly fill the jar without being too tightly packed.
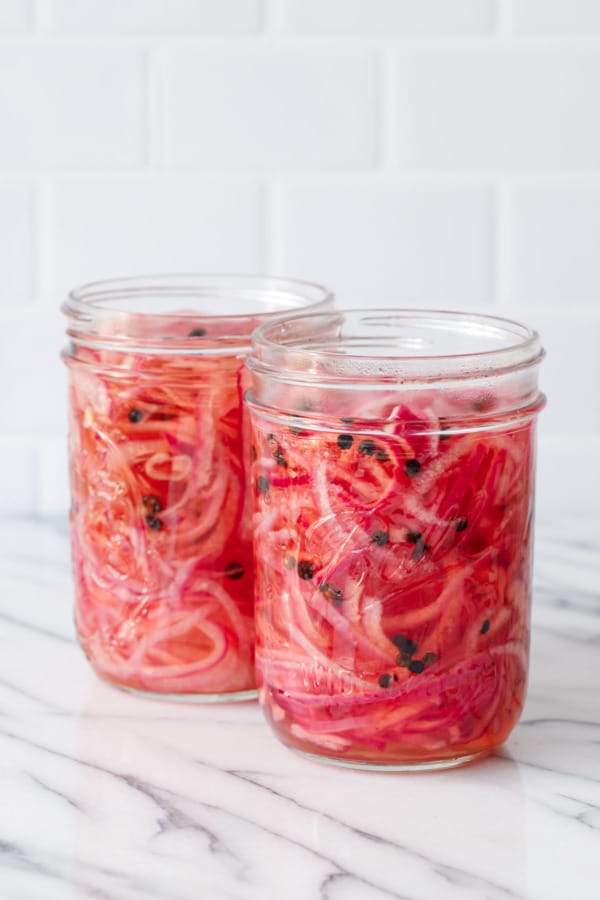
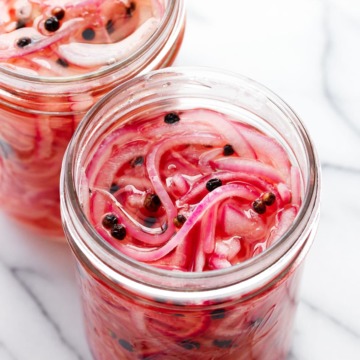
- Heat vinegar, sugar, salt, and peppercorns in a saucepan or in the microwave until sugar is completely dissolved. Pour over onions, making sure the liquid fully covers the onions (if you need to top it off with a bit more vinegar you can).
- Let cool to lukewarm, then secure lid and refrigerate. They’ll be ready after just a few hours, but will keep in the fridge for up to 4 weeks.
Did you make this recipe?
Let us know what you think!
Leave a Comment below or share a photo and tag me on Instagram with the hashtag #loveandoliveoil.