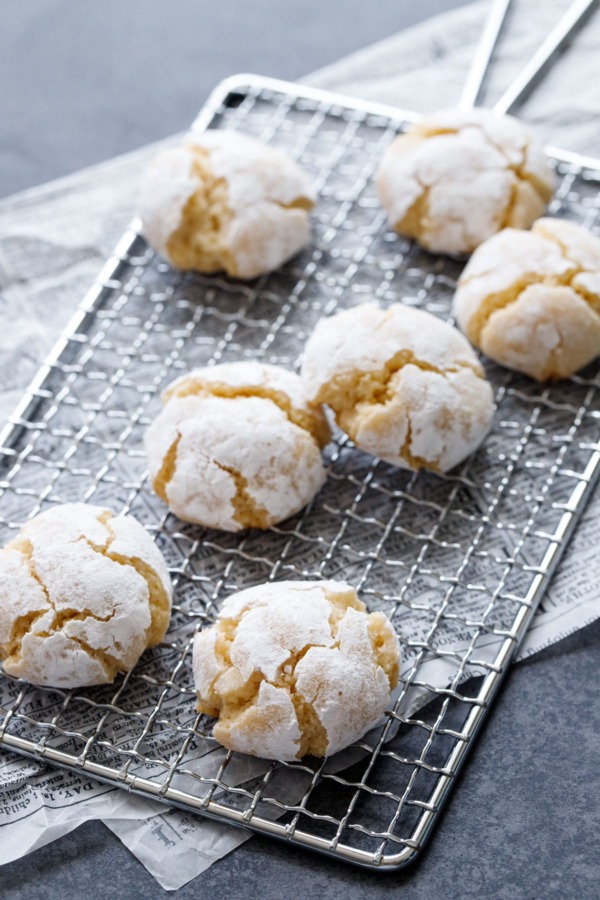
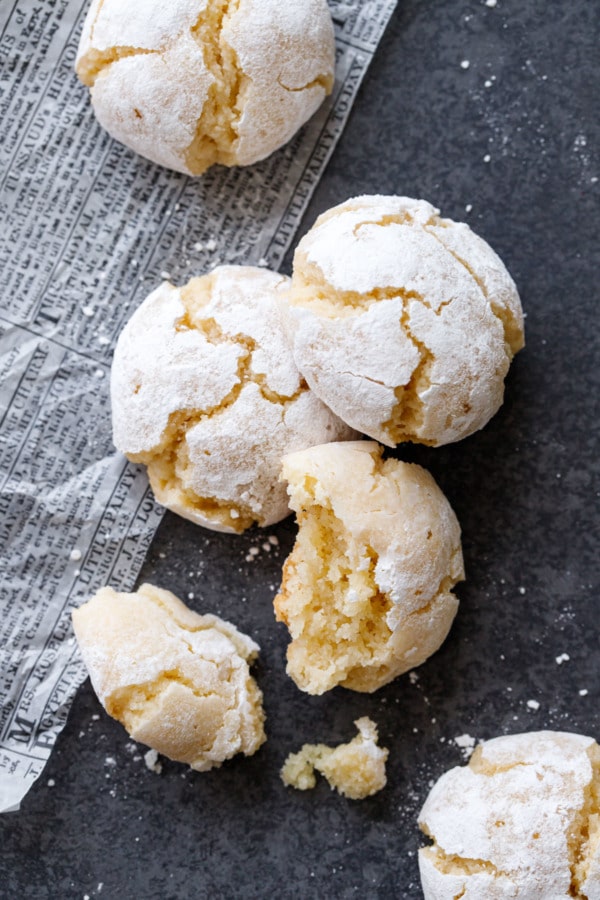
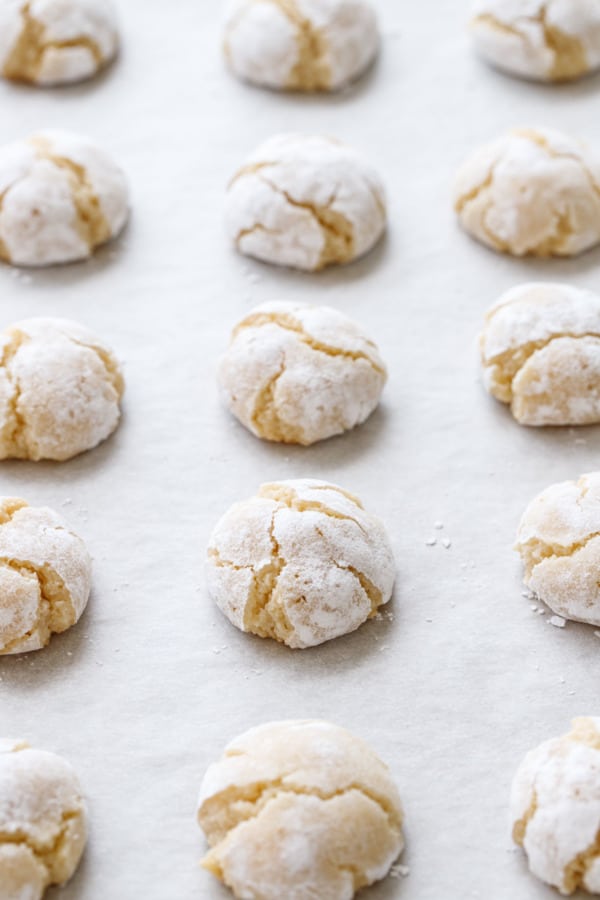
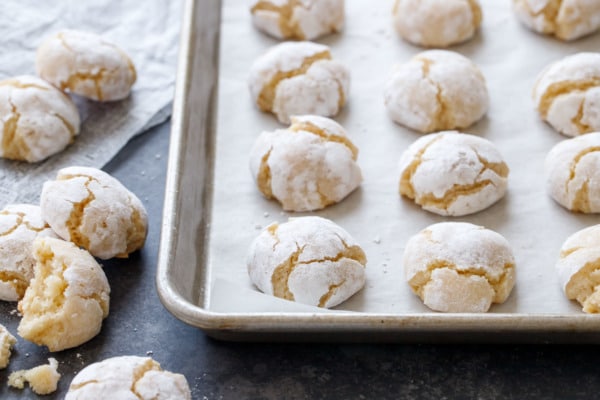
These chewy almond cookies are made with little more than almond flour, sugar, and whipped aquafaba (chickpea liquid), making them entirely vegan and perfectly pantry friendly.
A regular reader favorite, my original amaretti cookie recipe uses whipped egg whites to give the cookies a chewy texture. But did you know that the liquid drained from a can of chickpeas (also called aquafaba) is a perfect vegan substitution for egg whites? It may sound weird, but I promise it works!
Have you ever baked with aquafaba before?
Aquafaba is the liquid leftover from a can of chickpeas.
And for some reason (magic? science? a bit of both?) it whips up almost exactly like egg whites.
Which got me to thinking… would it work in my amaretti cookies?
Turns out, it does. And quite well in fact (you’d be hard pressed to tell the difference!)
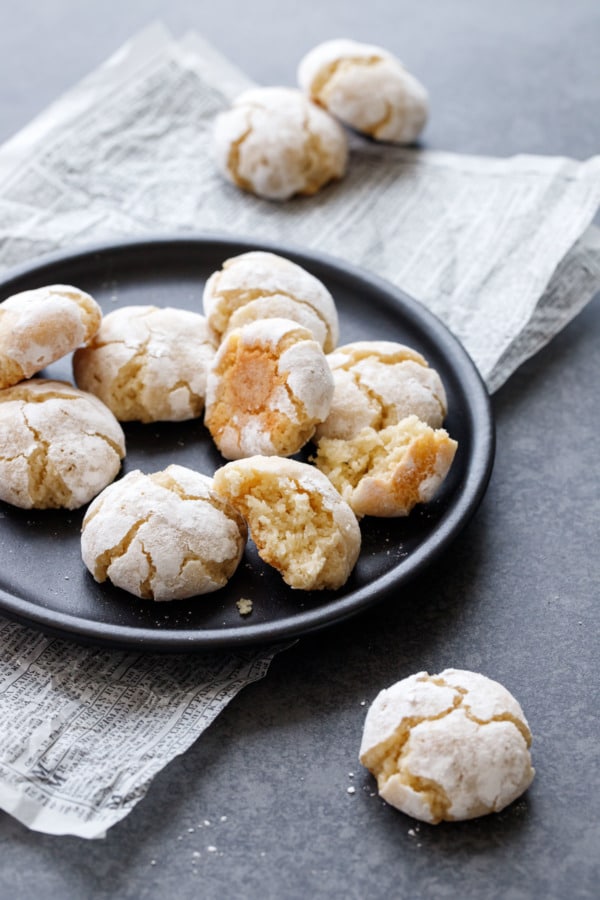
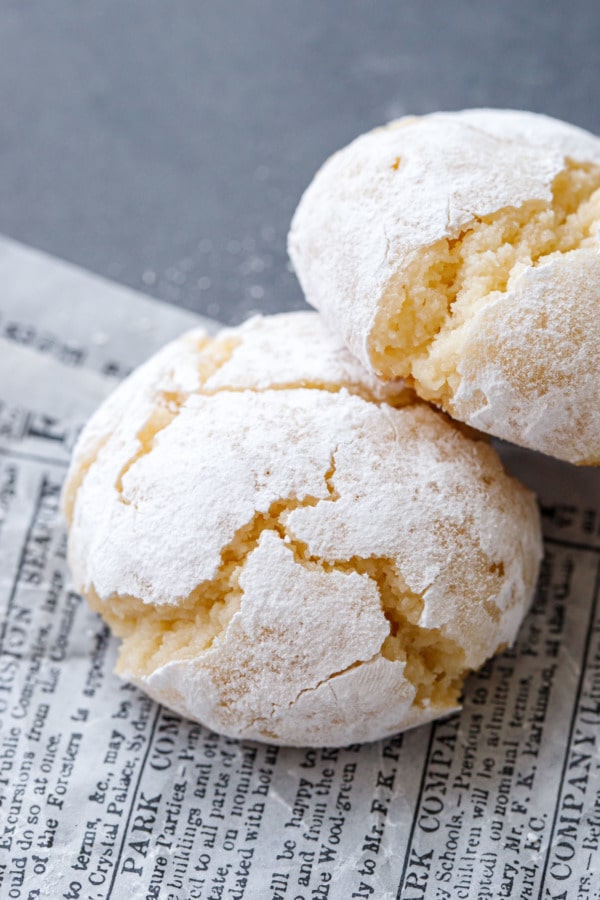
Using aquafaba instead of egg whites produces the same delightfully chewy texture, but the result is completely vegan (assuming you use vegan sugar, of course, but that’s a discussion for another day).
Does it taste like chickpeas, though?
No! Despite the fact that the aquafaba smells a little bit funky in liquid form, once whipped and baked you cannot taste a thing. I promise, these cookies don’t taste anything like falafel (lol).
I’m sure if you compared the original to this vegan version, you may notice a slight difference in flavor, but unless you are tasting them side by side you really won’t notice a difference.
The aquafaba does behave a little bit differently than egg whites (the cookies will likely take a bit longer to bake and are slightly more irregularly shaped and prone to spreading), so I’ve tweaked the proportions of the original amaretti cookie recipe ever so slightly to accommodate.
If you find your dough is too sticky and/or your cookies are spreading too much, feel free to add a bit more almond flour to help stiffen up the dough.
I do get asked often about reducing the sugar in the original recipe, and I opted to do so here for a slightly less sweet final product (I always feel like almond flavor amplifies sweetness, which is one reason amaretti cookies always taste extra sweet). Overall it has about 25g less sugar, but also 40g more almond flour, so overall it’s about 25% less sugar than the original.
That said, I don’t recommend reducing the sugar much more than that, as I found too little sugar produced a drier, less chewy cookie (they were good the day they were baked, but they dried out much quicker than the batch with slightly more sugar).
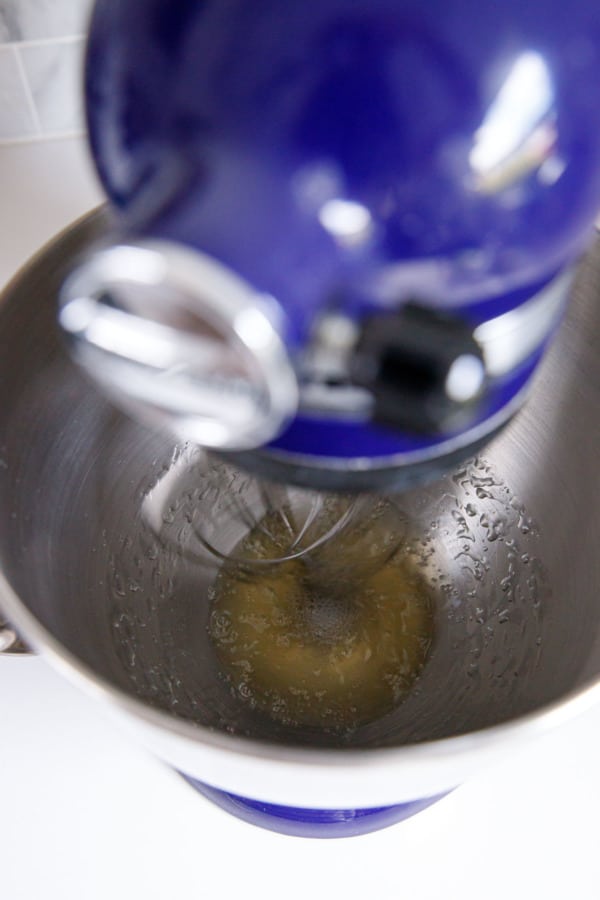
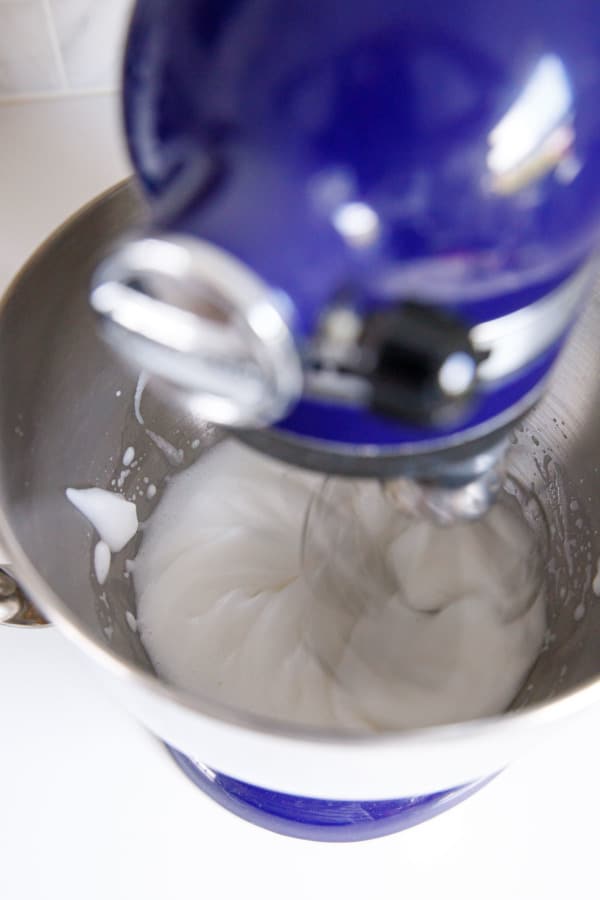
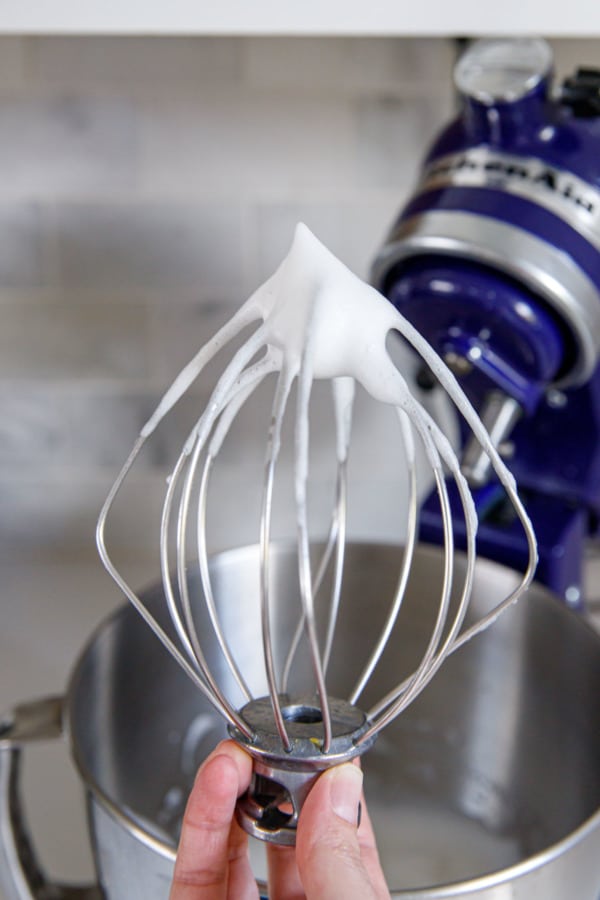
Whipping aquafaba is almost exactly like whipping egg whites, though I did find it took a little longer to get it going and to reach stiff peaks. You want to be sure you beat it thoroughly, when it reaches true stiff peaks you should be able to flip the bowl over and it’ll stay put; if it starts to slide out keep beating.
You’ll drain off around 1 cup of aquafaba from a single can of chickpeas. This recipe only needs 1/4 cup of it, so unless you plan to make a quadruple batch, I recommend portioning out the leftover and freezing it, either in ice cube trays or freezer-safe bags.
Like the originals, I recommend using a double cookie sheet (two identical, heavyweight cookie sheets stacked on on top of the other). This provides an extra layer of insulation on the bottom, allowing the cookies to bake longer without the bottoms getting too brown. The longer, slower baking allows the outsides of the cookies to get nice and chewy while the insides stay perfectly soft.
If you don’t have two identical cookie sheets, just keep an eye on your cookies as they’ll likely be done sooner and you don’t want the bottoms to burn. Cooking them like this just means the bottoms will be slightly crunchy while the centers will be much softer, more like raw marzipan.
These aquafaba amaretti cookies can be transformed into the same fun flavors as my original cookies, namely matcha, raspberry, chocolate and pistachio.
Flavor Variations:
Matcha: add 1 tablespoon (5g) matcha powder to the almond/sugar mixture.
Fruity: add a few tablespoons finely ground freeze dried fruit powder (about 1 ounce worth). Finely grind the freeze dried fruit in a clean coffee or spice grinder (add a spoonful or two of the sugar to help it grind smoothly). You can use dried raspberries, strawberries, blueberries or even mango!
Chocolate: add 3 tablespoons dark or Dutch-process cocoa powder.
Pistachio: replace 50-75% of the almond flour with pistachio flour by weight (pistachio flour is super expensive and you can achieve similar results by using part almond flour). You can also make a similar swap with hazelnut flour! Optionally, replace the almond extract with pistachio extract for a more intense pistachio flavor.
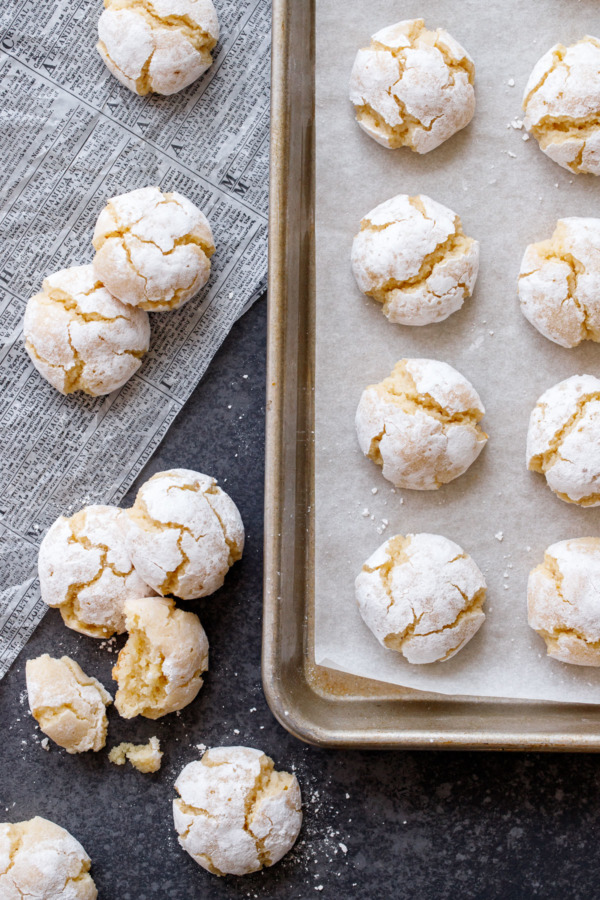
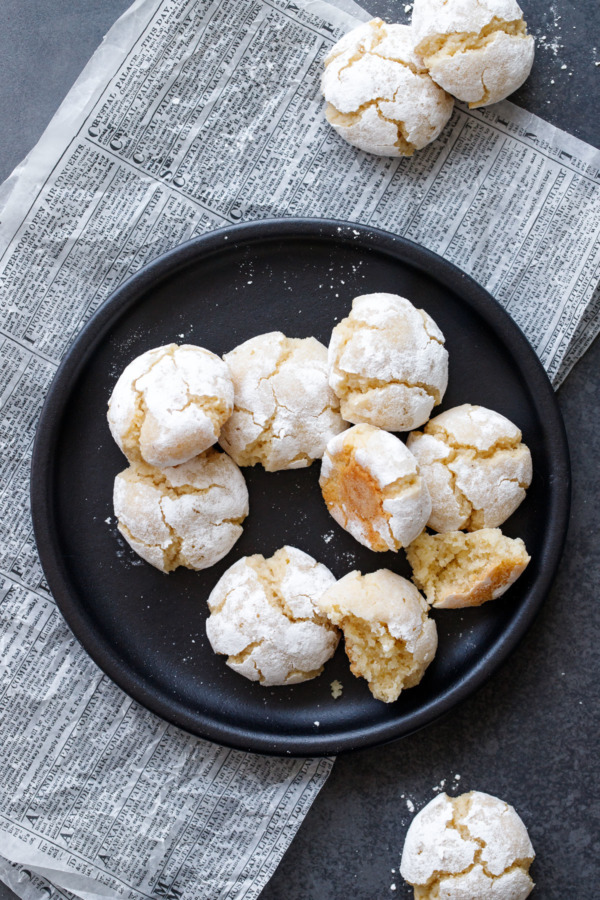
These cookies keep quite well in an airtight container for 2 or 3 days; beyond that they are still delicious, just not quite as soft.
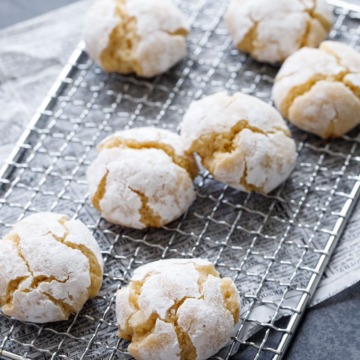
Vegan Amaretti Cookies
These soft and chewy almond cookies are completely vegan, made with whipped aquafaba (chickpea liquid) in place of the typical egg whites.
Ingredients:
- 2 1/2 cups (240g) almond flour or very finely ground almonds, sifted
- 3/4 cup (170g) granulated sugar*
- pinch salt
- 1/4 cup (60g) aquafaba*
- 1/4 teaspoon lemon juice
- 1/2 teaspoon almond extract
- confectioners’ sugar, as needed
Directions:
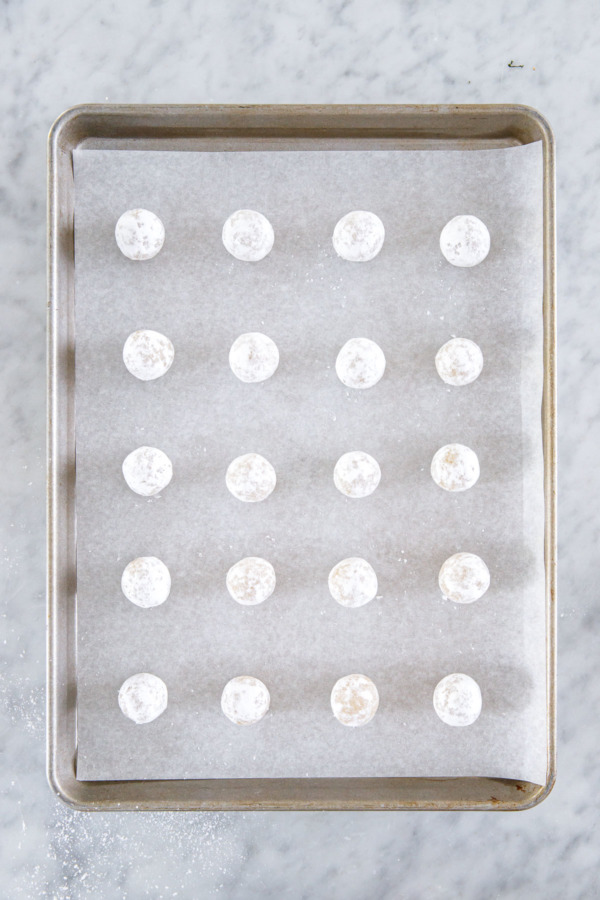
- Preheat oven to 300 degrees F. Stack two matching, heavyweight, light to medium colored cookie sheets one inside the other (stacking two cookie sheets together keeps the bottoms of the cookies from getting too brown). Line with parchment paper or a silicone baking mat.
- In a large bowl, whisk together almond flour, sugar and salt until evenly incorporated.
- In a mixing bowl or the bowl of a stand mixer fitted with the whisk attachment, whip aquafaba and lemon juice until they hold stiff peaks (it should stay in the bowl if you flip it upside down; if it starts to slide, keep beating it a bit longer).
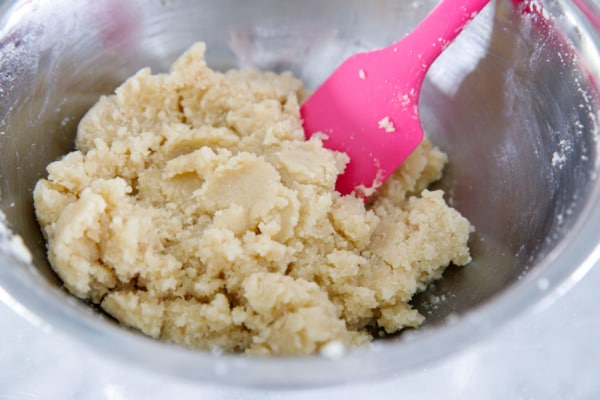
- Add aquafaba and almond extract to dry ingredients and stir until mixture forms a soft, sticky dough, kneading with your hands if necessary.
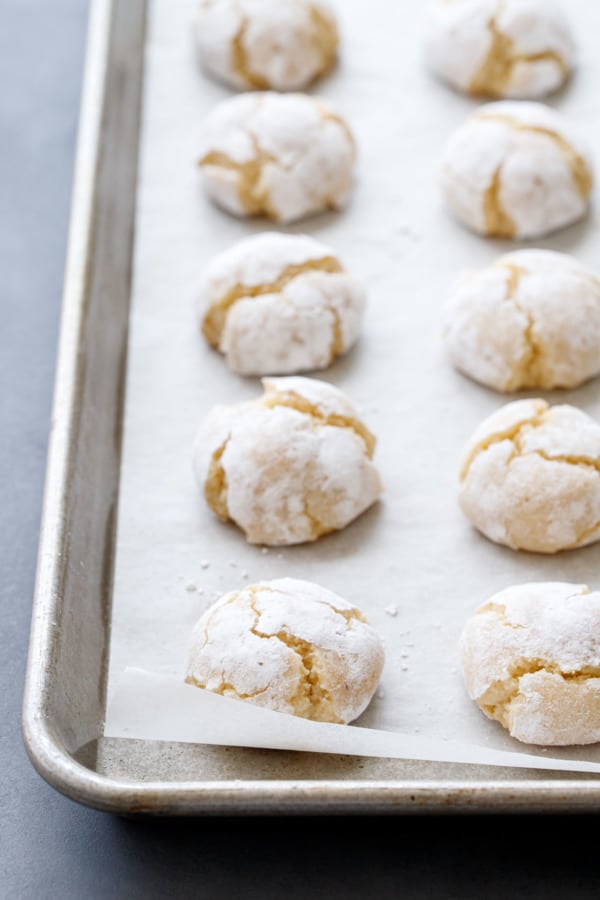
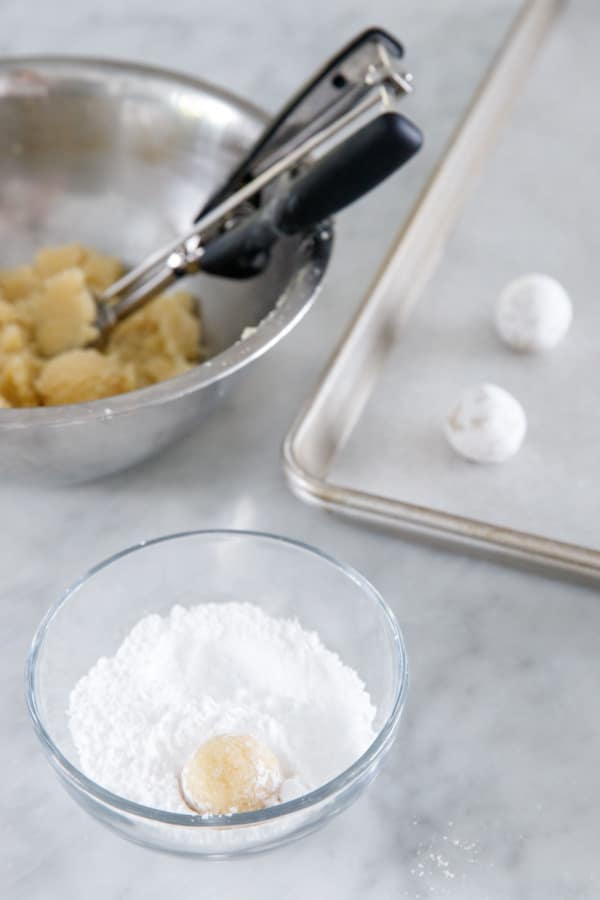
- Lightly dust your hands with powdered sugar. Use a small cookie scoop to portion dough into 1-inch balls. Roll into a smooth ball, then roll in powdered sugar. Arrange on parchment or silicon-lined baking sheets, leaving 1 inch of space between cookies.
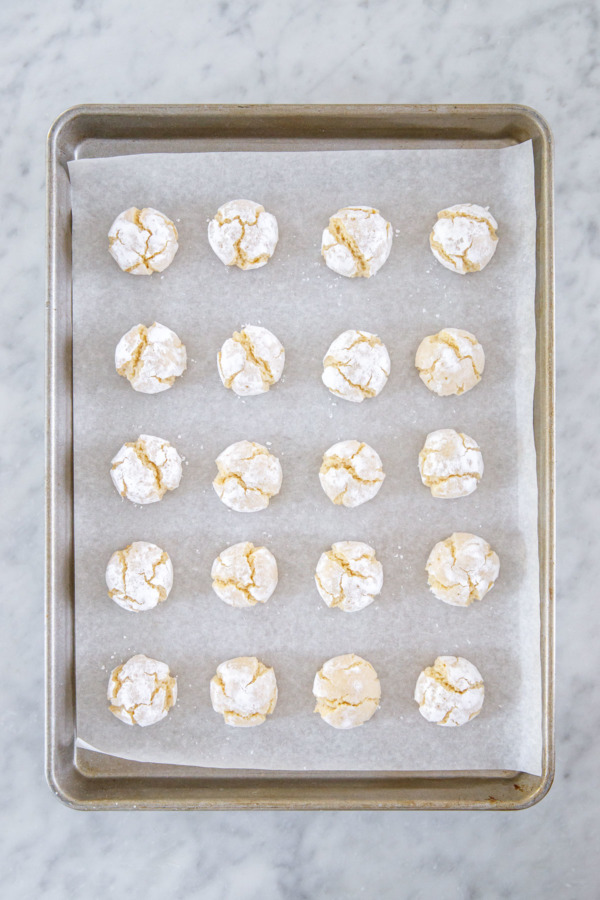
- Bake for 30 to 35 minutes until tops are cracked and bottoms are just starting to darken (if you are NOT using doubled cookie sheets your cookies will brown more quickly, so start checking after 25 minutes or so). Remove from oven; let cool a few minutes, then transfer to wire racks to cool completely.
- Cookies will keep at room temperature in an airtight bag or container for up to 5 days.
* If you are serving these to vegans, be sure to buy organic sugar or sugar that is specifically labeled as vegan. Most non-organic white sugar and powdered sugar is processed with bone char which makes it decidedly not vegan.
* Aquafaba is the liquid drained off from a can of chickpeas. Be sure you shake the can well before you drain it off to ensure the proteins are distributed evenly. I have not tested this recipe with chickpeas cooked from dried beans, just the liquid from canned chickpeas.
Did you make this recipe?
Let us know what you think!
Leave a Comment below or share a photo and tag me on Instagram with the hashtag #loveandoliveoil.