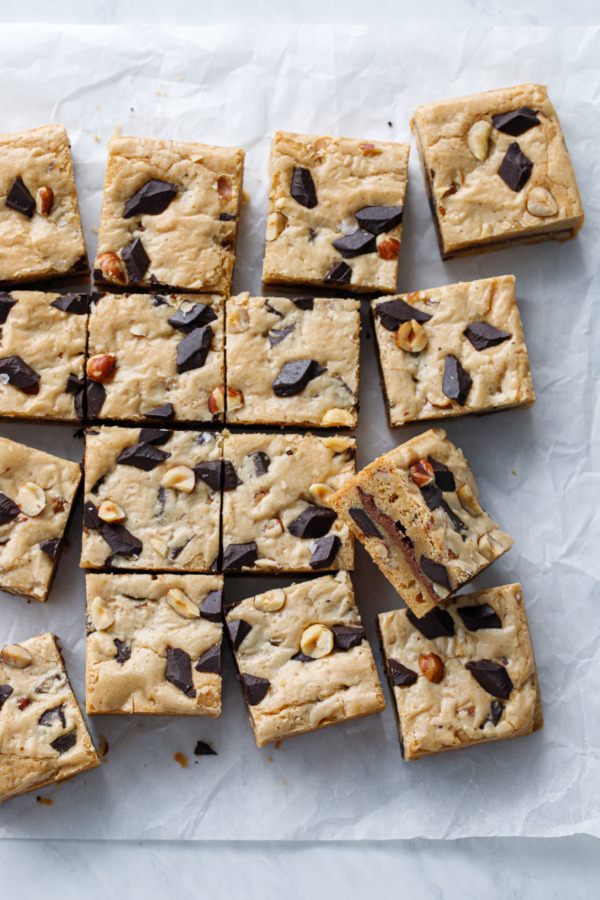
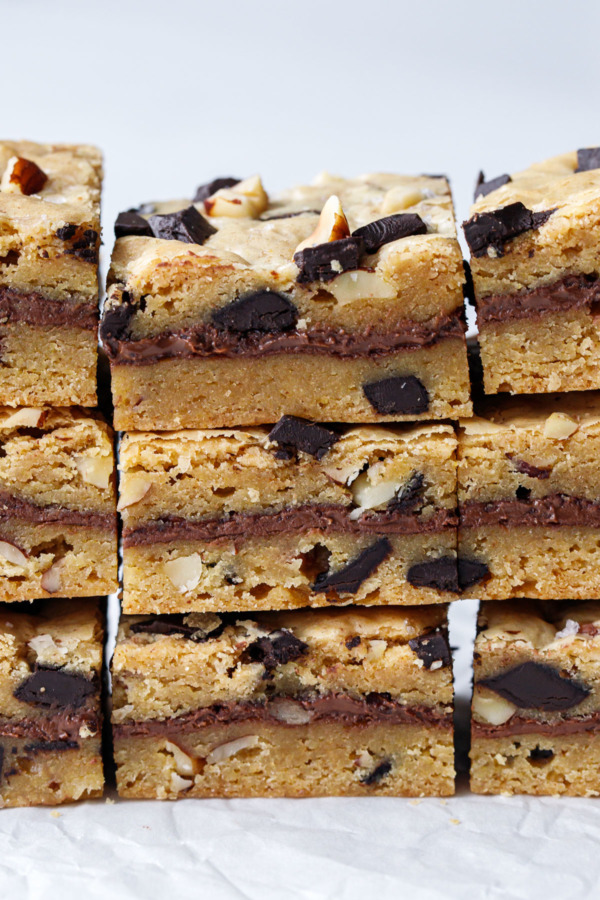
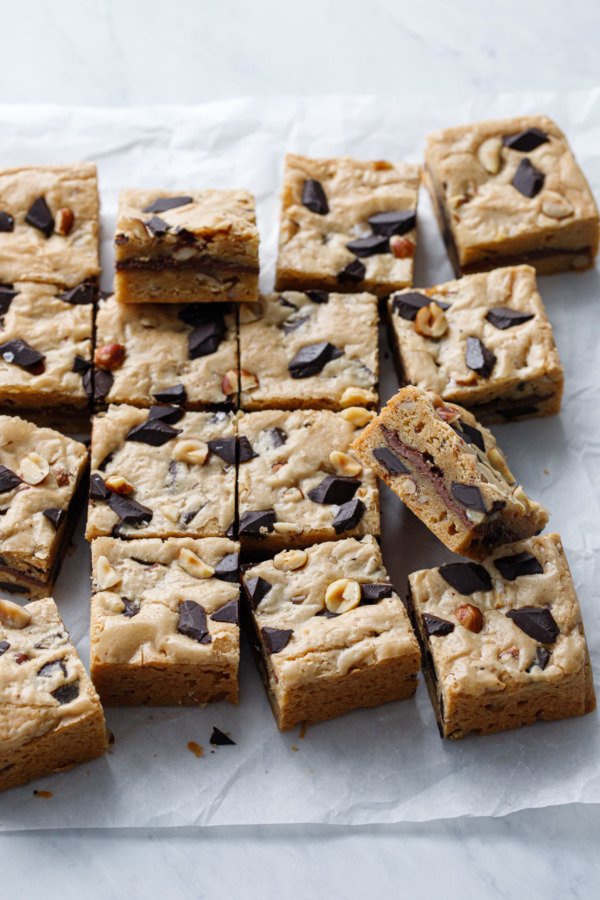
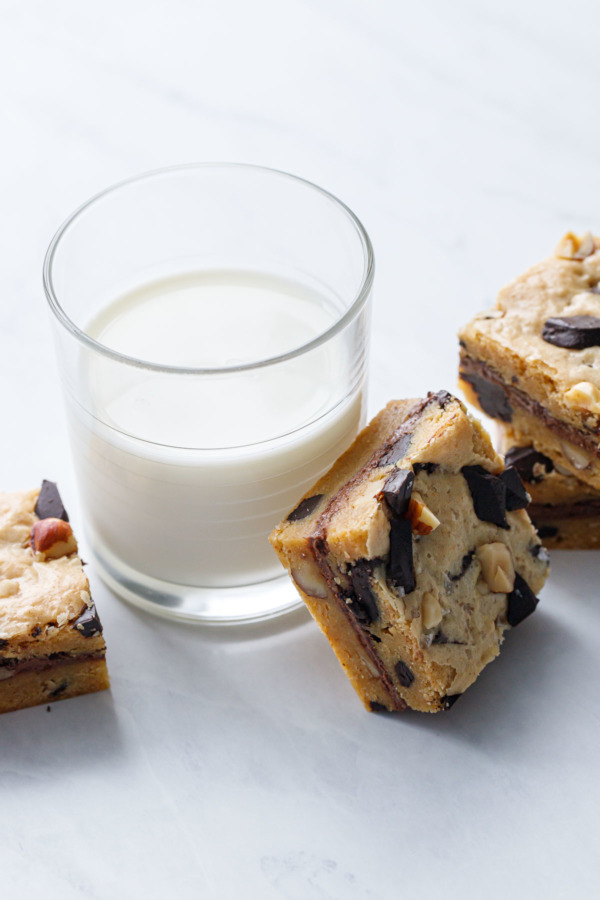
Talk about delightful—these soft and chewy brown butter chocolate chunk blondies have a layer of gooey nutella hidden inside.
One good thing stuffed inside another good thing: does it get any better? In this case you have a layer of molten hazelnut spread inside a chewy brown butter blondie, studded with chocolate chunks and crunchy hazelnuts.
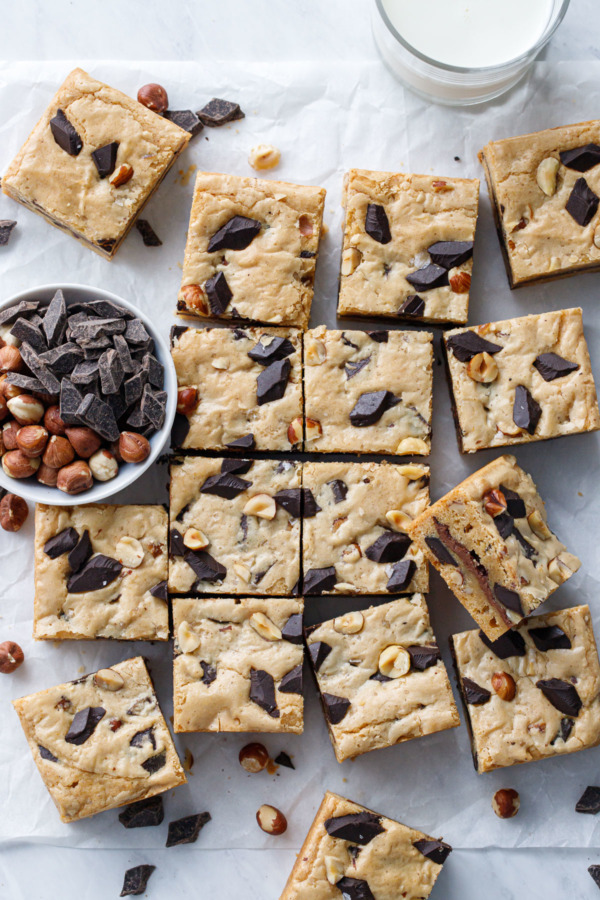
Blondies are tricky little buggers. They seem simple, but so often they come out greasy and underdone despite ample baking times; in fact this result is so common that most people think blondies are supposed to be dense, gooey and almost cookie dough-like in the middle.
Don’t get me wrong, I love me some cookie dough, but that’s not quite what I was going for here.
Most blondie recipes call for you to stir the sugar into melted butter, then whisk in the eggs followed by the dry ingredients. Basically a chocolate-less version of your typical brownie, like my favorite espresso brownie recipe.
Unfortunately, this method often leads to greasy blondies with dry, crispy edges that seem undercooked even after baking for far longer than the recipe states. Not ideal.
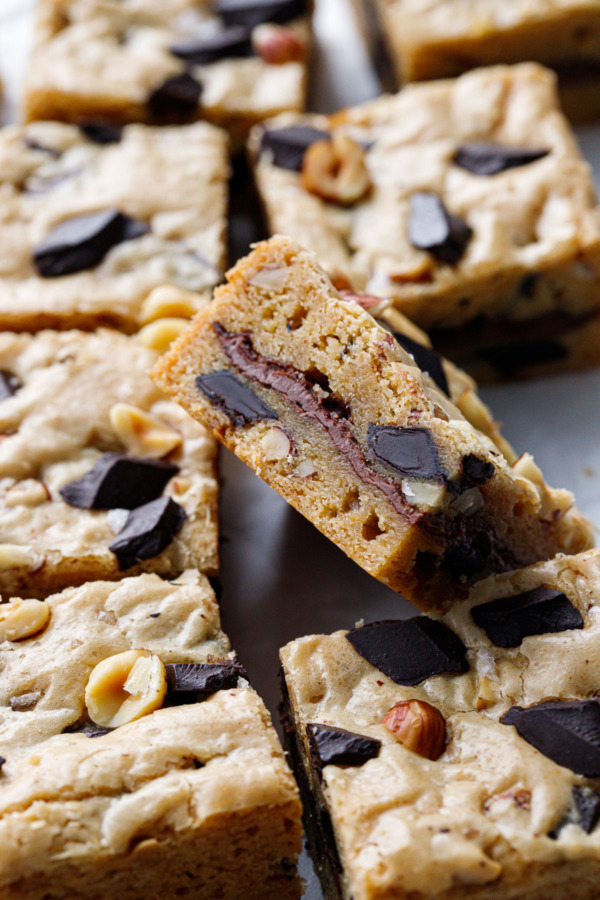
With a bit of testing and lot of research (aka intense googling that ultimately led me to Stella Parks’ thoughts on the subject), it turns out the difference between undercooked, greasy blondies and perfectly chewy, cookie-like blondies is… air.
So instead of mixing the sugar into the butter and then adding the eggs, instead we beat the sugar and the eggs together first, until they are light in color and thick but not stiff. Then add the melted butter (browned butter, in this case) followed by the dry ingredients and the mix ins.
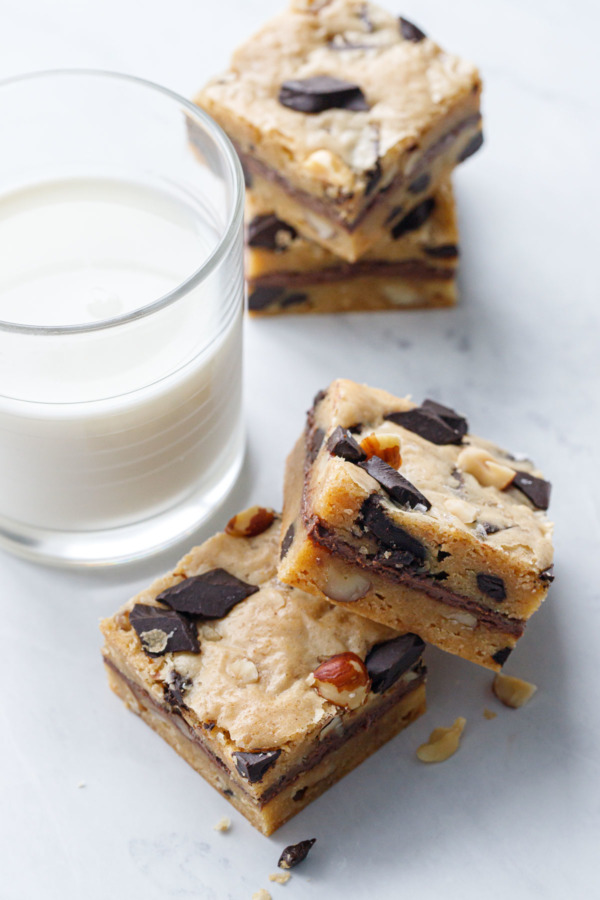
This simple act of beating the heck out of the eggs and sugar makes a world of difference, resulting in a thick and chewy blondie with a beautifully shiny, delicately crackly top. It’s a pretty brilliant trick, actually—the actual ingredients and proportions are nearly identical to my first batch, but simply modifying the process produces wildly different results.
I imagine that you could beat the egg slightly more or less depending on how cookie dough-like you want your blondies. I beat mine for about 2-3 minutes; do more like 1-2 minutes if you like them a bit doughier in the middle.
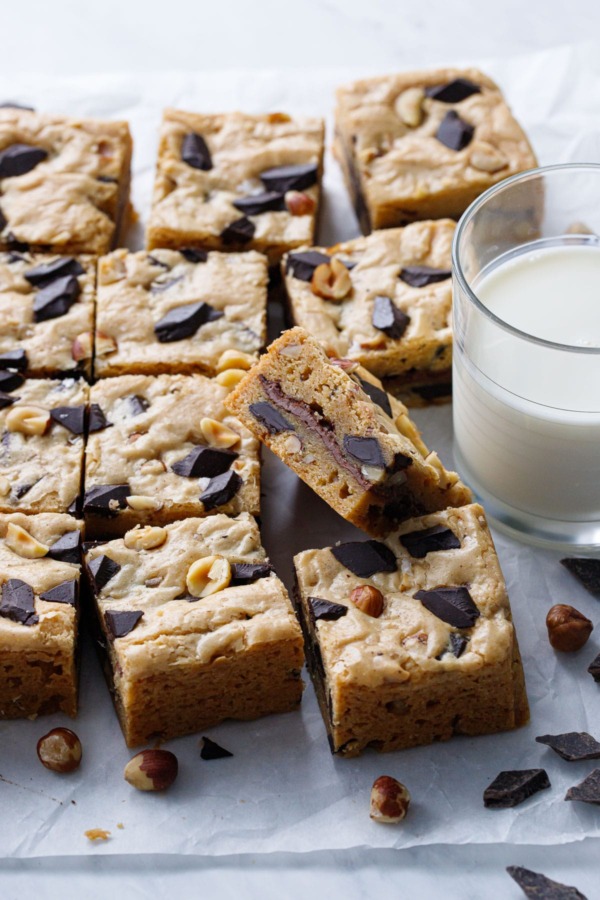
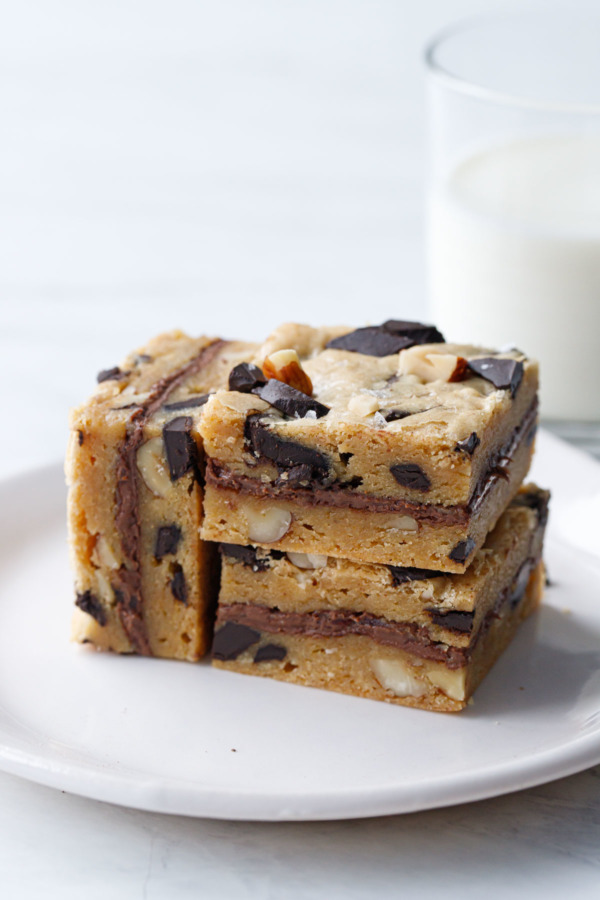
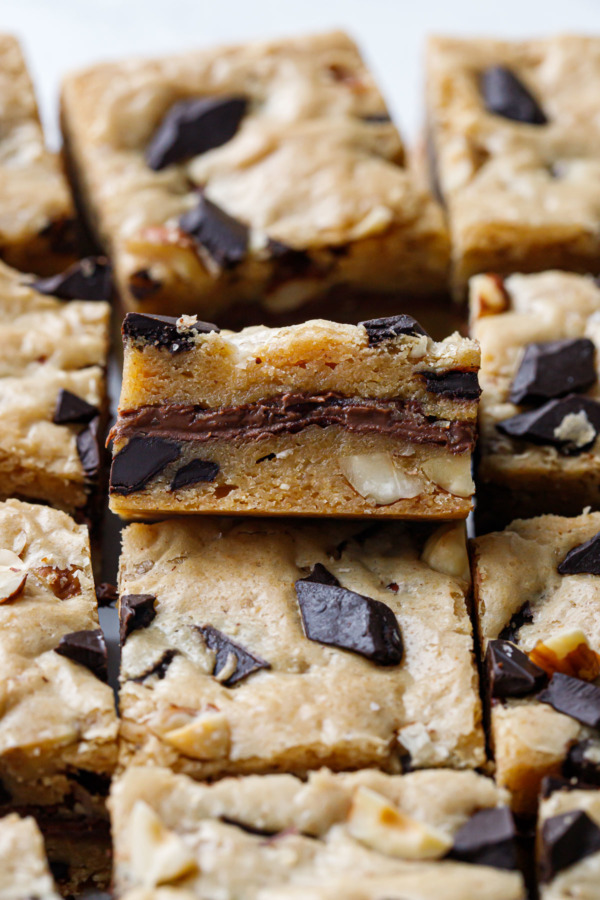
Blondie science aside, let’s talk about the real star of the show here: that layer of gooey Nutella magically sandwiched in the middle.
The secret to getting that perfect layer of nutella in the middle is freezing it first.
Otherwise, if you tried to spread room temperature nutella on top of the thick blondie batter, and then another layer of the thick better on top of the slippery nutella, you’d end up with more of a ‘swirl’ of nutella rather than a crisp, defined layer.
Freezing the nutella first makes it easy to spread an even layer of dough on top without any undesired co-mingling of the layers.
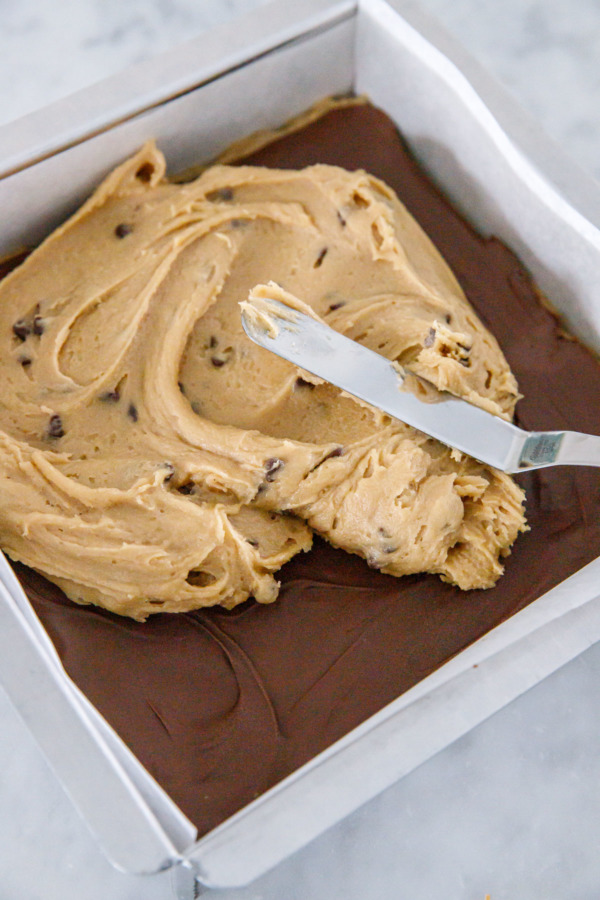
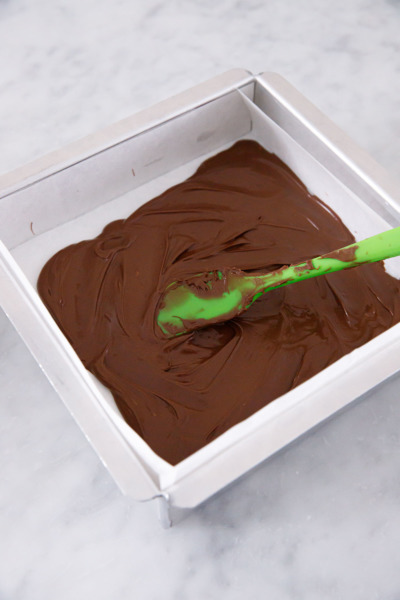
I achieved this by first lining my baking pan with parchment, then spreading a thin layer of nutella into the bottom. Pop it into the freezer for 30 minutes and voila. Frozen sheet of nutella.
I have two identical baking pans, but if you only have one baking pan, freeze your nutella for 10 to 15 minutes, then lift it out of the pan and place it in a flat spot in the freezer until you’re ready to use it. Line the same pan with a fresh piece of parchment (and if you’re curious, here are my favorite techniques for lining a square pan with parchment paper).
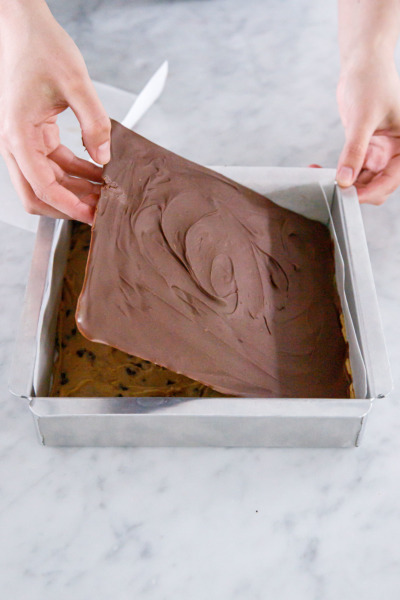
Spread half the blondie dough into the pan using an offset spatula, then place the frozen sheet of nutella on top. Spread the remaining batter on top, working pretty quickly before the nutella has a chance to melt.
Baking Tip:Want to be sure you have exactly half? Weigh your empty mixing bowl before you start, and again with your final dough. Subtract the original weight of the empty bowl (the ‘tare’ weight) to get the weight of the batter itself. From there you can measure out exactly half the dough for each layer.
Finally, sprinkle a few chocolate chunks and hazelnut pieces on top for a prettier final appearance (plus a sprinkle of flake salt for good measure), and pop the whole thing in the oven.
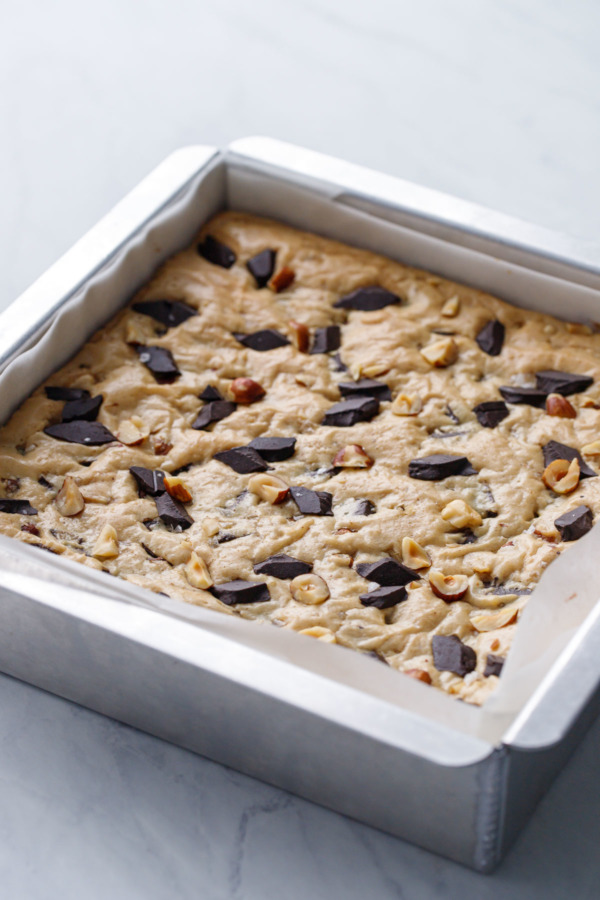
This freezer-stuffing trick would work with any sweet spread, and you could certainly swap in peanut butter, chocolate almond spread, cookie butter, chocolate ganache or dulce de leche in this recipe for equally delicious results.
I’ve actually been hoarding a jar of a chocolate halva spread that I think would be simply divine in this recipe.
Conversely, this blondie recipe is stellar even without the stuffing, although admittedly not nearly as fun. But you can certainly use it as a basic blondie recipe for whatever delicious mix ins you’d like to add!
Baking blondies does require a bit of estimation, as blondies can’t really be tested for doneness with toothpicks like cakes or other baked goods can.
Also, the bake time can vary depending on your particular oven, which baking pan you use (I recommend using a light colored metal pan, NOT glass here), as well as your personal preference for doneness.
So the first time you make these, take them out around 35 to 40 minutes as instructed in the recipe, and let them fully cool before slicing (not an easy task, I know, but I believe in you!)
Once you slice the cooled blondies you’ll be able to tell pretty quickly if they’re over or underdone (you should probably eat a corner piece and a middle piece just to be sure you’ve got the full picture). Then make a note as to whether you’d prefer them baked more or less the next time. I find even a minute or two can make a pretty big difference, so just keep tweaking the bake time with every batch. Pretty soon you’ll find the sweet spot (literally) that’s just right for you.
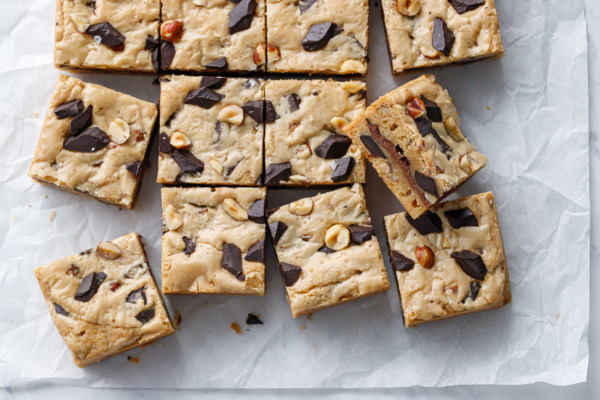
Nutella-Stuffed Brown Butter Blondies
Ingredients:
- 1/2 cup (175g) Nutella
- 3/4 cup (1 1/2 sticks/170g) unsalted butter, cut into chunks
- 1 1/4 cup (250g) packed light brown sugar
- 2 large eggs
- 1 large egg yolk
- 2 teaspoons vanilla extract
- 1 teaspoon baking powder
- 1/2 teaspoon kosher salt
- 2 cups (250g) all-purpose flour
- 1/2 cup (75g) semisweet chocolate chunks or chips
- 1/2 cup (65g) coarsely chopped hazelnuts
- maldon flake sea salt, for topping
Directions:
- Line an 8-by-8-inch square baking pan (I recommend a light colored metal pan) with parchment paper. Spread Nutella in a thin layer in the bottom of the pan; freeze for at least 20 minutes or until solid.
- To brown your butter, melt butter in a sauce pan set over medium heat. The butter will foams up and starts to sputter (this is the water being cooked off). Swirl the pan occasionally to keep the butter cooking evenly. Eventually the foam will subside and the milk solids will sink to the bottom of the pan. Continue to cook, swirling occasionally, until the solids on the bottom turn a light golden brown and the butter has a fragrant, nutty aroma. Keep a close eye on it as it will go from perfectly brown to burnt rather quickly (in which case I’d recommend dumping it and starting over). Remove from heat and let cool to lukewarm.
- Preheat oven to 350 degrees F. Line a second 8-by-8-inch pan with parchment paper (or, if you only have one pan, at this point your Nutella should be solid enough to take it out of the pan; leave the parchment with the Nutella in the freezer, and line the pan with a fresh piece of parchment and set aside).
- In a large bowl or the bowl of a stand mixer fitted with the whisk attachment, beat eggs, egg yolk, sugar, vanilla, salt and baking powder on high speed for 2 to 3 minutes or until light in color and thick but not stiff.
- Reduce mixer to low and drizzle in lukewarm brown butter until fully incorporated.
- Sprinkle over flower and mix on low speed until just incorporated, scraping down the sides of the bowl as needed. Fold in chocolate chips and hazelnuts (reserve a spoonful of each for topping).
- Spread half of the dough in the bottom of the prepared baking pan. Remove frozen Nutella from the freezer and gently lay it on top of the dough in the pan. Spread remaining dough in an even layer on top. Sprinkle with flake sea salt as well as reserved chocolate chips and hazelnut pieces if desired.
- Bake for 35 to 40 minutes or until top is shiny and set and starting to brown around the edges. The ‘toothpick test’ doesn’t really work with blondies, so you’ll have to make your best educated guess as to when they are done (this can vary depending on your particular oven, baking pan, alignment of the stars, etc). Each time you make them you can adjust the bake time until they are just right for your particular situation and preferences.
- Place pan on a wire cooling rack and let cool to room temperature.
- Lift out the entire block of blondies using the parchment paper, then use a large chef knife to cut into 16 even squares (wipe the blade between each cut). Blondies will keep in an airtight container at room temperature for up to 3 days.
Did you make this recipe?
Let us know what you think!
Leave a Comment below or share a photo and tag me on Instagram with the hashtag #loveandoliveoil.
