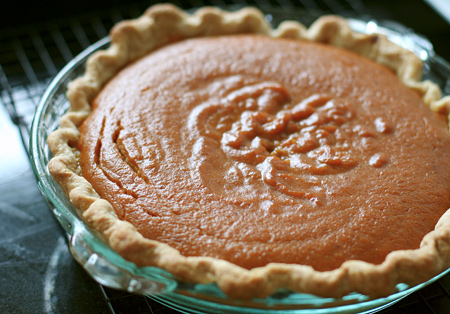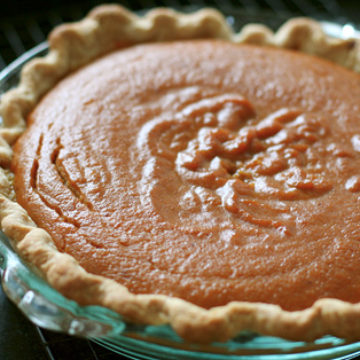
Ok, so the final product might look fine. But you have no idea what it took to get to this point. A series of disasters the day before thanksgiving forced me to wake up on Thursday morning and bake a whole new pie early in the morning, before we had to put the turkey in the oven.
Take 1: Pre-made pie crust. Yes, I admit, I bought a premade pie crust. I battle with pie crusts, and figured might as well take it easy on myself this year. Took the roll out of the freezer and let it thaw, then unrolled it and draped it in my pie pan. It was only then (and not at the grocery store where I should have noticed), that this pie crust was made for a 9″ pie pan. My pie pans are 9.5″. Failure #1. Any attempt at stretching the overly-sticky crust only caused it to tear. Into the trash it went.
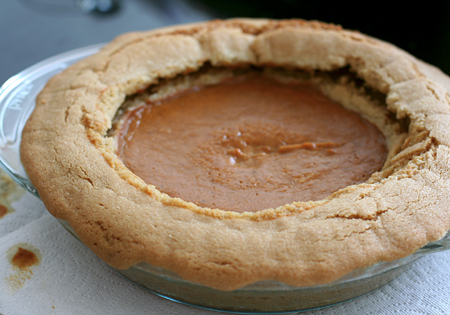
Take 2: Cookie pie crust. Lucky for me, I had seen a recipe earlier in the day for a chocolate chip cookie pie crust. I thought, it’s perfect! It sounds delicious, and it doesn’t require rolling. Sounds like my dream pie crust.
Not so fast.

Oh the horror!
We all watched in horror as the pie baked, and the crust kept getting bigger and bigger and the pie kept getting smaller and smaller. Not only that but the little center of pie filling that was left was completely soupy, it didn’t even begin to set even after well over an hour in the oven. So we gave up. And at that point it was 10:30 at night and I wasn’t about to start over again.
(Just a note that I WILL be trying this crust again. The concept of it is too delicious not to. But maybe I’ll skip the baking soda. That just *might* have had something to do with the mutant crust that came out of the oven…)
Onward!
Take 3: Woke up the next morning, and told myself to keep it simple. Used a basic pie crust recipe, and a soy version of the pie filling on the back of the Libby’s pumpkin can. It doesn’t get any more simple than that.

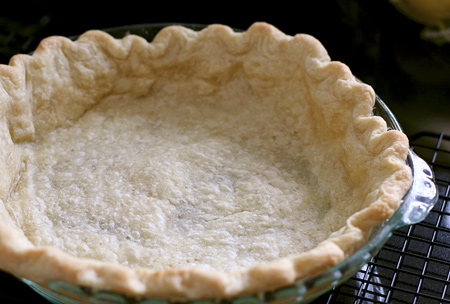
Aside from some slight shrinkage when parbaked, this just might be the prettiest pie crust I’ve ever made. It did get a little soggy on the bottom underneath the filling, but overall a success.
As for the soy version, I do feel that substituting thickened soy milk for evaporated milk or cream in a pie recipe results in a slightly softer pie than you may be used to. It’s still delicious and doesn’t affect the flavor at all, but something about real dairy milk helps the pie set up. Which could have been part of the problem with my first version, who knows. But it works in a pinch.
I’m going to post the mish-mashed recipe I ended up using here, mainly for my own reference when I try to improve it next year. I’ve decided I need some more practice, and will probably try to make at least a handful of pumpkin pies and pie crusts throughout the year (which I’m sure Taylor will love – he’s the one always trying to sneak a bakery pie into the cart at kroger).
Pumpkin Pie
Makes 1 9.5 inch pie. Recipe adapted from Fine Cooking and LIBBY’S Famous Pumpkin Pie.

Ingredients:
Crust:
1/2 teaspoon salt
1-1/2 cups (6-3/4 oz.) unbleached all-purpose flour
10 tablespoons (5 oz.) cold unsalted butter, cut into 1-inch pieces
Filling:
1/4 cup granulated sugar
1/2 cup brown sugar, packed
1 teaspoon ground cinnamon
1/2 teaspoon salt
1/2 teaspoon ground ginger
1/4 teaspoon ground cloves
1/4 teaspoon ground nutmeg
2 large eggs
1 can pure pumpkin (not pumpkin pie filling)
1 1/4 cup thickened soymilk (water mixed with soymilk powder until it reaches the consistency of, well, thick soymilk?)
Whipped Cream (optional):
1 cup heavy whipping cream
2 tablespoons packed light brown sugar
1 teaspoon ground ginger
1 teaspoon brandy
Directions:
Make the crust: In a small bowl, stir the salt into 1/3 cup very cold water until dissolved. Put the flour in a food processor and scatter the butter on top. Pulse until the mixture forms large crumbs and some of the butter is in pieces the size of peas, about 8 pulses. Add the salt water and pulse until the dough begins to come together in large clumps, about 7 pulses.you’ll still see some butter pieces. Shape the dough into a 1-inch-thick disk, wrap in plastic, and chill for at least 1 hour or up to overnight.
On a lightly floured surface, roll the dough into a circle 16 inches in diameter and 1/8 inch thick. Transfer to a 9-inch ceramic, metal, or glass pie plate, easing the dough into the bottom and sides and then gently pressing into place. For a traditional crimped edge, trim the overhanging dough to 1/2 inch from the edge of the plate. Fold the overhang under and crimp decoratively. Wrap and refrigerate for at least 30 minutes or up to overnight, or freeze for up to 2 weeks.
Blind-bake the crust: Position a rack in the center of the oven and heat the oven to 400°F. Line the chilled pie shell with parchment and fill it with dried beans or pie weights. Bake until the sides have just set and look dry, 16 to 20 minutes (lift the parchment to check). Remove the weights and parchment and bake until the edges are light golden and the bottom is pale and completely dry, about 5 minutes. If the dough starts to bubble while baking, gently push the bubbles down with the back of a spoon. Let the crust cool completely on a wire rack before filling.
Preheat the oven to 425°F.
Make the filling: Combine sugar, cinnamon, salt, ginger and cloves in small bowl. Beat eggs in large bowl. Stir in pumpkin and sugar-spice mixture. Gradually stir in soymilk. Pour into pie shell. Bake at 425°F for 15 minutes. Reduce temperature to 350°F; bake for and additional 40 to 50 minutes or until knife inserted near center comes out clean. Cool on wire rack for 2 hours. Serve immediately or refrigerate.
Make the cream just before serving: Whip the cream with an electric mixer on medium-high speed until it forms very soft peaks, about 2 minutes. Add the sugar, ginger, and brandy and continue whipping until it forms medium-firm peaks, about 30 seconds longer. Dollop in the center of the pie, leaving a band of filling visible around the edge of the pie, or dollop on individual servings.
Did you make this recipe?
Let us know what you think!
Leave a Comment below or share a photo and tag me on Instagram with the hashtag #loveandoliveoil.