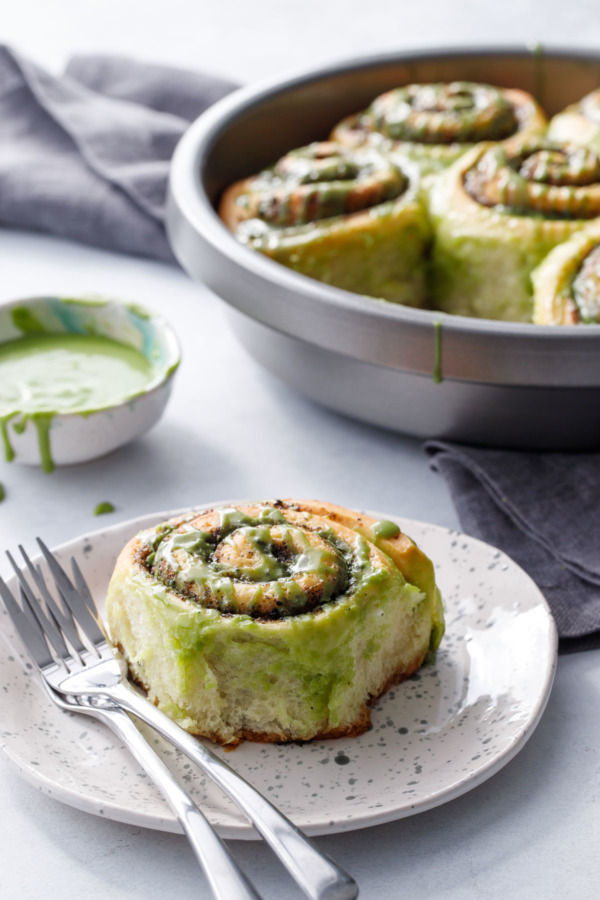
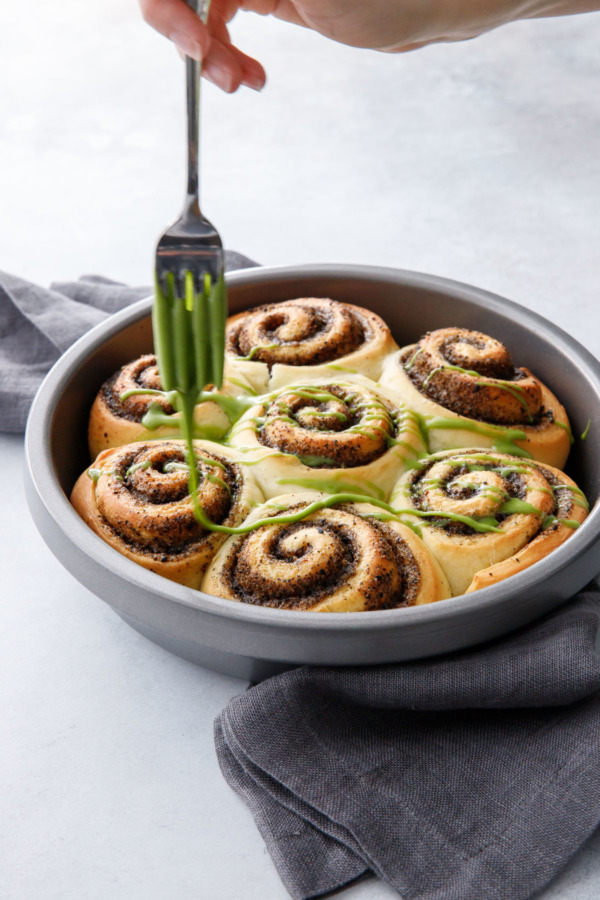
Soft and fluffy cinnamon rolls with a surprising flavor twist: toasted black sesame filling and a sweet matcha glaze.
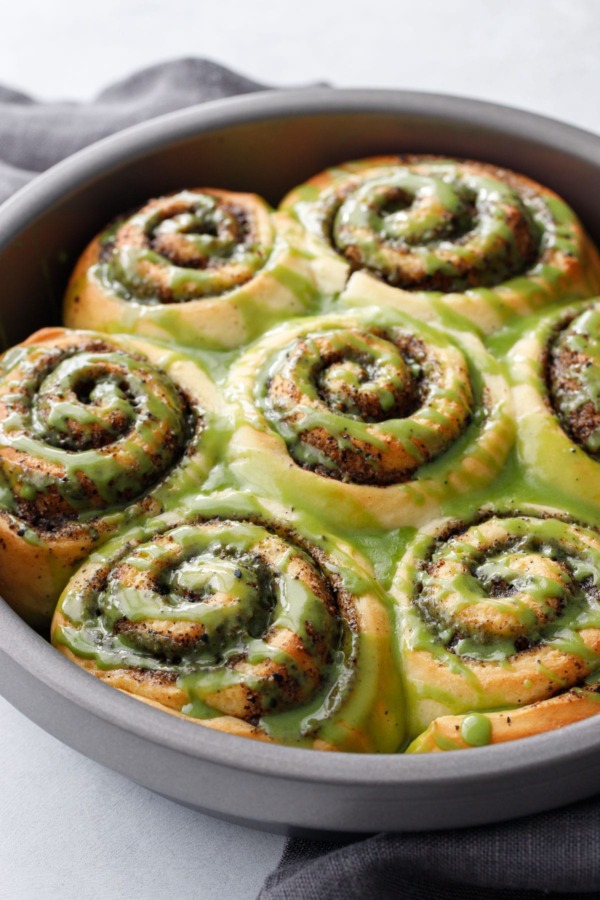
Homemade cinnamon rolls are a thing of beauty, and this new-to-me method is by far my favorite. The filling features toasted black sesame seeds ground up with brown sugar and cinnamon, and the finished rolls are topped with a stunning green matcha glaze.
Oh boy, are you in for a real treat.
Everyone loves a warm, gooey cinnamon roll, but these take the classic breakfast treat to an entirely new level.
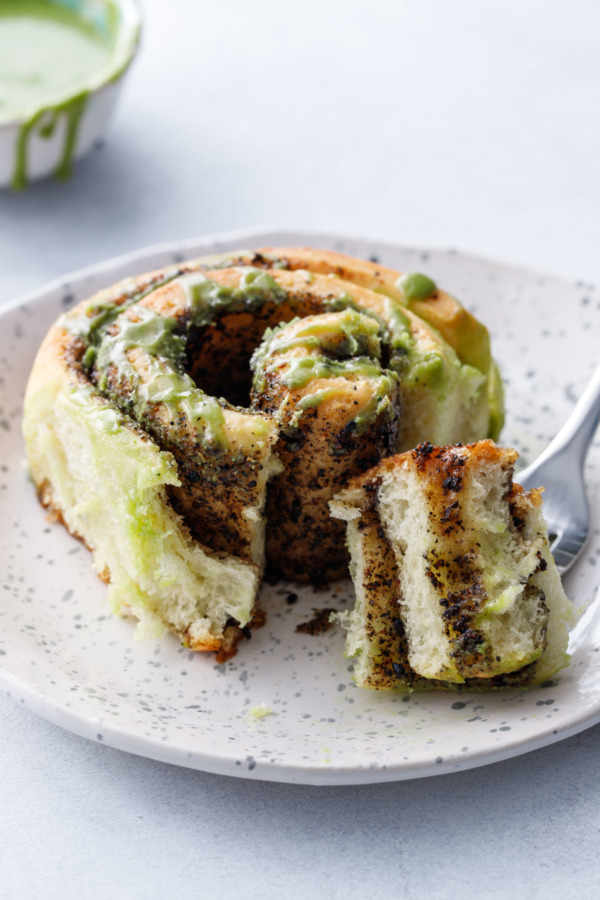
The foundation is the same as your basic cinnamon roll: a soft and fluffy swirl of buttery, doughy goodness surrounding a gooey cinnamon filling.
But that is where the similarities end.
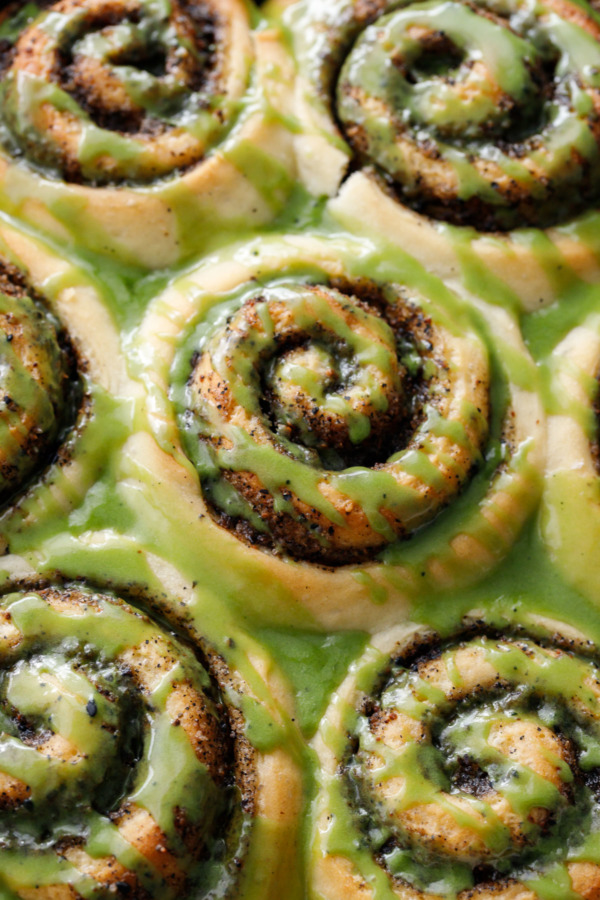
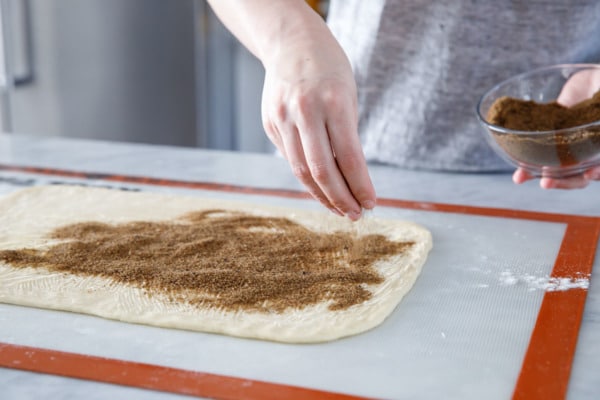
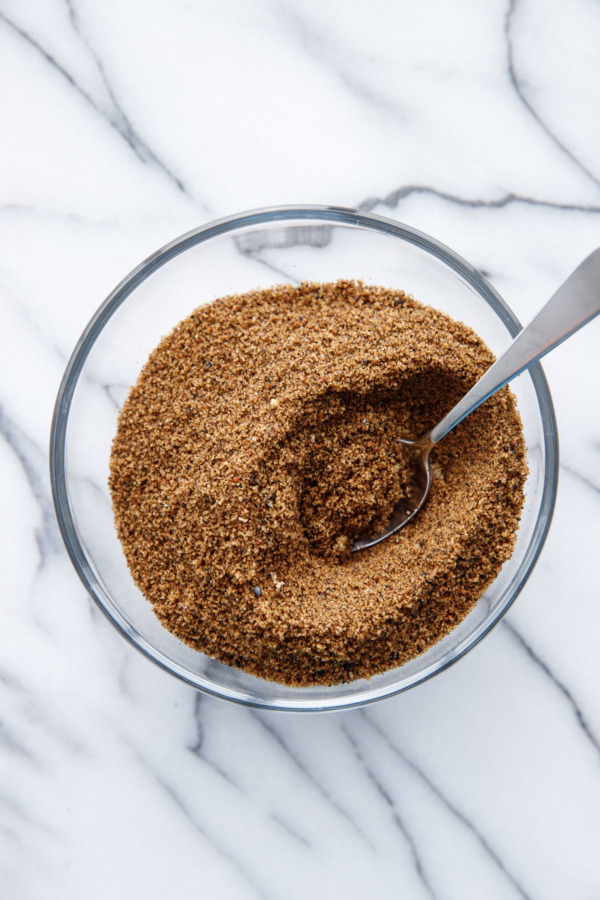
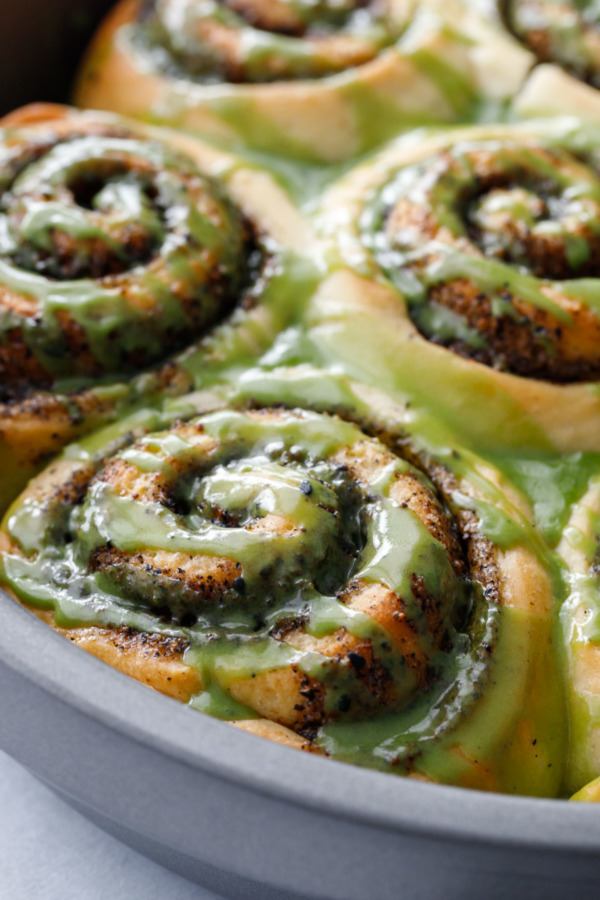
Instead of just cinnamon and sugar in the filling, I’ve added black sesame seeds that have been lightly toasted and ground up to a fine powder. This toasty and surprisingly savory mixture gets sprinkled in a thick layer over the dough, then rolled up and sliced into individual pieces.
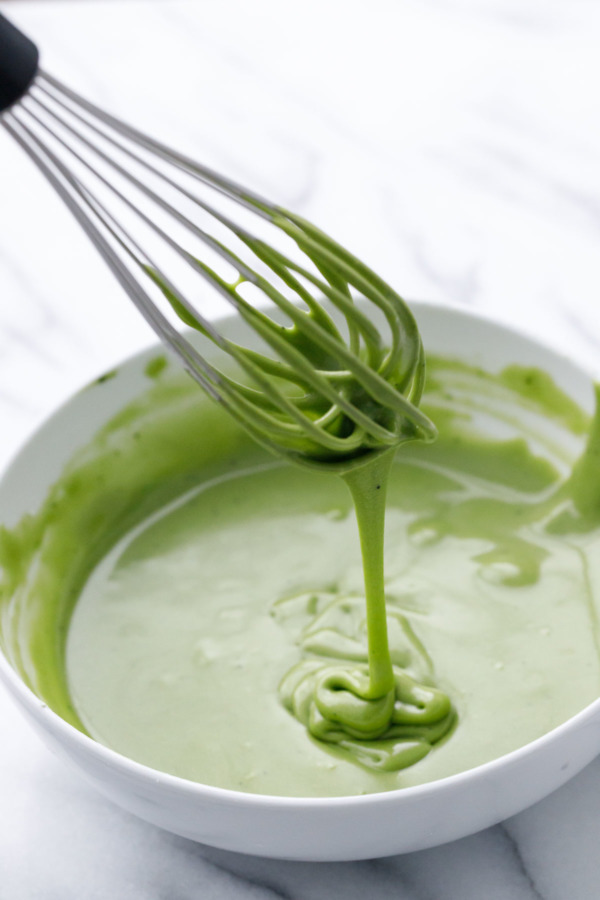
But the icing on the cake, er, cinnamon roll here is the matcha glaze. Perfectly balanced and stunningly green (ok, so maybe it looks a little like slime but I love it), the subtle sweetness complements the more savory nature of the black sesame filling.
The first time I made these (for a Christmas morning brunch with neighbors, no pressure lol) I may have toasted my black sesame seeds a bit too much (they’re black. It’s hard to tell when they are truly toasted). While they weren’t burnt, they had a robust and savory flavor reminiscent of dark roast coffee. Seriously. No idea how black sesame tastes like coffee, but it was undeniable. While it was unique, for sure, it was a bit too intense for me.
Luckily, simply toasting the seeds a bit lighter and increasing the proportion of sugar in the filling just a bit solved the problem. The black sesame still has a lovely toasty flavor to it, but it actually tastes like sesame now, with just a hint of nutty espresso.
The second time I made these, with a few small tweaks to the filling, I was sure they would be a slam dunk. So sure that I spent a good chunk of the morning taking process pictures and shooting the baked rolls in the pan. But only when I finally tried to take a roll out of the pan did I realize I had a problem. By that time the rolls had cooled, and the filling, which had oozed out of the rolls like lava in the oven, had since hardened to the bottom of the pan, cementing my rolls in place.
Oddly, the single roll I baked in a mini pie tin as a sample (I cut 8 rolls, but the arrangement in the pan worked best with 7) had no houdini filling whatsoever.
I racked my brain trying to figure out why that single roll would bake so perfectly while the rolls in the cake pan lost pretty much all their filling.
I even posted on Instagram hoping some of y’all would have answers, and sure enough, with a bit of back and forth discussion I realized that the single roll was the end piece, meaning it had a lot of excess dough that must have folded under itself, essentially ‘sealing’ in the filling. Lightbulb moment. I even pried out the entire block of rolls in the pan and flipped them over; sure enough, the other end piece was clearly discernible from the others because of its clean bottom.
So the third (and hopefully last) time I made these, I didn’t change anything about the recipe itself, but after slicing the individual rolls, I pinched and stretched the bottom of each roll to hopefully seal in the filling a bit better.
And you know what? It worked! I still lost a little bit of filling, but not enough to cement the rolls to the pan. Instead, most of the delicious black sesame filling stayed inside the roll where it belongs. Success!
The dough recipe itself comes from King Arthur Flour by way of my friend Tasbih at Cleobuttera. The ‘tangzhong’ method was new to me, but I’m totally sold on the results.
Basically, tangzhong is an Asian yeast bread technique that involves making a cooked flour paste. This extra step pre-gelatinizes the starches in the flour, meaning it can absorb and hold more water. And more water means an easier-to-knead dough, a higher rise, and a softer, more tender final product that stays fresh longer. I’m more than willing to spend an extra 10 minutes if it means all that!
Definitely check out Tasbih’s cinnamon roll post, which is chock-fill of useful tips and information to ensure your rolls turn out perfectly soft and delicious (she’s also got step by step process videos in her Instagram highlights if you’re more of a see-it-then-do-it type baker).
Here’s how to make them…
The tangzhong, or flour paste, is the key to soft and fluffy rolls. It’s basically just water, milk and flour, cooked until it forms a thick, pudding-like paste. Then, to that same pan you add the melted butter and more milk, whisking until smooth and the paste has cooled to lukewarm. Then whisk in the eggs. This whole slurry then gets added to the flour and yeast in the mixing bowl, where it is then kneaded into a smooth dough.
The recipe does call for a 20 minute rest after the dough initially comes together and before adding the salt and sugar, the idea being that the rest allows the flour to absorb more of the liquid. Is it essential? Certainly not; I accidentally added the sugar and salt altogether with the other dry ingredients the first time I made this (why it’s important to read a recipe through, more than once even, before you begin!) and skipped the rest period altogether. I didn’t do a side by side comparison, but the rolls were still plenty soft and fluffy.
The final kneaded dough should be very smooth and slightly sticky (resist the urge to add more flour than necessary.) Then let it rise for an hour or two, or cover tightly and refrigerate overnight (you’ll be surprised at how much it rises in the fridge!)
Roll out your dough (this is where the overnight chill comes in handy as cold dough is much easier to shape and handle than warm dough) into a rectangle. The exact size depends on how many rolls you want, and if you like your rolls with thinner sides/more swirls, or thicker swirls, or larger rolls. In this case, I rolled my dough to a 10-by-15-inch rectangle, which translated nicely into 8 evenly sized rolls. Tasbih (who was working with twice as much dough) rolled it into a 16-by-18-inch rectangle and sliced into 12 jumbo rolls. It’s totally up to you.
As you roll, try to keep the dough even in thickness, with nice square corners. I find that shaping the ball of dough into a rectangle before you start rolling helps immensely.
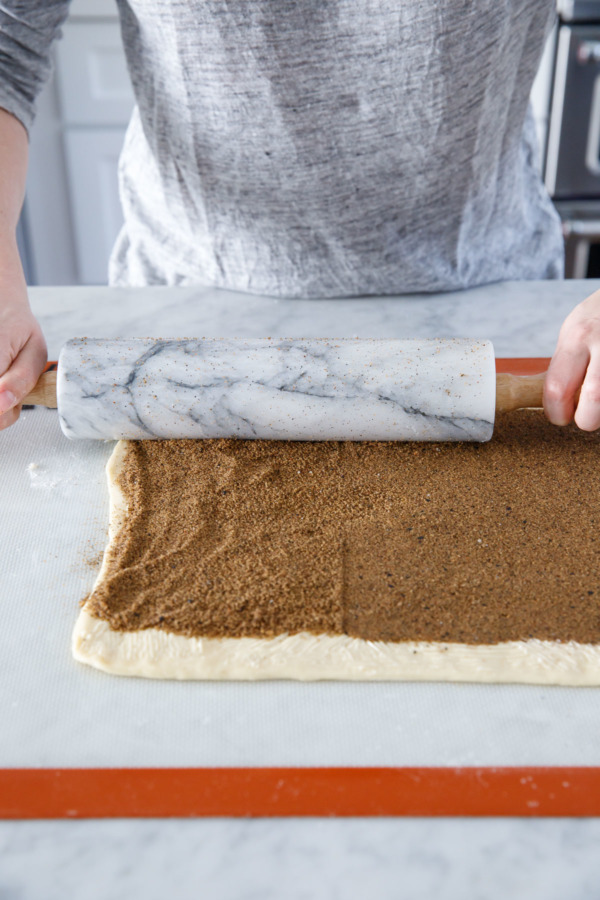
Since the filling is loose sugar and not a paste, I find it helpful to compress it into the dough using a rolling pin. Just gently roll the pin once over the entire surface. You might still lose a little bit out the edges as you roll it up, but it’s better than otherwise for sure.
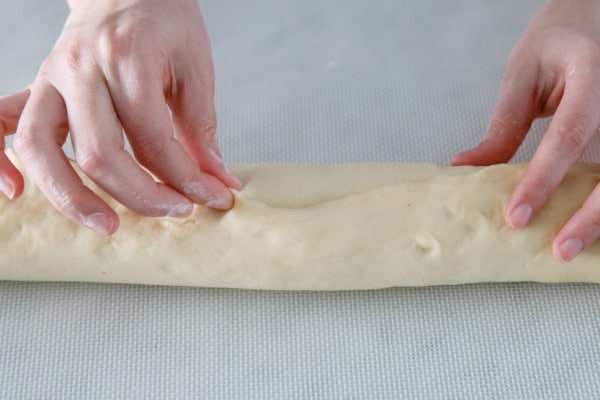
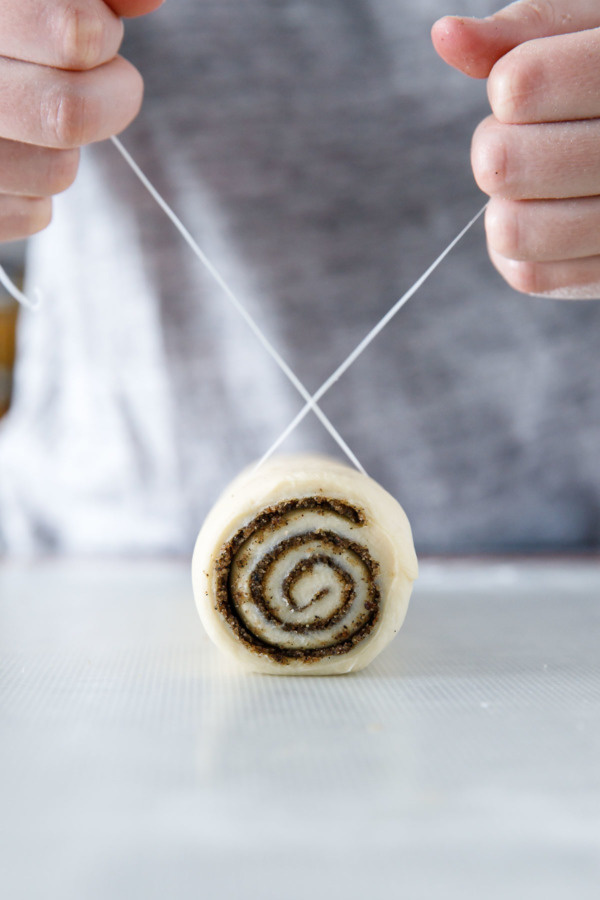
Here’s the trick to keeping the filling where it belongs: the pinch.
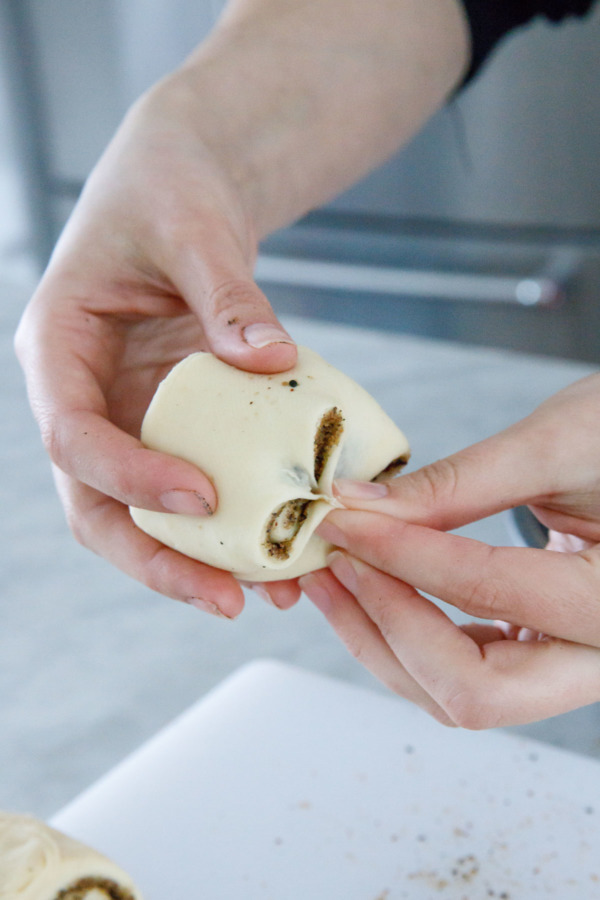
Cut the individual rolls (pro tip: use dental floss for perfect spiral cuts!) Then, gently pinch and stretch the bottoms of the rolls until they are mostly sealed. It doesn’t have to be completely covered, just enough to keep the filling on the inside.
If your roll has gotten a bit wonky, once you place it in the baking pan you can gently reshape it back as needed.
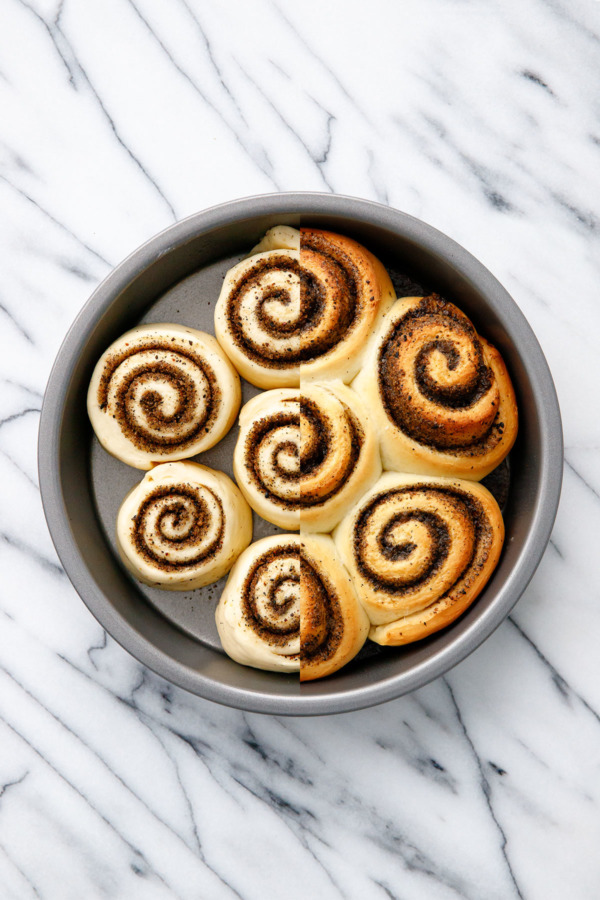
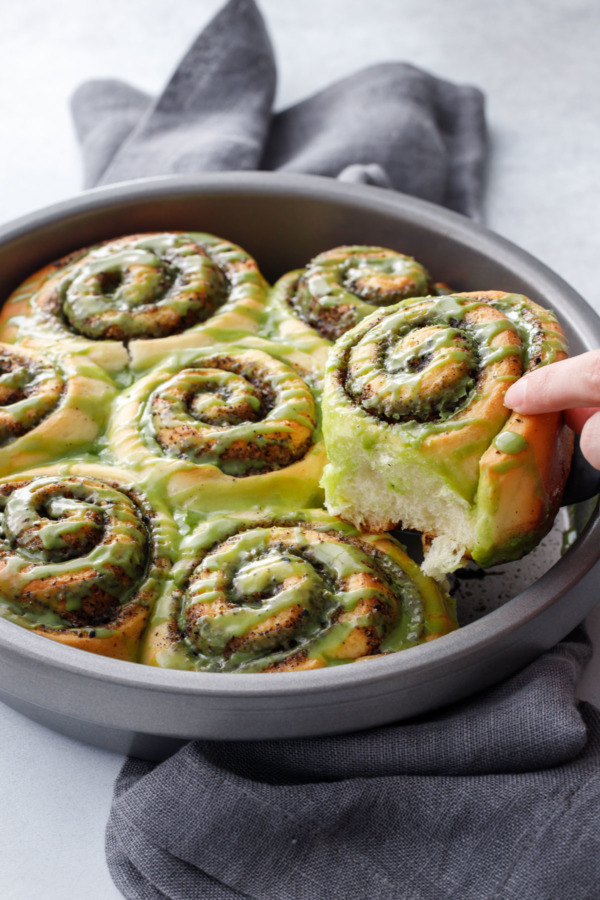
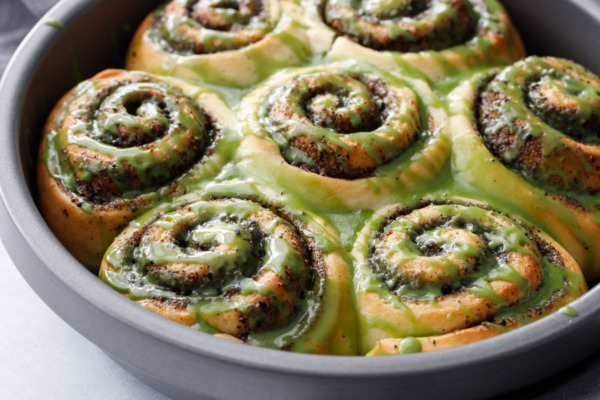
My final recipe is half of the original, making about 8 generously sized cinnamon rolls, or enough to fill one 9-inch cake pan. If you’re using a square pan instead, you may want to cut 9 rolls since they will fit in the pan more evenly. A round pan works best with 7. If you find yourself with an odd roll leftover, you can bake it by itself in a ramekin or mini pie tin (hello chef’s snack!)
If you’re baking for a crowd, you can double the recipe to fill a 13-by-9 pan (you could do either 15-20 smaller rolls, or 12 jumbo sized rolls, your preference). If you do double the recipe I recommend splitting the ball of dough in half and rolling out one piece at a time. I find it’s a bit more manageable than rolling and shaping a gigantic piece of dough.
You can also bake the rolls individually in a jumbo muffin tin, or spread out on a sheet pan (rolls baked on a sheet pan won’t be quite as tall, and will have crunchier edges).
Whatever pan size you use, just decide beforehand how many rolls you want, and measure and cut your cylinder of dough accordingly.
As for timing, I’m assuming that you plan to eat these babies for breakfast.
If so, unless you plan to wake up at like 4am to start baking, I recommend making the dough the night before, and let the dough chill overnight in the refrigerator. You can also make the black sesame sugar filling ahead of time as well (it’ll keep for days in an airtight container).
The morning of, plan on about 2 hours total in the morning from the time you take the dough out of the fridge to the moment you take your first bite.
While technically you could also shape the rolls the night before (if you are short on time the following morning and just want to pop them in the oven), I find that chilling the shaped rolls overnight tends to result in slightly weepy filling. Doable, but not ideal.
If you really want to do as much as possible ahead of time, go ahead and do the entire process of shaping and baking the rolls. Let cool, then cover tightly and refrigerate overnight (you can then freeze the baked and unglazed rolls, well covered, for up to 1 month.) Reheat in a 350 degree oven until heated through, then drizzle on your glaze.
Happy baking!
Black Sesame Cinnamon Rolls with Matcha Glaze
This recipe fills one 9-inch pan (round or square). Double the recipe for a 13-by-9-inch pan or sheet pan.
Ingredients:
For Tangzhong:
- 2 1/2 tablespoons (35g) water
- 2 1/2 tablespoons (35g) whole milk
- 4 1/2 teaspoons (14g) all-purpose flour
For Dough:
- 3 tablespoons (42g) unsalted butter, melted
- 3/8 cup (85g) whole milk
- 1 large egg
- 2 cups (248g) all-purpose flour
- 4 1/2 teaspoons (11g) dry milk powder
- 1 1/2 teaspoons (5g) instant dry yeast
- 2 tablespoons (25g) granulated sugar
- 1 teaspoon kosher salt
For Black Sesame Filling:
- 2 tablespoons (18g) black sesame seeds
- 1/2 cup (100g) brown sugar
- 2 teaspoons cornstarch
- 1 teaspoon cinnamon
- pinch salt
- 1/4 cup (56g) unsalted butter, very soft
For Matcha Glaze:
- 1 cup (125g) powdered sugar, sifted
- 1 teaspoon (2g) matcha powder, sifted
- 1 tablespoon unsalted butter
- 1 tablespoon milk
Directions:
For dough:
- Start by preparing your flour paste or tangzhong: combine water, milk and 14 grams of flour in a small saucepan set over medium heat. Whisk gently until no clumps remain. Continue to whisk until the mixture thickens to the consistency of thick paste, about 2 to 3 minutes. Remove from heat.
- Add melted butter to saucepan with flour paste and gently whisk until incorporated, then whisk in milk until smooth. Add in the egg and whisk until fully incorporated. At this point the mixture should feel lukewarm to the touch.
- In the bowl of a stand mixer fitted with the dough hook, whisk together the flour, powdered milk, and yeast to combine. Pour in the lukewarm flour paste, and mix on low speed until mixture forms a shaggy dough, about 1 to 2 minutes. Cover bowl with plastic wrap and let rest for 20 minutes (this rest gives the flour a chance to absorb the liquid, making it easier to knead later).
- Remove plastic wrap and add the sugar and salt. Mix on medium-low speed until dough is smooth and elastic, but still somewhat sticky, about 10 minutes. Add more flour only if absolutely necessary (a softer initial dough will result in a softer final product).
- Shape the dough into a ball (lightly oil your hands if necessary) and place in a lightly greased bowl. Cover with plastic wrap or a kitchen towel and allow to rise in a warm place until doubled in volume, about 1 to 1 1/2 hours. Alternatively, if you want to bake your rolls the next day, tightly cover the bowl with plastic wrap and pop it in the refrigerator to rise slowly overnight (my preference, as cold dough is so much easier to work roll out and shape).
For Filling:
- Preheat oven to 375 degrees F. Spread out sesame seeds in a single layer on a small baking sheet. Bake for 8 to 10 minutes, stirring once half way through. Seeds are done when fragrant and steaming; a single seed should crumble easily when crushed between your fingers. Let cool slightly.
- Transfer to a food processor or blender along with brown sugar. Pulse until seeds are finely ground. Add cornstarch, cinnamon and salt and pulse until evenly incorporated. (Filling can be made ahead of time; store at room temperature in an airtight container until ready to use).
To Assemble:
- Spray a 9-inch square or round cake pan with cooking spray. You can also use a muffin tin to bake rolls individually, or bake them on a sheet pan for crispier rolls.
- Turn dough out onto a lightly floured work surface. Pat into a rectangle, then roll out evenly into a rectangle approximately 10-by-15-inches in size. You want this piece to have an even overall thickness, with as square edges as possible.
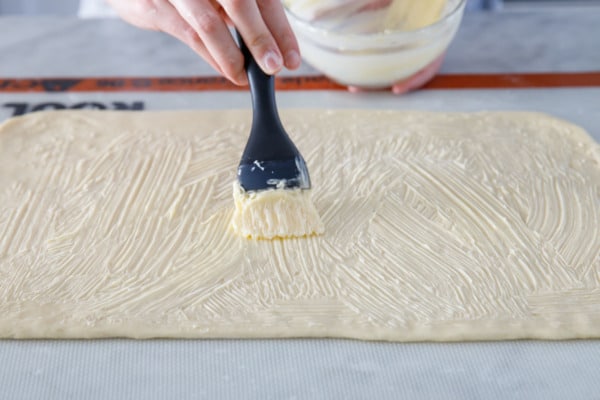
- Soften butter until it is nearly melted; it should be the consistency of warm peanut butter. Using a pastry brush, spread a thick layer of butter evenly over the entire piece of dough.
- Sprinkle an even layer of sesame filling over butter, leaving a 1-inch space empty along the top long edge. Pat down filling to adhere it. You can also gently run a rolling pin over the surface to compress the filling into the dough, making it easier to roll up.
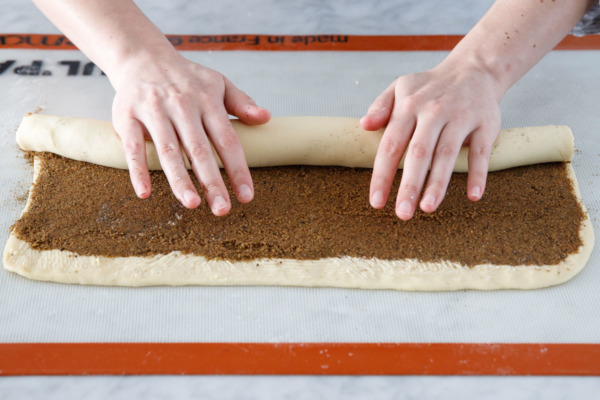
- Working with the long edge nearest you, start to roll up the dough fairly tightly, taking care not to stretch out the ends too much. Pinch along the edge of the dough to seal the seam, then roll the seam so it is face down.
- Using a ruler, measure out where you will cut your rolls, using a small knife to mark the cuts. For a 9-inch round pan, I cut 8 rolls, but if you are using a square pan you might want to cut 9 for a more even arrangement.
- To cut the rolls, you can use a sharp serrated knife (try to cut cleanly through in one movement front to back, rather than sawing it back and forth). You can also wrap a piece of dental floss around the dough, which will create perfect, clean cuts.
- To seal in the bottoms, gently pinch the dough together in a few places on the bottom of each roll. It doesn’t have to be 100% sealed, just enough to keep most of the filling in place as the rolls bake.
- Place rolls, pinched side down, into prepared baking pan, evenly spacing rolls in the pan, leaving a bit of space between them. Lightly cover and set pan in a warm spot until rolls are noticeably puffed and nearly doubled in size, about 45 to 60 minutes.
- Preheat oven to 350 degrees F.
- Once rolls are nearly doubled in size, bake for 20 to 25 minutes, or until tops are lightly golden brown and filling is bubbly (to be precise, the center of the dough should read about 190 degrees F on an instant-read thermometer). If your rolls are browning too quickly, you can tent them with foil and return to the oven to continue baking.
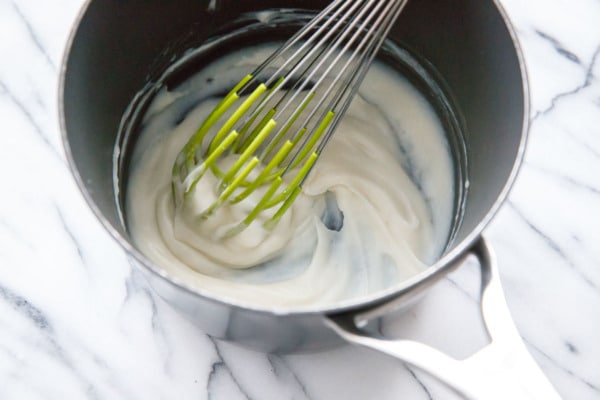
For Glaze:
- While rolls are baking, make the matcha glaze. Whisk sugar and matcha together in a bowl. Gently melt butter and milk together in the microwave, then add to sugar. Whisk until smooth. Add more milk as necessary, 1/2 teaspoon at a time, until glaze is of a nice consistency for drizzling.
- Let rolls cool for about 10 minutes, then generously spread or drizzle glaze on top. Serve warm. Rolls will also keep well for a few days, tightly covered or in an airtight container. Reheat in the oven or microwave and drizzle with some fresh glaze prior to serving.
Base dough recipe adapted from King Arthur Flour via Cleobuttera.
All images and text ©Lindsay Landis / Love & Olive OilDid you make this recipe?
Let us know what you think!
Leave a Comment below or share a photo and tag me on Instagram with the hashtag #loveandoliveoil.