Twisted and flaky, fruity and chocolatey, this pastry is all I ever want for breakfast from here on out (Cereal? What is that?)
This pastry is serious business. I mean, I’ll be honest, it’s basically pie. But pie that you’re allowed to eat for breakfast (see what I did there? By calling it a Danish I made it perfectly fine to eat dessert for breakfast. That’s winning right there.)
One of these days I’ll master making homemade Danish, but for now, puff pastry is a perfectly suitable substitution and lord knows it’s way easier to deal with. So easy in fact that you might just impress yourself with your fancy new pastry skills.
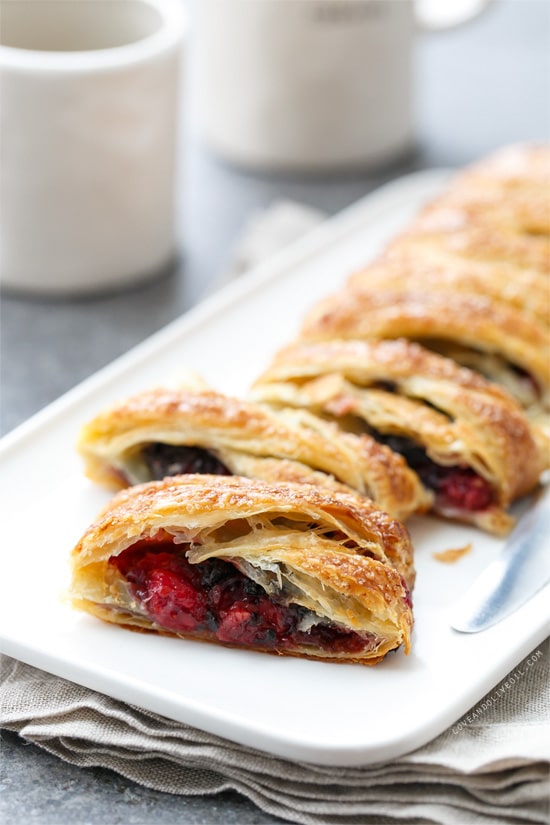
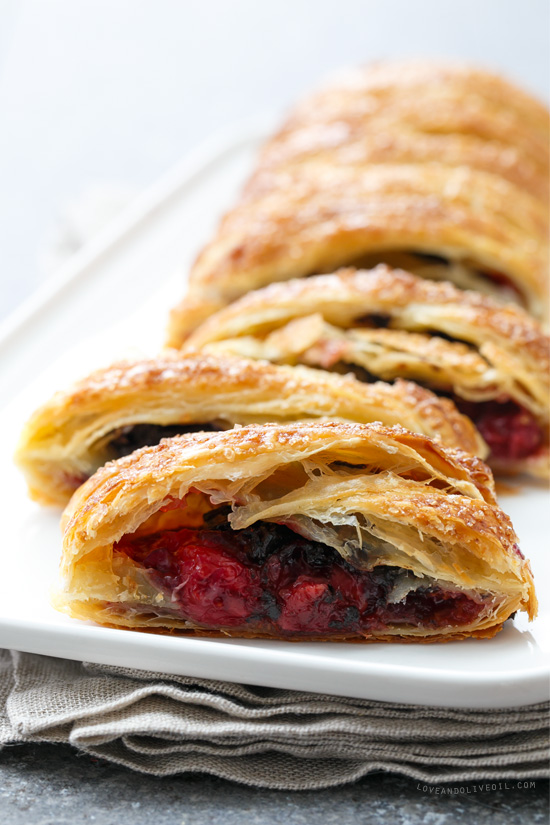
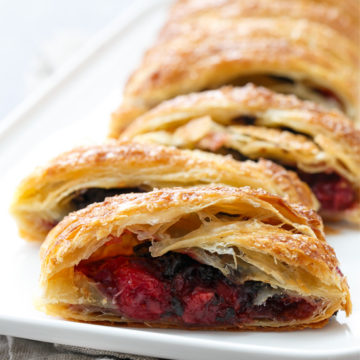
Let’s talk about the tart cherry filling for a second, because that’s where this pastry, as pretty as it is on the outside, really shines.
It’s not much different than my Cherry Pie Filling, just a little bit thicker and with a little bit of vanilla in addition to the almond extract. It highlights the bright tart cherry flavor at the same time as the sugar mellows it, a perfect balance of sweet and tart.
The chocolate, well, let’s just call that a little bonus. :)
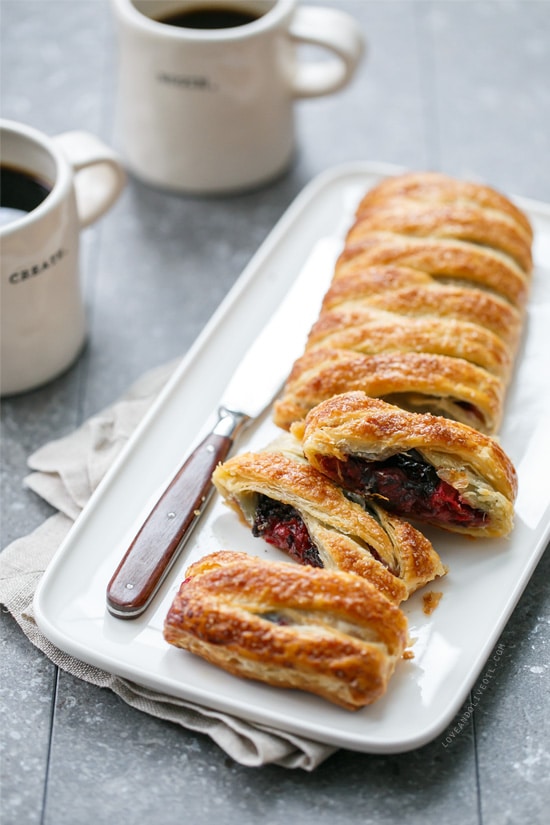
You can make the filling a day ahead of time, then braid and bake your pastries in the morning, slicing and serving them while they are still perfectly warm and melty.
As for the braiding, there are a number of different techniques for doing this, and quick google search brings up numerous tutorials with videos and pictures galore. But it’s really quite simple, easier even than braiding hair (WAY easier than braiding your own hair… that is a skill I doubt I’ll ever master).
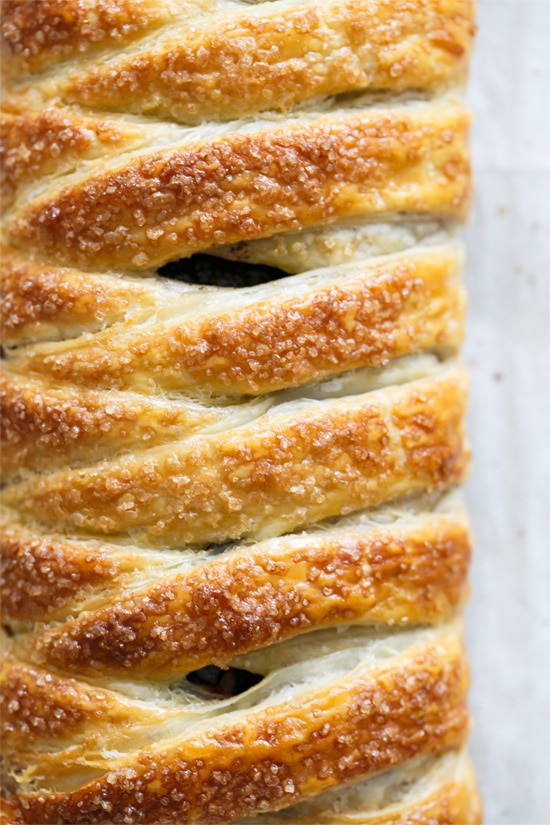
I used the folds of the puff pastry and a ruler to lightly mark my strips before cutting, giving me straight and even lines. Yes, I used a ruler, but I didn’t actually do any measuring. Rather the width of the ruler became the template for my sections. It doesn’t really matter how many sections you end up with, so don’t hurt your brain with any complicated puff pastry math. Just know that fewer, thicker sections will yield a thicker braid, and thinner strips will make a smaller more delicate pattern. I ended up with (lucky) 13 and it was just about right.

Many braided Danishes are drizzled with sugary glazes, and I opted not to in this case, feeling the rich fruit and chocolate filling was more than enough sweetness to go around. The raw sugar sprinkled on top gives the pastry a little extra sparkle, and a delightful crunch.
I’ll go ahead and say it now: this might just be the year of tart cherries. Last year saw a passionfruit overload, the year before that was decidedly hibiscus. My fruitful obsessions seem to permeate all sorts of things, from dinner to dessert to breakfast, and this is obviously no exception. I’m very excited to be working with the Cherry Marketing Institute, to bring you all sorts of tart cherry goodness over the course of the year. I couldn’t be more excited about this partnership, and I hope you are too! I may as well just hang a big sign around my neck that says: WILL WORK FOR FRUIT.
But hey, when you’re dealing with something as deliciously unique as a tart cherry, can you blame me?
Braided Tart Cherry & Chocolate Chunk Danish
Ingredients:
- 12 ounces frozen tart cherries
- 3 tablespoons cornstarch
- 1/3 cup granulated sugar
- 1/2 teaspoon vanilla extract
- 1/4 teaspoon almond extract
- 1 package (2 sheets) frozen puff pastry, thawed overnight in the refrigerator
- 1/2 cup semisweet chocolate chips or chopped chocolate chunks, divided
- 1 egg
- raw or turbinado sugar, for sprinkling
Directions:
- Place frozen cherries in a sieve or strainer and set over top of a bowl. Let thaw, catching any juices that drain off in the bowl below. Measure out 2 tablespoons juice (or, if there is not that much juice in the bowl, add enough water to equal 2 tablespoons) and place in a small bowl. Whisk in cornstarch until smooth and no chunks remain.
- Place semi-thawed cherries in a saucepan along with granulated sugar. Bring to a boil over medium heat. Once mixture begins to boil, stir cornstarch juice again to re-mix, and pour into saucepan. Return to a boil and cook until thickened, another 2 to 3 minutes. Remove from heat and let cool, then transfer to a bowl and refrigerate until thoroughly cooled. (Filling can be made a day ahead of time and refrigerated until ready to assemble).
- Preheat oven to 425 degrees F.
- On a lightly floured piece of parchment paper, roll out one sheet of puff pastry until it is about 10 inches square. Using a ruler or (if your pastry was folded) the fold lines to lightly mark the square into thirds vertically.
- Then, again using the ruler, divide the pastry horizontally into even sections. Approximately 12 to 16 depending on how thin you’d like your braids. I simply used the width of the ruler to divide mine into 6 sections, then split the distance and divided it into thinner sections.
- Using a knife or rotary cutter, cut along the horizontal markings, just on the left and right thirds of the pastry. Leave the center section intact and uncut.
- Trim and remove the corner sections from each of the 4 corner strips. Transfer the sheet of parchment with the pastry to a baking sheet.
- Spread half of the cool cherry filling evenly in the center section of the pastry. Sprinkle with 1/4 cup of chocolate chips.
- Fold the top flap down over the filling. Then, gently lift and drape the top left strip over the center filling, folding it slightly on a diagonal so it matches up with the next section down. Press lightly to adhere. Then fold the top right strip over the center and down in the same manner. Repeat with the remaining strips, alternating left and right down the length of the pastry to form a braided pastry. Before you fold the second to last row, fold up the top flap over the filling, then fold one of the second to last strips diagonally over it, pinching the edges to seal. Trim off the last strips and discard.
- Whisk the egg with 1 tablespoon of cold water until even. Brush on a thin layer of egg, then sprinkle with raw sugar.
- Bake pastry for 18 to 20 minutes or until golden brown and flaky. Remove from oven and let cool for 10 minutes before slicing and serving.
- Repeat as desired for second pastry (filling will also keep in the refrigerator for up to 2 days or the freezer for up to one month if you’d like to save the rest for later).
Did you make this recipe?
Let us know what you think!
Leave a Comment below or share a photo and tag me on Instagram with the hashtag #loveandoliveoil.
Disclosure: This post was sponsored by the Cherry Marketing Institute. As always, all opinions written are purely our own. We’re incredibly grateful for opportunities like these that allow us to continue sharing delicious recipes with you, so thank you for supporting us and the brands we love.