
I love Swiss chard. The bunches of “bright lights” we’ve got growing in a pot outside aren’t doing so hot (not sure what would cause chard to stop growing but it’s been “not quite big enough” for the past month or so.) Luckily for us our CSA came through, giving us an abundance of swiss chard.
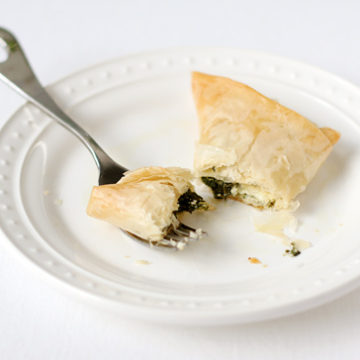
What I like most about it is the depth of flavor. It’s earthier, richer than spinach. Spanakopita with spinach is good, but using Swiss chard makes it so much better. Not to mention they are personal size. I mean, seriously, I will never make lasagna-style spanakopita ever again, because having your own personal, homemade hot pocket is SO much better, and more fun.

To take things up even another level, we made our first batch of homemade ricotta cheese. Hold on, before you go running for the hills (as if homemade pita bread and ice cream wasn’t enough), you wouldn’t believe how easy it is to make ricotta cheese. Get this: bring 1 quart whole milk to a rolling boil with a pinch of salt. Add 1 1/2 tablespoons lemon juice. Boil for about 2 minutes or until the mixture curdles (yes, you’re purposely trying to get milk to curdle). Then, strain it through a fine mesh sieve lined with cheesecloth. Let it drain over a bowl for an hour or so, and voila. Ricotta. I’m dead serious. It’s that easy. And it is worlds away from the soupy store bought stuff, not to mention a great way to use up the rest of the quart of milk that didn’t make it into the homemade ice cream.
Spanakopita with Swiss Chard and Homemade Ricotta
Makes 8 pockets. Adapted from David Lebovitz.
Ingredients:
2 tablespoons olive oil
1 medium onion, peeled and minced
12 ounces (1 large bunch) fresh Swiss chard
salt and freshly-ground pepper
4 ounces feta cheese
4 ounces fresh homemade ricotta
2 tablespoons finely-chopped flat leaf parsley
pinch of freshly-grated nutmeg
1 large egg, at room temperature
1/2 tablespoon lemon juice
16 sheets phyllo dough, thawed, if frozen
Melted butter (about 2-3 tablespoons)
Directions:
Heat oil in a large saucepan or skillet over medium head. Add the onions and cook, stirring frequently, until transluscent. Add the chard and a bit of salt and pepper, cover, and cook until completely wilted, stirring once or twice as needed.
Transfer chard to a colander and allow to cool. When cool enough to handle, firmly squeeze out the excess liquid. Coarsely chop.
In a medium bowl, combine chopped chard, feta, and ricotta cheese, stirring until evenly distributed. Add nutmeg and a lemon juice (to taste), plus additional salt and pepper as needed. Stir in the egg.
Working quickly, lay one sheet of phyllo on the counter and lightly brush with butter. Lay another sheet on top of it and brush it with butter as well. Keep remaining phyllo covered with plastic wrap and a slightly damp tea towel to prevent it from drying out.
Place 1/4 cup of the chard mixture in the bottom center of the phyllo square, about 1-inch from the edge. Fold the two edges of the dough over the filling, lengthwise, to encase the filling.
Brush the exposed surface of the filo with butter and fold one corner diagonally over the filling, then continue folding keeping the triangle shape (as you’d fold a flag) and brushing the exposed surfaces of the phyllo with butter, until you have a neat triangle. Easier but not quite as pretty, you can fold the pastry into a rectangle (think hot pocket) as well. Brush the top with butter and arrange on a baking sheet lined with parchment.
Continue making more triangles/rectangles with the remaining filling. At this point the pockets can be frozen for later use. Simply place the baking sheet in the freezer. Once the pockets are frozen through, transfer to a freezer-safe zip top bag until ready to bake. They’ll keep for a couple of months.
Preheat the oven to 350 degrees F. Bake for 18-20 minutes (30 if frozen), or until golden brown and crispy. Allow to cool for 5 minutes before eating.
Did you make this recipe?
Let us know what you think!
Leave a Comment below or share a photo and tag me on Instagram with the hashtag #loveandoliveoil.