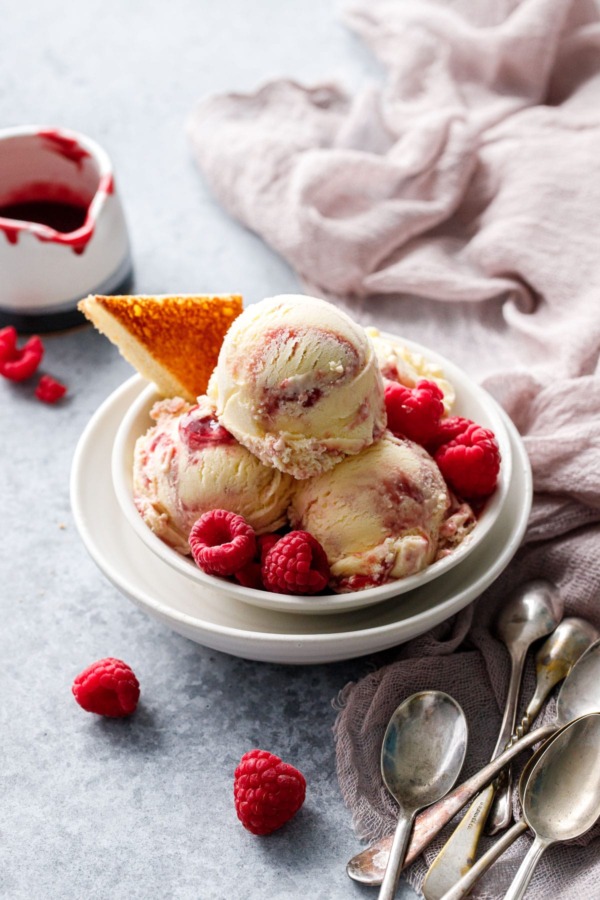
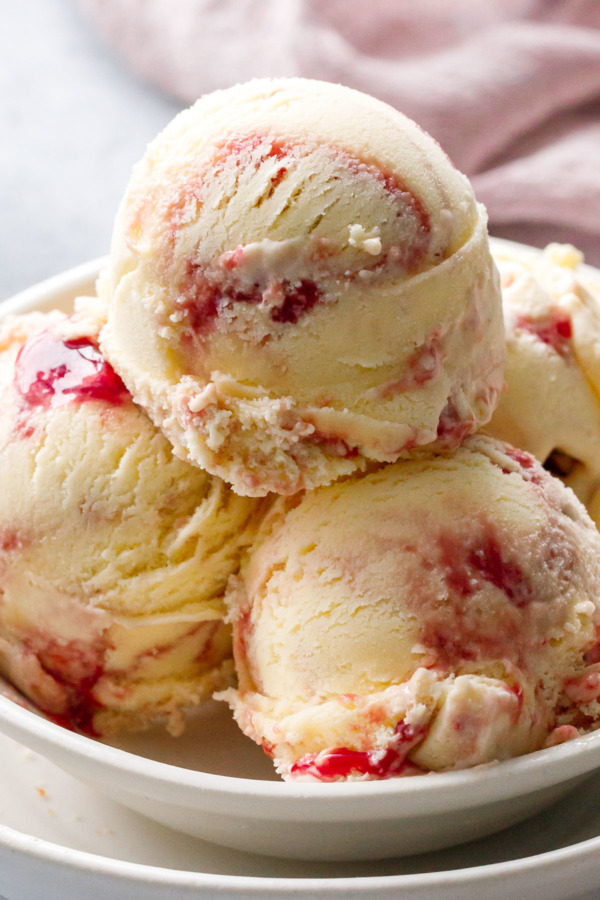
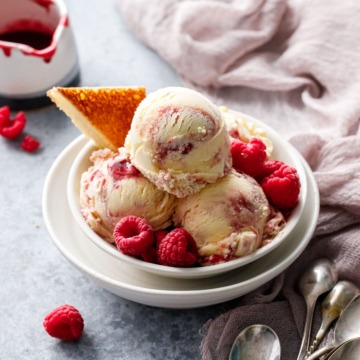
Toast and raspberry jam, now in ice cream form. Or, to be more descriptive, toasted brioche ice cream with a swirl of hibiscus raspberry caramel (I mean, how good does that sound?!)
How do you turn your favorite morning toast and jam into a delectable dessert? Start with a sweet custard ice cream base base, infused with actual toasted bread (trust me, it sounds weird but it’s actually amazing), and then swirl with a jammy hibiscus raspberry caramel sauce.
My thought process for this recipe was pretty convoluted, over the course of a few weeks I somehow went from a black sesame ice cream to this final toast and jam-inspired flavor. There was a peanut butter iteration in there somewhere too (think fancy PB&J) but ultimately I ended up here, with this toasted brioche ice cream and raspberry caramel ripple.
Much like my Sourdough Ice Cream, the custard base of this unique flavor is infused with actual bread; toasted brioche, to be exact, though you can pretty much do this with any kind of bread (whatever your favorite bread is for toast? Use that).
It’s always surprising to me how much flavor the bread imparts on the cream after a short 30 minute steep. I really didn’t think it would work the first time I tried it, and was simply floored when I snuck a spoonful of the freshly churned ice cream.
The jam ripple is actually a fruit-infused caramel. Think of it as somewhere in between a luscious caramel sauce and a tart raspberry jam.
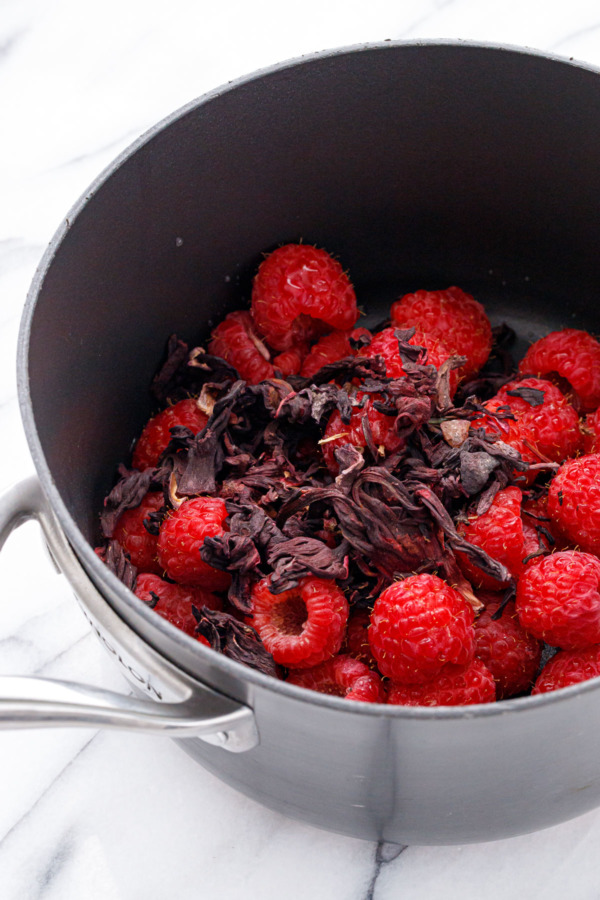
I added some dried hibiscus to amp up the raspberry flavor and deepen the rich fuchsia color, but you can certainly leave that part out.
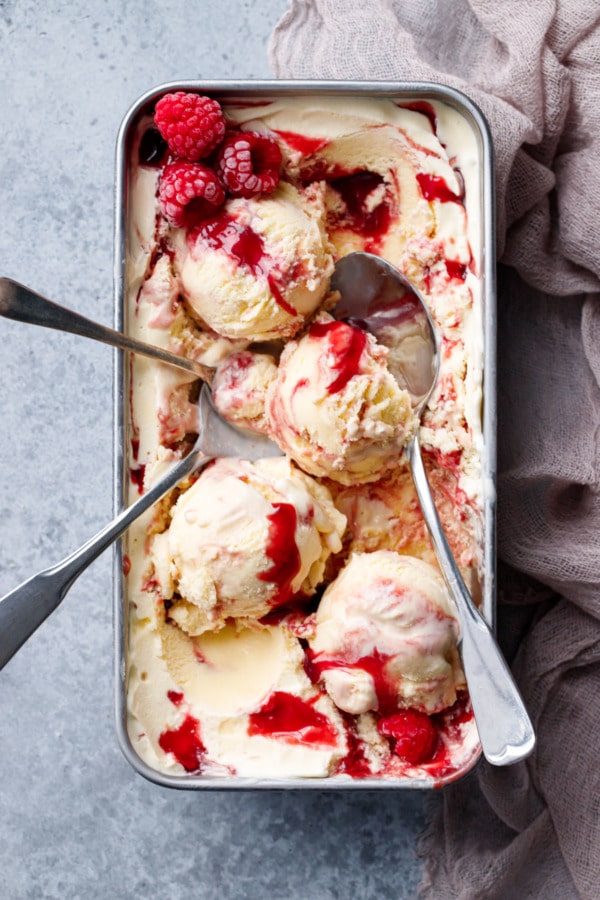
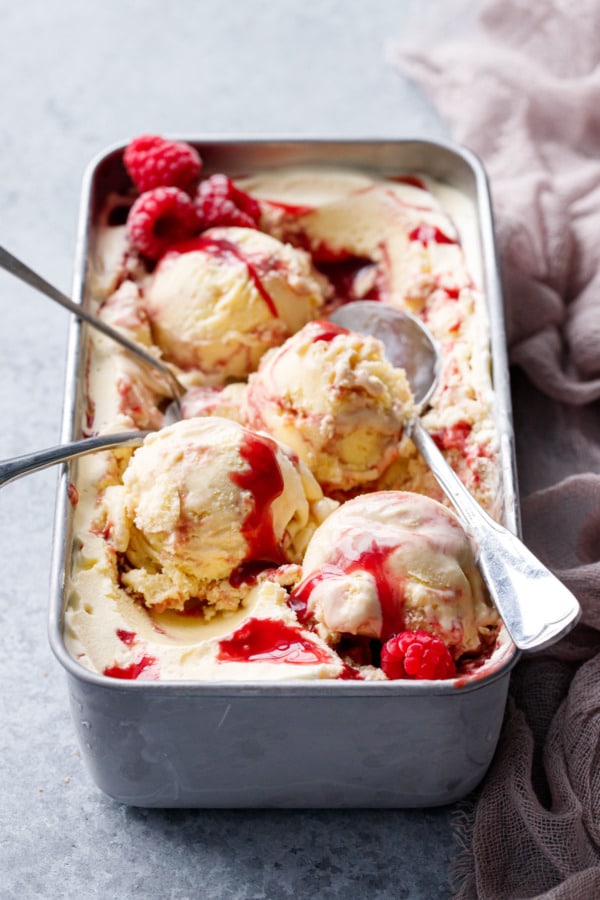
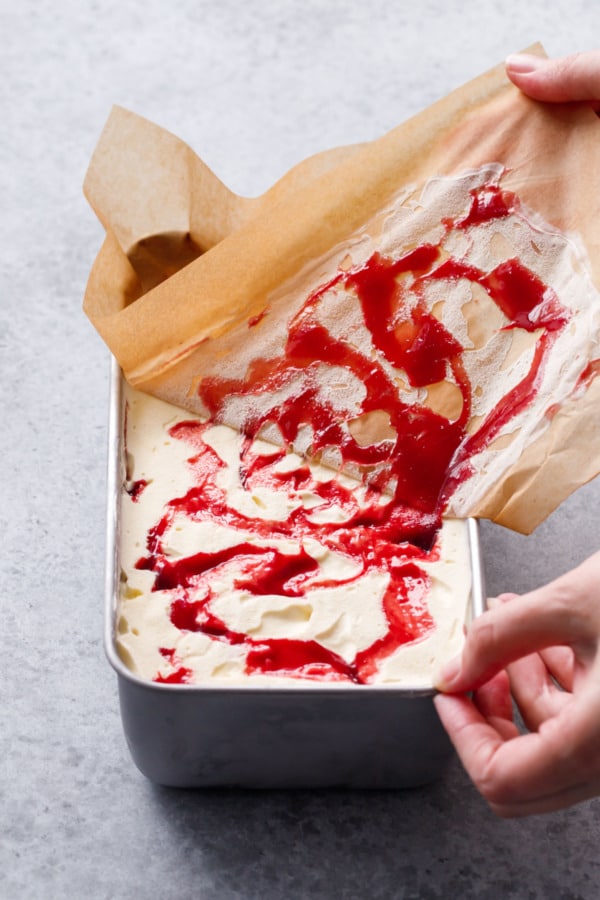
For swirl ice cream recipes like this one, you don’t actually swirl the fruit part into the ice cream base, rather you layer it in the container after churning and before the final freeze. I find a shallower loaf pan or rectangular ice cream container works the best for this, giving the most surface area for even distribution of the layers. That way, when you go to serve it, you have a lovely ribbon of raspberry caramel running through each and every scoop.
I also like rectangular containers because it basically gives you a sugary runway for the perfect swoop and scoop.
The creaminess of homemade ice cream relies on freezing the ice cream base as quickly as possible. For that reason I suggest chilling your ice cream base overnight, even popping it in the freezer for 15 or 20 minutes before you freeze it, along with the container you will store your churned ice cream in. Also make sure your freezer is on the coldest setting, and that the freezer bowl of your ice cream maker is thoroughly frozen beforehand (48 hours ideally).
Basically, if it’s going to touch your ice cream, freeze it ahead of time.
I upgraded to a compressor machine a few years ago and haven’t looked back, despite the amount of space it’s taking up in our pantry. While I don’t eat a ton of ice cream, having this type of machine means I don’t have to pre-freeze any bowls beforehand, and I can also make multiple batches of ice cream on the same day (helpful for testing purposes).
Although, I still think I could get it creamier, so next time I may try turning the machine on for 5 or 10 minutes before I add the ice cream base (if it’ll let me), just so it’s good and cold by the time I start churning.
Storage Tip: Keep your ice cream covered with parchment paper (press it down on the surface) to avoid freezer burn. I also use a rectangular silicone stretch lid to add another layer of protection on top of that.
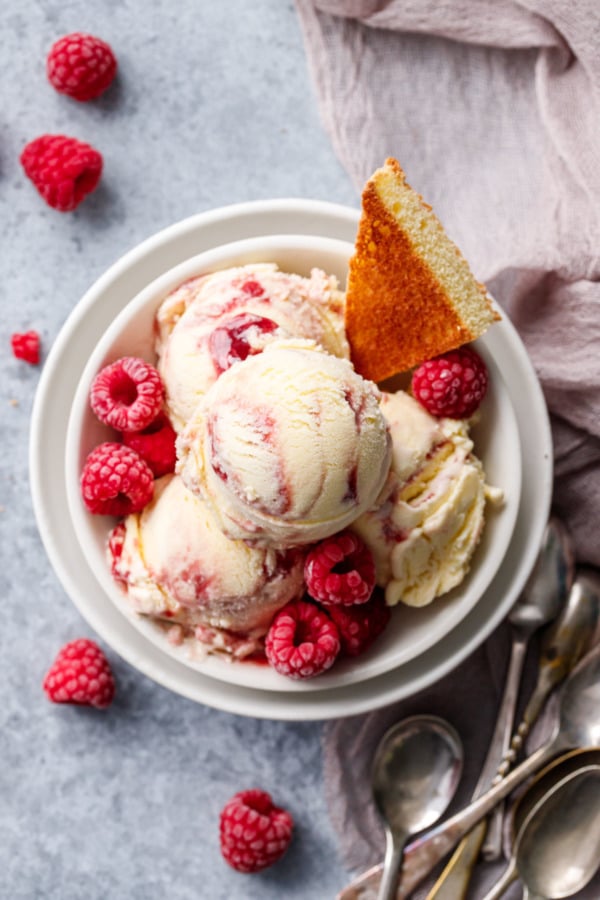
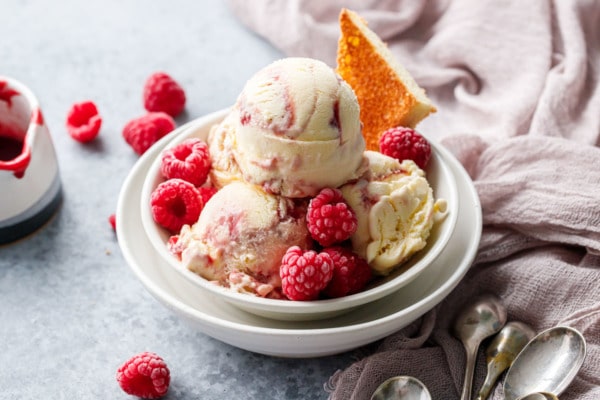
Serve it with leftover raspberry caramel (if you have any that is, er, maybe double that part of the recipe?) or as an ice cream sandwich between two pieces of thick sliced brioche bread, toasted with salted butter and sprinkled with sugar.
If you want a bit of crunch you could also make some caramelized brioche breadcrumbs using the technique outlined here (swap brioche for sourdough). I also think this ice cream would be lovely sprinkled with some bits of crunchy toffee or peanut brittle (back to that whole fancy PB&J idea…)
Toasted Brioche Ice Cream with Raspberry Caramel Swirl
A sweet custard ice cream base base infused with toasted brioche bread, and then swirled with a jammy hibiscus raspberry caramel sauce that you’ll want to drizzle over everything!
Ingredients:
For Raspberry Caramel:
- 1 cup (4oz/113g) fresh or frozen raspberries
- 2 tablespoons (10g) dried hibiscus flowers
- 2 tablespoons water
- 1 tablespoon lemon juice
- 1/2 cup (100g) granulated sugar
- 2 tablespoons corn syrup
- 2 tablespoons water
- 1/4 cup heavy cream, at room temperature
- pinch sea salt
For Toast Ice Cream:
- 2 slices brioche bread (or whatever your favorite bread for toast is)
- 1 teaspoon salted butter, softened
- 1 1/2 cups heavy cream, divided
- 1 1/2 cups whole milk, plus more as needed
- 2/3 cup granulated sugar
- 1/4 teaspoon sea salt
- 5 large egg yolks
- 1/2 teaspoon vanilla extract
Directions:
- To make raspberry caramel, first prepare the hibiscus raspberry juice. Combine raspberries, dried hibiscus, lemon juice and water in a small saucepan. Bring to a simmer, smashing the berries as they soften. Cover and let steep for 30 minutes, then strain through a fine mesh sieve, pressing to remove as much of the juice as possible. You should end up with about 1/3 cup. (You’ll only need 1/4 cup for the recipe, any excess makes delicious drink, stirred into a ginger beer or club soda with a splash of your favorite liquor).
- In a medium, high-sided saucepan, dump sugar in a pile in the middle of the pan. Add corn syrup, then drizzle water around the edges. Cover and place over medium heat. Let it come to a simmer with the lid still on (the condensation will help ‘wash’ any stray sugar crystals off the sides of the pan). You shouldn’t need to stir the mixture at all for the sugar to completely dissolve into a crystal clear, bubbling liquid.
- Continue to cook, without stirring, until sugar starts to darken to a light amber brown. Watch it carefully as it can burn quite easily if you’re not paying attention!
- Remove from heat and whisk in cream (it will bubble and spit violently so please be careful not to get burned). Once the caramel has calmed down a bit, add salt and 1/4 cup of raspberry juice, whisking until smooth. Set aside and let cool, then transfer to a jar or other lidded heat-proof container and refrigerate until completely cooled and you’re ready to use it.
- Spread a thin layer of butter over bread slices. Toast in a broiler until deep golden brown (watch them carefully so they don’t burn). Flip and toast the other side as well.
- Combine 1/2 cup cream and milk in a saucepan. Tear bread into chunks and submerge. Heat over medium-low heat, stirring occasionally, until mixture just starts to steam.
- Remove from heat, cover and let steep for 30 minutes to infuse the bread flavor. Pour through a fine mesh sieve, pressing out as much liquid from the soaked bread as possible. Measure the strained milk and add additional milk as necessary to bring it back to 2 cups (different kinds of bread will absorb more/less of the milk).
- Meanwhile, assemble an ice bath by pouring remaining 1 cup of the heavy cream into a heat-proof bowl and nest inside a larger bowl filled with ice water. Alternatively, you can use a gallon sized freezer bag nestled in a bowl of ice water. Place a fine mesh sieve over the top of the bag or bowls.
- In a medium bowl, whisk together egg yolks until smooth.
- Return strained milk to saucepan, discarding soaked bread. Add sugar and salt and warm over medium heat, until it starts to steam and barely bubble around the edges (do not let it boil).
- Slowly whisk some of the hot cream mixture into the egg yolks, drizzling in 1/3 cup or so at a time, until about half of the cream mixture has been incorporated and yolk mixture is warm to the touch. You want to do this gradually; doing so will temper the egg yolks rather than cook them.
- Pour yolk mixture back into the saucepan and return to medium-low heat, stirring constantly, until the mixture thickens slightly and coats the back of a spatula, about 5 to 7 minutes, or until it reaches approximately 175ºF. Do not allow it to boil. Remove from heat, and pour mixture through a fine mesh sieve into cold cream, discarding any solids. Let cool to room temperature, stirring occasionally. Cover with plastic wrap, carefully pressing wrap down onto the surface of the cream mixture. This will prevent a skin from forming on top of the custard. Refrigerate until completely cool, at least 3 hours or overnight if possible. Pre-freeze the container you will be storing your ice cream in for at least 30 minutes as well.
- When ice cream base is thoroughly chilled, churn ice cream according to manufacturer’s instructions until it is the consistency of soft serve.
- Take out your frozen container and put a few dollops of raspberry caramel in the bottom. Spread a layer of churned ice cream, then drizzle generously with more caramel. Repeat two or three more times, ending with a drizzle of caramel. You may not use all the caramel, that’s ok (save it to serve on top). Press a layer of parchment paper on the top of the container to prevent freezer burn, then freeze at least 2 hours or overnight until firm.
Did you make this recipe?
Let us know what you think!
Leave a Comment below or share a photo and tag me on Instagram with the hashtag #loveandoliveoil.