This recipe was created in partnership with OXO® – smartly designed kitchen tools for the modern cook. Thanks for supporting us and the brands we love!
One of my earliest memories is making spritz cookies with my grandmother for Christmas, the palm trees glittering with lights and the warm breeze a welcome change from the Colorado snow (white Christmases are overrated, in my opinion: the only white I want to see at Christmastime is sugar.)
Growing up, we usually spent Christmas on the opposite coast in Florida with my mom’s side of the family, but that one year in Los Angeles, with Bettie and the rest of the Landis clan, stands out in my mind, if only for the dozens and dozens of Christmas cookies we made together.
I recently asked my aunts if they had Bettie’s recipe for spritz cookies, and sure enough, they did. In true Bettie fashion the ingredients were written on an index card, two different recipe variations labeled simply Spritz #1 and Spritz #2, but nothing else: no oven temperature or cook time or instructions whatsoever.
I tested both recipes, deciding that Spritz #2 (made with granulated sugar instead of powdered sugar) was preferable in terms of flavor and texture, and then tweaked it slightly to modernize the recipe (added a pinch of salt, for example, as well as a touch of cornstarch and an extra egg yolk to help the cookies keep their shape when baking).
If you prefer a butterier, softer cookie, increase the butter to 10 tablespoons instead of 8. I opted for more shape definition, since the snowflakes are just so gosh darn pretty I didn’t want to lose the details.
One thing I remember most about making spritz cookies with Bettie is the old-fashioned cookie press she had, and just how much pain it inflicted on your poor wrists and hands. I mean, your muscles were literally sore the day after using it.
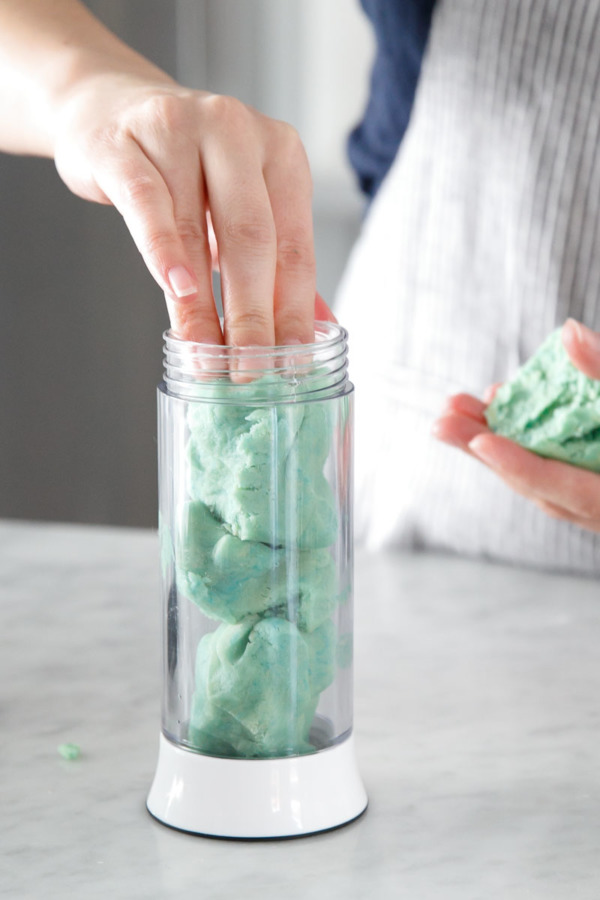
Luckily, times have changed. OXO’s cookie press is worlds away from that old metal press, with an ergonomic lever that pumps out a perfectly shaped cookie with barely any pressure.
The trick to getting spritz cookies to stick to the cookie sheets? That’s not modern science (the new presses work just the same as the old ones in that respect). Some recipes will tell you to use a non-nonstick, aluminum cookie sheet. Don’t do it. While your dough might stick, your baked cookies will too (ack).
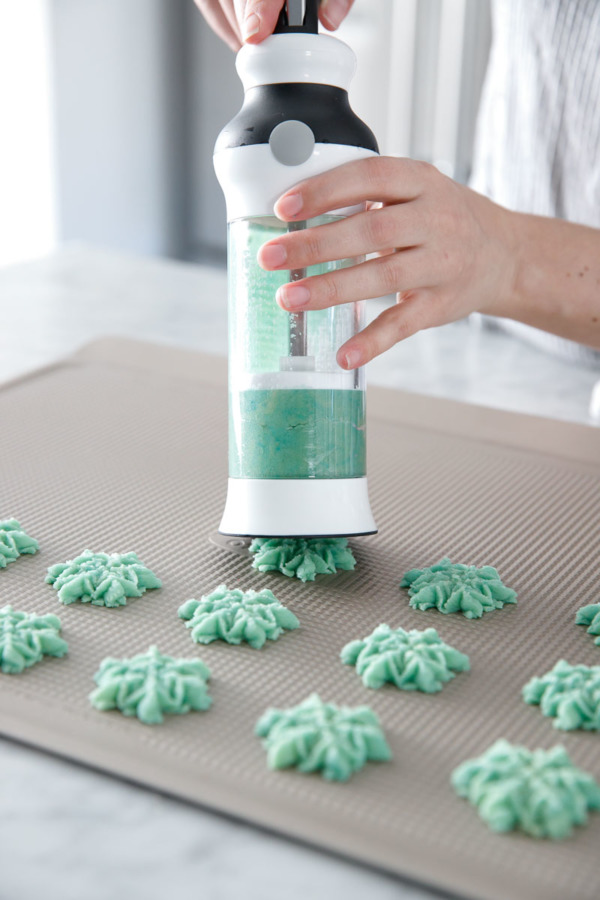
For this recipe I used OXO’s Non-Stick Pro Cookie sheet and simply froze the cookie sheet first. A good 10 to 15 minutes in the freezer and your cookies will stick to the cookie sheet, like magic. Don’t try to go too fast, press down the handle, pause for a second to let the dough flash-chill, then gently lift up and your cookie should remain perfectly positioned on the cookie sheet. It may take a few tries to get it to work, but trust me, it does.
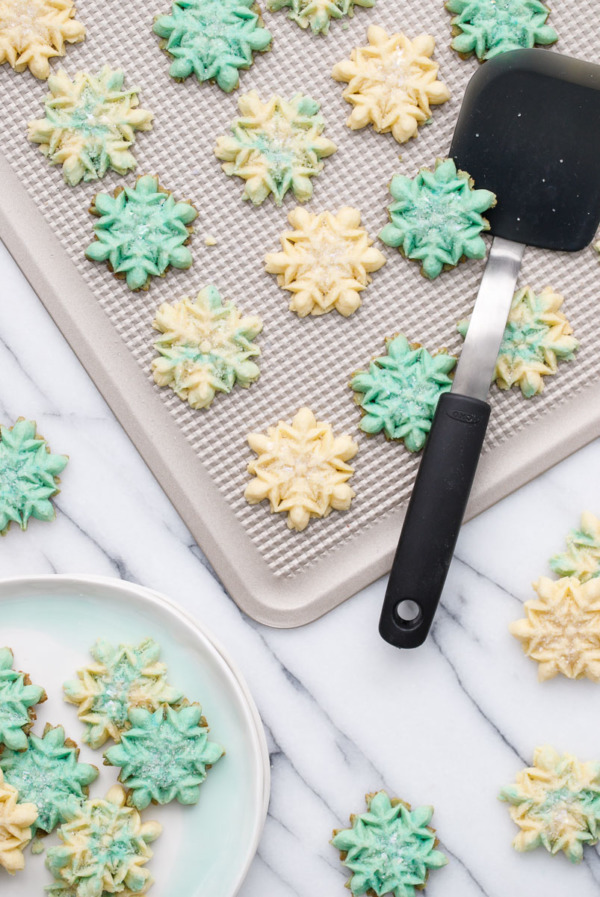
If you are baking multiple sheets of cookies, you want to wipe down the cookie sheet and refreeze it between each batch. If you have multiple cookie sheets this process will be quicker, otherwise let the cookies cool for 5-10 minutes, transfer them to a wire cooling rack, then once the cookie sheet is cool to the touch, wipe off the residual grease and sanding sugar that may be stuck to it, and pop it back in the freezer for 10 minutes.
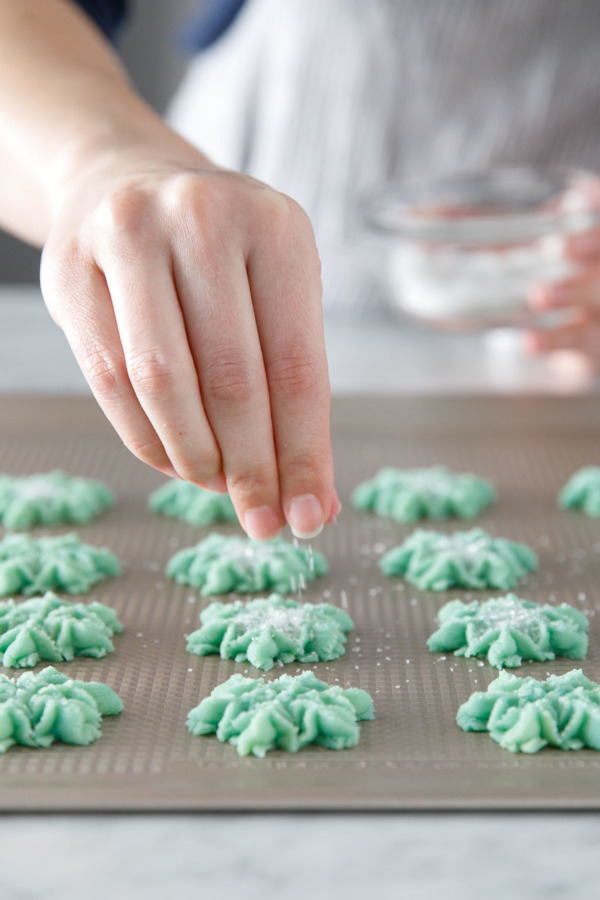
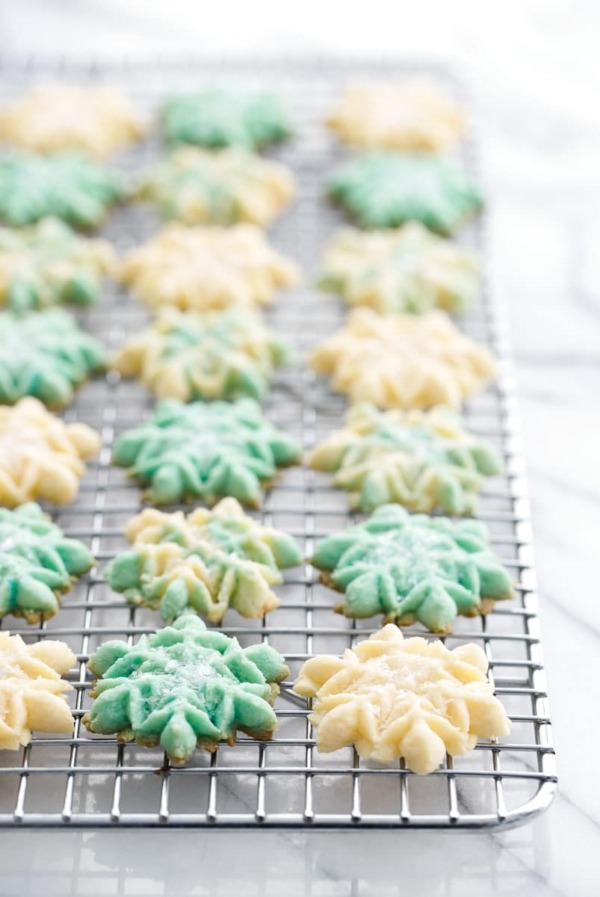
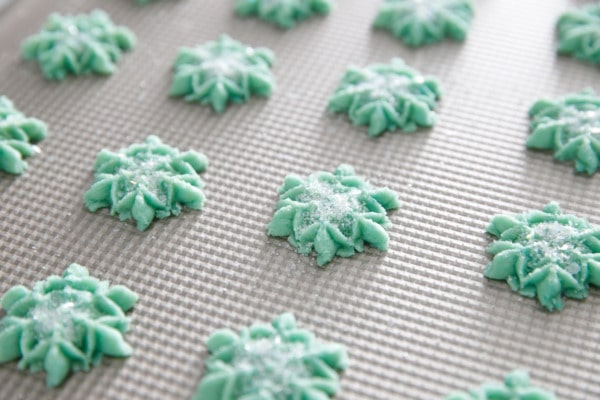
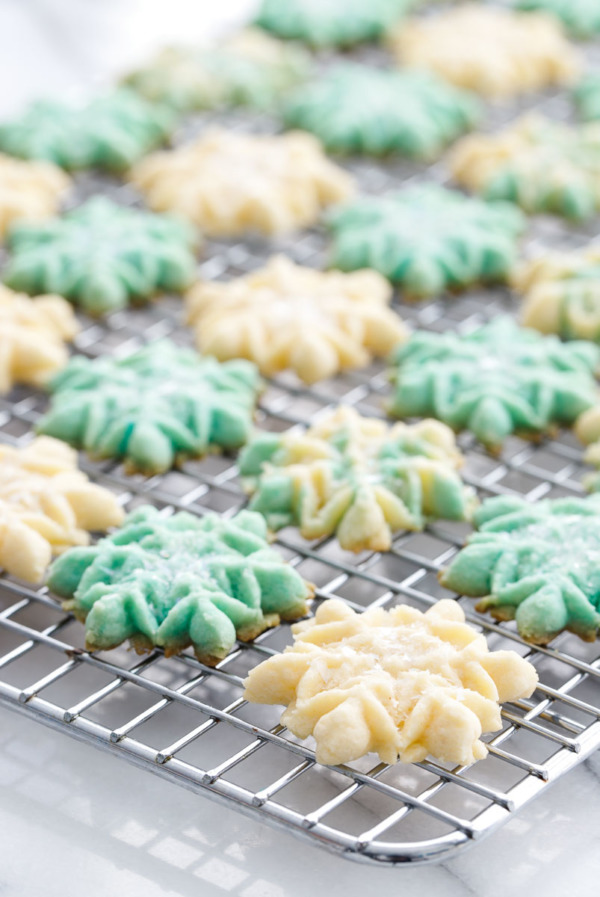
With a sprinkle of opal sanding sugar and a pinch of iridescent edible glitter, these snowflake spritz cookies sparkle like freshly fallen snow.
I used the snowflake disk from the Christmas Cookie Press Disk set, which is more detailed than the standard snowflake disk that comes with the press.
Remember, if you want to make multiple shapes, limit yourself to one shape per cookie sheet, since the different shapes will bake at different rates.
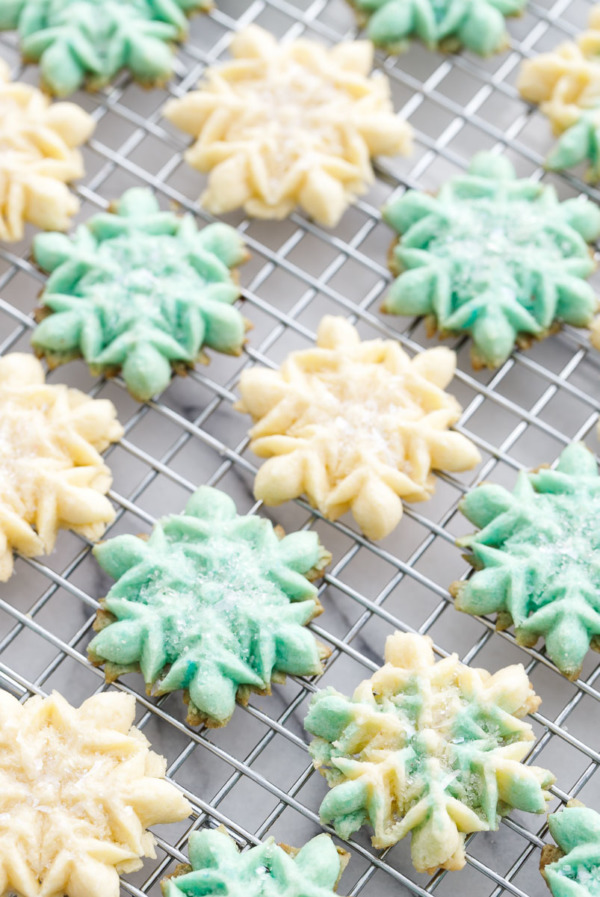
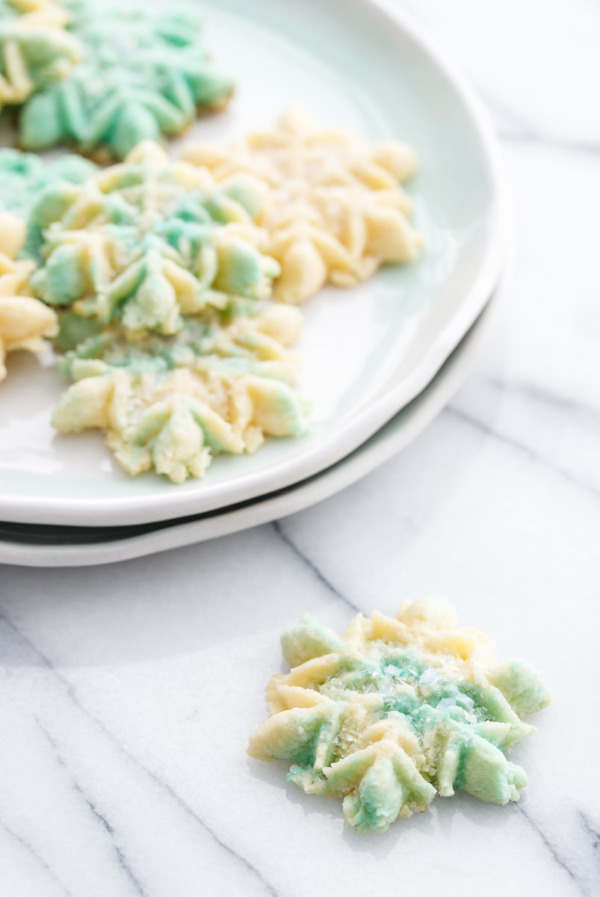
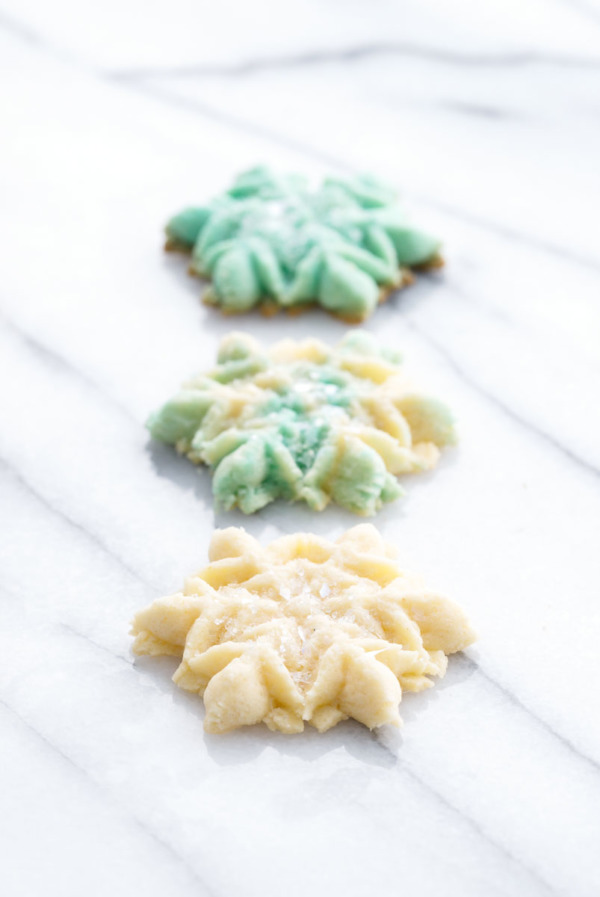
For a multi-colored effect, color one half of your dough with 1-2 drops of sky blue Americolor gel food coloring – the blue mixes with the natural yellow of the dough to form a lovely turquoise blue. Pressing one sheet of blue and one of white, and you should have a small ball of each color leftover. Roll into logs and twist the two colors together, then load into the cookie press for a pretty swirled effect.
You could also go classic, with red and green sanding sugar, like Bettie used to do. Classic or not, I think she’d be pleased with these!

Vanilla Almond Spritz Cookies
Buttery spritz cookies flavored with vanilla and almond. These classic holiday cookies have always been one of my favorites!

Ingredients:
- 1/2 cup (1 stick) unsalted butter, at room temperature
- 1/2 cup granulated sugar
- 2 egg yolks
- 3/4 teaspoon almond extract
- 1/2 teaspoon vanilla extract
- 1 3/4 cups (7.5oz/212g) all-purpose flour
- 1 tablespoon cornstarch
- 1/4 teaspoon kosher salt
- food coloring (optional)
- sanding sugar, for sprinkling (optional)
Directions:
- Preheat oven to 375 degrees F. Place a nonstick baking sheet in the freezer for at least 10 minutes before baking.
- In a large mixing bowl or the bowl of a stand mixer, cream butter and sugar until light and fluffy, 3 to 5 minutes. Add egg yolks and extracts and beat on medium-high speed for another 2 to 3 minutes until creamy, scraping down the sides of the bowl as needed.
- Add flour, cornstarch, and salt and mix on low speed until dry ingredients are just incorporated. If coloring, divide dough in half and add food coloring and knead until color is evenly distributed.
- Place desired design disk on end of cookie press. Fill tube with dough, then screw on lever top.
- Remove cookie sheet from freezer. Place cookie press flat on cookie sheet surface, press lever, pause for one second to allow the dough to freeze to the sheet, then gently lift press. Repeat with remaining cookies, leaving 1 inch of space between cookies (they won’t spread very much so you should be able to fit an entire tube of dough onto one cookie sheet). If desired, sprinkle cookies with sanding sugar.
- Bake for 6 to 7 minutes or until tops are set and edges are just starting to brown. Remove from oven and let cool for 10 minutes, then transfer cookies to a wire rack to cool completely. Let cookie sheet cool, then freeze for 10 minutes before pressing out the next sheet of cookies.
- Spritz cookies will keep in an airtight container for up to 1 week.
Did you make this recipe?
Let us know what you think!
Leave a Comment below or share a photo and tag me on Instagram with the hashtag #loveandoliveoil.
Disclosure: This post was created in partnership with OXO®. As always, all opinions written are purely our own. We’re incredibly grateful for opportunities like these that allow us to continue sharing delicious recipes with you, so thank you for supporting us and the brands we love.