Roasted Carrots with Basil & Carrot Top Pesto
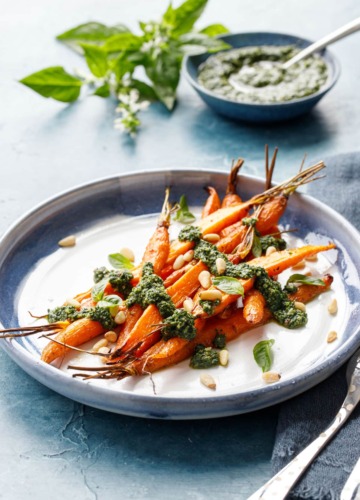
Roasting carrots brings out their natural sweetness; when topped with a tangy pesto made with the parsley-like carrot tops (just say no to food waste!)...
Roasting carrots brings out their natural sweetness; when topped with a tangy pesto made with the parsley-like carrot tops (just say no to food waste!)...

These sweet and salty peanut butter-packed cookies are a peanut butter lover’s dream: soft and chewy and studded with peanut butter chips for an even...

Chill out with these boozy ice pops based on your favorite tiki cocktail: the mai tai! With a unique slushy consistency (thanks to the ample...
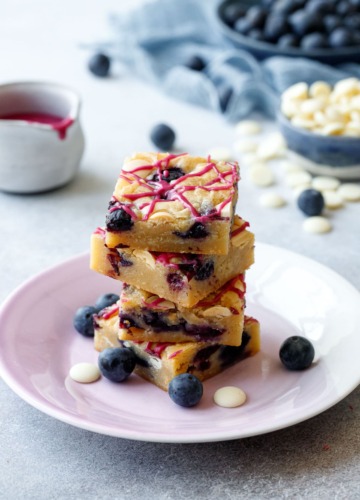
With a satisfyingly fudgy texture, these white chocolate blueberry blondies are studded with chunks of white chocolate and pockets of soft, jammy blueberries and finished...
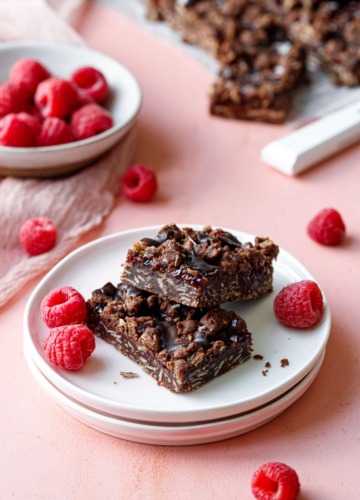
Chocolate and raspberry, together at last in one sweet and salty (and delightfully crumbly) mouthful. Jam crumb bars are one of my favorite desserts, and...
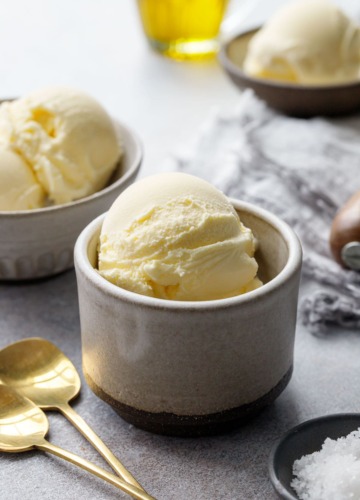
Rich and creamy homemade ice cream made with, yes, extra virgin olive oil (E.V.O.O. I.C. if you will). The bright, fruity, and nutty flavors of...

These homemade sour gummies are bursting with strawberry flavor from real fruit, coated with citric acid and sugar for a spectacularly sour finish. Making your...
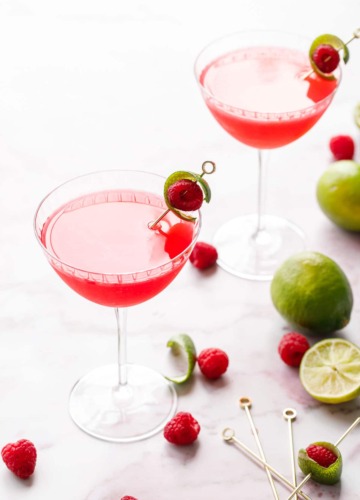
There’s nothing shy about this summery twist on a classic cocktail—from its striking hue to its eye-opening tart flavor, you’ll want to sip on one...
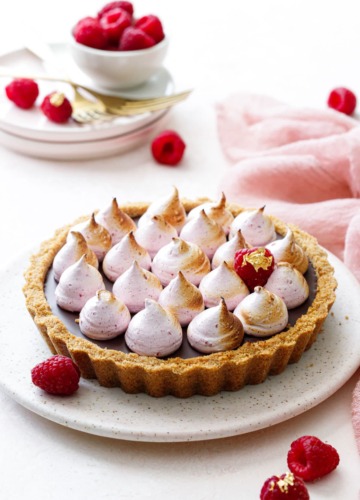
Talk about the perfect dessert, this stunning tart is basically a giant raspberry-flavored s’more with a silky chocolate ganache and fluffy, pink-tinged marshmallow meringue topping...
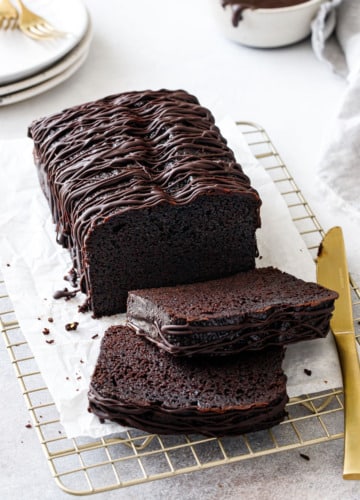
This unique chocolate loaf cake is made with olive oil for a distinctive flavor and perfectly moist crumb. Not to mention it comes together in...
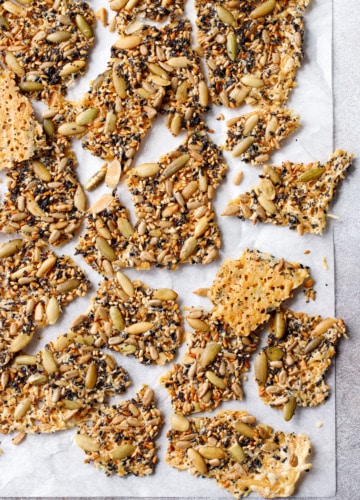
These seeds & cheese crackers are made from two kinds of cheese and five different kinds of seeds, baked to light and crispy perfection. They’d...
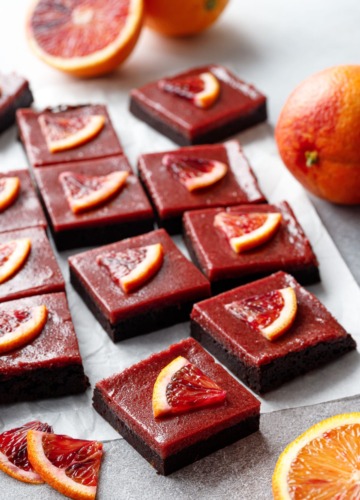
Vibrant in both flavor and color, these blood orange brownies feature a layer of rich, fudgy chocolate brownie topped with a tart blood orange curd....


©2007-2024 All Rights Reserved.
Love & Olive Oil® is a registered trademark of Purr Design, LLC.
Privacy Policy