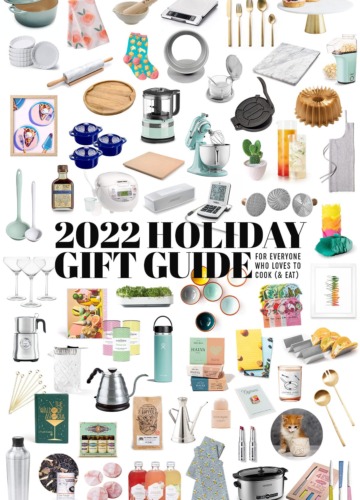
Ultimate Foodie Holiday Gift Guide
Holiday shopping season seems to come earlier and earlier every year, so unlike previous years where I’ve waited until after Thanksgiving to post my gift...
Holiday shopping season seems to come earlier and earlier every year, so unlike previous years where I’ve waited until after Thanksgiving to post my gift...
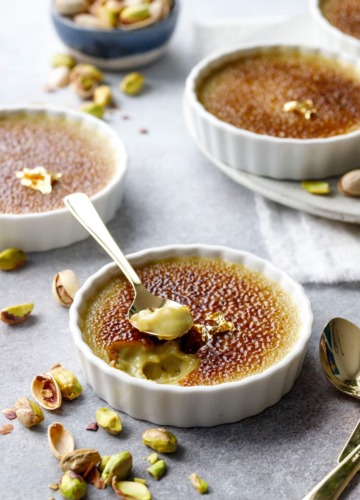
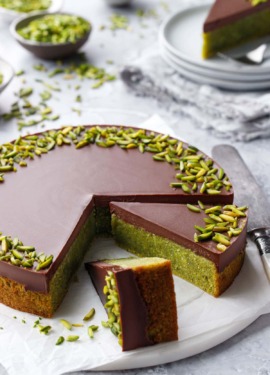
Classic crème brûlée gets a nutty new twist in this ultra-creamy pistachio crème brûlée recipe, made with luscious pistachio cream for a gorgeous flavor and...
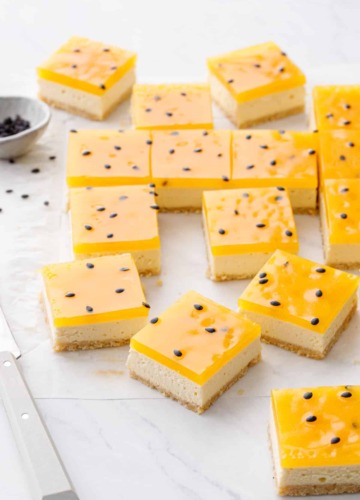
These stunning cheesecake bars feature a coconut and vanilla wafer cookie base, an ultra-creamy vanilla bean cheesecake, topped with a tart layer of passionfruit gelée...

These glorious glazed pumpkin donut waffles are a must make for fall: with a fluffy, yeasty waffle base infused with pumpkin and brown butter, dipped...
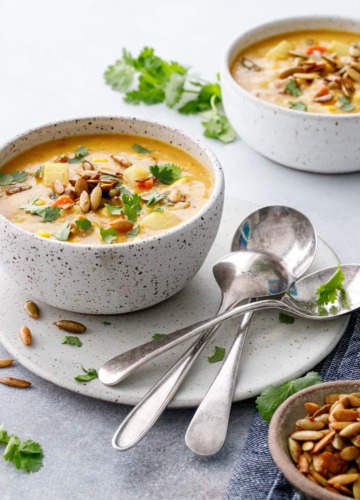
This hearty corn chowder features flavorful Italian sausage, sweet corn, and tender potatoes in a thick and creamy base, topped with some sweet and salty...
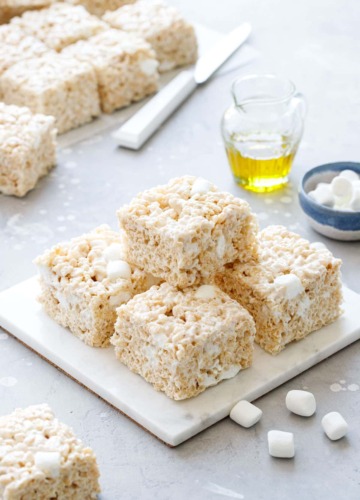
Gooey, chewy, and naturally dairy free, these olive oil rice crispy treats use extra virgin olive oil in place of the typical butter. This twist...
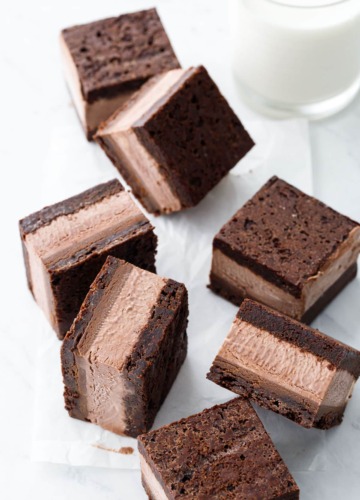
Sweet dreams are made of these malted fudge brownie ice cream sandwiches, with layers of chewy fudge brownie, luscious ganache, and a malted cocoa ice...

Tart and fruity, bright and boozy, these tequila, lime, & watermelon popsicles are the perfect late-summer treat! Freeze a taste of summer that can be...
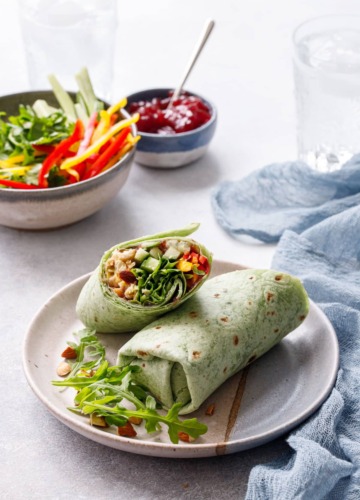
These curried chicken & arugula wraps are proof that lunch doesn’t have to be boring: healthy and satisfying with a mix of tantalizing flavors and...
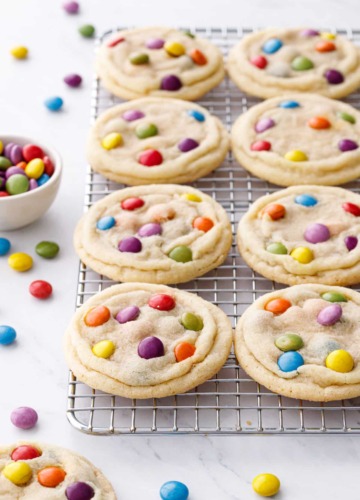
Live your most colorful life with these soft and chewy sugar cookies studded with vibrantly colored milk chocolate M&Ms candies! The perfect sugar cookie is...
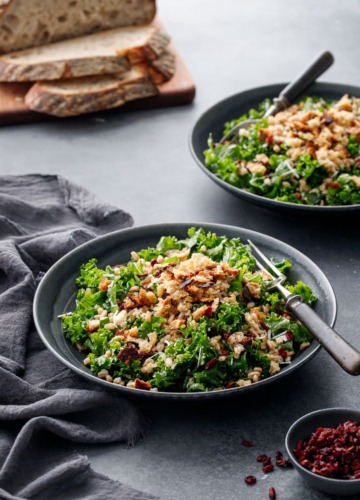
This hearty kale salad is anything but boring: tossed with tangy lemon and flavorful pecorino cheese and topped with nutty farro, crunchy sourdough breadcrumbs, and...
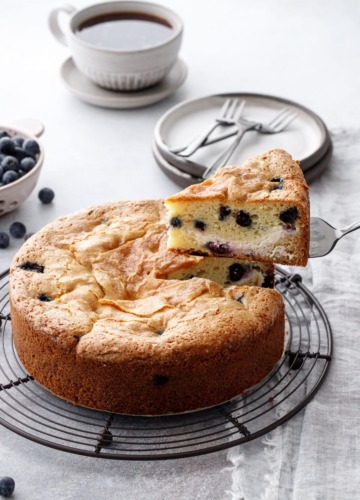
You should know by now that I love coffee cakes (I mean, any excuse to eat cake for breakfast, right?) and this blueberry cream cheese...


©2007-2024 All Rights Reserved.
Love & Olive Oil® is a registered trademark of Purr Design, LLC.
Privacy Policy