Growing up, my grandparents had a house on Balboa Island in Southern California, and we spend a lot of time out there as kids: playing in the shallow bay waters, hopping the ferry over to the fun zone to play skee ball, and walking to Marine Avenue to Dad’s in the mornings for old-fashioned donuts, and back again in the afternoons for frozen bananas and Balboa bars.
It’s a place that brings back nothing but fond memories.
Of course, no surprise that over half of those fond memories involve food in one way or another.
I’m sure you’re probably all familiar with frozen bananas; they’re pretty self-explanatory: a whole banana, frozen solid and then dipped in chocolate and rolled in sprinkles (or whatever other topping you choose).
Balboa bars are basically vanilla ice cream bars presented in the same way, freshly dipped in chocolate and enrobed in the topping of your choice.
I am pretty definitively a frozen banana girl, but the Balboa bars were always tempting. I always enjoyed my bananas (coated in rainbow sprinkles, always!) but that didn’t mean I didn’t gaze longingly at my cousin’s Balboa bar too.
As with all my past decision-making dilemmas, rather than force myself to decide, I decide NOT to decide and have both instead… combining both treats into one single, awesome frozen dessert.
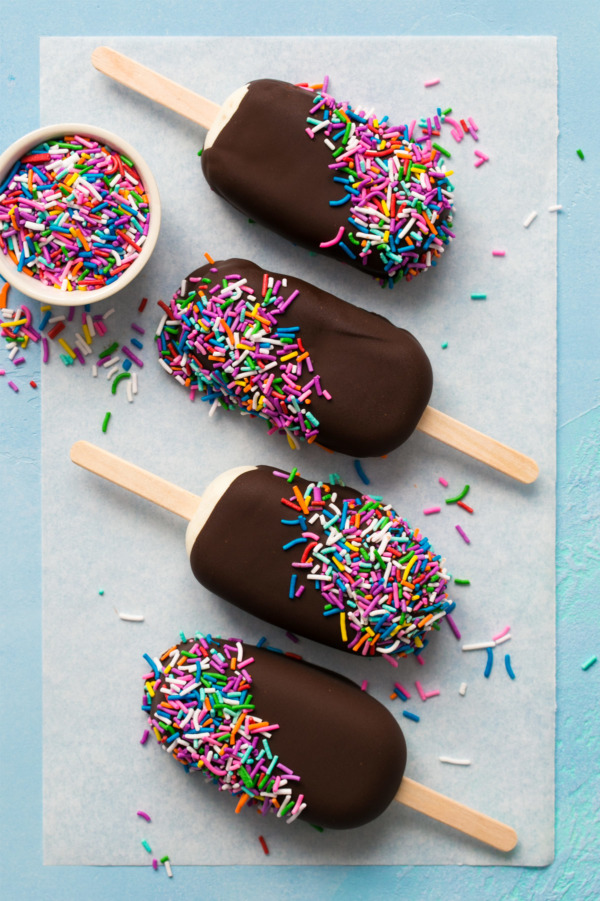
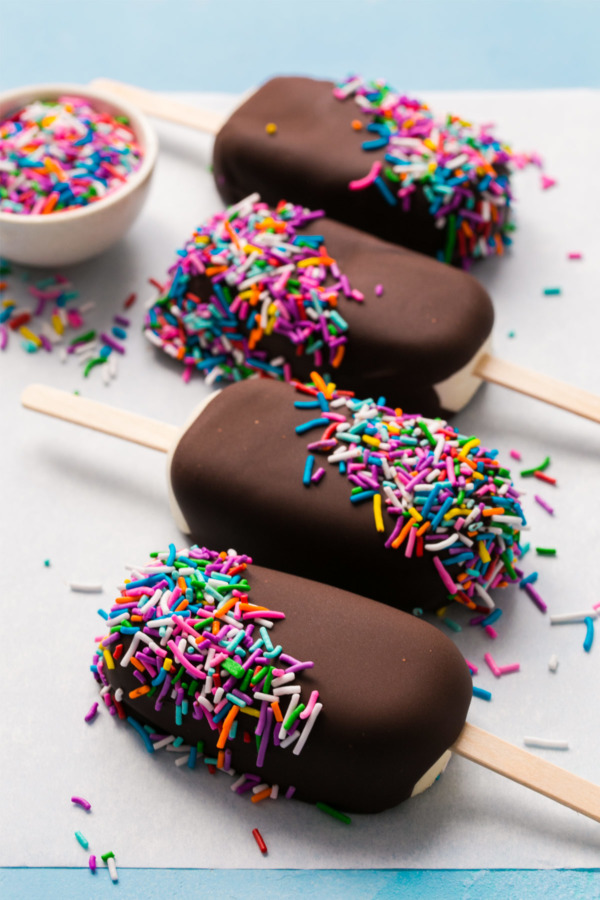
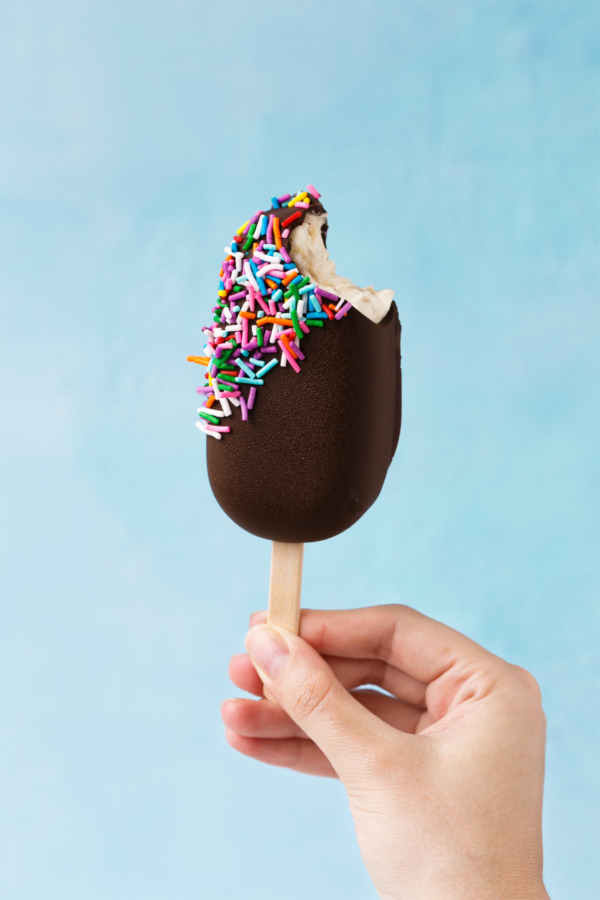
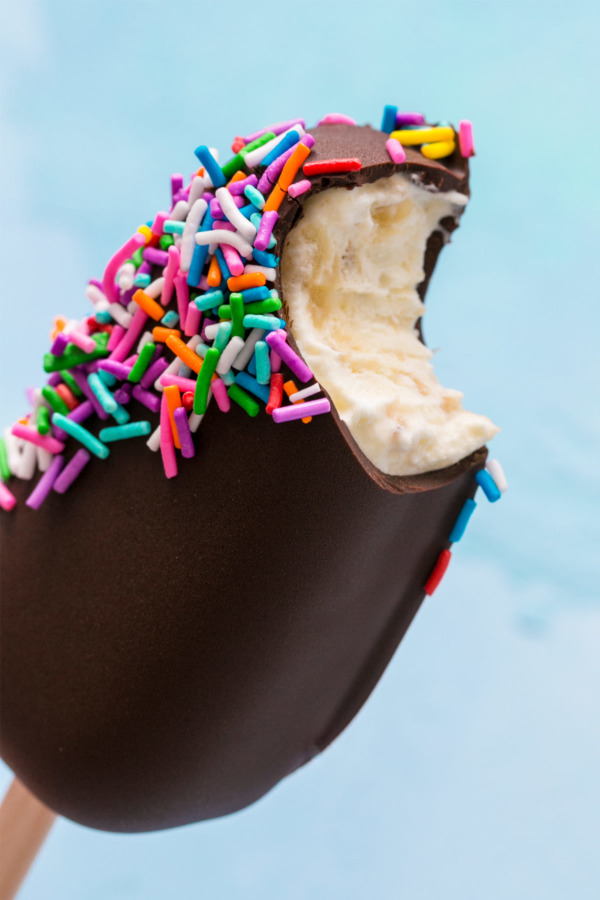
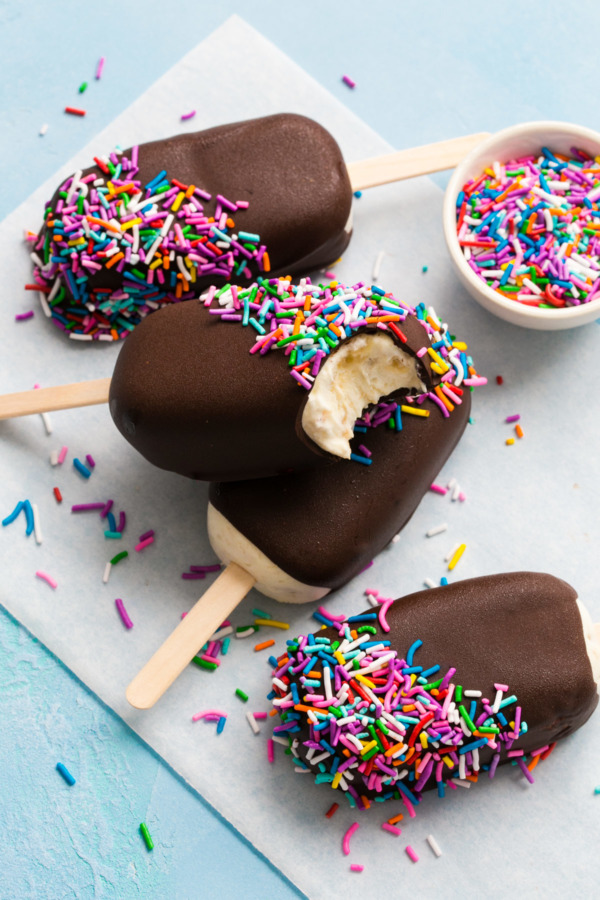
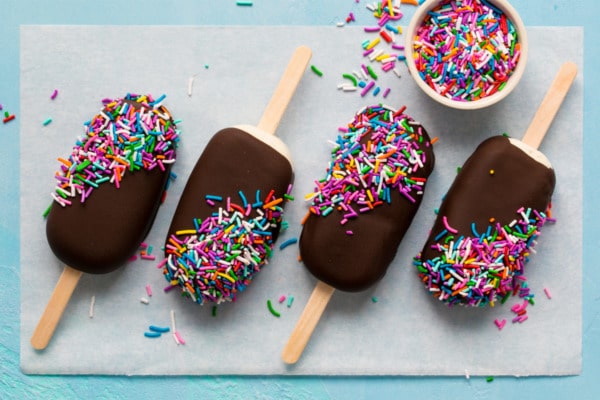
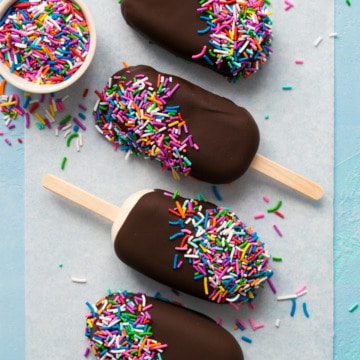
With that in mind I present to you: the Frozen Banana Ice Cream Bar. A simple no-churn banana ice cream, molded into bars, and then dipped in dark chocolate and rainbow sprinkles.
The best of both worlds.
While the no-churn ice cream is dead easy and pretty darn good, I don’t like it quite as much as actual banana ice cream which is much creamier and robust in flavor. But is it worth the extra 45 minutes of cook time plus an overnight rest plus another 20 minutes of churning? Debatable. That’s where the real beauty of no-churn ice cream lies: it is so quick to come together and is dead easy to make. I’m sold.
I used these silicone ice cream bar molds, which are a perfect mini size for a single serving. One batch will make 4 bars.
If you don’t have ice cream bar molds, you could also spread the ice cream base into a parchment-lined pan (a loaf pan might be the perfect size) freeze overnight, then lift it out, cut into bar shapes, insert sticks and dip in chocolate. You could also scoop the ice cream into balls, refreeze, and then dip in chocolate for banana ice cream truffles. Or go sundae style and scoop the ice cream into a serving bowl, douse with hot fudge, and pile high with rainbow sprinkles. Your call.
Frozen Banana Ice Cream Bars
Frozen banana meets Balboa bar in this easy summer treat! For maximum fun, dip in rainbow sprinkles.
Ingredients:
- 1/2 cup heavy cream
- 1 tablespoon sweetened condensed milk
- 1/4 teaspoon vanilla extract
- pinch salt
- 1 ripe banana, mashed (1/2 cup mashed)
- 8 ounces semisweet or dark chocolate, finely chopped
- 1-2 tablespoons coconut oil or unflavored vegetable shortening
- sprinkles or chopped nuts, for decoration
Directions:
- Combine heavy cream and sweetened condensed milk in a mixing bowl or the bowl of a stand mixer fitted with the whisk attachment. Beat on medium speed until cream holds medium-stiff peaks. Mix in vanilla and salt.
- Mash banana until smooth and place in a bowl (don’t do this first otherwise the banana will turn brown while your cream is whipping). Fold in whipped cream until smooth.
- Spread banana mixture into silicone ice cream bar molds. You should have just enough for 4 bars.
- Place molds in freezer and freeze overnight until completely solid.
- The following day, line a baking sheet with parchment paper and place in the freezer to chill.
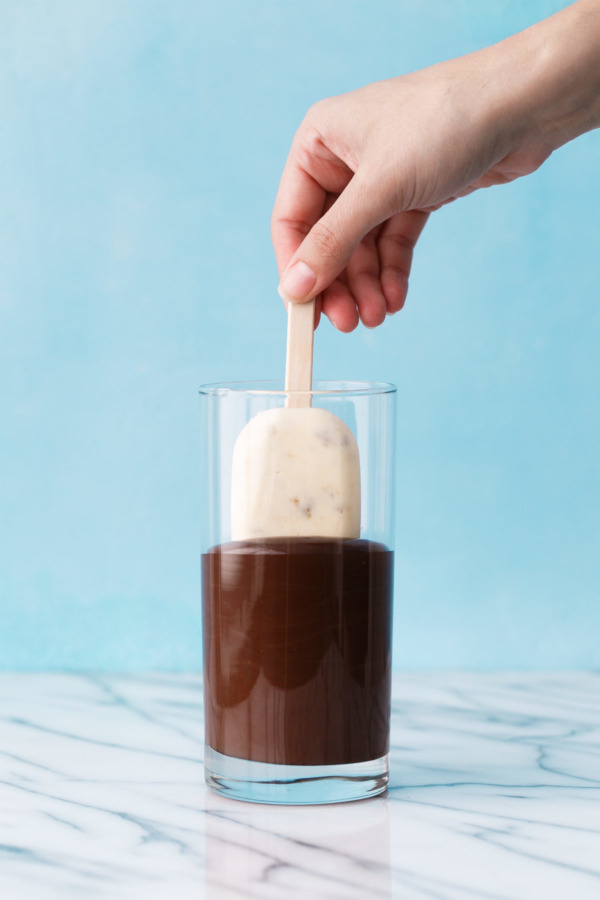
- Meanwhile, gently melt chocolate together with coconut oil on the stovetop over very low heat or in 30 second intervals in the microwave at 50% power until smooth. You can add a bit more coconut oil as needed to thin out your chocolate if necessary. Transfer chocolate to a glass or mason jar (to reduce waste, the glass should be as narrow as possible while still being just big enough for the popsicle to dip, and at least 2x the height to allow for displacement).
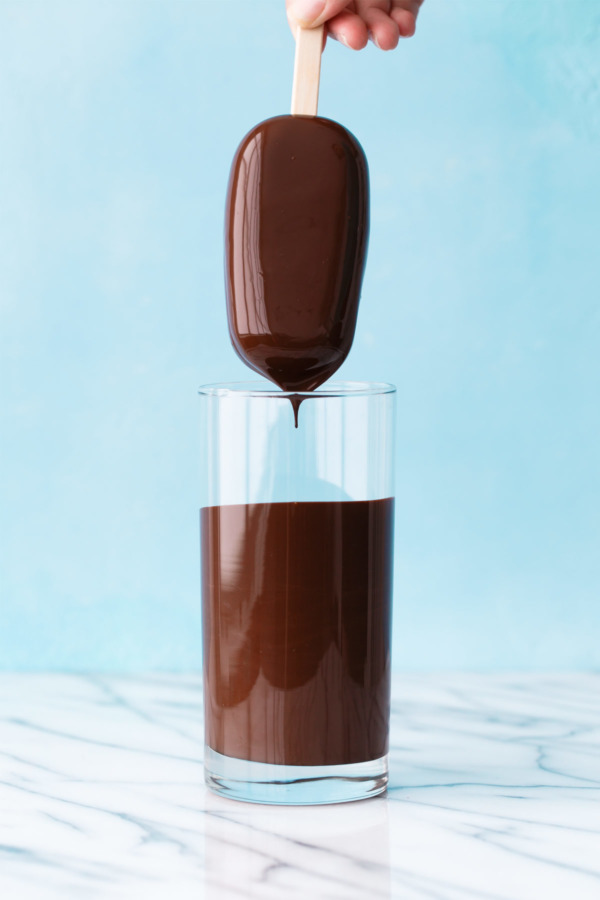
- Remove ice cream bars from silicone molds. Dip into melted chocolate, then press into or sprinkle with sprinkles. Place on chilled baking sheet. Repeat with remaining bars. Return to freezer until set.
Did you make this recipe?
Let us know what you think!
Leave a Comment below or share a photo and tag me on Instagram with the hashtag #loveandoliveoil.