It’s not a proper birthday party without cake. So even though I was throwing a brunch birthday party, I decided there needed to be cake.
As for what kind of cake is appropriate for a brunch party, I’d argue any kind, really, but it’d be nice if that cake fit with the brunch theme. I thought about a citrus cake of some sort, but ultimately went with cinnamon swirl (basically a cinnamon roll in cake form).
That, my friends, is what you call a good decision.
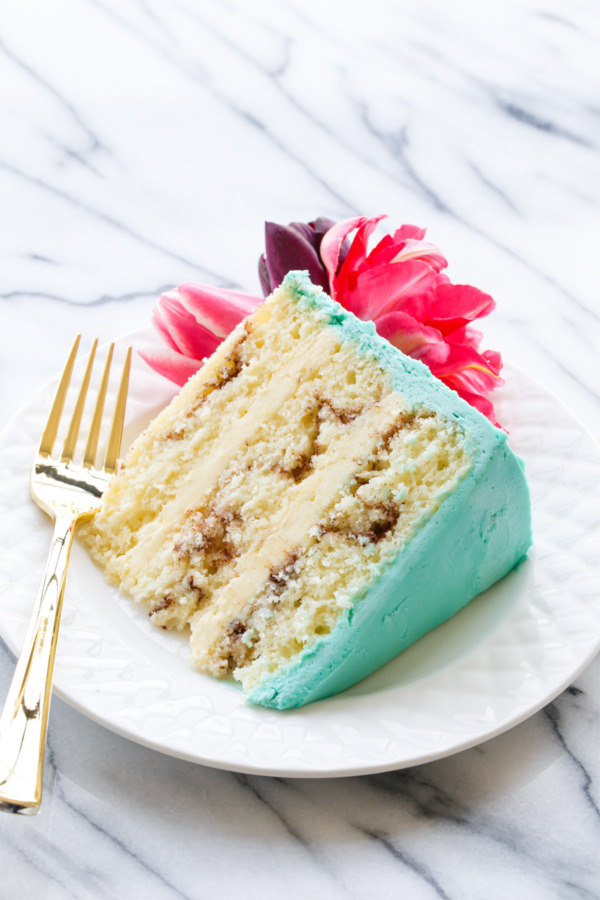
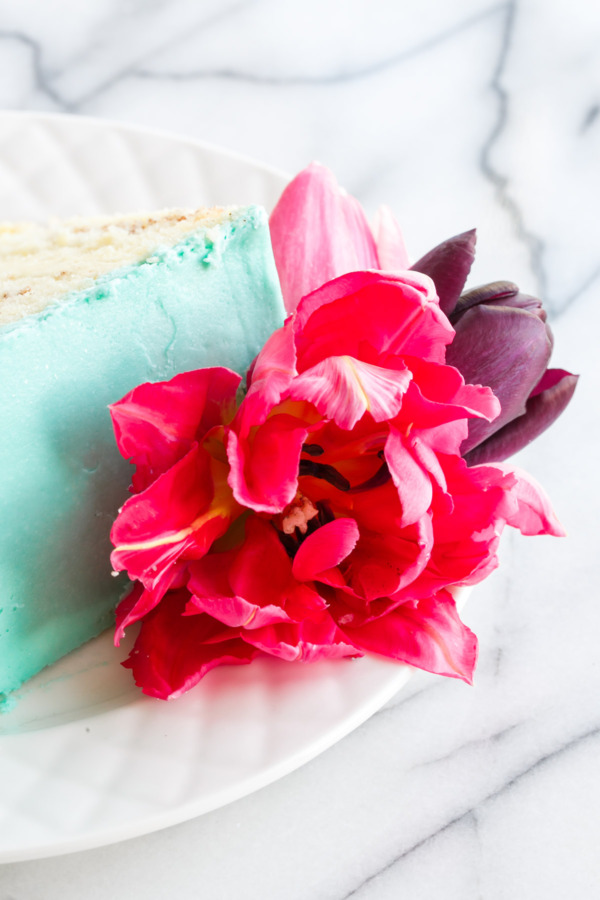
Layers of light, fluffy butter cake are swirled with cinnamon sugar, creating a ribbon of cinnamon visible when you slice into it. The cinnamon flavor is not overpowering, rather perfectly complimentary of the sweet vanilla cake and buttercream.
I filled and frosted the cake with a fluffy vanilla buttercream, made with European-style cultured butter to give the frosting a richer depth of flavor and an almost cream cheese-like undertone without actually using cream cheese (because, sorry dude, I am not a fan of cream cheese frosting). Substituting a bit of mascarpone for some of the butter would have a similar result, adding another layer of flavor and helping to cut the cloying sweetness.
Oh winter buttercream, how I love thee! Your sweetness is so much more subtle that your summertime counterpart, where warmer temperatures and overly soft butter require so much more sugar to acheive a frostable consistency. If you are making this (or any) frosted cake in the summertime, I’d advise substituting at least one stick of butter with shortening to help stabilize the frosting.
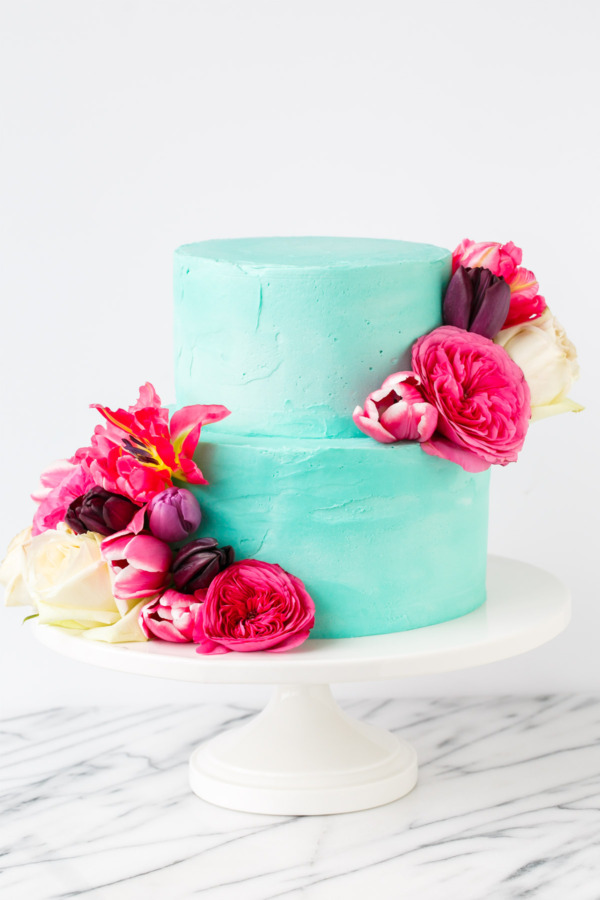
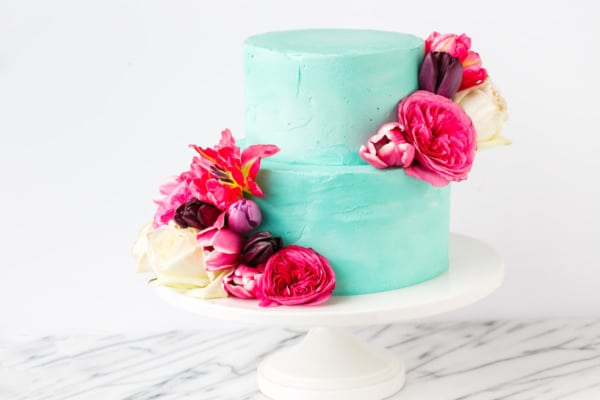
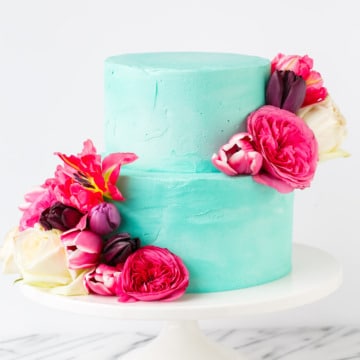
We decorated the cake simply, with fresh flowers leftover from our arrangements on a smooth layer of aqua blue buttercream to match the blog (no easy feat). If you’re trying to get a specific color, you can do a test run on a small bowl of frosting or milk if you have to, but either way, go slow… you can always add more food coloring, but never less. Ultimately I ended up using about 1 drop of Americolor Teal, a few drops of Sky Blue, as well as a generous squirt of Bright White (to offset the yellow of the butter) to achieve the (nearly) perfect color.
When I frosted the cake the frosting took on an almost watercolor-like appearance, entirely by accident, but the result is beautiful. And no, it’s not perfect, but this was perhaps the most level cake I’ve ever assembled (which was a lucky break since stacking two tiers on non-level cakes could have ended very badly).
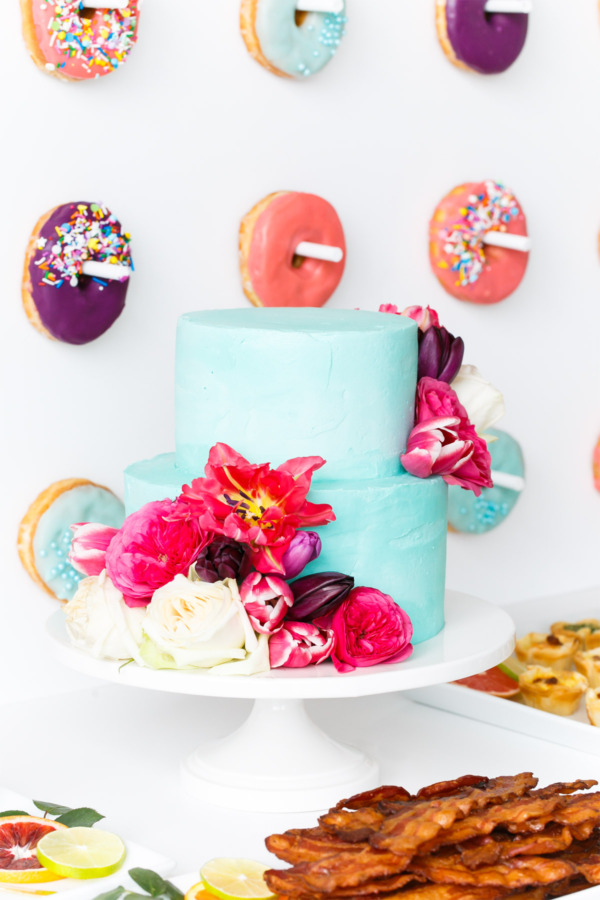
I’m pretty pleased with how this turned out considering it was my first ever attempt at a two-tiered cake. Whether or not they were necessary, I didn’t want to take chances, so I inserted a few plastic dowels in the bottom layer for support. The top layer is sitting on a layer of parchment paper trimmed to the very edge of the cake. Is this proper tiered cake technique? Who knows. Would I try it on more than two tiers? Not without professional help. Will I be making any more tiered cakes anytime soon? Probably not, I can’t think of any equally-momentous occasions that would warrant one!
The recipe below is for an 8 inch round triple layer cake. If you want to replicate my tiered version, just make 1.5 times the recipe below. Bake 3 layers in 8-inch cake pans and 3 layers in 6-inch cake pans. Depending on the size of your mixer, you might want to divide up at least the frosting into batches (this is really the first time I’ve ever wished I had a larger mixer).
Finally: let’s talk flour. When it comes to cakes, the less protein your flour has, the more tender your final cake will be. For that reason I recommend using bleached cake flour or bleached all purpose (the process of ‘bleaching’, whereupon the flour is treated with very small quantities of chlorine gas, actually changes the chemical makeup of the flour, softening it and making for a more tender crumb in the final cake. If you want to get really scientific about it, this article about bleached cake flour—and why it is indispensable for baking–is truly enlightening). While regular AP flour may be good for cookies or muffins or whatnot, for cakes, my go-to flours are Swan’s Down cake flour or White Lily AP flour (and in fact, for this specific cake, I ran out of cake flour, so I used a mix of both).
Oh, and did you happen to see I’m giving away a year’s supply of White Lily flour? It includes 4 bags of Bleached AP flour, enough to make, well, lots and lots of cakes. You’ll also want to come back tomorrow to check out another amazing giveaway that will certainly make your cake baking endeavors easier.
Cinnamon Swirl Layer Cake
Layers of tender vanilla butter cake swirled with a cinnamon swirl: your favorite cinnamon roll in cake form!
Ingredients:
For Cake:
- 2 1/2 cup cake flour or bleached all purpose flour
- 4 teaspoons baking powder
- 1/2 teaspoon kosher salt
- 3/4 cup (1 1/2 sticks) unsalted butter, room temperature*
- 1 1/2 cups granulated sugar
- 3/4 cup sour cream, room temperature
- 2 teaspoons vanilla extract
- 2 large eggs, room temperature
- 2 large egg whites, room temperature
- 1 cup whole milk
For Cinnamon Swirl:
- 1/4 cup granulated sugar
- 1 tablespoon ground cinnamon
For Frosting:
- 4 sticks unsalted butter (use all or half cultured butter for a more flavorful frosting)
- 1/4 cup heavy cream
- 1/4 teaspoon kosher or fine sea salt
- 4 cups sifted powdered sugar (more or less as needed)
- 1 teaspoon vanilla extract
Directions:
- Preheat oven to 350 degrees F. Take out butter and all wet ingredients at least 30 minutes or more before you start, they need to be at room temperature.
- Butter and line the bottoms of 3 8-inch cake pans with parchment paper. Butter parchment and the sides of the pans.
- Whisk together flour, baking powder, and salt and set aside.
- In a large mixing bowl or the bowl of a stand mixer, cream butter and sugar until very light and fluffy, 3 to 5 minutes, scraping down the sides of the bowl at least once.
- Add sour cream and vanilla and mix well.
- Add eggs, followed by egg whites, mixing well after each addition.
- Add half of dry ingredients and mix on low speed until just incorporated, then add half of milk and mix. Scrape down the sides of the bowl. Add remaining dry ingredients, followed by remaining milk, mixing until just incorporated.
- In a small bowl, whisk together cinnamon and sugar. Divide half of batter evenly among prepared pans. Sprinkle an even layer of cinnamon sugar over batter. Top with dollops of remaining batter, then gently spread into an even layer with an offset spatula, running the spatula through the batter once or twice to swirl the sugar (don’t overdo this or you’ll mix in the sugar instead of swirling it).
- Bake for 25 to 30 minutes or until edges are barely starting to turn brown and a toothpick inserted near the center comes out clean. Transfer to a wire rack to cool for 15 minutes, then turn cakes out of pans and let them cool completely, then wrap tightly in plastic wrap and chill. At this point you can also freeze the layers, wrapped tightly in plastic and stored in a zip top bag, until you are ready to assemble (freezing also makes the cakes easier to level/frost later, I do it even if I’ll be assembling the cake the next day).
- To prepare frosting, in a large mixing bowl, beat butter on medium-high speed until smooth and fluffy, 2 to 3 minutes. Add powdered sugar, 1/2 cup at a time, mixing well after each addition. As frosting thickens, add a few tablespoons of cream as needed. Depending on the temperature and consistency of your frosting, continue alternating additions of cream and powdered sugar, until frosting is light and fluffy. Mix in vanilla extract and food coloring (if desired), then increase speed and beat until almost whipped-cream like in consistency. You can make the frosting a day ahead of time; store in an airtight container in the refrigerator. Let the frosting fully come up to room temperature then whip it again in the mixer (with a smudge more cream if needed) before frosting your cake.
- To assemble, level each cake layer by cutting of the domed top with a long serrated knife. Place one layer, flat side down, on a cake stand or serving platter. Spread on about 1/2 cup of frosting onto cake using an offset spatula. Position second layer on top and press to adhere. Repeat with another 1/2 cup of frosting, and then position final cake layer, flat side up.
- Cover the entire cake with a thin layer of frosting. This “crumb coat” will keep the stray crumbs in place and make frosting the cake easier. Refrigerate for about 15 minutes to allow this crumb coat to set, then cover with remaining frosting, reserving some frosting for piping decorative details and borders if desired.
- Frosted cake will keep overnight, lightly covered or in an airtight container in the refrigerator or a cool, dry place. Sliced cake should be refrigerated in an airtight container otherwise it’ll dry out very quickly.
*Cook’s Note: Room temperature means just that: room temperature. For a smooth batter and even crumb on your final cake, it’s essential that all wet ingredients be at room temperature. That includes butter, eggs, sour cream, and milk. Plan ahead, and let these things sit out for 30 minutes to 2 hours (depending on the temperature of your room) before starting.
Cake layers adapted from Life, Love and Sugar.
All images and text ©Lindsay Landis / Love & Olive OilDid you make this recipe?
Let us know what you think!
Leave a Comment below or share a photo and tag me on Instagram with the hashtag #loveandoliveoil.