)
In this household, blog birthdays are just as important as human (and feline) birthdays, if not moreso. I mean, I’ve never really thrown myself a birthday party, and yet I had no qualms about celebrating the blog’s 5th anniversary with a lime green dessert table. It’s just how it is around here.
Technically I’m a few days late here (February 15th being the actual date of the first published post) but I couldn’t let the 9 year milestone go unacknowledged…
Because 9 years is a BFD. A big frosted deal.
It’s crazy to imagine it’s actually been nine years. I can’t even wrap my brain around it.
Cake, on the other hand, that’s a no-brainer.
Last year I celebrated with a reader survey. Which, if you think about it, really isn’t very exciting. It’s like celebrating your wedding anniversary at the DMV.
Sorry about that.
This year, it’s all about the cake.
Because a birthday just isn’t a birthday without cake, that’s a fact.
(That said, I may actually do another reader survey here in the coming weeks, since your feedback was so valuable, but a survey is no way to celebrate such a milestone day.)
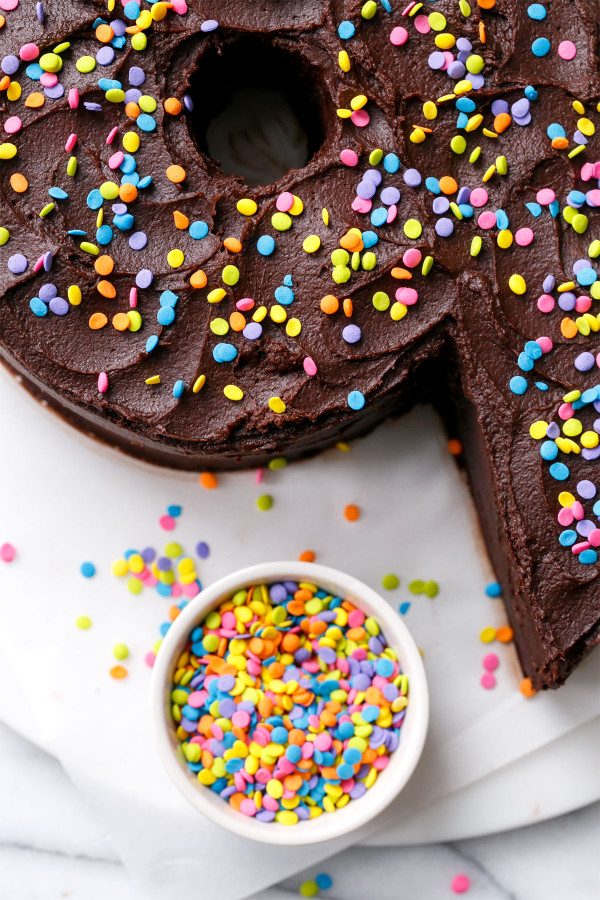
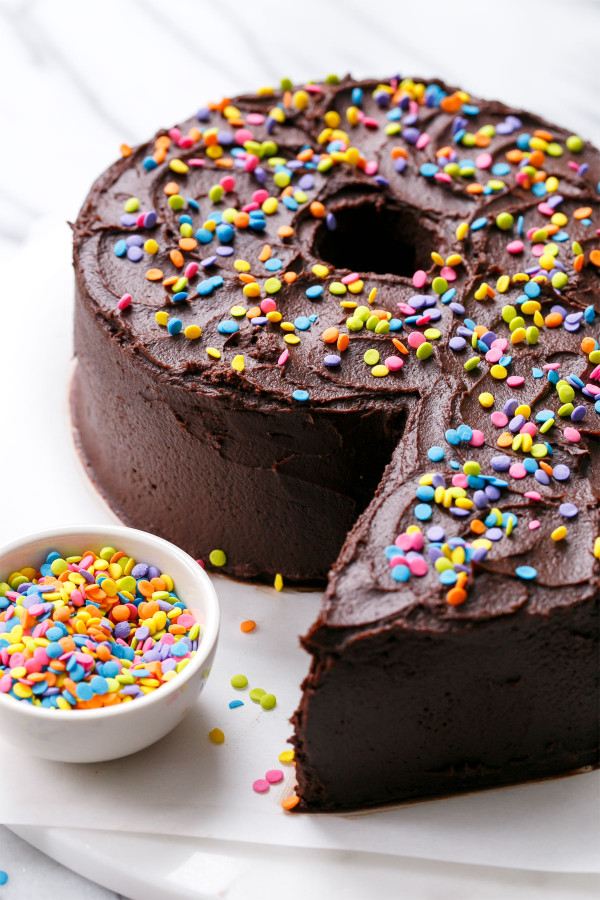
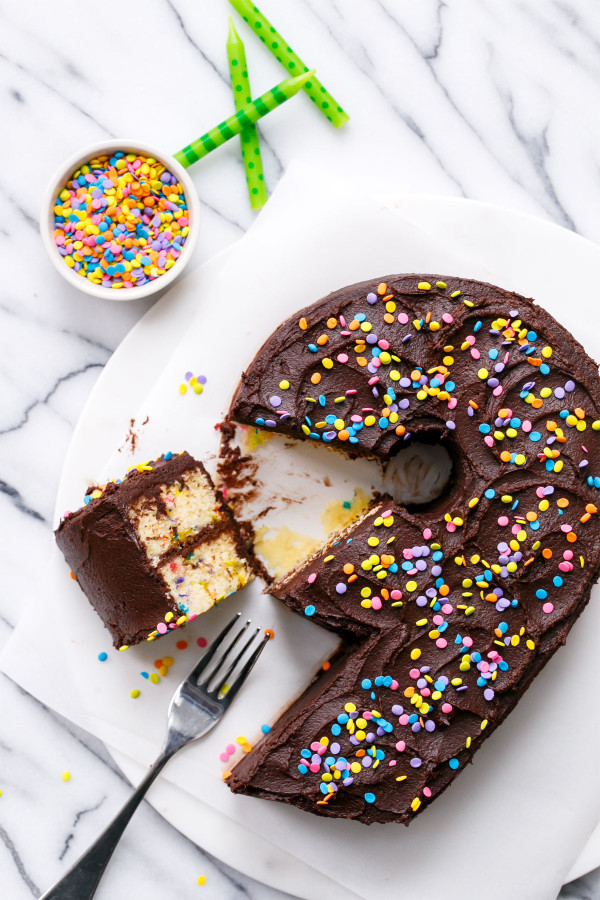
To celebrate 9 years, I made a giant number 9 out of cake. I think this same idea would be perfect for a kid’s birthday, at least until they hit age 10, whereupon you’d need to make two giant numbers instead of just one.
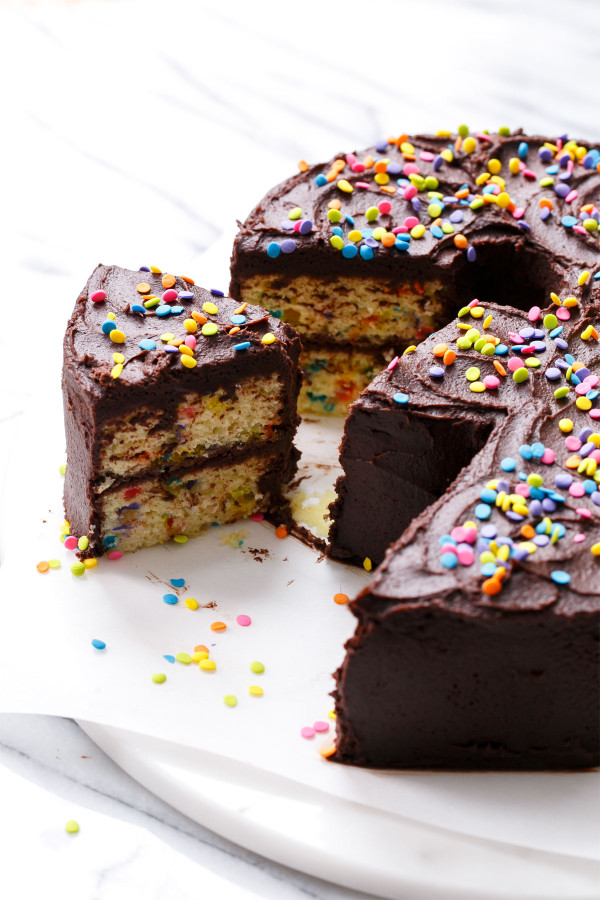
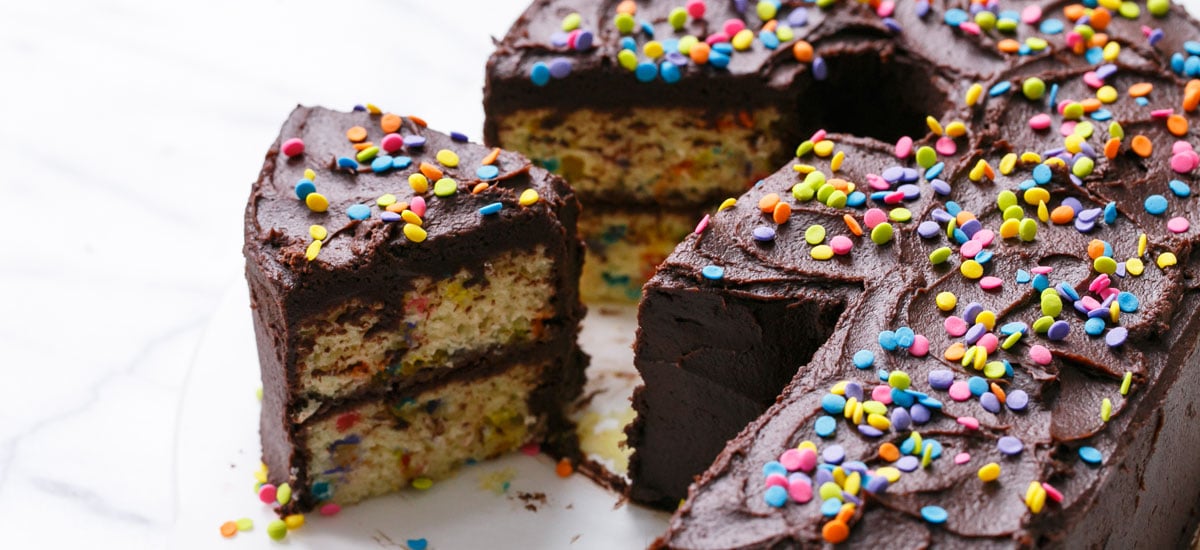
I used my favorite funfetti cake recipe, which I’ll love until the day I die. It’s perfectly moist, with a slight tang from the buttermilk to offset the rich butter and fragrant vanilla. And sprinkles. You can’t go wrong with colorful sprinkles.
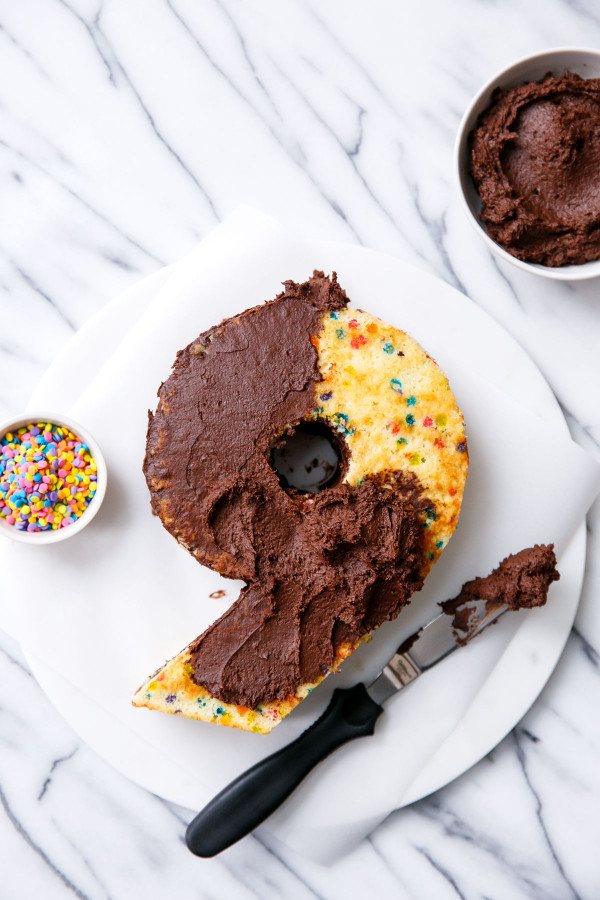
I topped it this time with a fluffy chocolate buttercream, just to show its versatility. Vanilla cake doesn’t have to be limited to just vanilla buttercream.
How I did it:
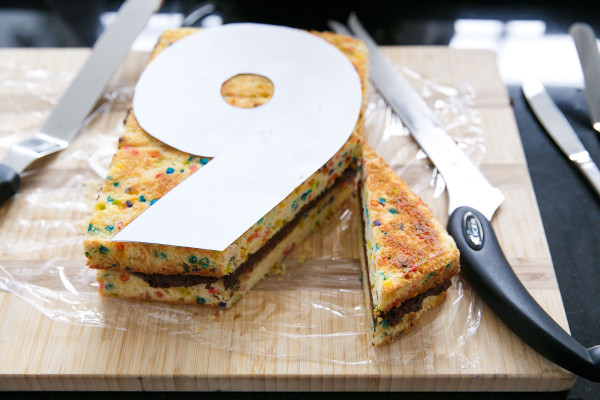
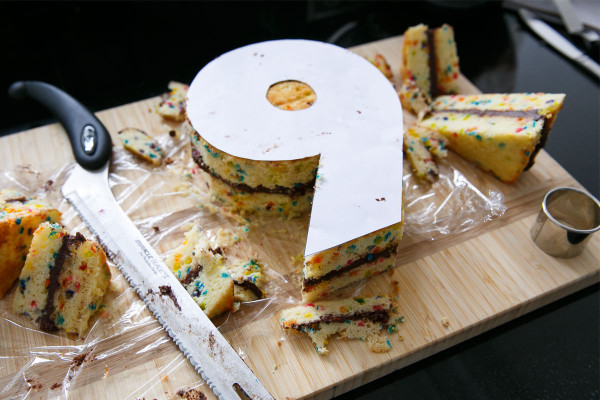
I baked the cake in a quarter sheet pan. Once it had baked and fully cooled, I cut the cake in half and stacked the two layers on top of each other with frosting in between. Then I printed out a “9” template and laid that on top of the cake.
Using a serrated knife, I cut around the template. For the circular parts of the number, it’s easiest to cut off triangles of gradually decreasing sizes, until you end up with a rounded shape. It’s easier that way than trying to saw your way around a semi-circle.
Yes, the scraps look like sandwiches. And yes, you should eat them.
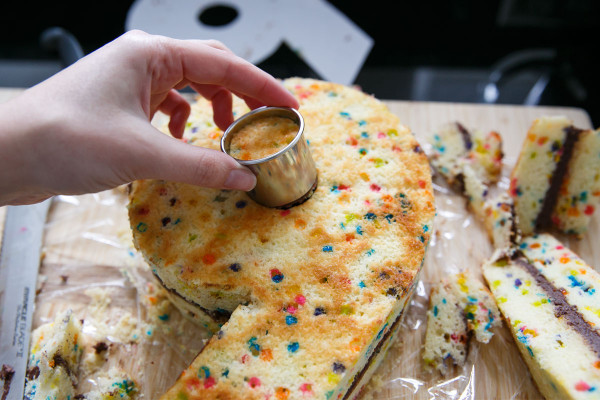
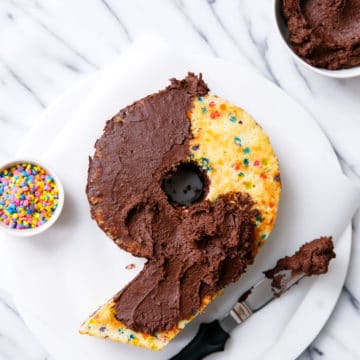
For the center hole, I used a round cookie cutter which was deep enough to cut out the top layer. Then I used a smaller knife to carefully cut out the lower layer (it won’t be quite as crisp but that’s ok because no one will ever see it). Use a spoon if you need to to fish out the cakehole (more snacks for you).
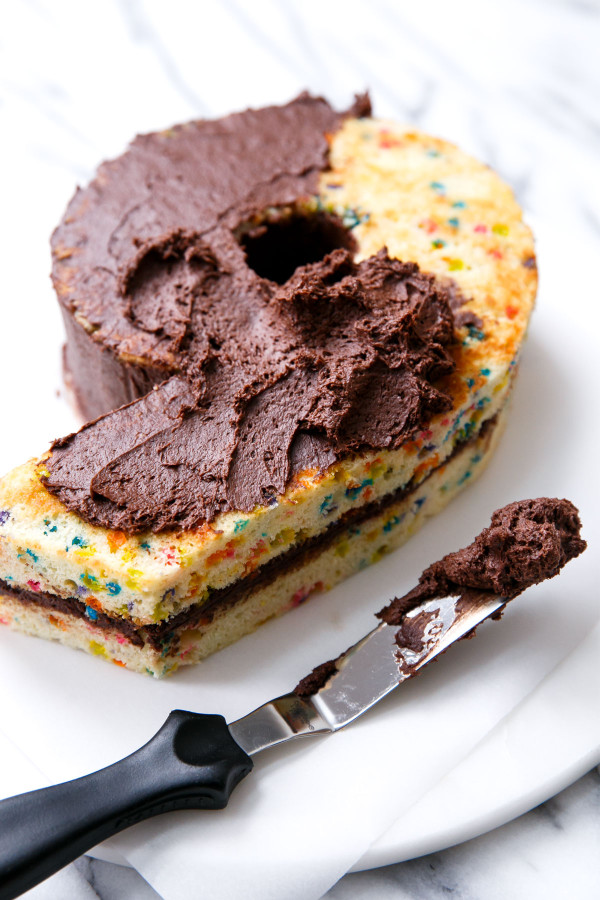
Once the cake was trimmed to my satisfaction, the cake then got a thin crumb coat all over, taking care to make the corners as level and crisp as possible. Once chilled, the frosting hardens and makes the final layer of frosting much neater and easier.
I’d never done a carved cake like this, so I was quite pleased with how it turned out, and Taylor was even more pleased with how it tasted. I think he gobbled up all the scraps before I was even done frosting the darn thing.
Thanks for celebrating this special day with me. Because really, it wouldn’t be a celebration at all without you. With out you I’d just be some crazy girl taking pictures of her food (ok, so even with you I’m still that crazy girl, but it seems more reasonable when there’s someone on the other end of it).
What will the 10th year have in store? I foresee big things, exciting things, delicious things… and a whole lot more cake.
Enjoy!
Funfetti Birthday Cake with Fluffy Chocolate Buttercream
This recipe will fill one quarter sheet pan or three 6-inch round pans. For a half sheet pan or an 8-inch layer cake, double the recipe.
Ingredients:
For Cake:
- 1 1/2 cups cake flour
- 1 1/4 cups granulated sugar
- 1 1/2 teaspoons baking powder
- 1/2 teaspoon salt
- 3/4 cup (1 1/2 sticks) unsalted butter, softened and cut into cubes
- 1/2 cup plus 2 tablespoons buttermilk, divided
- 2 large eggs
- 1 large egg yolk
- 1 teaspoons vanilla extract
- 1/2 cup confetti quin sprinkles
For Chocolate Frosting:
- 3/4 cup (1 1/2 sticks) unsalted butter, room temperature
- 2/3 cup dark or Dutch processed cocoa powder, sifted
- 2 to 2 1/2 cups powdered sugar
- 1/4 to 1/2 cup heavy cream, more or less as needed
- 3/4 teaspoon vanilla extract
- 1/4 teaspoon fine sea salt
Directions:
- Preheat oven to 350 degrees F. Butter the bottoms and sides of a quarter sheet pan (or equivalent). Line bottom with parchment paper; butter parchment.
- In a large mixing bowl or the bowl of a stand mixer, combine flour, sugar, baking powder, and salt. Mix to combine. Add butter and 1/2 cup of buttermilk. Mix on low speed until flour is evenly moistened, then increase speed to medium-high and beat until light and fluffy, 1 to 2 minutes, scraping down the sides of the bowl as needed.
- In a small bowl, beat remaining 2 tablespoons buttermilk with eggs, egg yolk, and vanilla. Add to the batter mixture one-third at a time, mixing well after each addition. Stir in sprinkles. Spread batter into prepared pan(s).
- Bake for 20 to 25 minutes, rotating halfway through baking, until edges are lightly golden brown and the center bounces back when you gently press it with your finger. Transfer to a wire cooling rack to cool completely, about 1 hour. Run a knife or thin spatula around the edge of the pan, then invert the cake onto wire rack. It should come out easily and cleanly. Remove parchment from the bottom. At this point the cake can be wrapped tightly in a double layer of plastic wrap and frozen until ready to use (in fact, I recommend you freeze the cakes overnight, as the frozen cakes will be easier to level and frost later).
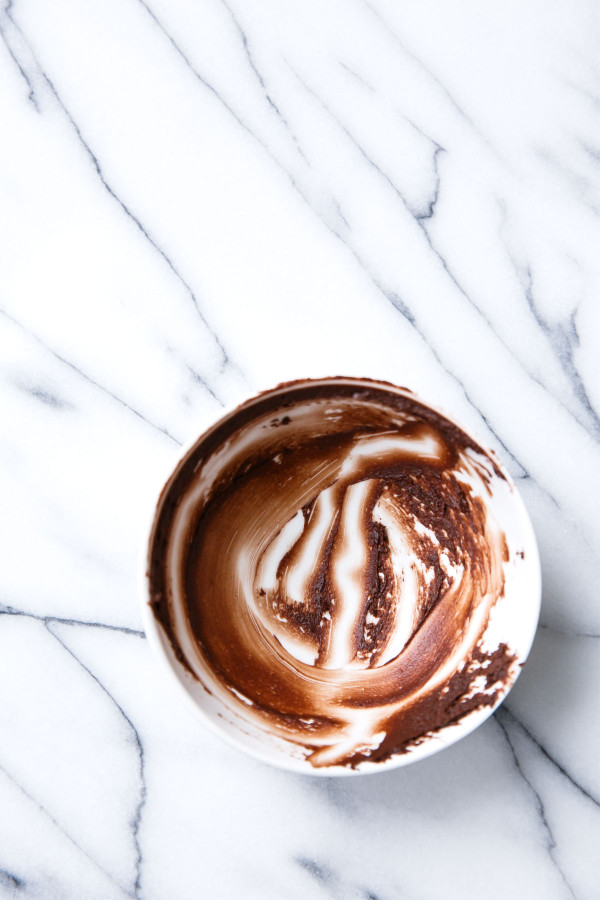
- To prepare frosting, in a large mixing bowl, beat butter on medium-high speed until smooth and fluffy, 2 to 3 minutes. Add cocoa powder and beat until smooth. Add powdered sugar, 1/2 cup at a time, mixing well after each addition. As frosting thickens, add a few tablespoons of cream as needed. Depending on the temperature and consistency of your frosting, continue alternating additions of cream and powdered sugar, until frosting is light and fluffy. The amount of cream you need will vary depending mainly on the room temperature; on a cold day in February I used about 1/2 cup of cream, but on a hot day I might not need any at all. Use your best judgement here. Add vanilla and salt and beat on high for an additional 1 to 2 minutes or until light and fluffy.
- To assemble, cut cake in half using a large serrated knife. Place one layer, flat side down, on a cake stand or serving platter. Spread on about 1 cup of frosting onto cake using an offset spatula. Position second layer on top and press to adhere.
- Position your number template on top of the cake, and trim off excess. For round areas, cut off one triangle at a time until you have an overall rounded shape. For the center hole, I used a round cookie cutter to cut out the top layer, then a small serrated or pairing knife to gently cut out the lower layer. Use a small spoon to scoop it out.
- Cover the entire cake with a thin layer of frosting. This “crumb coat” will keep the stray crumbs in place and make frosting the cake easier. Refrigerate for about 15 minutes to allow this crumb coat to set, then spread with remaining frosting. Decorate with additional confetti sprinkles, if desired.
Did you make this recipe?
Let us know what you think!
Leave a Comment below or share a photo and tag me on Instagram with the hashtag #loveandoliveoil.