I’ve been working on this recipe since March.
It’s quite hard when you’re working with a seasonal ingredient, and trying to test a recipe that requires long rest periods between steps (and I don’t mean hours, I mean weeks and even months).
The first batch of limoncello I made was less than stellar, with a bit too much of a bitter burn to be palatable. While it was plenty sweet, it had bite. And not just a little nibble either… this stuff had serious fangs.
I almost gave up.
But after our Alaskan cruise this spring aboard the Ruby Princess, I was inspired to try again. One night, our friendly and incredibly animated waiter, Peres, served us glasses of their special house-made (er, ship-made?) limoncello. It blew my mind, smooth and perfectly sweet with a luscious lemon flavor and none of the alcoholic burn that my version had. Brenda and I grilled him afterwords as to how it was made, since it was leaps and bounds better than my first attempt. He was more than willing to share their process, which seemed to involve little more than lemons, vodka, and sugar. He didn’t have specifics, of course, but I stored the information in the back of my mind, determined to give it another go once I got back home.
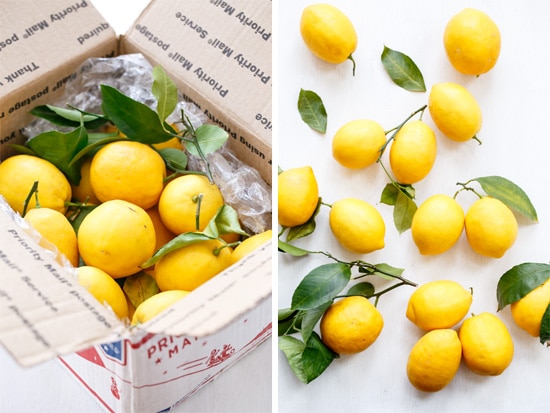
My mom had sent me the lemons for my first batch (Meyer lemons having a very short season of availability here), but she didn’t have any more ripe ones. And I wanted to be sure I got organic, unsprayed lemons, as any spray or residue on the lemons themselves can impart a bitter flavor to the limoncello, and that was one variable we didn’t want to test. So that pretty much rules out your plain old grocery store lemons. I called up my aunt in California who happens to have a prolific tree in her yard (color me jealous). I tell you, family members with fruit trees are invaluable when you’re a food blogger.
A week or so later a huge box of lemons arrived, “as organic as they get, spiders and all” said the note.
That’s what I call one big box of happy, right there. Well, minus the spiders of course.
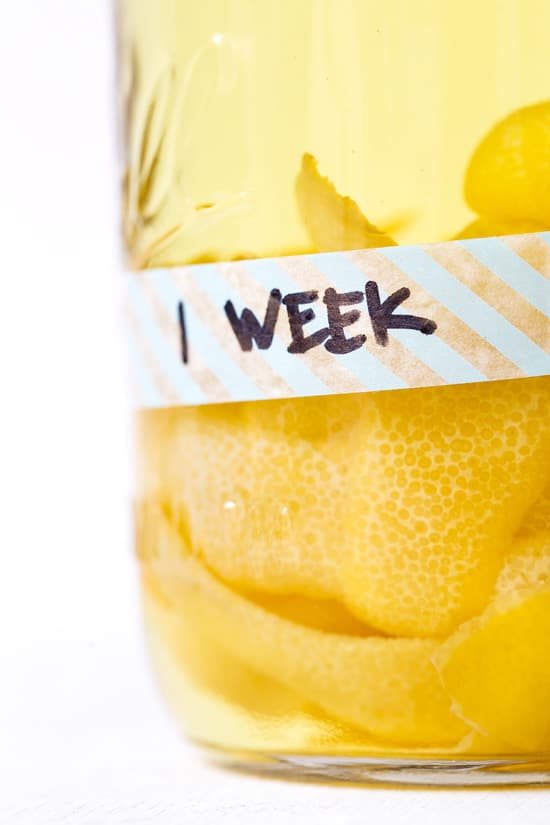
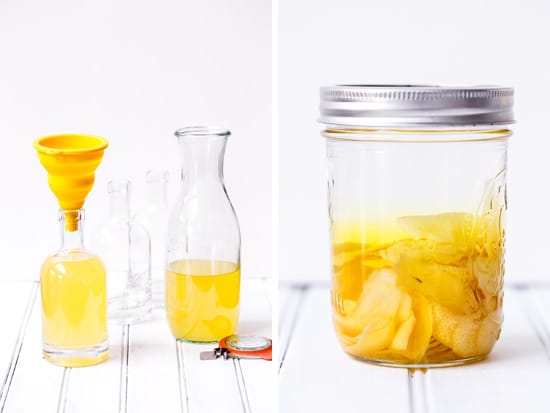
I quickly set about zesting and de-pithing and steeping the lemons, dividing up what I had to test as many different variables as I could.
I made some with pure 120-proof grain alcohol (Everclear) and some with 100-proof vodka (slightly higher than the standard 80 proof). I divided each into smaller batches and let them steep for 1, 2, and 4 weeks, respectively, to see how much the flavor would change with time. Each batch got mixed with sugar syrup and then stashed away to mellow for at least 2 weeks before we tasted it (see why this post has been so long in the making?)
I even tried this unusual lemon-hammock method from the New York Times, which—spoiler alert—failed miserably. The only ‘flavor’ that came out of the lemon was absorbed by the cheesecloth, leaving nothing but clear alcohol with no noticeable lemon flavor behind. What a waste.
(Click through to read the rest of my trials in tribulations into the fantastic world of limoncello, and download the FREE printable gift tags while you’re at it!)
The final verdict is far from final. Despite having a good gallon of limoncello in the freezer of varying degrees of drinkability, there is still room for improvement. The ultimate goal, of course, is a perfectly smooth and lemony apertif. And this is darn close, though not quite as good as Princess’ version. Being the perfectionist I am, I can’t help but wonder what else can be done to improve it.
In my experimentation, I learned a few things about making homemade limoncello.
– Using Everclear will result in a stronger final product (obviously), pulling out more of the lemon’s essential oils in a shorter amount of time. Of course, you’ll likely need more water and sugar to compensate for the higher alcohol content, so taste and adjust accordingly.
– Everclear also produced a cloudy limoncello (as you can see in the bottled photos above), while the high-proof vodka batch (that I didn’t photograph) was clear. Baffling. I don’t know if the higher alcohol caused this difference, but I’ve also read that adding warm sugar syrup to the strained lemon liquor will produce a cloudy limoncello, while a cooled sugar syrup will remain clear. Not sure how accurate this is, however, as I cooled my sugar syrup completely for both batches.
– Obviously, steeping the lemons for longer resulted in a more pronounced lemon flavor. Although it wasn’t as big of a difference as you might expect, and the 1 week version was still plenty lemony.
– I used Meyer lemons for both of my test batches, typically preferring the slightly orangey flavor to standard lemons. But you can certainly use regular lemons too, just be sure that whatever you use, they are organic and untreated (and if you don’t know, assume they’ve been sprayed or at the very least, waxed). I know, that doesn’t make it easy, but it’s so so so important to the final product.
– Oddly enough, my 4 week vodka batch is frozen solid in the freezer right now, so it never got properly taste-tested. Maybe I effed up my proportions or something. We may never know…
– Regardless of other factors, there is no denying that limoncello improves with time. Even my initial ‘vampire’ version is actually palatable now, nearly 6 months later. The harsh burn of the alcohol fades with time, allowing the pleasant lemon flavor to shine through. In short, patience is key. Don’t rush the ‘cello.
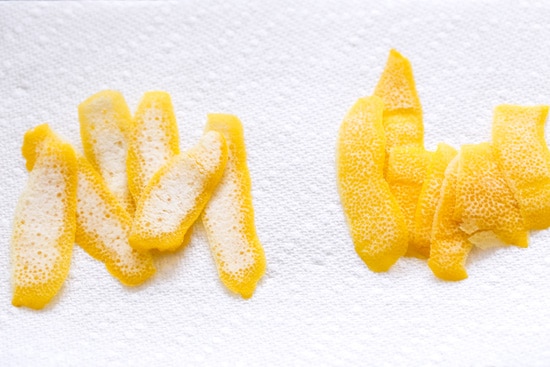
Another important factor in making limoncello is removing the peel with as little pith as possible. For me that meant shaving off strips of lemon peel with a vegetable peeler, them coming back in with a pairing knife and delicately shaving off what little of the white inner pith remained. Less pith = less bitterness in the final product.
In her version, Brenda actually zested her lemons with a microplane, which takes off just the outermost layer of zest and would be a perfect solution if your knife skills are less than precise (or your patience was wearing thin). Zested lemon also needs less stepping time due to the total surface area exposed to the alcohol and stuff (oh hey, high school math, nice to see you again).
The other factor affecting the final product is the ratio of lemon liquor to sugar syrup, and even water to sugar within the sugar syrup. Much of that depends on personal taste, whether you like your limoncello on the sweeter side or not, so adjust as necessary, remembering that the limoncello will mellow over time.
I’m most definitely planning to continue refining my process and recipe come Meyer lemon season next year. In the meantime, I’ve got a slew of limoncello stashed in the freezer. Other than sip it, and make jam with it, I’d love to hear your ideas for unique ways to creatively use up my stash!
Homemade Limoncello
Ingredients:
- 12 organic lemons
- 1000 mL Everclear or 100-proof vodka
- 1 1/2 cups granulated sugar
Directions:
- Peel or zest the lemons, taking care to just zest the outermost yellow peel and none of the white pith inside. If necessary, carefully cut off any residual pith with a small pairing knife.
- Place lemon in a large glass mason jar or other glass container than can be sealed airtight. Cover with everclear or vodka. Secure lid and place in a cool, dark location for at least 1 week and up to 4 weeks.
- When liquor is yellow in color and peel begins to turn white and easily snaps in two pieces when bent, limoncello is done. The longer it steeps the stronger the lemon flavor will be.
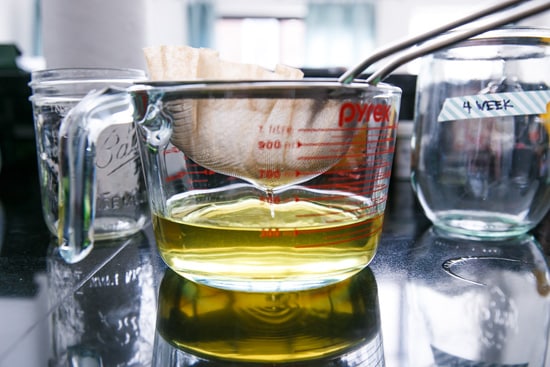
- Strain limoncello into a clean class jar, discarding lemon peels. If desired, strain the lemon liquor again through a fine mesh sieve lined with a coffee filter. This will remove even more residual solids and result in a smoother final product.
- Combine sugar and 3 cups filtered or bottled water in a saucepan set over medium high heat. Bring to a simmer, stirring occasionally until sugar is completely dissolved. Remove from heat and let cool, then pour into jar with lemon liquor. Secure lid and return to your cool, dark location to mellow, at least 2 weeks or more. The longer you let it mellow, the better your final limoncello will be.
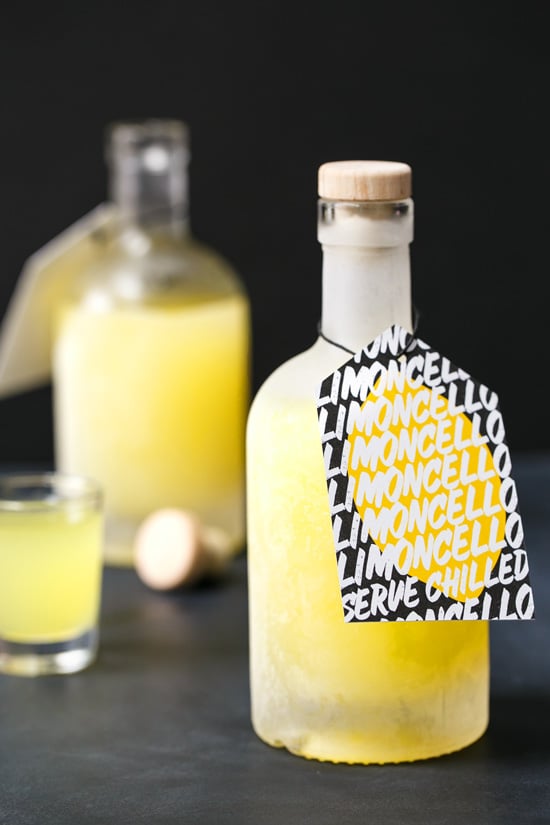
- Once limoncello has mellowed, use a funnel to divide limoncello among three half-liter glass bottles or equivalent. Chill in the freezer for at least 24 hours before serving.
*Once zested, don’t waste the rest of the lemons! Instead, juice them and make some lemon curd or a giant batch of lemonade, or freeze the juice for later use.
Did you make this recipe?
Let us know what you think!
Leave a Comment below or share a photo and tag me on Instagram with the hashtag #loveandoliveoil.
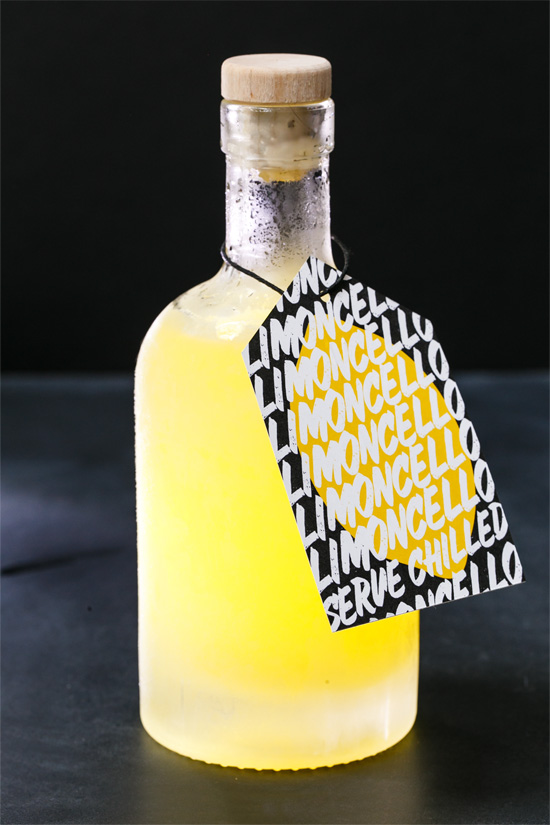
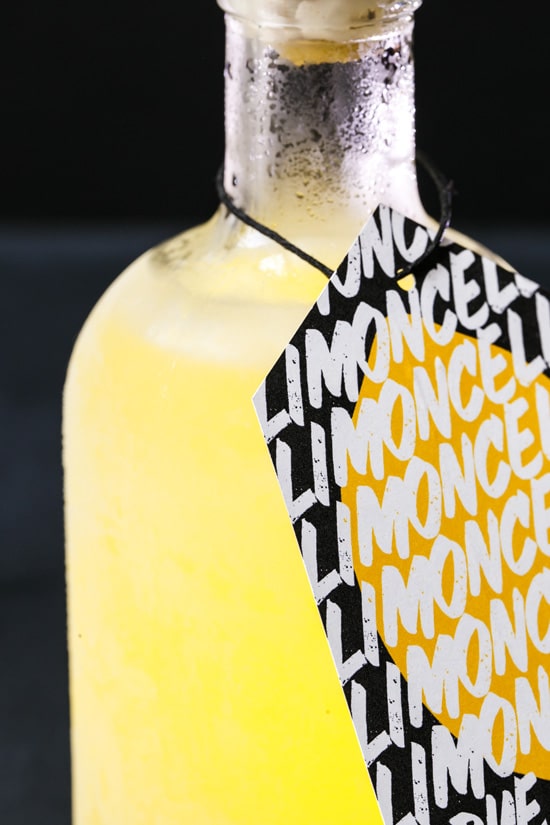
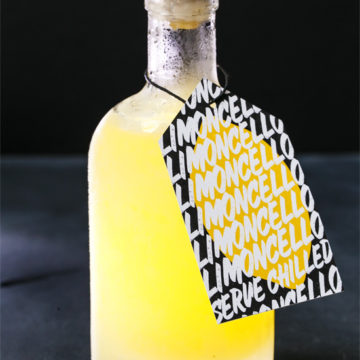
Homemade limoncello makes a great gift, and if you start, like, right now (assuming you can find usable lemons, of course) you still have time to steep and mellow a batch just in time for the holidays.
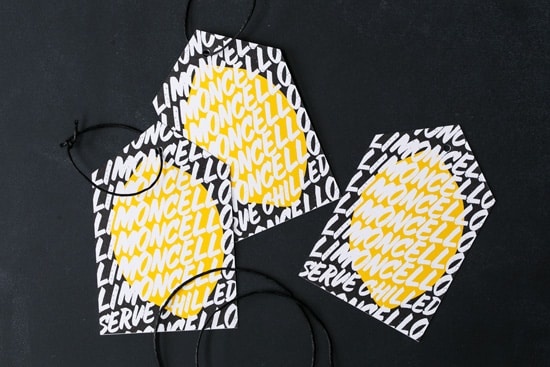
With that in mind, I’ve designed some bold and graphic gift tags to adorn your homemade limoncello. To use, simply print out the PDF file onto some thick white cardstock, cut out the tag shapes, punch a hole in the top, and tie them on to your glass corked bottles (I used the half liter, 375mL size) with some nice black hemp twine. If you can, I recommend having the tags laminated (or at least cover them with a layer of clear packaging tape) so the colors won’t bleed from the condensation off the bottle. You could also print the same label file on weatherproof label paper and adhere them directly to the bottles.
Disclosure: We sailed to Alaska as a guest of Princess Cruises. As always, all opinions written are purely our own. We’re incredibly grateful for opportunities like these that allow us to continue sharing experiences like this with you, so thank you for supporting us and the brands we love.